This post may contain affiliate links, which means I may receive a small commission should you decide to click that link and make a purchase. For more information please refer to the Terms & Conditions.
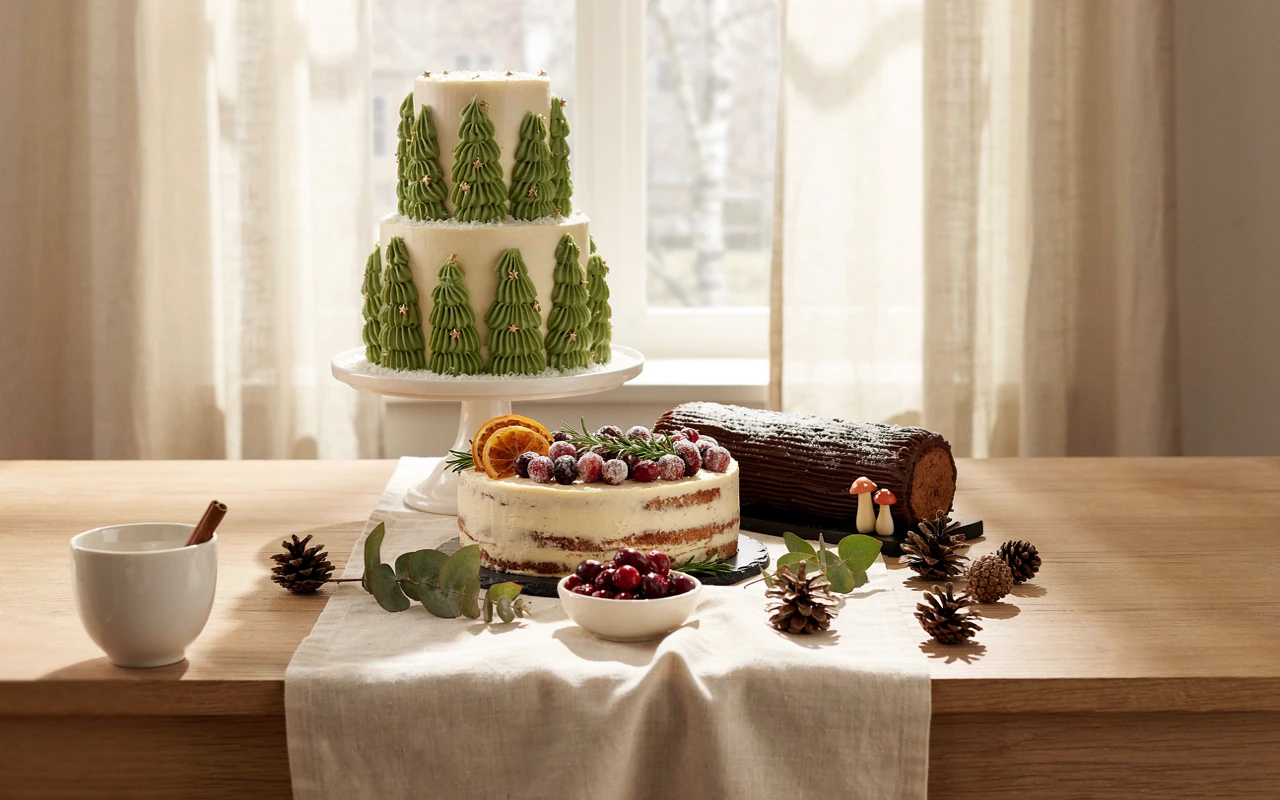
Christmas cake designs can make your holiday table feel extra special, even if you’re not an experienced baker.
I love how a few simple decorating touches can turn an ordinary cake into something festive and beautiful.
Holiday baking doesn’t have to be stressful.
Simple tricks like turning a sugar cone into a Christmas tree or using pretzels for antlers can make cake decorating much easier.
Below, you’ll find 15 stunning Christmas cake designs for the holidays, with ideas for different skill levels and schedules.
Whether you’re planning a family gathering or a cozy afternoon of baking, there’s something here to inspire your next holiday cake.
| Cake | Skill Level | Total Time |
|---|---|---|
| Snowy Pine Forest Buttercream Cake | Beginner | About 3 hours |
| Classic Chocolate Yule Log | Intermediate | About 2 hours 30 minutes |
| Gingerbread House Layer Cake | Intermediate | About 3 hours 30 minutes |
| Red Velvet Christmas Wreath Bundt Cake | Beginner | About 3 hours |
| Peppermint Candy Cane Striped Cake | Intermediate | About 3 hours 30 minutes |
| Santa Suit Buttercream Cake | Intermediate | About 4 hours |
| Ugly Christmas Sweater Sheet Cake | Beginner | About 2 hours 30 minutes |
| Winter White Snowflake Cake | Beginner | About 3 hours |
| Christmas Ornament Dome Cake | Intermediate | About 4 hours |
| Rudolph Reindeer Chocolate Cake | Beginner | About 3 hours |
| Sugared Cranberry and Rosemary Naked Cake | Beginner | About 4 hours |
| Christmas Tree Pull-Apart Cupcake Cake | Beginner | About 2 hours |
| Traditional Royal Iced Christmas Cake | Advanced | 2 to 6 weeks (mostly waiting) |
| Hot Chocolate Marshmallow Drip Cake | Intermediate | About 3 hours 30 minutes |
| Chocolate Orange Starry Night Cake | Intermediate | About 3 hours 30 minutes |
Below you’ll find fifteen complete recipes, from easy sheet cakes to a proper royal iced fruit cake, each with simple decorating steps that don’t need fancy tools or years of practice.
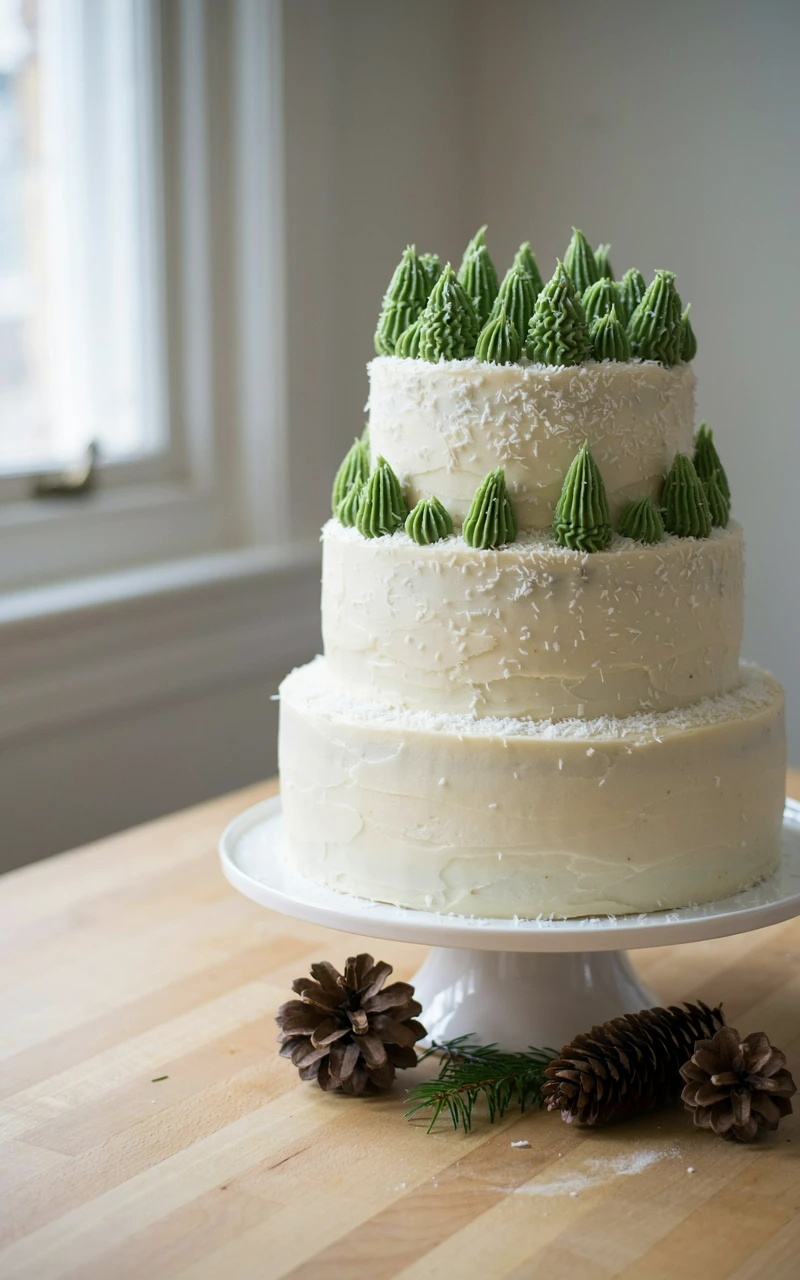
1. Snowy Pine Forest Buttercream Cake
Why You’ll Love This Recipe
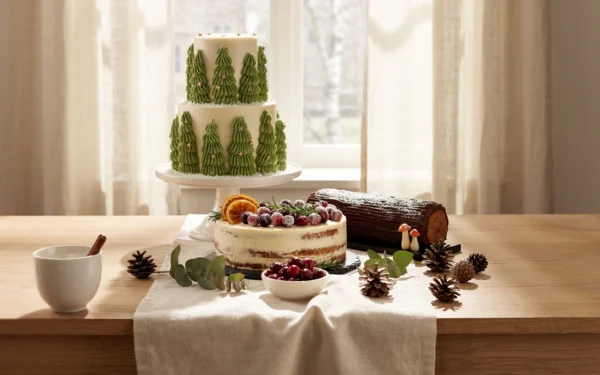
This is the cake I point beginners to first. The trees are just sugar cones covered in green buttercream, and they look like a little forest after a fresh snowfall.
The vanilla cake underneath is soft, buttery, and easy to stack. You don’t need a smooth finish on top either, because swoopy frosting looks like snowdrifts.
Ingredients
For the cake
- 3 cups (375 g) all-purpose flour
- 1 tbsp (12 g) baking powder
- 1/2 tsp (3 g) salt
- 1 cup (225 g) unsalted butter, softened
- 2 cups (400 g) granulated sugar
- 4 large eggs, room temperature
- 1 tbsp (15 ml) vanilla extract
- 1 1/4 cups (300 ml) whole milk, room temperature
For the buttercream and trees
- 1 1/2 cups (340 g) unsalted butter, softened
- 5 cups (600 g) powdered sugar
- 3 to 4 tbsp (45 to 60 ml) heavy cream
- 2 tsp (10 ml) vanilla extract
- Pinch of salt
- Green gel food coloring
- 5 sugar cones
- 1/4 cup (20 g) sweetened shredded coconut
- 1 tbsp (8 g) powdered sugar, for dusting
Tools and Preparation
You’ll need three 8-inch (20 cm) round cake pans, parchment paper, a stand or hand mixer, an offset spatula, a bench scraper, a piping bag, and an open star tip such as a #21. Set your butter, eggs, and milk out about an hour ahead so everything mixes smoothly.
- Prep time: 30 minutes
- Bake time: 25 minutes
- Cooling and decorating: about 2 hours
- Total time: about 3 hours
- Serves: 14
Step-by-Step Instructions
- Heat your oven to 350°F (180°C). Grease the three pans and line the bottoms with parchment.
- Whisk the flour, baking powder, and salt in a bowl.
- Beat the butter and sugar for 3 to 4 minutes, until pale and fluffy. Add the eggs one at a time, then the vanilla.
- Add the flour mixture in three parts, alternating with the milk. Start and end with flour, and mix only until you can’t see dry streaks.
- Divide the batter between the pans and bake for 23 to 26 minutes, until the tops spring back and a toothpick comes out clean. Cool in the pans for 10 minutes, then on a rack until completely cool.
- For the buttercream, beat the butter for 3 minutes, then add the powdered sugar a cup at a time. Add the cream, vanilla, and salt and beat for 3 more minutes.
- Scoop 2 cups of buttercream into a separate bowl and tint it deep green.
- Stack the layers with white buttercream between them. Spread a thin crumb coat over the outside and chill for 20 minutes.
- Add a thicker white coat, smooth the sides with the bench scraper, and leave the top a little swoopy.
- Hold a sugar cone upside down by the tip, then pipe short upward pulls of green buttercream from the bottom to the top. Set the trees on the cake in a cluster, tallest at the back.
- Scatter coconut around the trees and dust the whole cake with powdered sugar through a small sieve.
Common Mistakes to Avoid
- Frosting a warm cake. The buttercream melts and slides, so wait until the layers feel cool in the center.
- Skipping the crumb coat. Without it, crumbs show up in your white frosting.
- Adding the trees too early. Sugar cones go soft in the fridge, so put them on the same day you serve.
Variations, Storage, and Final Thoughts
Swap the vanilla for 1 tsp almond extract, or roll the piped trees in sprinkles for a twinkly look. Small rosemary sprigs stuck into the frosting make a sweet mini forest too.
Keep the cake covered at room temperature for up to 2 days, or in the fridge for up to 5. Let it sit out for an hour before serving so the buttercream softens.
Key takeaway: a few sugar cones and one bowl of green frosting can give you a showstopper with almost no special skills.
2. Classic Chocolate Yule Log (Bûche de Noël)
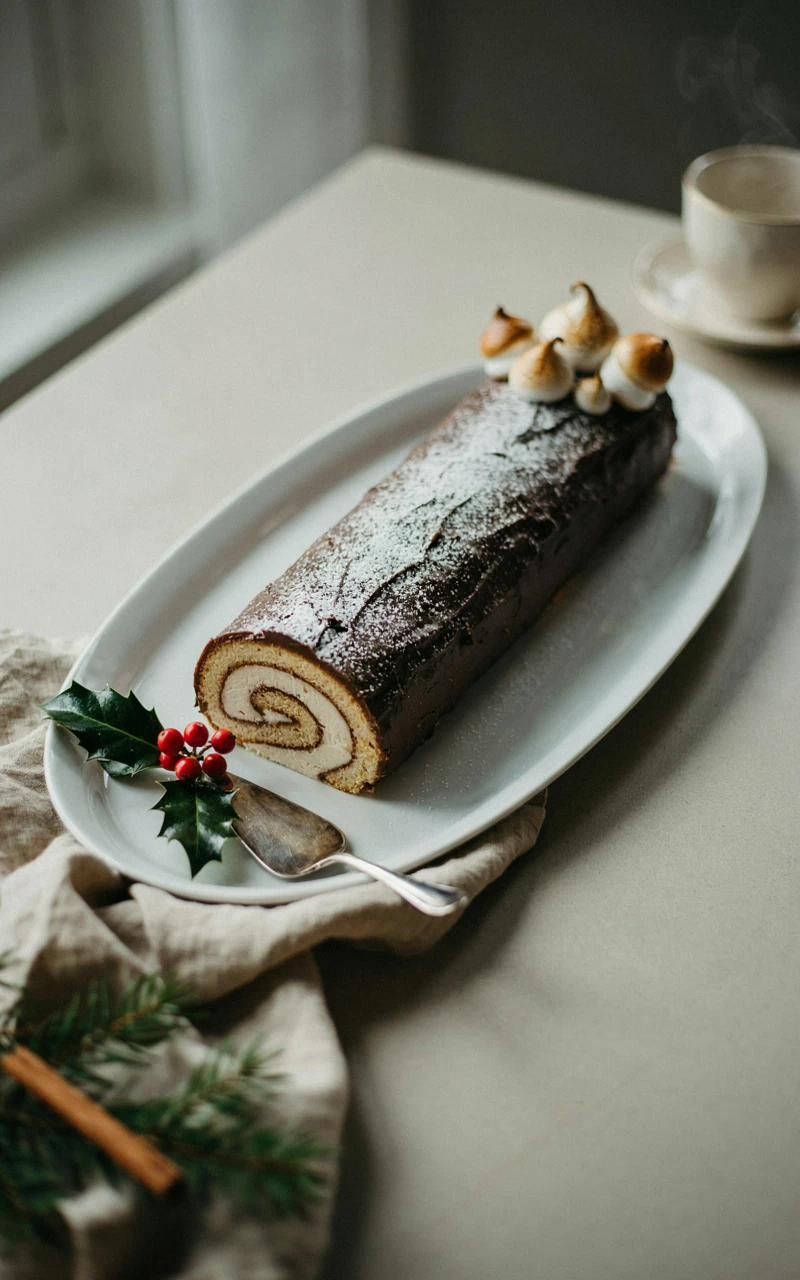
Why You’ll Love This Recipe
The yule log is the French Christmas classic, and it’s easier than it looks. A thin chocolate sponge gets rolled around whipped cream, then covered in ganache that you drag with a fork to look like bark.
It’s light, it’s chocolatey, and every slice shows a pretty swirl. It also bakes in about 10 minutes, which feels like a gift in December.
Ingredients
For the sponge
- 4 large eggs, room temperature
- 1/2 cup (100 g) granulated sugar
- 1 tsp (5 ml) vanilla extract
- 1/2 cup (60 g) all-purpose flour
- 1/4 cup (25 g) unsweetened cocoa powder
- 1/4 tsp (1.5 g) salt
- 2 tbsp (30 ml) melted butter, cooled
- 2 tbsp (15 g) powdered sugar, for the towel
For the filling
- 1 cup (240 ml) cold heavy cream
- 3 tbsp (25 g) powdered sugar
- 1 tsp (5 ml) vanilla extract
For the ganache and decoration
- 6 oz (170 g) semisweet chocolate, chopped
- 3/4 cup (180 ml) heavy cream
- 1 tbsp (8 g) powdered sugar
- 3 or 4 small rosemary sprigs
- A small handful of fresh cranberries
Tools and Preparation
Grab a 10 x 15 inch (25 x 38 cm) jelly roll pan, parchment paper, a clean thin kitchen towel, a mixer, an offset spatula, and a fork. Have the towel laid out and dusted with powdered sugar before the cake comes out of the oven, because you need to move fast.
- Prep time: 30 minutes
- Bake time: 10 minutes
- Cooling, filling, and decorating: about 1 hour 50 minutes
- Total time: about 2 hours 30 minutes
- Serves: 10
Step-by-Step Instructions
- Heat your oven to 375°F (190°C). Line the pan with parchment and grease the parchment lightly.
- Beat the eggs and sugar on high for 6 to 8 minutes, until pale and thick. When you lift the beaters, the batter should fall in a ribbon that sits on top for 2 seconds. Beat in the vanilla.
- Sift the flour, cocoa, and salt over the eggs in two batches, folding gently with a spatula each time.
- Stir a big spoonful of batter into the melted butter, then fold that back into the bowl.
- Spread the batter evenly into the pan and bake for 9 to 11 minutes, until the top springs back when you touch it.
- Flip the hot cake onto the sugared towel, peel off the parchment, and roll it up from a short end with the towel inside. Let it cool rolled for 1 hour.
- Whip the cream, powdered sugar, and vanilla to firm peaks.
- Unroll the cake, spread the cream to within 1 inch (2.5 cm) of the edges, and roll it back up without the towel. Set it seam side down and chill for 20 minutes.
- For the ganache, heat the cream until it steams, pour it over the chocolate, wait 5 minutes, then stir until smooth. Cool for 20 to 30 minutes, until it’s as thick as peanut butter.
- Cut a 2-inch (5 cm) piece off one end at an angle and set it against the side of the log as a branch.
- Cover everything in ganache and drag a fork along the length for bark lines. Dust with powdered sugar and tuck in rosemary and cranberries.
Common Mistakes to Avoid
- Overbaking the sponge. Even 2 extra minutes can make it crack when you roll it.
- Letting it cool flat. Roll it while it’s hot so the cake “remembers” the curl.
- Using runny ganache. It will drip off instead of holding the bark lines, so give it time to thicken.
Variations, Storage, and Final Thoughts
Add 1 tsp instant espresso powder to the sponge, or stir 1/4 tsp peppermint extract into the cream. Meringue mushrooms on the plate make it look like a real forest floor.
Because of the whipped cream, keep it in the fridge and eat it within 3 days. Pull it out 20 minutes before serving so the ganache softens a little.
Key takeaway: roll the sponge while it’s hot, and the rest of this classic falls into place.
3. Gingerbread House Layer Cake
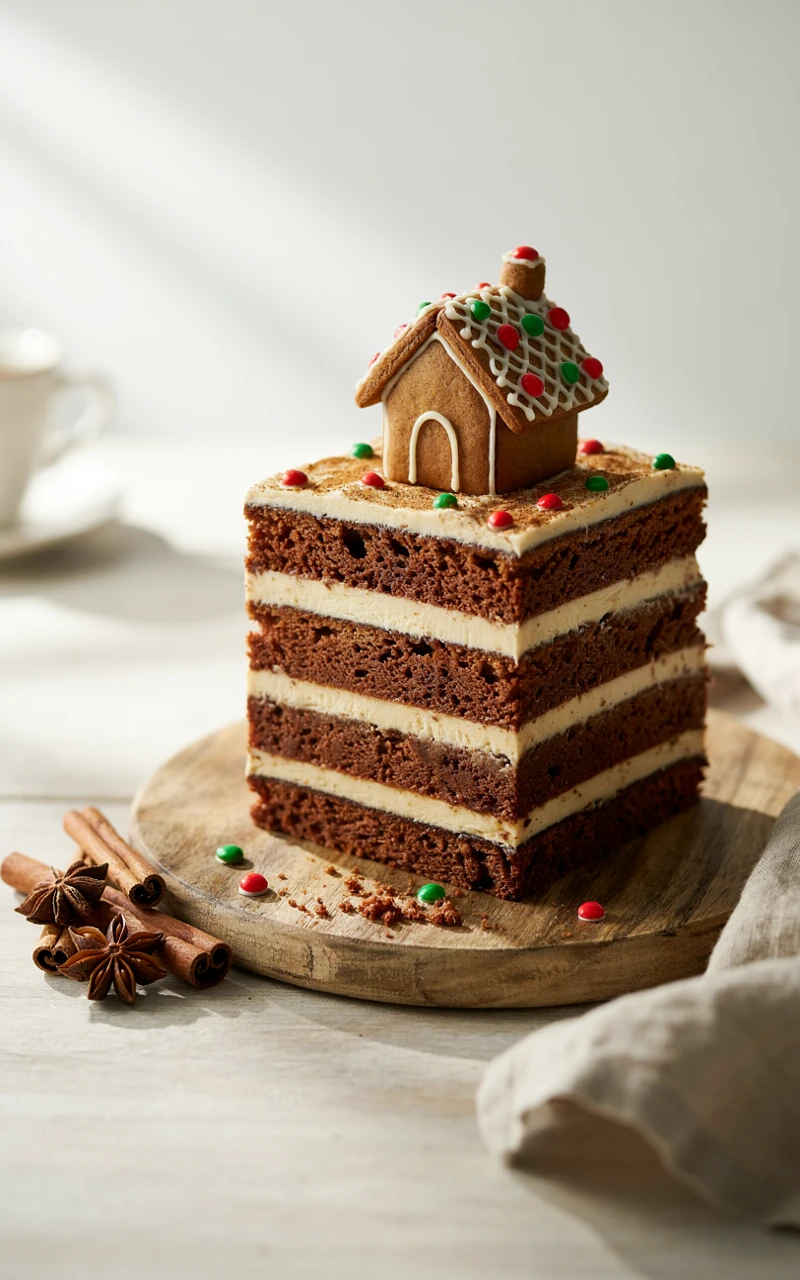
Why You’ll Love This Recipe
This is two holiday favorites in one. A dark, spicy gingerbread cake sits under tangy cream cheese frosting, with a tiny graham cracker house perched on top.
The house is small enough to build in 20 minutes. It’s the kind of cake guests photograph before anyone grabs a knife.
Ingredients
For the cake
- 2 1/2 cups (315 g) all-purpose flour
- 2 tsp (4 g) ground ginger
- 1 1/2 tsp (4 g) ground cinnamon
- 1/2 tsp (1 g) ground nutmeg
- 1/4 tsp (0.5 g) ground cloves
- 1 tsp (6 g) baking soda
- 1/2 tsp (3 g) salt
- 3/4 cup (170 g) unsalted butter, melted
- 3/4 cup (150 g) packed brown sugar
- 3/4 cup (180 ml) unsulphured molasses
- 2 large eggs
- 1 cup (240 ml) hot water
For the frosting and house
- 8 oz (225 g) cream cheese, softened
- 1/2 cup (115 g) unsalted butter, softened
- 4 1/2 cups (540 g) powdered sugar, divided
- 1 tsp (5 ml) vanilla extract
- 4 full graham cracker sheets
- 1/4 cup (45 g) small candies, such as mini gumdrops or sprinkles
- 1 tbsp (8 g) powdered sugar, for dusting
Tools and Preparation
You’ll need two 8-inch (20 cm) round pans, parchment, a mixer, a serrated knife, a piping bag with a small round tip such as a #3, and an offset spatula. Build the house on a sheet of parchment first, not on the cake.
- Prep time: 30 minutes
- Bake time: 32 minutes
- Cooling, building, and decorating: about 2 hours 30 minutes
- Total time: about 3 hours 30 minutes
- Serves: 12
Step-by-Step Instructions
- Heat your oven to 350°F (180°C). Grease and line the two pans.
- Whisk the flour, spices, baking soda, and salt together.
- In another bowl, whisk the melted butter, brown sugar, molasses, and eggs until smooth.
- Stir in the dry ingredients, then slowly whisk in the hot water. The batter will be thin, and that’s right.
- Bake for 30 to 35 minutes, until a toothpick comes out with a few moist crumbs. Cool 10 minutes in the pans, then fully on a rack.
- Beat the cream cheese and butter until smooth. Add 4 cups (480 g) powdered sugar and the vanilla and beat until fluffy.
- Move 1/2 cup of frosting to a small bowl and stir in the last 1/2 cup (60 g) powdered sugar. This stiff frosting is your glue. Put it in the piping bag.
- Gently saw one graham sheet in half to make two squares, then trim each square into a triangle for the front and back walls. Use two full sheets as the roof.
- Pipe glue along the edges, lean the roof pieces together over the triangles, and chill the house for 30 minutes.
- Stack and frost the cake, leaving the sides a little rough like snow.
- Set the house on top, pipe icicles along the roof, press on candies, and dust with powdered sugar.
Common Mistakes to Avoid
- Using blackstrap molasses. It’s bitter here, so stick with regular unsulphured molasses.
- Building on the cake. Graham crackers shift on soft frosting, so let the house set on parchment first.
- Loading the roof with candy. Too much weight makes it slide, so keep the decorations light.
Variations, Storage, and Final Thoughts
Use small gingerbread cookies instead of graham crackers if you have them. A pinch of black pepper in the batter gives the spice a gentle kick.
Store the cake in the fridge for up to 4 days because of the cream cheese frosting. The graham crackers will soften after the first day, so serve the house while it’s crisp.
Key takeaway: a stiff frosting glue and 30 minutes in the fridge are what keep the little house standing.
4. Red Velvet Christmas Wreath Bundt Cake
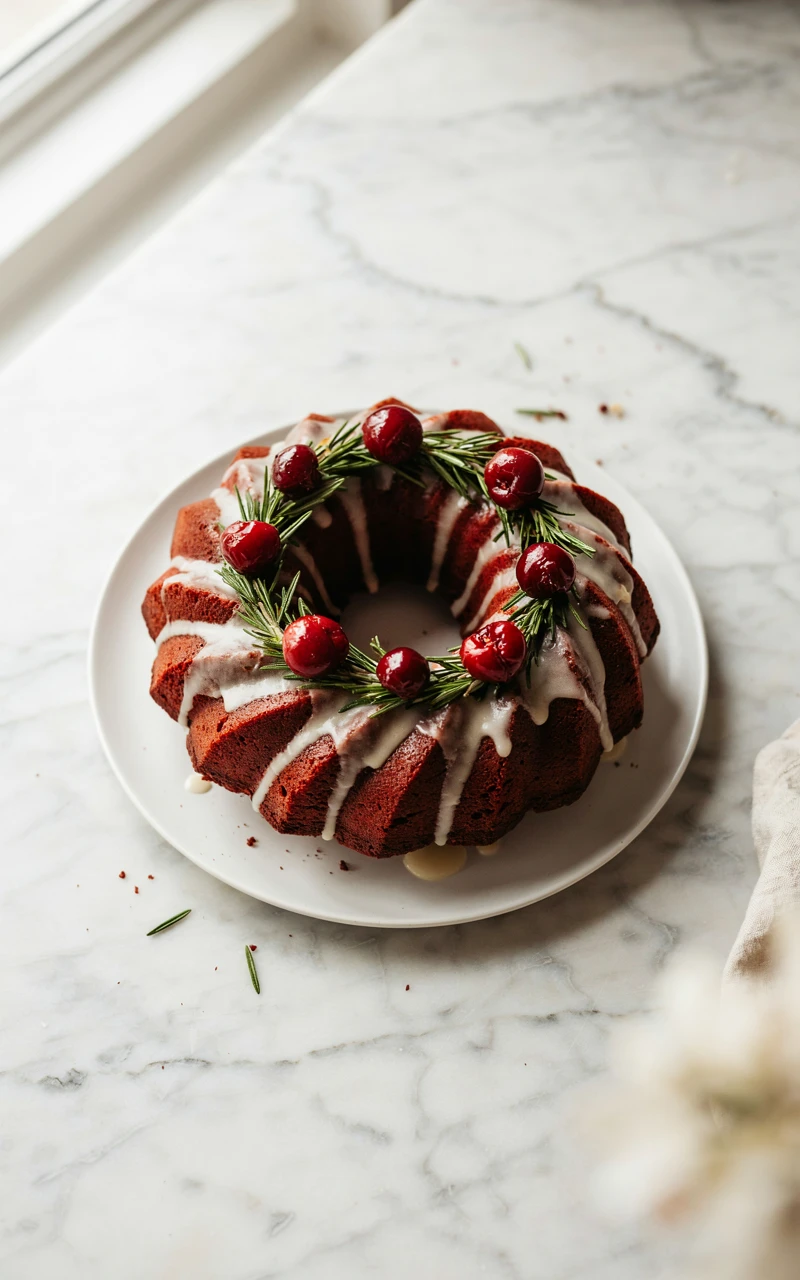
Why You’ll Love This Recipe
A Bundt pan already gives you a wreath shape, so most of the decorating is done before you start. You just pour on a cream cheese glaze and tuck in rosemary and cranberries.
The deep red cake looks gorgeous against the white glaze. It’s one of my favorite Christmas cake decorating ideas for busy weeks, because there’s no stacking and no piping.
Ingredients
For the cake
- 2 1/2 cups (315 g) all-purpose flour
- 2 tbsp (10 g) unsweetened cocoa powder
- 1 tsp (6 g) baking soda
- 1 tsp (6 g) salt
- 1 1/2 cups (300 g) granulated sugar
- 1 cup (240 ml) vegetable oil
- 2 large eggs, room temperature
- 1 cup (240 ml) buttermilk, room temperature
- 2 tbsp (30 ml) red liquid food coloring
- 1 tsp (5 ml) white vinegar
- 2 tsp (10 ml) vanilla extract
- 1 tbsp (15 g) soft butter and 2 tbsp (15 g) flour, for the pan
For the glaze and decoration
- 4 oz (115 g) cream cheese, softened
- 1 1/2 cups (180 g) powdered sugar
- 2 to 3 tbsp (30 to 45 ml) milk
- 10 small rosemary sprigs
- 1/2 cup (50 g) fresh cranberries
- 1 tsp (3 g) powdered sugar, for dusting
Tools and Preparation
You’ll need a 10 to 12 cup (2.4 to 2.8 L) Bundt pan, a pastry brush, two mixing bowls, a whisk, a cooling rack, and a spoon for the glaze. Grease every ridge of the pan with soft butter using the pastry brush, then dust it with flour and tap out the extra.
- Prep time: 20 minutes
- Bake time: 50 minutes
- Cooling and decorating: about 1 hour 50 minutes
- Total time: about 3 hours
- Serves: 12
Step-by-Step Instructions
- Heat your oven to 350°F (180°C) and prepare the pan.
- Whisk the flour, cocoa, baking soda, and salt in one bowl.
- In a second bowl, whisk the sugar, oil, eggs, buttermilk, food coloring, vinegar, and vanilla.
- Pour the wet mixture into the dry and whisk until just smooth.
- Pour the batter into the pan and bake for 45 to 50 minutes, until a skewer in the thickest part comes out clean.
- Cool in the pan for exactly 10 minutes, then flip onto a rack. Let it cool completely, at least 1 hour 30 minutes.
- Beat the cream cheese until smooth, then beat in the powdered sugar. Add milk a spoonful at a time until the glaze drips slowly off the spoon.
- Spoon the glaze around the top and let it run down the sides.
- Tuck rosemary sprigs all around the top so they overlap like wreath greenery. Add cranberries in three small clusters and dust lightly with powdered sugar.
Common Mistakes to Avoid
- Greasing lightly. Bundt cakes stick in the ridges, so be thorough.
- Leaving it in the pan too long. After 10 minutes, the sugars start to set and glue the cake in.
- Glazing a warm cake. The glaze turns see-through and runs off.
Variations, Storage, and Final Thoughts
Tie a red velvet ribbon bow and set it at the front of the plate. You can also swap the cream cheese glaze for a simple white chocolate drizzle.
Keep it covered in the fridge for up to 4 days, and add the rosemary and cranberries on serving day so they stay fresh. The unglazed cake freezes well, wrapped tightly, for up to 2 months.
Key takeaway: let the pan do the shaping, and a few sprigs of rosemary do the rest.
5. Peppermint Candy Cane Striped Cake
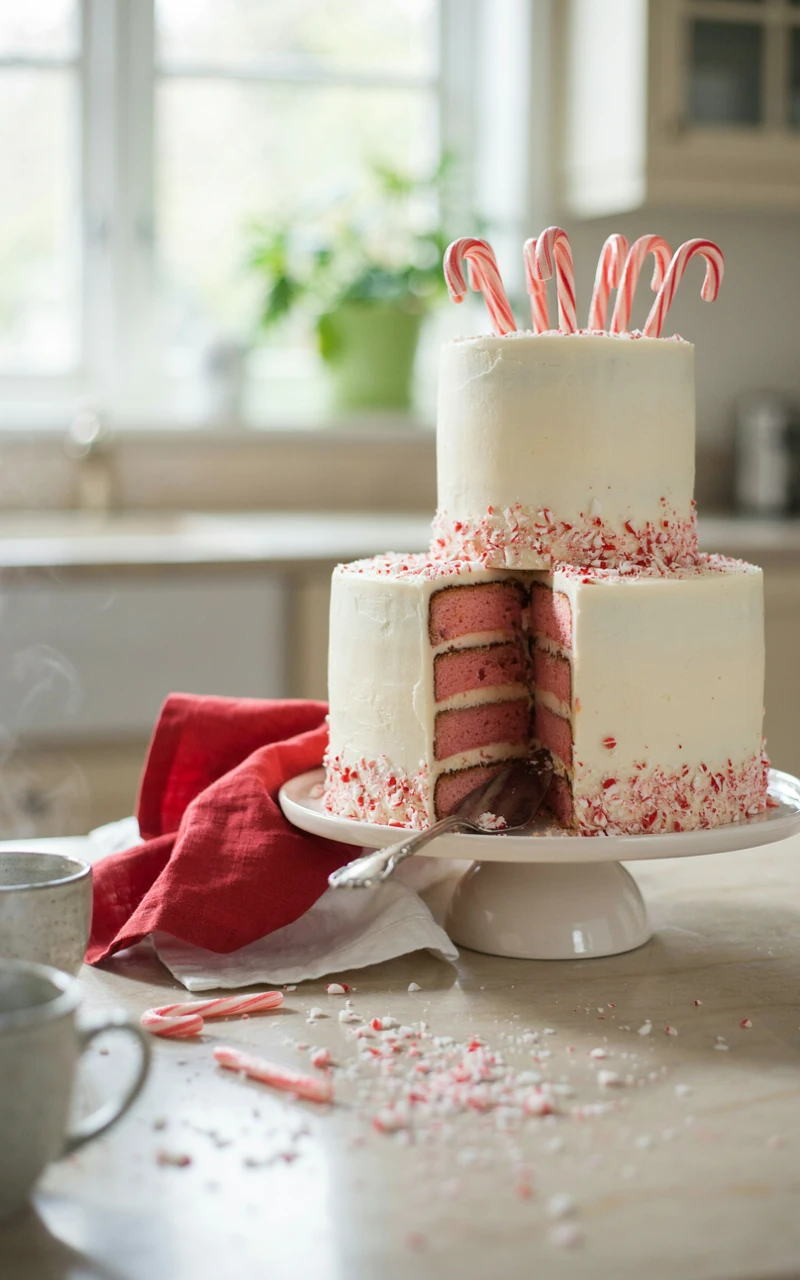
Why You’ll Love This Recipe
Red and white stripes wrap around the outside of this cake, just like a candy cane. A peppermint buttercream and a crunchy crushed candy topping make every bite taste like the holidays.
The stripes look tricky, but a cheap striped cake comb does the work for you. It’s a fun project if you want to try something a step past the basics.
Ingredients
For the cake
- 2 3/4 cups (345 g) all-purpose flour
- 1 tbsp (12 g) baking powder
- 1/2 tsp (3 g) salt
- 1 cup (225 g) unsalted butter, softened
- 1 3/4 cups (350 g) granulated sugar
- 5 large egg whites, room temperature
- 1 cup (240 ml) whole milk, room temperature
- 2 tsp (10 ml) vanilla extract
- 1/2 tsp (2.5 ml) peppermint extract
For the buttercream and topping
- 2 cups (450 g) unsalted butter, softened
- 7 cups (840 g) powdered sugar
- 1/4 cup (60 ml) heavy cream
- 1 tsp (5 ml) peppermint extract
- 1 tsp (5 ml) vanilla extract
- Pinch of salt
- Red gel food coloring
- 6 regular candy canes, crushed (about 1/2 cup / 90 g)
- 8 mini candy canes
Tools and Preparation
You’ll need two 8-inch (20 cm) round pans, a mixer, a cake turntable, a bench scraper, a striped cake comb, an offset spatula, and a piping bag. Tint 1 1/2 cups of the buttercream red the day before if you can, since red gets deeper as it sits.
- Prep time: 30 minutes
- Bake time: 30 minutes
- Cooling and decorating: about 2 hours 30 minutes
- Total time: about 3 hours 30 minutes
- Serves: 12
Step-by-Step Instructions
- Heat your oven to 350°F (180°C). Grease and line the pans.
- Whisk the flour, baking powder, and salt.
- Beat the butter and sugar for 3 to 4 minutes until fluffy. Beat in the egg whites in two additions, then the vanilla and peppermint.
- Add the flour mixture and milk alternately, mixing only until combined.
- Bake for 28 to 32 minutes, until the tops spring back and a toothpick comes out clean. Cool completely.
- Make the buttercream by beating the butter for 3 minutes, then adding powdered sugar, cream, extracts, and salt. Beat for 3 more minutes and tint 1 1/2 cups of it red.
- Stack and crumb coat the cake with white buttercream, then chill for 20 minutes.
- Spread a thick white coat on the sides. Hold the striped comb against the cake and spin the turntable to cut grooves. Chill for 20 minutes.
- Pipe red buttercream into the grooves, overfilling a little. Chill for 15 minutes, then scrape smooth with the bench scraper to reveal clean stripes.
- Right before serving, pile crushed candy canes around the top edge and stand the mini candy canes in a ring.
Common Mistakes to Avoid
- Too much peppermint. More than the recipe says can taste like toothpaste.
- Scraping a soft cake. Chill between each step, or the red smears into the white.
- Adding crushed candy too early. It pulls in moisture and turns sticky within a few hours.
Variations, Storage, and Final Thoughts
Fold 1/2 cup (90 g) mini chocolate chips into the batter for a mint chip version. You can also fill the layers with chocolate ganache instead of buttercream.
The cake keeps covered in the fridge for up to 5 days. Bring it to room temperature for an hour before serving.
Key takeaway: cold buttercream and patient chilling are what give you crisp, clean stripes.
6. Santa Suit Buttercream Cake
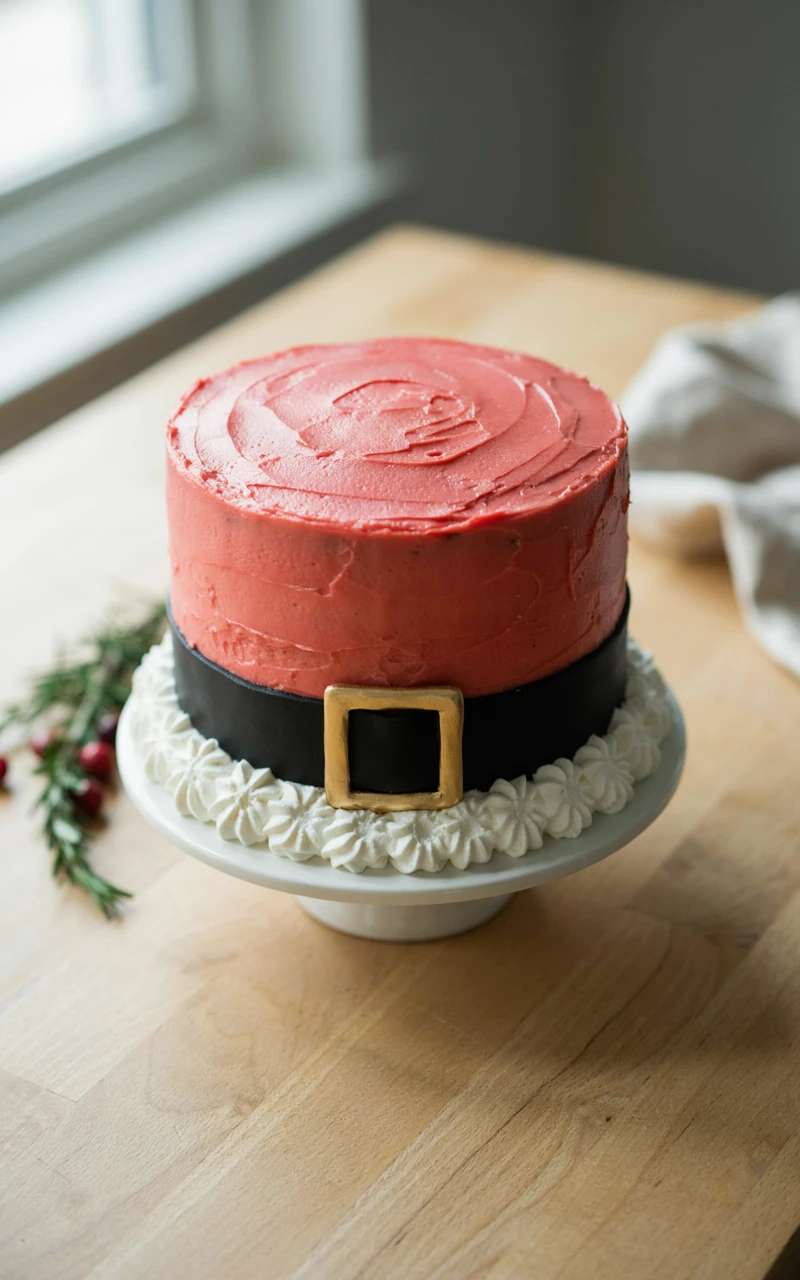
Why You’ll Love This Recipe
This cake is dressed up like Santa’s coat, with a red body, a black belt, a gold buckle, and fluffy white trim. Kids spot it from across the room and go straight for it.
Inside is a rich, moist chocolate cake that stays tender for days. It’s one of those holiday cake designs that looks clever but is really just frosting colors and a few straight lines.
Ingredients
For the cake
- 1 3/4 cups (220 g) all-purpose flour
- 2 cups (400 g) granulated sugar
- 3/4 cup (65 g) unsweetened cocoa powder
- 2 tsp (12 g) baking soda
- 1 tsp (4 g) baking powder
- 1 tsp (6 g) salt
- 2 large eggs
- 1 cup (240 ml) buttermilk
- 1/2 cup (120 ml) vegetable oil
- 2 tsp (10 ml) vanilla extract
- 1 cup (240 ml) hot coffee
For the buttercream and trim
- 2 cups (450 g) unsalted butter, softened
- 7 cups (840 g) powdered sugar
- 1/4 cup (60 ml) heavy cream
- 1 tbsp (15 ml) vanilla extract
- 1/4 tsp (1.5 g) salt
- Red, black, and yellow gel food coloring
- 1 tbsp (5 g) black cocoa powder
- 1/2 cup (40 g) sweetened shredded coconut (optional)
- 1 tbsp (12 g) gold sprinkles (optional)
Tools and Preparation
You’ll need two 8-inch (20 cm) round pans, a mixer, a turntable, a bench scraper, an offset spatula, three piping bags, a small round tip, an open star tip such as a #21, and a toothpick. Make the red buttercream a day ahead if you can, because it darkens overnight.
- Prep time: 30 minutes
- Bake time: 32 minutes
- Cooling and decorating: about 3 hours
- Total time: about 4 hours
- Serves: 14
Step-by-Step Instructions
- Heat your oven to 350°F (180°C). Grease and line the pans.
- Whisk the flour, sugar, cocoa, baking soda, baking powder, and salt in a large bowl.
- Add the eggs, buttermilk, oil, and vanilla and mix for 2 minutes. Stir in the hot coffee; the batter will be thin.
- Bake for 30 to 35 minutes, until a toothpick comes out clean. Cool completely.
- Make the buttercream, then divide it: about 4 cups for red, 1 1/2 cups for white, 3/4 cup for black (add the black cocoa and black gel), and 2 tbsp for yellow.
- Stack the layers, crumb coat with red, and chill for 20 minutes. Add a final smooth red coat and chill again.
- Use a toothpick to mark two level lines around the middle, about 1 1/2 inches (4 cm) apart. Fill the space with black buttercream and smooth it with a small spatula.
- Pipe a square buckle outline on the front of the belt with yellow buttercream, or press gold sprinkles into a square.
- Pipe a row of white stars around the top edge and the bottom. Pipe a vertical line of stars down the front for the coat opening.
- Press a little coconut into the white trim if you want it to look fluffy.
Common Mistakes to Avoid
- Coloring red on the spot. Same-day red often looks pink, so mix it ahead.
- Freehanding the belt. Toothpick guide lines keep it straight.
- Working with warm frosting. Black and red bleed into white if the cake isn’t chilled.
Variations, Storage, and Final Thoughts
Make it Mrs. Claus by adding a white piped apron, or turn it into an elf with green buttercream. A vanilla cake works just as well inside.
Keep it covered at room temperature for up to 2 days or refrigerated for up to 5. Serve at room temperature so the buttercream is soft and creamy.
Key takeaway: mix your red early and mark your lines, and the Santa suit practically decorates itself.
7. Ugly Christmas Sweater Sheet Cake
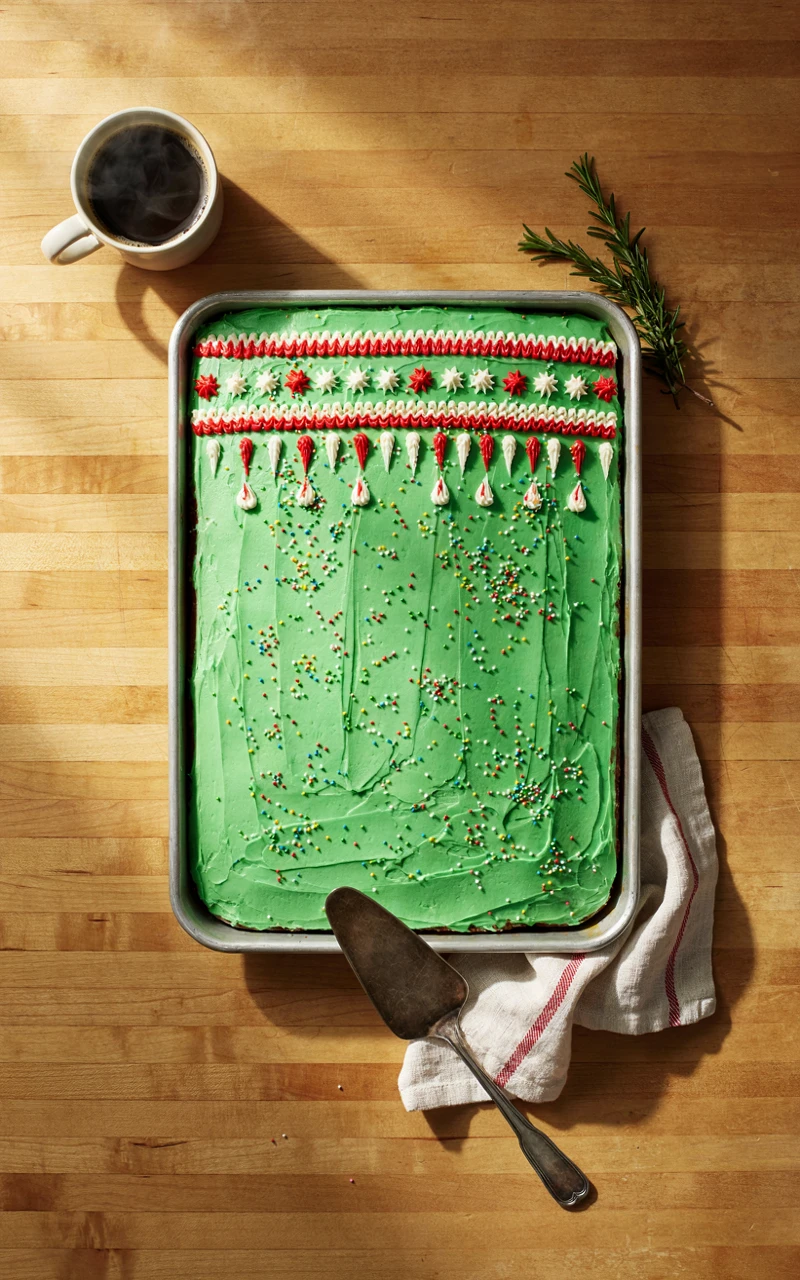
Why You’ll Love This Recipe
This one is pure fun and zero pressure. The whole point is that it’s loud and a little silly, so wobbly lines just add to the charm.
It bakes in one pan and feeds a crowd. I love bringing it to office parties and letting kids help with the sprinkles.
Ingredients
For the cake
- 2 1/2 cups (315 g) all-purpose flour
- 2 tsp (8 g) baking powder
- 1/2 tsp (3 g) baking soda
- 1/2 tsp (3 g) salt
- 3/4 cup (170 g) unsalted butter, softened
- 1 1/2 cups (300 g) granulated sugar
- 3 large eggs
- 2 tsp (10 ml) vanilla extract
- 1 cup (240 ml) buttermilk
For the frosting and decoration
- 1 cup (225 g) unsalted butter, softened
- 4 cups (480 g) powdered sugar
- 3 tbsp (45 ml) milk
- 1 tsp (5 ml) vanilla extract
- Green and red gel food coloring
- 1 cup (50 g) mini marshmallows
- 1/2 cup (90 g) mini candy-coated chocolates
- 3 tbsp (35 g) Christmas sprinkles
Tools and Preparation
You’ll need a 9 x 13 inch (23 x 33 cm) pan, a mixer, an offset spatula, two piping bags (or zip-top bags), and small round tips. Leave the cake in the pan so it’s easy to carry to a party.
- Prep time: 20 minutes
- Bake time: 32 minutes
- Cooling and decorating: about 1 hour 40 minutes
- Total time: about 2 hours 30 minutes
- Serves: 20
Step-by-Step Instructions
- Heat your oven to 350°F (180°C) and grease the pan.
- Whisk the flour, baking powder, baking soda, and salt.
- Beat the butter and sugar for 3 minutes. Add the eggs one at a time, then the vanilla.
- Mix in the dry ingredients and buttermilk alternately, just until smooth.
- Spread in the pan and bake for 30 to 35 minutes, until golden and a toothpick comes out clean. Cool completely in the pan.
- Beat the frosting ingredients until fluffy. Set aside 1/2 cup white and 1/2 cup for red, then tint the rest green.
- Spread the green frosting over the whole cake.
- Pipe two rows of red zigzags across the cake, one near the top and one near the bottom.
- Pipe white dots, little trees, or snowflakes between the zigzags. Anything goes.
- Line mini marshmallows along the top and bottom edges like fuzzy sweater trim. Scatter candies and sprinkles as “pom-poms” and “buttons.”
Common Mistakes to Avoid
- Overmixing the batter. Sheet cakes get tough fast, so stop as soon as it’s smooth.
- Thin frosting. If it’s too soft to pipe, beat in a few more spoonfuls of powdered sugar.
- Sprinkling too early. Some sprinkles bleed color overnight, so add them the day you serve.
Variations, Storage, and Final Thoughts
Make it a chocolate sheet cake, or turn it into a reindeer sweater with pretzel antlers. If you want more ways to set up a fun party table, my birthday cake scenes post has plenty of ideas that work at Christmas too.
Cover the pan and keep it at room temperature for up to 2 days, or refrigerate for up to 5.
Key takeaway: on this cake, messy is the look, so let everyone join in.
8. Winter White Snowflake Cake
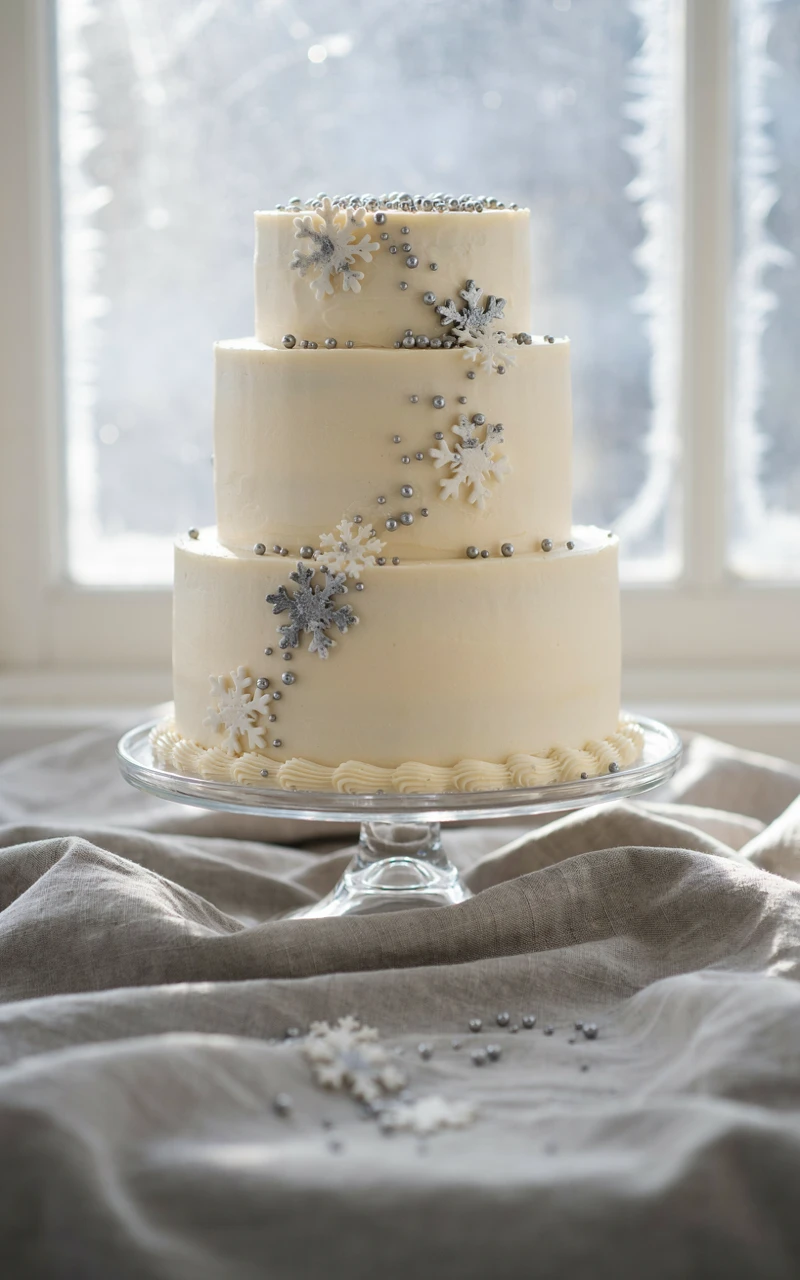
Why You’ll Love This Recipe
All white, with a little sparkle, this cake looks calm and elegant on a holiday table. The snowflakes are piped from melted candy melts on parchment, then pressed onto the frosting.
The vanilla bean cake is tender thanks to sour cream, and the white chocolate buttercream tastes creamy without being too sweet.
Ingredients
For the cake
- 2 1/2 cups (315 g) all-purpose flour
- 2 tsp (8 g) baking powder
- 1/2 tsp (3 g) baking soda
- 1/2 tsp (3 g) salt
- 1 cup (225 g) unsalted butter, softened
- 1 1/2 cups (300 g) granulated sugar
- 3 large eggs
- 1 tbsp (15 ml) vanilla bean paste
- 1 cup (240 g) sour cream
- 1/2 cup (120 ml) whole milk
For the buttercream and snowflakes
- 4 oz (115 g) white chocolate, chopped
- 1 cup (225 g) unsalted butter, softened
- 3 cups (360 g) powdered sugar
- 2 tbsp (30 ml) heavy cream
- 1 tsp (5 ml) vanilla extract
- 1 cup (170 g) white candy melts
- 2 tbsp (25 g) white sparkling sugar
Tools and Preparation
You’ll need two 8-inch (20 cm) round pans, a mixer, an offset spatula, a bench scraper, parchment paper, a baking sheet, and a small zip-top bag. Draw a few simple snowflakes on paper (six lines crossing in the middle, with small V shapes at the ends), then slide them under the parchment as a guide.
- Prep time: 30 minutes
- Bake time: 28 minutes
- Cooling, setting, and decorating: about 2 hours
- Total time: about 3 hours
- Serves: 12
Step-by-Step Instructions
- Heat your oven to 350°F (180°C). Grease and line the pans.
- Whisk the flour, baking powder, baking soda, and salt.
- Beat the butter and sugar until fluffy. Add the eggs one at a time, then the vanilla bean paste and sour cream.
- Mix in the flour mixture and milk alternately until just combined.
- Bake for 26 to 30 minutes, until the tops are lightly golden and spring back. Cool completely.
- Melt the candy melts in 30-second bursts, stirring between each. Pour into the zip-top bag and snip a tiny corner.
- Trace your snowflakes onto the parchment, making about 12 in different sizes. Chill for 15 to 20 minutes until firm.
- Melt the white chocolate in 20-second bursts and let it cool until barely warm. Beat the butter, add the powdered sugar, then the white chocolate, cream, and vanilla.
- Stack, crumb coat, chill, and add a smooth final coat.
- Peel the snowflakes off the parchment and press them gently onto the sides and top. Sprinkle sparkling sugar over everything.
Common Mistakes to Avoid
- Overheating white chocolate. It seizes easily, so use short bursts and stir well.
- Piping thin lines. Very thin snowflakes snap, so keep your lines a little chunky.
- Making just enough. A few always break, so pipe extras.
Variations, Storage, and Final Thoughts
Tint the candy melts pale blue for an icy look, or add 1 cup (80 g) shredded coconut to the sides for a snowball cake. A few white sugar pearls look lovely too.
Store covered in the fridge for up to 5 days. Add the snowflakes on serving day, since fridge moisture can make them sticky.
Key takeaway: snowflakes piped on parchment are an easy trick that makes a plain white cake look special.
9. Christmas Ornament Dome Cake
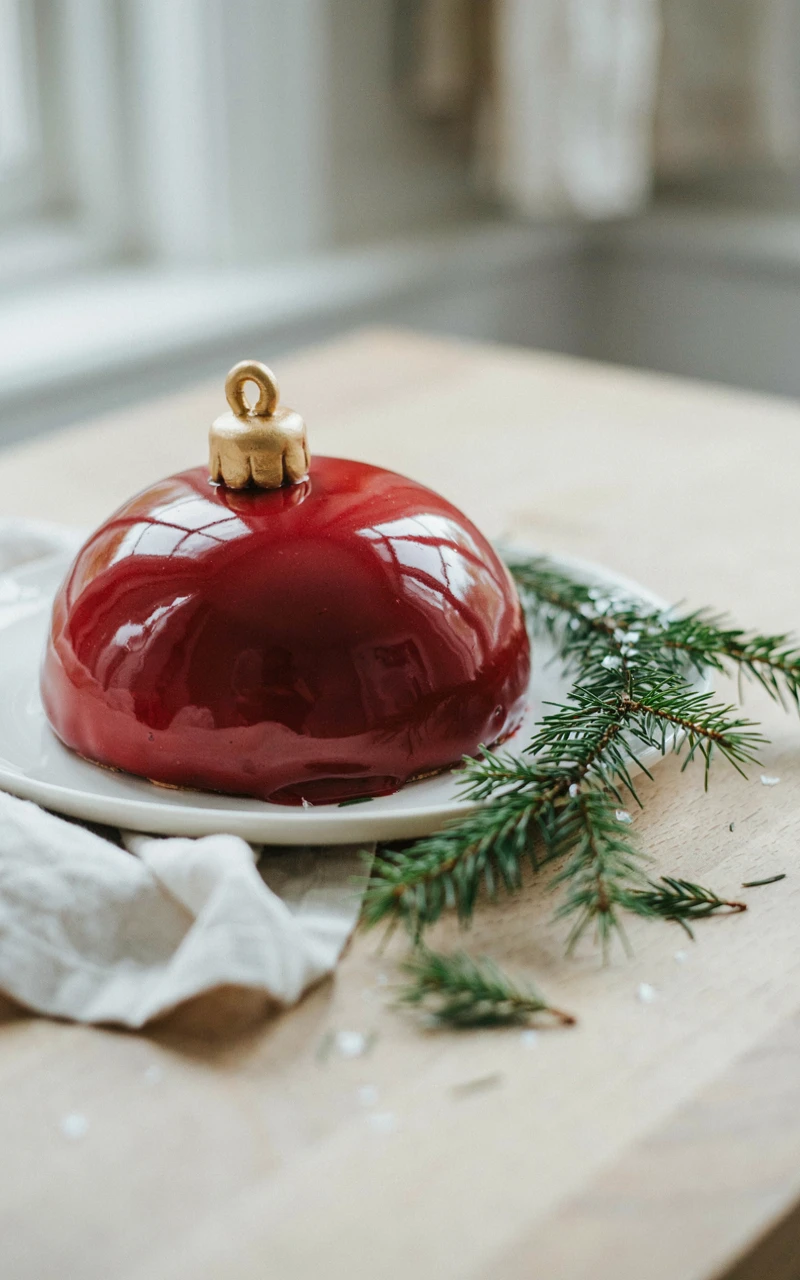
Why You’ll Love This Recipe
This cake looks like a giant shiny Christmas ornament. It’s baked in a glass bowl, covered in a glossy red glaze, and topped with a little gold cap.
When people ask me for Christmas cake inspiration that still feels doable, this is the one I send. The glaze does most of the work, and it hides small bumps beautifully.
Ingredients
For the cake
- 1 3/4 cups (220 g) all-purpose flour
- 2 cups (400 g) granulated sugar
- 3/4 cup (65 g) unsweetened cocoa powder
- 2 tsp (12 g) baking soda
- 1 tsp (4 g) baking powder
- 1 tsp (6 g) salt
- 2 large eggs
- 1 cup (240 ml) buttermilk
- 1/2 cup (120 ml) vegetable oil
- 2 tsp (10 ml) vanilla extract
- 1 cup (240 ml) hot water
For the crumb coat, glaze, and cap
- 1/2 cup (115 g) unsalted butter, softened
- 2 cups (240 g) powdered sugar
- 1 to 2 tbsp (15 to 30 ml) milk
- 8 oz (225 g) white chocolate, chopped
- 1/2 cup (120 ml) heavy cream
- Red gel food coloring
- 2 tbsp (25 g) gold sprinkles
- 1 mini peanut butter cup
- 1/4 tsp gold luster dust mixed with a few drops of lemon extract
- 1 small pretzel twist, for the hanger loop
Tools and Preparation
You’ll need a 2 1/2 quart (2.4 L) oven-safe glass bowl, a serrated knife, a cake board, a wire rack set over a sheet pan, an offset spatula, a thermometer, and a small paintbrush used only for food. Grease the bowl well and line the bottom with a circle of parchment.
- Prep time: 30 minutes
- Bake time: 60 minutes
- Cooling and decorating: about 2 hours 30 minutes
- Total time: about 4 hours
- Serves: 12
Step-by-Step Instructions
- Heat your oven to 325°F (165°C).
- Whisk the flour, sugar, cocoa, baking soda, baking powder, and salt. Mix in the eggs, buttermilk, oil, and vanilla, then stir in the hot water.
- Pour into the bowl and bake for 55 to 65 minutes, until a skewer in the center comes out clean.
- Cool in the bowl for 20 minutes, then turn out onto a rack and cool completely. Trim the flat side level and set it on the cake board.
- Beat the butter, powdered sugar, and milk into a soft frosting. Spread a thin, smooth coat over the dome and chill for 30 minutes until firm.
- Heat the cream until steaming and pour over the white chocolate. Wait 3 minutes, stir until smooth, and tint deep red.
- Let the glaze cool to about 90°F (32°C). It should be warm but not hot.
- Set the cold cake on the rack over the sheet pan. Pour the glaze over the top center in one steady stream and let it run down the sides.
- While the glaze is still tacky, press gold sprinkles in a band around the middle. Chill for 15 minutes, then move to a serving plate.
- Paint the peanut butter cup gold, set it upside down on top as the cap, and press the pretzel into it as the hanger loop.
Common Mistakes to Avoid
- Pouring hot glaze. It runs straight off and leaves bald spots.
- Glazing a room-temperature cake. A cold cake helps the glaze set smooth and shiny.
- Pulling the cake too early. The center of a dome bakes last, so test it well.
Variations, Storage, and Final Thoughts
Make a set of ornaments in green, gold, and silver using small oven-safe bowls. A vanilla cake works too if chocolate isn’t your thing.
Keep it refrigerated and covered for up to 4 days. The glaze loses a bit of shine in the fridge, so decorate on the day you serve if you can.
Key takeaway: cold cake plus warm glaze at the right temperature gives you that glossy ornament finish.
10. Rudolph Reindeer Chocolate Cake
Why You’ll Love This Recipe
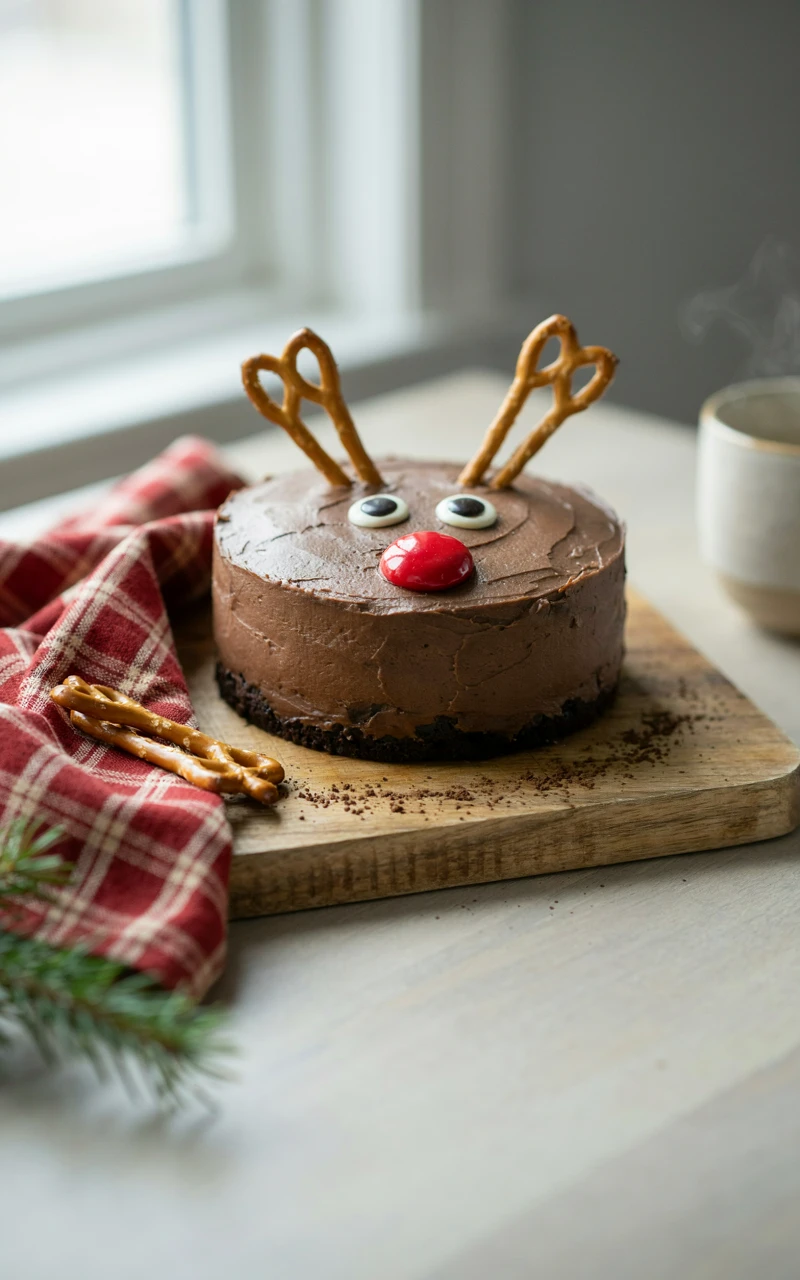
Rudolph is all about the face: big candy eyes, a shiny red nose, and pretzel antlers poking out the top. It’s silly and sweet, and kids light up when they see it.
The sour cream chocolate cake is deeply moist, and the chocolate buttercream spreads easily even for beginners.
Ingredients
For the cake
- 2 cups (250 g) all-purpose flour
- 2 cups (400 g) granulated sugar
- 3/4 cup (65 g) unsweetened cocoa powder
- 2 tsp (12 g) baking soda
- 1 tsp (6 g) salt
- 2 large eggs
- 1 cup (240 g) sour cream
- 1/2 cup (120 ml) vegetable oil
- 2 tsp (10 ml) vanilla extract
- 1 cup (240 ml) hot water
For the frosting and face
- 1 cup (225 g) unsalted butter, softened
- 3 1/2 cups (420 g) powdered sugar
- 2/3 cup (55 g) unsweetened cocoa powder
- 1/4 cup (60 ml) heavy cream
- 2 tsp (10 ml) vanilla extract
- Pinch of salt
- 4 large pretzel twists
- 2 oz (55 g) dark chocolate, melted
- 2 large candy eyes
- 1 large red gumball or red candy ball, about 1 inch (2.5 cm) wide
- 2 oval chocolate sandwich cookies, for ears
Tools and Preparation
You’ll need two 8-inch (20 cm) round pans, a mixer, an offset spatula, parchment paper, and a small spoon. Make the antlers first so they have time to set while the cake bakes.
- Prep time: 30 minutes
- Bake time: 32 minutes
- Cooling and decorating: about 2 hours
- Total time: about 3 hours
- Serves: 14
Step-by-Step Instructions
- For the antlers, lay two pretzel twists side by side on parchment, glue them together with melted chocolate, then brush chocolate over them. Make a second pair and chill both for 30 minutes.
- Heat your oven to 350°F (180°C). Grease and line the pans.
- Whisk the flour, sugar, cocoa, baking soda, and salt. Add the eggs, sour cream, oil, and vanilla and mix well, then stir in the hot water.
- Bake for 30 to 35 minutes, until a toothpick comes out with a few moist crumbs. Cool completely.
- Beat the butter, then add the powdered sugar, cocoa, cream, vanilla, and salt. Beat until fluffy.
- Stack and frost the cake, using the back of a spoon to make soft swirls like fur.
- Press the antlers into the top toward the back, standing them upright.
- Push the two cookies into the top in front of the antlers as ears, angled outward.
- On the front side, press in the candy eyes about 1 inch (2.5 cm) below the top edge, and the red nose about 2 inches (5 cm) below them.
Common Mistakes to Avoid
- Skipping the chill on the antlers. They’ll fall apart when you press them in.
- Setting the face too low. Rudolph looks sleepy, so keep the eyes near the top edge.
- Frosting too thin. The antlers need thick frosting to hold them upright.
Variations, Storage, and Final Thoughts
Swap the gumball for a maraschino cherry patted dry, or add a red ribbon “collar” around the base. Cupcakes work too, with mini pretzels as antlers.
Store covered at room temperature for 2 days or refrigerated for up to 5. Pretzels soften after a day, so add them close to serving time.
Key takeaway: a few candies placed in the right spots turn a plain chocolate cake into a character.
11. Sugared Cranberry and Rosemary Naked Cake
Why You’ll Love This Recipe
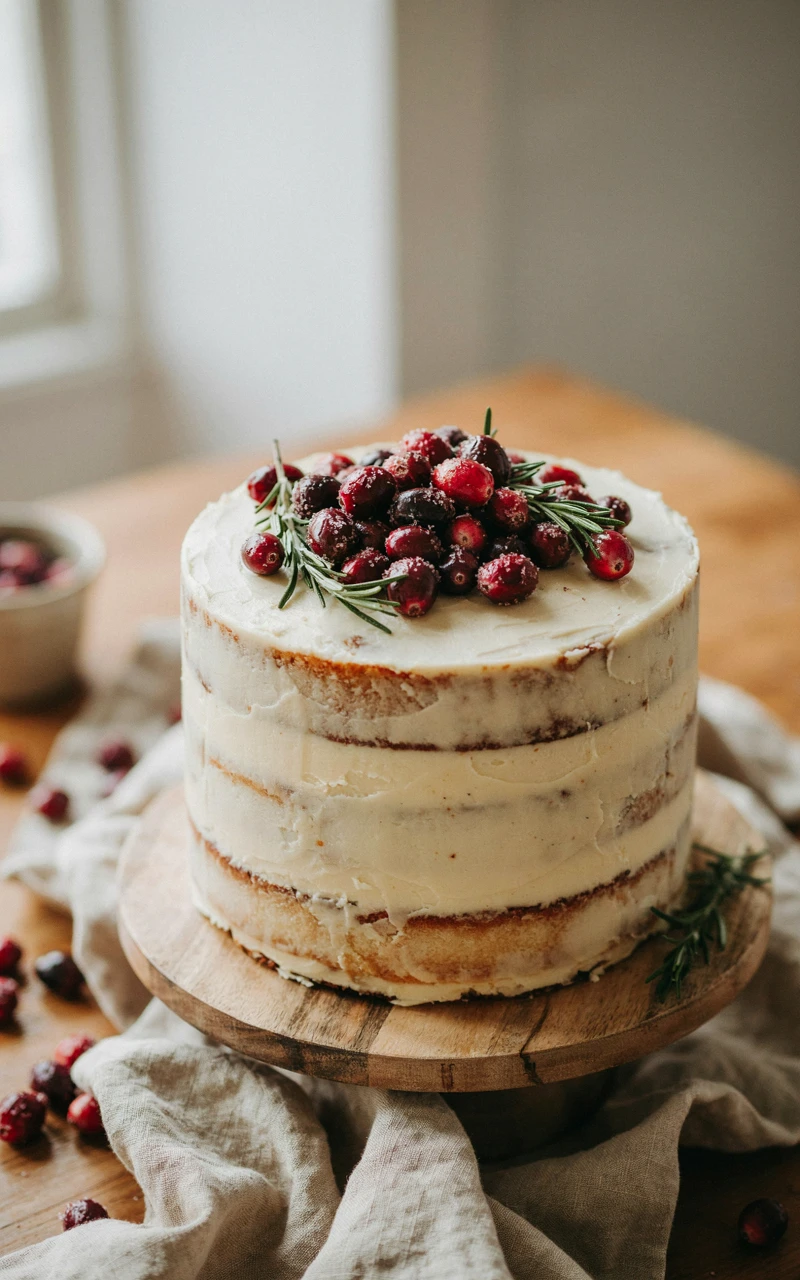
A naked cake has just a thin scrape of frosting, so the layers peek through. Topped with sparkly sugared cranberries and rosemary, it looks like it came from a farmhouse bakery.
The orange vanilla cake and cream cheese frosting pair perfectly with the tart berries. If you love this rustic look, my aesthetic birthday cake ideas use the same bare-sided style all year.
Ingredients
For the sugared cranberries and rosemary
- 1 cup (200 g) granulated sugar plus 1 cup (240 ml) water, for the syrup
- 1 1/2 cups (150 g) fresh cranberries
- 8 rosemary sprigs
- 3/4 cup (150 g) granulated sugar, for rolling
For the cake
- 3 cups (375 g) all-purpose flour
- 1 tbsp (12 g) baking powder
- 1/2 tsp (3 g) salt
- 1 cup (225 g) unsalted butter, softened
- 2 cups (400 g) granulated sugar
- 2 tbsp (12 g) orange zest (about 2 oranges)
- 4 large eggs
- 1 tbsp (15 ml) vanilla extract
- 1 cup (240 ml) whole milk
- 1/4 cup (60 ml) fresh orange juice
For the frosting
- 8 oz (225 g) cream cheese, cold
- 1 cup (225 g) unsalted butter, softened
- 5 cups (600 g) powdered sugar
- 1 tsp (5 ml) vanilla extract
- Pinch of salt
Tools and Preparation
You’ll need a small saucepan, a wire rack, three 8-inch (20 cm) round pans, a mixer, a turntable, and a bench scraper. Start the cranberries first so they can soak and dry while the cake bakes and cools.
- Prep time: 40 minutes
- Bake time: 25 minutes
- Soaking, drying, cooling, and assembly: about 3 hours
- Total time: about 4 hours
- Serves: 14
Step-by-Step Instructions
- Simmer the sugar and water until the sugar dissolves, then cool for 10 minutes. Add the cranberries and rosemary and soak for 1 hour.
- Lift them onto a rack and let them get tacky, about 30 minutes. Roll in sugar and dry for 1 more hour.
- Heat your oven to 350°F (180°C). Grease and line the pans.
- Rub the orange zest into the sugar with your fingers until fragrant. Beat with the butter until fluffy, then add the eggs one at a time and the vanilla.
- Whisk the flour, baking powder, and salt. Add to the batter alternately with the milk and orange juice.
- Bake for 23 to 26 minutes, until golden and springy. Cool completely.
- Beat the butter until creamy, add the cold cream cheese and beat just until smooth, then add the powdered sugar, vanilla, and salt.
- Stack the layers with a generous amount of frosting between each.
- Spread a thin coat on the outside, then scrape most of it away with the bench scraper so the cake shows through.
- Pile the cranberries on top in a crescent shape and tuck in the rosemary.
Common Mistakes to Avoid
- Soaking berries in hot syrup. They’ll burst, so let the syrup cool first.
- Overbeating cream cheese. It turns runny, so mix only until smooth.
- Leaving the cake out uncovered. Naked cakes dry out faster, so serve the same day or wrap them well.
Variations, Storage, and Final Thoughts
Use lemon zest instead of orange, or add a thin layer of cranberry jam between the layers. Sugared grapes look lovely too.
Keep the cake covered in the fridge for up to 3 days. Sugared cranberries stay pretty for about 2 days at room temperature, so add them on serving day.
Key takeaway: the less frosting you leave on the sides, the more those sparkling berries shine.
12. Christmas Tree Pull-Apart Cupcake Cake
Why You’ll Love This Recipe
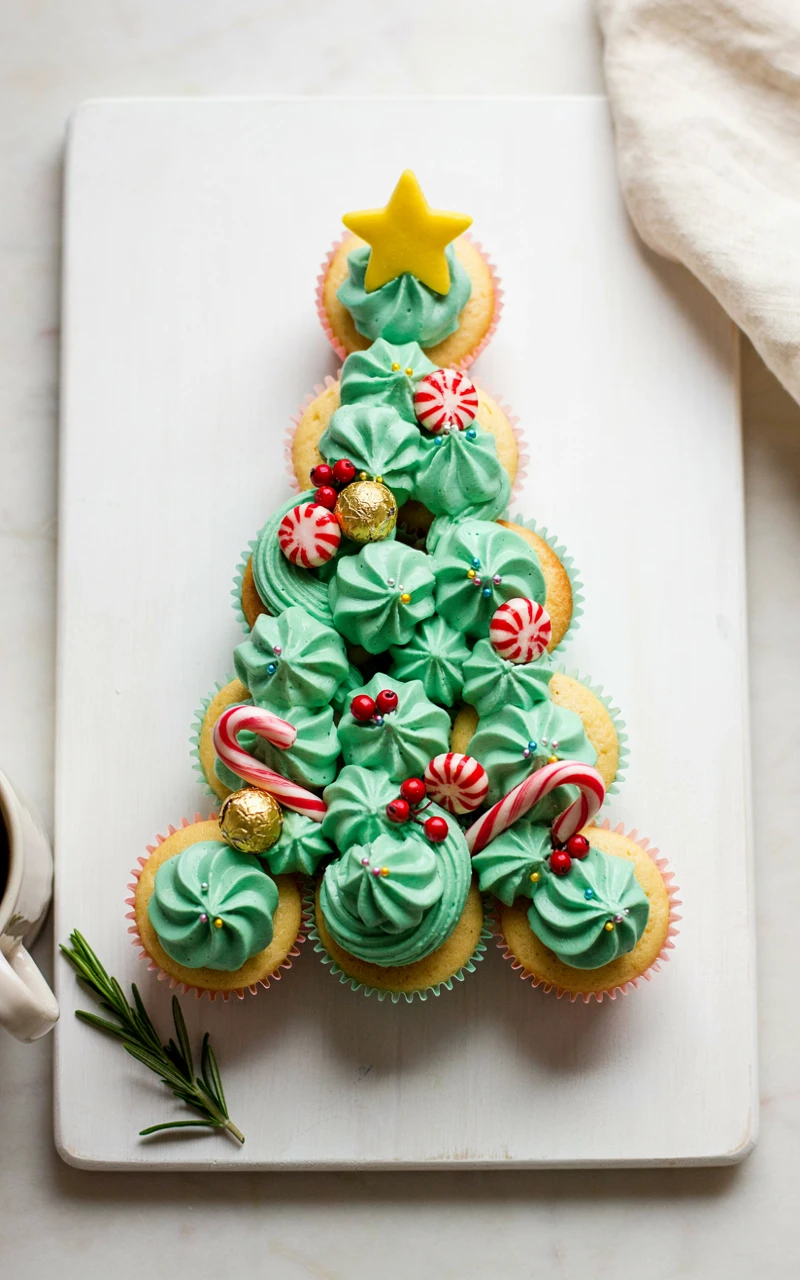
Cupcakes are arranged into a tree shape, then frosted as one big surface. Nobody needs a knife or a plate, which makes it a dream for school parties and potlucks.
It’s also the quickest cake on this list. You can go from mixing bowl to finished tree in about 2 hours.
Ingredients
For the cupcakes
- 2 cups (250 g) all-purpose flour
- 2 tsp (8 g) baking powder
- 1/2 tsp (3 g) salt
- 2/3 cup (150 g) unsalted butter, softened
- 1 cup (200 g) granulated sugar
- 3 large eggs
- 2 tsp (10 ml) vanilla extract
- 3/4 cup (180 ml) whole milk
For the frosting and decoration
- 1 1/2 cups (340 g) unsalted butter, softened
- 5 cups (600 g) powdered sugar
- 3 tbsp (45 ml) heavy cream
- 2 tsp (10 ml) vanilla extract
- Green gel food coloring
- 2 tbsp (10 g) unsweetened cocoa powder, for the trunk
- 1/4 cup (45 g) mini candy-coated chocolates
- 2 tbsp (25 g) Christmas sprinkles
- 1 star-shaped cookie or large yellow candy star
Tools and Preparation
You’ll need two standard muffin pans, 18 paper liners, a mixer, a large piping bag, a large open star tip such as a 1M, and a board about 16 x 20 inches (40 x 50 cm). You’ll use 17 cupcakes for the tree and keep one for the baker.
- Prep time: 20 minutes
- Bake time: 20 minutes
- Cooling and decorating: about 1 hour 20 minutes
- Total time: about 2 hours
- Serves: 17
Step-by-Step Instructions
- Heat your oven to 350°F (180°C) and line the muffin pans.
- Whisk the flour, baking powder, and salt.
- Beat the butter and sugar until fluffy. Add the eggs one at a time and the vanilla.
- Mix in the dry ingredients and milk alternately until smooth.
- Fill each liner two-thirds full and bake for 18 to 20 minutes, until the tops spring back. Cool completely, about 45 minutes.
- Beat the frosting ingredients until fluffy. Take out 1/2 cup, stir in the cocoa for the trunk, and tint the rest green.
- Arrange the cupcakes on the board in rows of 1, 2, 3, 4, and 5 from the top, with 2 below for the trunk. Dab a little frosting under each to hold it in place.
- Pipe green frosting across the tree cupcakes in tight zigzags, covering the gaps so it reads as one tree.
- Spread the brown frosting over the trunk.
- Pipe or sprinkle diagonal garlands, add candies as ornaments, and set the star on top.
Common Mistakes to Avoid
- Leaving gaps between cupcakes. Push them tightly together so the frosting can bridge them.
- Frosting each cupcake separately. It looks like a pile of cupcakes, not a tree.
- Overfilling the liners. Domed tops make the surface lumpy.
Variations, Storage, and Final Thoughts
Make it chocolate, or use red velvet cupcakes with a green frosting tree. A snowman shape with two circles works the same way.
Cover loosely and keep at room temperature for up to 2 days.
Key takeaway: arrange first, frost second, and the tree shape takes care of itself.
13. Traditional Royal Iced Christmas Cake
Why You’ll Love This Recipe
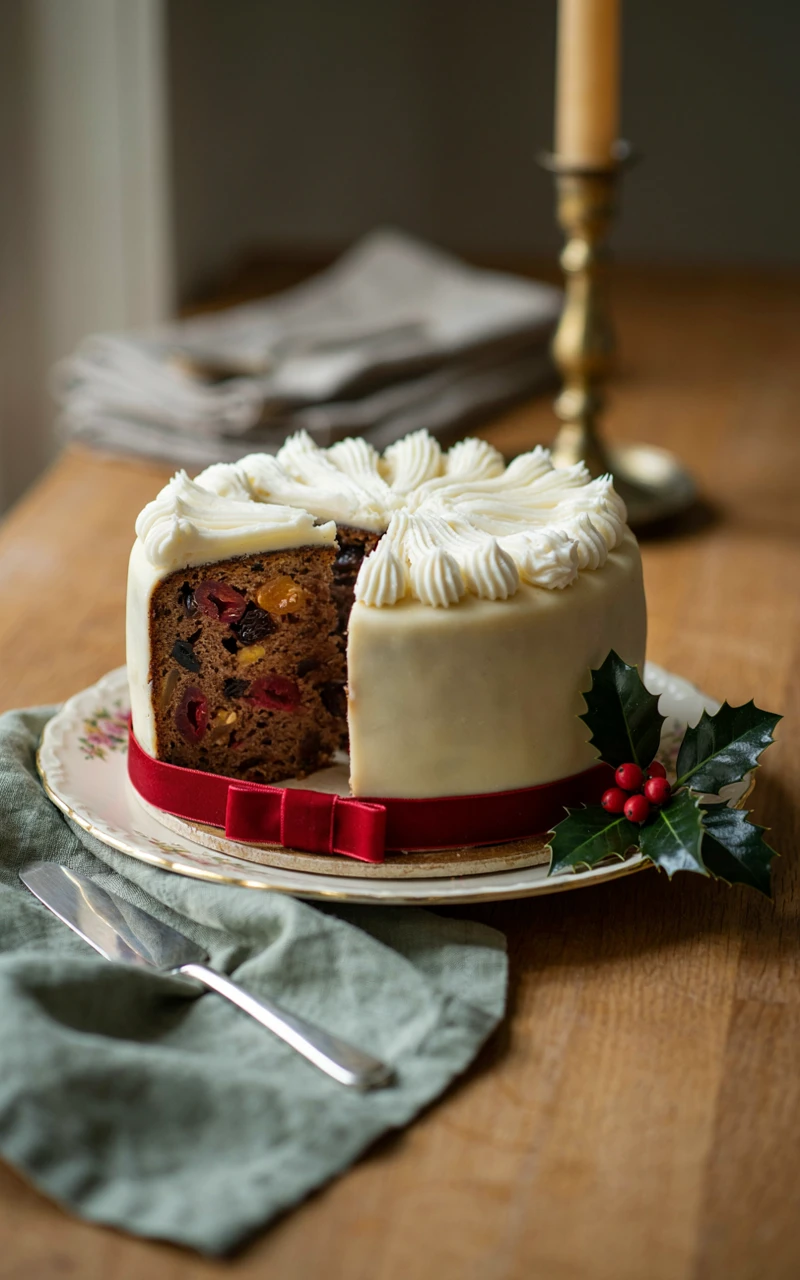
This is the old-fashioned British fruit cake, rich with dried fruit and brandy, then covered in marzipan and snowy peaks of royal icing. It’s the kind of Christmas cake people remember from their grandmother’s table.
It takes weeks, but most of that is waiting. Each week you “feed” it a little brandy, and the flavor gets deeper and mellower.
Ingredients
For the soaked fruit
- 1 1/2 cups (225 g) raisins
- 1 1/2 cups (225 g) golden raisins
- 1 cup (150 g) dried currants
- 1/2 cup (100 g) candied cherries, halved
- 1/2 cup (75 g) mixed candied peel
- Zest of 1 orange and 1 lemon
- 1/2 cup (120 ml) brandy, plus 6 tbsp (90 ml) for feeding
For the cake
- 1 cup (225 g) unsalted butter, softened
- 1 cup (200 g) packed dark brown sugar
- 4 large eggs
- 1 tbsp (20 g) molasses
- 2 cups (250 g) all-purpose flour
- 1/2 cup (50 g) ground almonds
- 1 tsp (2 g) pumpkin pie spice or mixed spice
- 1/2 tsp (1 g) ground cinnamon
- 1/4 tsp (1.5 g) salt
For the covering
- 3 tbsp (60 g) apricot jam, warmed and strained
- 1 lb (450 g) marzipan
- 2 tbsp (15 g) powdered sugar, for rolling
- 3 tbsp (30 g) meringue powder plus 6 tbsp (90 ml) water, or 2 pasteurized egg whites
- 4 cups (480 g) powdered sugar
- 1 tsp (5 ml) lemon juice
- 1 tsp (5 ml) glycerin (optional, keeps the icing easier to cut)
Royal icing isn’t cooked, so I use meringue powder or pasteurized egg whites. The FDA recommends pasteurized eggs for any recipe that calls for raw eggs.
Tools and Preparation
You’ll need an 8-inch (20 cm) round pan at least 3 inches (7.5 cm) deep, parchment, brown paper or extra parchment and kitchen string, a skewer, a rolling pin, a pastry brush, and a mixer. Line the inside of the pan with a double layer of parchment that stands 2 inches (5 cm) above the rim, then tie brown paper around the outside to stop the edges from burning.
- Soaking time: overnight, about 12 hours
- Prep time: 40 minutes
- Bake time: 3 to 3 1/2 hours
- Feeding: once a week for 2 to 6 weeks
- Covering and drying: 2 to 3 days
- Serves: 20 small slices
Step-by-Step Instructions
- Stir the fruit, zests, and 1/2 cup (120 ml) brandy in a bowl. Cover and leave overnight.
- Heat your oven to 300°F (150°C).
- Beat the butter and brown sugar until fluffy. Add the eggs one at a time with a spoonful of flour each, then the molasses.
- Fold in the flour, almonds, spices, and salt, then the soaked fruit with any liquid.
- Spoon into the pan, level the top, and make a slight dip in the center. Bake for 3 to 3 1/2 hours, until the top is firm and a skewer comes out clean.
- Cool completely in the pan. Poke holes all over with the skewer and spoon over 2 tbsp (30 ml) brandy.
- Wrap in parchment, then foil, and store in an airtight tin. Feed with 1 to 2 tbsp brandy each week.
- About a week before Christmas, brush the cake with warm jam. Roll the marzipan to 1/4 inch (6 mm) on powdered sugar, drape it over, and smooth. Let it dry uncovered for 24 to 48 hours.
- Beat the meringue powder and water (or egg whites) with the powdered sugar, lemon juice, and glycerin for 5 to 7 minutes, until thick and glossy with stiff peaks.
- Spread the icing over the cake, then dab and lift with a spatula to make snowy peaks. Add small toppers or a rosemary sprig and let it set for 24 hours.
Common Mistakes to Avoid
- Baking too hot. A low oven keeps the outside from burning before the middle cooks.
- Icing over fresh marzipan. The almond oil can stain the white icing, so let it dry first.
- Over-feeding. Too much brandy makes the cake soggy, so stick to small spoonfuls.
Variations, Storage, and Final Thoughts
Swap the brandy for orange juice or cold tea for an alcohol-free version, though it won’t keep as long. Chopped pecans or walnuts are a lovely addition to the batter.
Wrapped and stored in a cool, dry tin, the iced cake keeps for 2 to 3 weeks. Set it on a cake stand and it becomes part of your Christmas kitchen decor until it’s time to slice.
Key takeaway: this cake rewards patience, so start it early and let time do the hard part.
14. Hot Chocolate Marshmallow Drip Cake
Why You’ll Love This Recipe
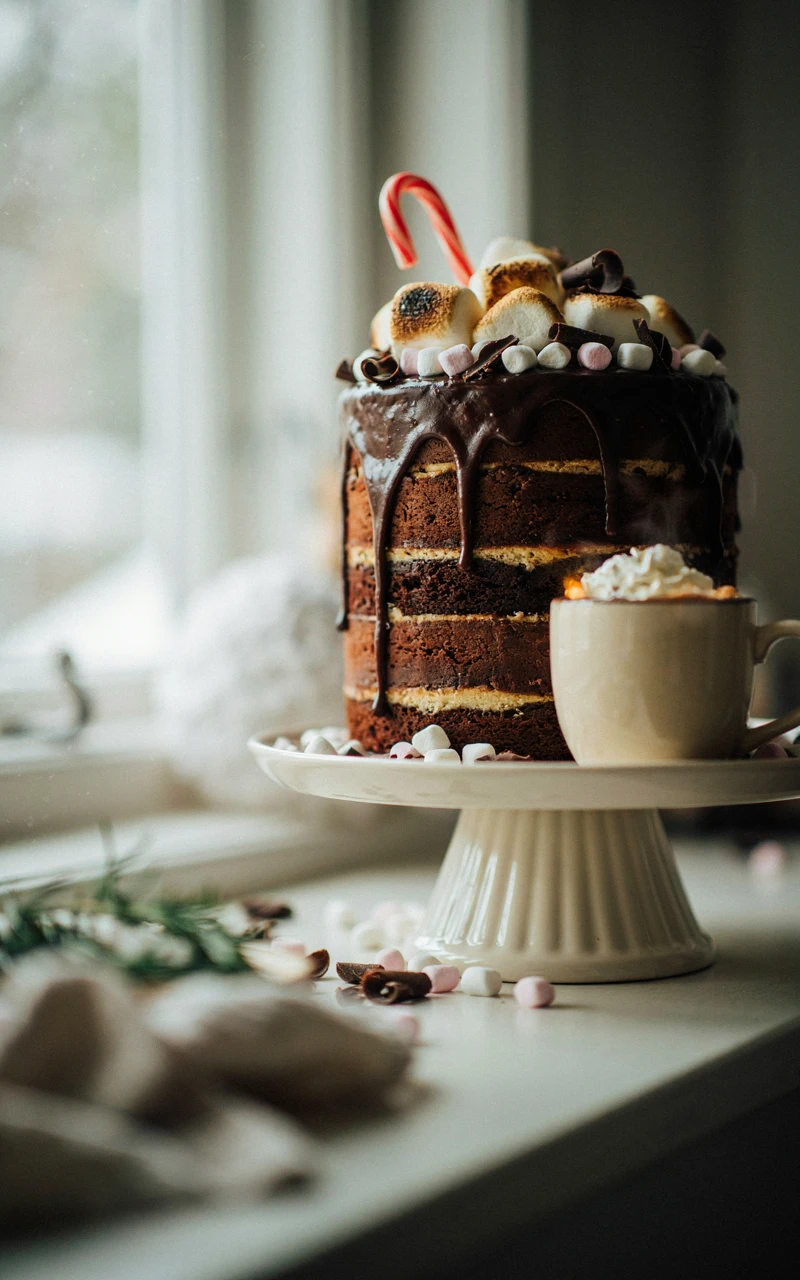
This tall cake tastes like a mug of hot cocoa. Chocolate layers with a hint of cocoa mix sit under fluffy marshmallow frosting, a chocolate drip, and a pile of toasted marshmallows.
Drip cakes look bakery-level, but the drip is just warm ganache spooned around the edge. It’s a great pick for holiday cake decorating if you’ve mastered the basics and want a bit of wow.
Ingredients
For the cake
- 1 3/4 cups (220 g) all-purpose flour
- 1 1/2 cups (300 g) granulated sugar
- 3/4 cup (65 g) unsweetened cocoa powder
- 1/4 cup (30 g) hot cocoa mix
- 1 1/2 tsp (9 g) baking soda
- 1 tsp (4 g) baking powder
- 1 tsp (6 g) salt
- 2 large eggs
- 1 cup (240 ml) whole milk
- 1/2 cup (120 ml) vegetable oil
- 2 tsp (10 ml) vanilla extract
- 1 cup (240 ml) hot water
For the frosting, drip, and topping
- 1 cup (225 g) unsalted butter, softened
- 1 jar (7 oz / 198 g) marshmallow creme
- 3 cups (360 g) powdered sugar
- 1 tsp (5 ml) vanilla extract
- 1 to 2 tbsp (15 to 30 ml) milk
- 4 oz (115 g) semisweet chocolate, chopped
- 1/2 cup (120 ml) heavy cream
- 2 cups (100 g) mini marshmallows
- 5 large marshmallows
- 4 mini candy canes
- 2 tbsp (15 g) chocolate shavings
Tools and Preparation
You’ll need three 6-inch (15 cm) round pans, a mixer, a turntable, a bench scraper, a squeeze bottle or spoon, a thermometer, and a kitchen torch if you have one. The smaller pans give you a tall cake, which makes the drip look dramatic.
- Prep time: 30 minutes
- Bake time: 30 minutes
- Cooling, assembly, and chilling: about 2 hours 30 minutes
- Total time: about 3 hours 30 minutes
- Serves: 12
Step-by-Step Instructions
- Heat your oven to 350°F (180°C). Grease and line the three pans.
- Whisk the flour, sugar, cocoa, cocoa mix, baking soda, baking powder, and salt. Add the eggs, milk, oil, and vanilla and mix for 2 minutes, then stir in the hot water.
- Bake for 28 to 32 minutes, until a toothpick comes out clean. Cool completely.
- Beat the butter for 3 minutes, then beat in the marshmallow creme. Add the powdered sugar, vanilla, and milk and beat until fluffy.
- Stack, crumb coat, and chill for 20 minutes. Add a smooth final coat and chill for at least 30 minutes, until cold.
- Heat the cream until steaming, pour over the chocolate, wait 3 minutes, and stir smooth. Cool to 85 to 90°F (29 to 32°C).
- Test one drip on the side. If it runs to the bottom, wait 5 more minutes.
- Spoon drips around the top edge, then fill in the center and smooth it.
- Pile mini marshmallows and large marshmallows on top and toast them lightly with the torch. Finish with candy canes and chocolate shavings.
Common Mistakes to Avoid
- Dripping onto a warm cake. The ganache will run straight to the plate.
- Skipping the test drip. One test saves the whole cake.
- Torching too close. Marshmallows catch fast, so keep the flame moving.
Variations, Storage, and Final Thoughts
Add 1/2 tsp peppermint extract to the frosting for a peppermint mocha version, or use white chocolate for the drip. A tiny mug set on top makes it extra cute.
Store covered in the fridge for up to 4 days. Add the toasted marshmallows on serving day, since they get chewy and sticky overnight.
Key takeaway: a cold cake and a test drip are the two keys to clean, even drips.
15. Chocolate Orange Starry Night Cake
Why You’ll Love This Recipe
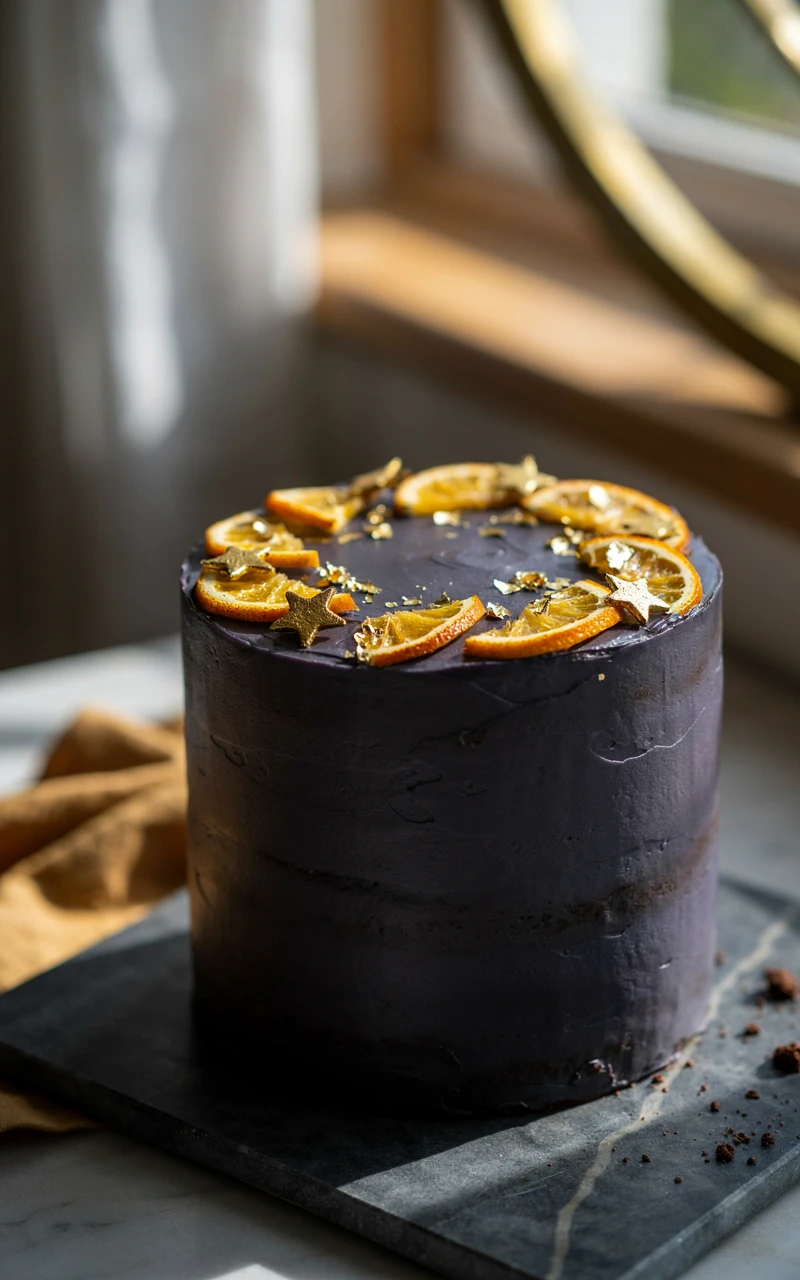
This dark, glossy cake is covered in tiny white chocolate “stars” and gold sparkles, like a clear winter night. Chocolate and orange together taste like those foil-wrapped chocolate oranges in a Christmas stocking.
It’s a lovely grown-up choice for a dinner party. The splatter decoration takes about 5 minutes and looks like you spent hours.
Ingredients
For the cake
- 1 3/4 cups (220 g) all-purpose flour
- 2 cups (400 g) granulated sugar
- 3/4 cup (65 g) unsweetened cocoa powder
- 2 tsp (12 g) baking soda
- 1 tsp (4 g) baking powder
- 1 tsp (6 g) salt
- 2 large eggs
- 1 cup (240 ml) buttermilk
- 1/2 cup (120 ml) vegetable oil
- Zest of 2 oranges (about 2 tbsp / 12 g)
- 1 tsp (5 ml) orange extract
- 1 cup (240 ml) hot strong coffee
For the ganache and stars
- 12 oz (340 g) dark chocolate, 60 to 70 percent, chopped
- 1 1/2 cups (360 ml) heavy cream
- 2 tbsp (30 g) unsalted butter
- 1 tsp (5 ml) orange extract
- Pinch of salt
- 2 oz (55 g) white chocolate
- 1/2 tsp (2.5 ml) coconut oil
- 2 tbsp (25 g) gold star sprinkles
- 1/2 tsp edible gold luster dust (optional)
- A few strips of candied orange peel (optional)
Tools and Preparation
You’ll need two 8-inch (20 cm) round pans, a mixer, a heatproof bowl, a turntable, an offset spatula, a bench scraper, a clean dry pastry brush, and a dry paintbrush used only for food. Cover your counter with parchment before splattering, because the white chocolate flies everywhere.
- Prep time: 30 minutes
- Bake time: 32 minutes
- Cooling, setting, and decorating: about 2 hours 30 minutes
- Total time: about 3 hours 30 minutes
- Serves: 14
Step-by-Step Instructions
- Heat your oven to 350°F (180°C). Grease and line the pans.
- Whisk the flour, sugar, cocoa, baking soda, baking powder, salt, and orange zest. Add the eggs, buttermilk, oil, and orange extract and mix for 2 minutes, then stir in the hot coffee.
- Bake for 30 to 35 minutes, until a toothpick comes out clean. Cool completely.
- Heat the cream until it just simmers at the edges. Pour over the dark chocolate, wait 5 minutes, then stir gently from the center out. Stir in the butter, orange extract, and salt.
- Pour half the ganache into a separate bowl and leave it at room temperature for about 1 hour, until thick and spreadable. Keep the other half loosely covered.
- Stack the layers with thick ganache between them and spread a thin coat on the outside. Chill for 20 minutes.
- Gently rewarm the reserved ganache until pourable, about 90°F (32°C). Pour over the top and smooth it down the sides. Chill for 20 minutes.
- Melt the white chocolate with the coconut oil. Dip the pastry brush in it and flick your finger across the bristles over the cake to splatter tiny stars.
- Brush a diagonal streak of gold luster dust across the top, scatter star sprinkles, and add candied orange peel if you like.
Common Mistakes to Avoid
- Boiling the cream. Too-hot cream can make ganache split and look oily.
- Whisking ganache hard. It adds bubbles, so stir slowly with a spatula.
- Big splatter blobs. Shake off extra white chocolate first, and practice on parchment.
Variations, Storage, and Final Thoughts
Use raspberry instead of orange, or splatter with pale blue tinted white chocolate for a frosty sky. A pinch of cinnamon in the batter adds gentle warmth.
Keep it covered in a cool spot for up to 2 days or in the fridge for up to 5. Let it sit out for 30 minutes so the ganache turns silky again.
Key takeaway: a smooth dark ganache is the perfect blank sky, and a flick of white chocolate does the rest.
That’s every recipe from my well-loved notebook. Some of these Christmas cakes take an afternoon, and one takes weeks, but every single one started as a messy first try in my own kitchen.
You don’t need to bake all fifteen. Pick the one that made you smile, give yourself a little extra time, and remember that a lopsided tree or a wobbly stripe is proof that someone made it with love.
I’d love to hear which cake you’re making this year, so tell me in the comments. You’ve got this, and your holiday table is going to look wonderful.