This post may contain affiliate links, which means I may receive a small commission should you decide to click that link and make a purchase. For more information please refer to the Terms & Conditions.
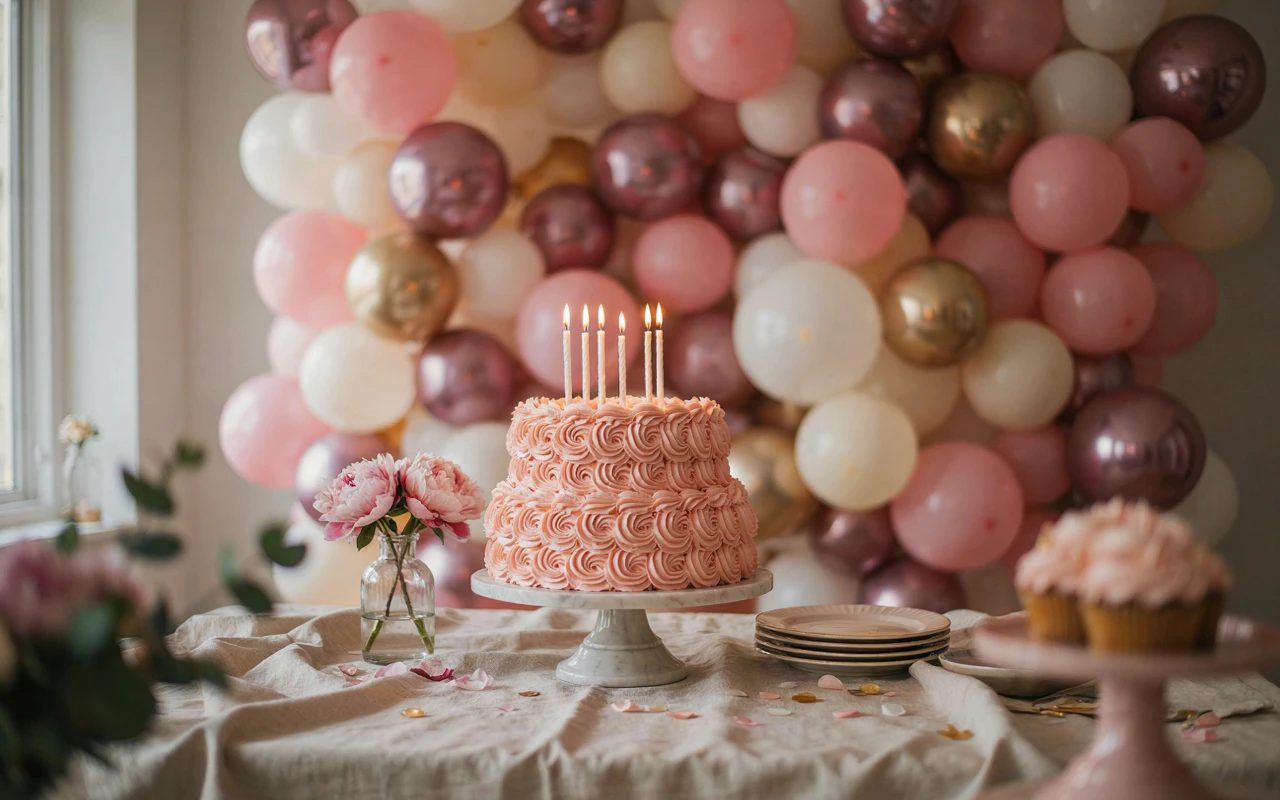
Birthday cake scene ideas can turn a simple cake into the highlight of a picture-perfect celebration.
The cake itself matters, but the table, background, decorations, and lighting all help create a beautiful display that looks great in photos.
You don’t need a professional party planner or an expensive photo setup to make it happen.
With a few thoughtful touches, you can create a lovely birthday cake display right at home.
Below, you’ll find 11 birthday cake ideas, each paired with simple decorating and styling tips to help you create a beautiful cake scene.
Whether you’re planning a child’s birthday, an elegant celebration, or a fun party at home, these ideas will help make the day feel extra special.
| Cake | Setup Around It | Skill Level | Serves |
|---|---|---|---|
| Vintage Pink Heart Cake | Pink tablecloth, ribbon bows | Medium | 12 |
| Neon Zebra Cake | Zebra print, neon balloons | Medium | 10 |
| Chocolate Drip Cake | Gold balloon wall, sparklers | Medium | 12 |
| Strawberry Shortcake Cake | Gingham picnic blanket | Easy | 10 |
| Lemon Blueberry Cake | Bud vases and fresh flowers | Easy | 12 |
| Funfetti Sheet Cake | Streamer curtain | Easy | 16 |
| Dark Chocolate Raspberry Cake | Taper candles, dark linens | Medium | 12 |
| Coconut Lime Cake | Palm leaves | Easy | 12 |
| Galaxy Mirror Glaze Cake | Black backdrop, fairy lights | Advanced | 12 |
| Checkerboard Cupcake Tower | Checkered cloth, neon details | Easy | 24 |
| Pink Champagne Cake | Blush linens, coupe glasses | Medium | 12 |
1. Vintage Pink Heart Cake with Ribbon Piping
Why You’ll Love This Recipe
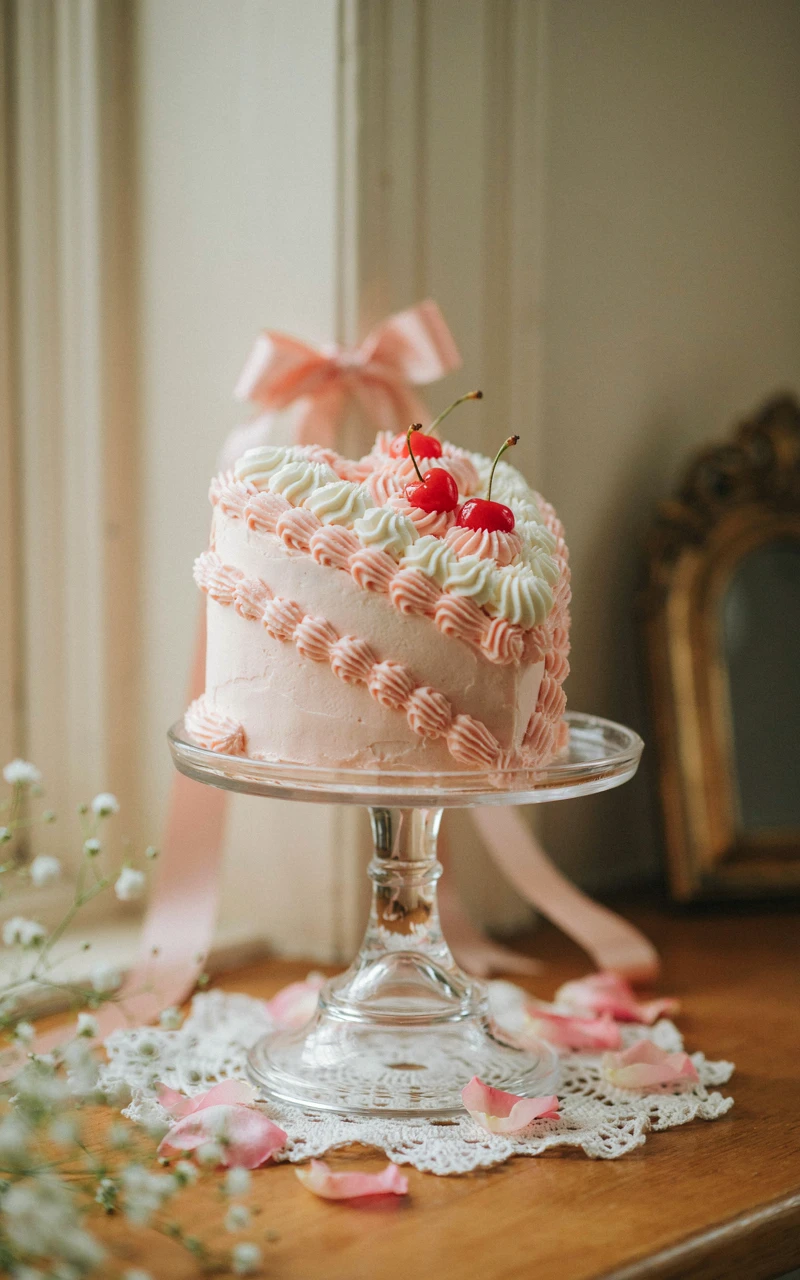
This is the frilly, old-fashioned cake you’ve seen all over your feed, with ruffled piping, cherries on top, and a heart shape that looks sweet from every angle. Underneath all that frosting is a soft vanilla butter cake that tastes as good as it looks.
The piping looks fancy, but it’s just two tips and a little patience. Wobbly ruffles still look charming on a vintage cake, so it’s very forgiving for beginners.
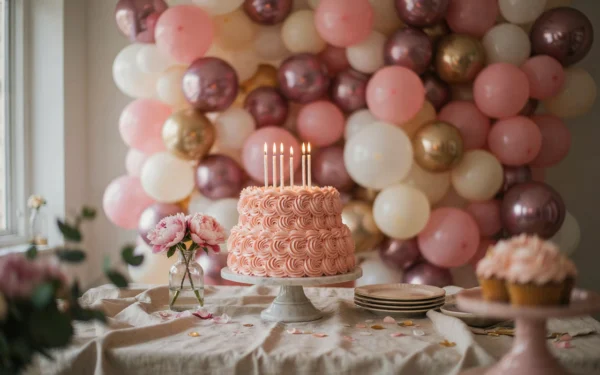
For the scene, keep everything pink and soft. Lay a pale pink tablecloth, set the cake on a white or milk glass cake stand, tie a few satin bows to the chair backs, and place the table near a window for soft daylight.
Ingredients
For the cake:
- 2 1/2 cups (315 g) all-purpose flour
- 2 1/2 tsp (10 g) baking powder
- 1/2 tsp (3 g) salt
- 3/4 cup (170 g) unsalted butter, softened
- 1 1/2 cups (300 g) granulated sugar
- 3 large eggs, room temperature
- 1 tbsp (15 ml) vanilla extract
- 1 cup (240 ml) whole milk, room temperature
For the frosting and decoration:
- 1 1/2 cups (340 g) unsalted butter, softened
- 5 cups (600 g) powdered sugar
- 3 to 4 tbsp (45 to 60 ml) heavy cream
- 2 tsp (10 ml) vanilla extract
- 1 pinch salt
- Pink gel food coloring
- 8 to 10 maraschino cherries with stems, patted dry
- 2 tbsp (25 g) white pearl sprinkles
Tools and Preparation
You’ll need two 8-inch (20 cm) heart-shaped cake pans, parchment paper, a stand or hand mixer, an offset spatula, two piping bags, a star tip (size 21), and a petal tip (size 104). A cake turntable helps a lot, but a plate you can spin works too.
- Prep time: 45 minutes
- Bake time: 28 to 32 minutes
- Cooling and decorating: about 2 hours
- Total time: about 3 hours 15 minutes
- Serves: 12
Step-by-Step Instructions
- Heat the oven to 350°F (175°C). Grease the heart pans and line the bottoms with parchment.
- Whisk the flour, baking powder, and salt in a bowl and set it aside.
- Beat the butter and sugar for 3 to 4 minutes, until pale and fluffy. Add the eggs one at a time, then the vanilla.
- Add the flour mixture in three parts, alternating with the milk, and mix only until no dry streaks remain.
- Divide the batter between the pans and bake for 28 to 32 minutes. The cakes are done when the tops spring back and a toothpick comes out with a few dry crumbs.
- Cool in the pans for 10 minutes, then turn out onto a wire rack and cool completely, about 1 hour.
- Make the frosting by beating the butter for 5 minutes, then adding the powdered sugar a cup at a time. Mix in the cream, vanilla, and salt, then tint most of it pale pink and about 1 cup (240 ml) a deeper pink.
- Level the cakes, stack them with frosting between, and spread a thin crumb coat. Chill for 20 minutes, then add a smooth final coat.
- Pipe a shell border around the base with the star tip. Use the petal tip to pipe ruffled swags along the top edge, then add the cherries and pearl sprinkles.
Common Mistakes to Avoid
- Using too much coloring. Vintage cakes look best in soft pastels, so add gel one drop at a time.
- Skipping the chill. A cold crumb coat keeps crumbs out of your pretty final layer.
- Piping in a hot kitchen. If your ruffles droop, chill the piping bag for 10 minutes.
- Wet cherries. Dry them well or they’ll bleed red streaks into the frosting.
Variations, Storage, and Final Thoughts
Swap the vanilla frosting for strawberry by beating in 1/2 cup (15 g) of crushed freeze-dried strawberries. You can also pipe the ruffles in white over a pink cake for a softer look.
Keep the cake covered at room temperature for up to 1 day, or in the fridge for up to 4 days. Let it sit out for an hour before serving so the frosting softens.
Key takeaway: imperfect ruffles are part of the charm here. Pipe with confidence and let the pink table do the rest.
2. Neon Zebra Scene Birthday Cake
Why You’ll Love This Recipe
If you grew up in the 2000s, you remember scene style: neon pink, zebra print, side bangs, and way too many glow bracelets. A scene birthday cake brings all of that back, and this one has a surprise inside too.
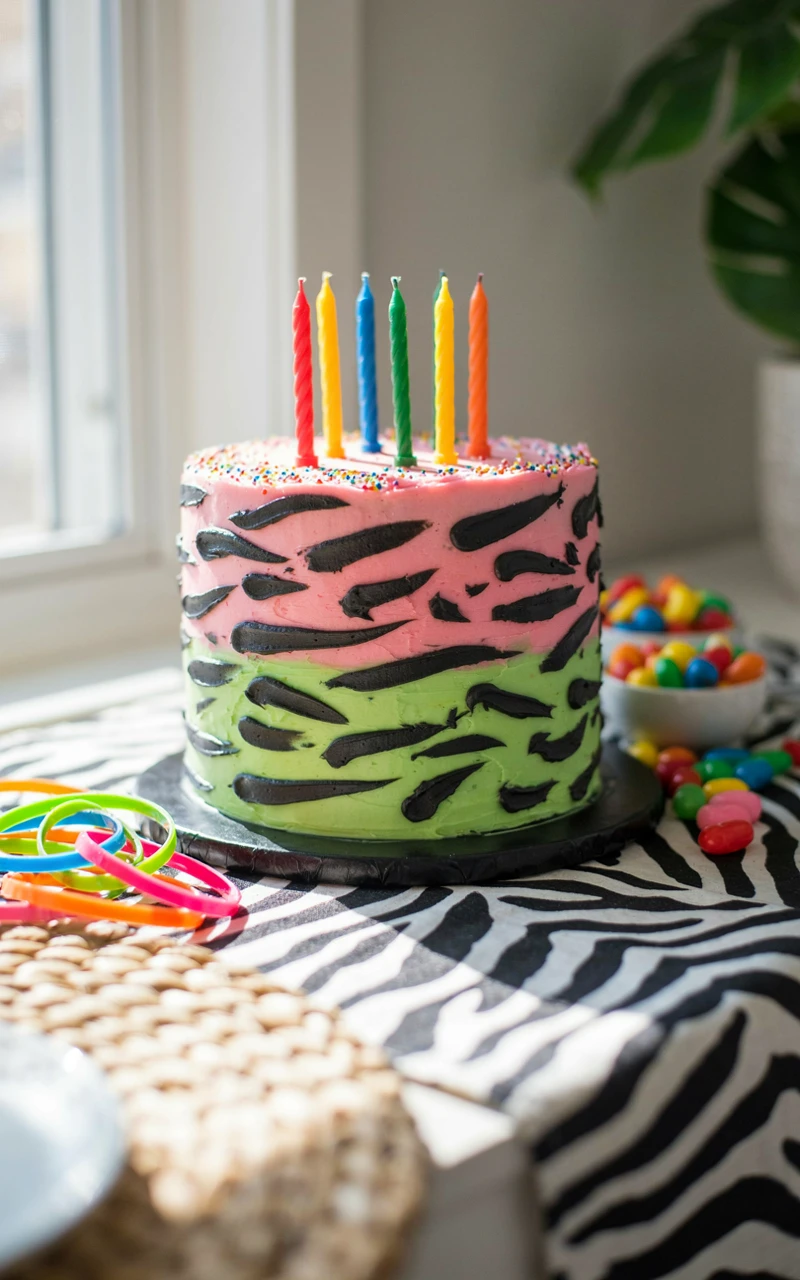
The cake itself is a classic zebra cake, made by spooning vanilla and chocolate batter into the center of the pan so it bakes into stripes. The outside gets neon pink frosting with black zebra stripes, so it’s loud on the outside and fun on the inside.
For the scene, use a zebra print tablecloth, neon pink and lime balloons, a few butterfly clips scattered around, and a “rawr” cake topper if you’re feeling brave. Play a 2000s playlist and everyone will know the theme before they even see the cake.
Ingredients
For the zebra cake:
- 4 large eggs
- 1 cup (200 g) granulated sugar
- 1 cup (240 ml) whole milk, plus 2 tbsp (30 ml) for the cocoa batter
- 1 cup (240 ml) vegetable oil
- 2 tsp (10 ml) vanilla extract
- 2 1/2 cups (315 g) all-purpose flour
- 2 tsp (8 g) baking powder
- 1/2 tsp (3 g) salt
- 3 tbsp (20 g) unsweetened cocoa powder
For the frosting:
- 1 1/4 cups (285 g) unsalted butter, softened
- 4 1/2 cups (540 g) powdered sugar
- 3 tbsp (45 ml) heavy cream
- 2 tsp (10 ml) vanilla extract
- Neon pink gel food coloring
- 2 tbsp (10 g) black cocoa powder
- Black gel food coloring
Tools and Preparation
Grab a 9-inch (23 cm) springform or round pan that’s at least 3 inches (7.5 cm) deep, two mixing bowls, a 3 tbsp (45 ml) scoop or measuring spoon, an offset spatula, and a piping bag with a small round tip (size 4).
- Prep time: 30 minutes
- Bake time: 45 to 55 minutes
- Cooling and decorating: about 2 hours
- Total time: about 3 hours 15 minutes
- Serves: 10
Step-by-Step Instructions
- Heat the oven to 350°F (175°C). Grease the pan and line the bottom with parchment.
- Whisk the eggs and sugar for 2 to 3 minutes, until pale. Whisk in 1 cup (240 ml) milk, the oil, and the vanilla.
- Fold in the flour, baking powder, and salt until smooth. Pour half into a second bowl and stir in the cocoa and the extra 2 tbsp (30 ml) milk.
- Spoon 3 tbsp (45 ml) vanilla batter into the very center of the pan. Spoon 3 tbsp (45 ml) chocolate batter right on top of it, then keep alternating until both bowls are empty.
- Don’t spread or swirl. The batter will push outward on its own and form rings.
- Bake for 45 to 55 minutes, until a toothpick in the center comes out clean. Cool for 15 minutes, then remove from the pan and cool completely.
- Beat the butter, powdered sugar, cream, and vanilla until fluffy. Set aside 3/4 cup (180 ml) and tint the rest neon pink.
- Stir the black cocoa and black gel into the reserved frosting until it’s very dark.
- Frost the cake in neon pink and smooth the sides. Pipe wavy, tapered black stripes down the sides and across the top, like a zebra’s coat.
Common Mistakes to Avoid
- Spreading the batter. Every spoonful goes in the center, or you’ll lose the stripes.
- Grey “black” frosting. Make the black frosting a day early, since the color deepens overnight.
- Straight stripes. Real zebra stripes are uneven and pointy at the ends, so wiggle your hand a little.
Variations, Storage, and Final Thoughts
Use neon green or electric blue instead of pink, or tint the vanilla batter pink for a pink-and-brown zebra inside. Cupcakes work too, using a teaspoon instead of a tablespoon.
Store covered at room temperature for 2 days or in the fridge for 4 days. Neon colors can fade in bright sun, so keep the cake out of the window until party time.
Key takeaway: a scene cake is supposed to be loud. Go bold with the color and have fun with the stripes.
3. Chocolate Drip Cake with Sparkler Candles and a Gold Balloon Backdrop
Why You’ll Love This Recipe
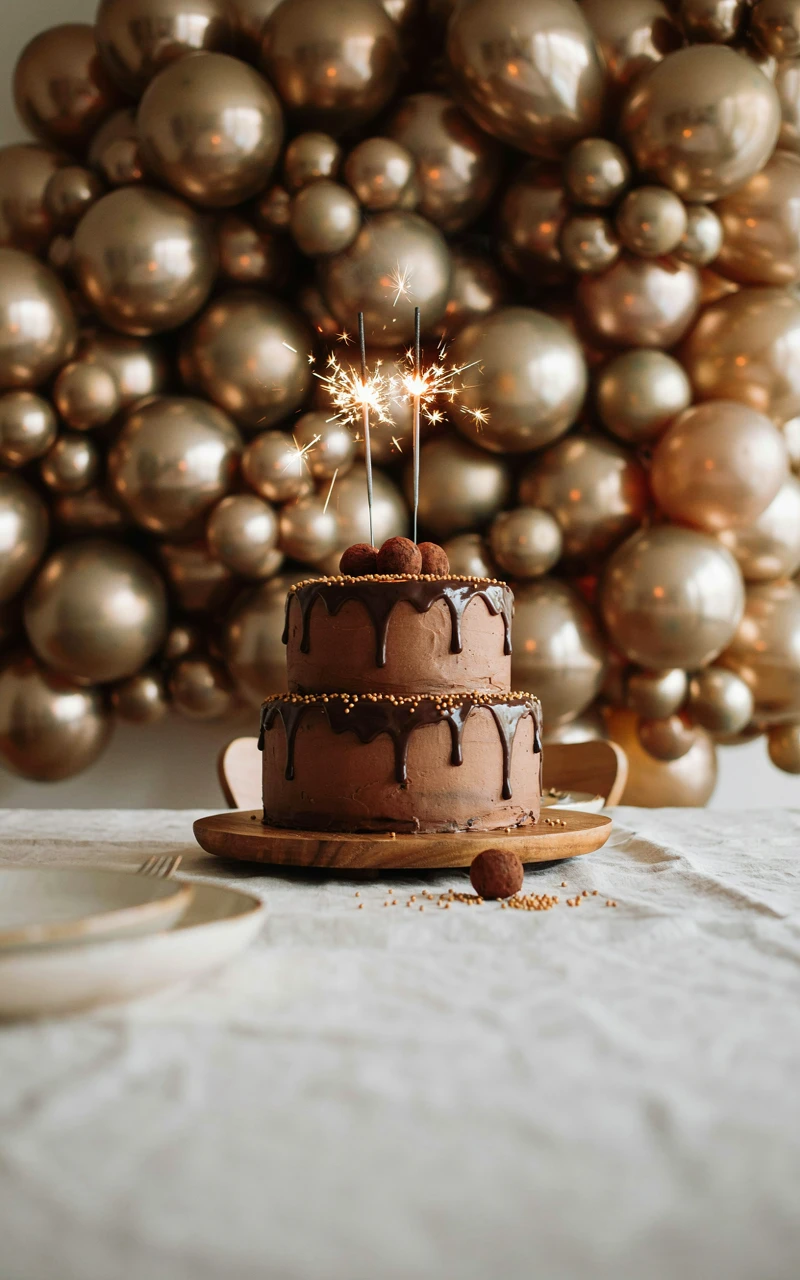
This is the cake for the person who wants a real “wow” moment when the lights go down. It’s a tall chocolate cake with fudgy frosting, a glossy chocolate drip, and sparkler candles that light up every face around the table.
The cake uses hot coffee, which makes the chocolate taste deeper without tasting like coffee. It stays moist for days, so you can bake it ahead.
Of all the birthday cake backdrop ideas I’ve tried, a wall of gold foil balloons is the easiest way to look like you hired someone. Tape gold number balloons and a cluster of round balloons behind the table, then add a black or gold tablecloth so the cake pops.
Ingredients
For the cake:
- 1 3/4 cups (220 g) all-purpose flour
- 2 cups (400 g) granulated sugar
- 3/4 cup (65 g) unsweetened cocoa powder
- 2 tsp (10 g) baking soda
- 1 tsp (4 g) baking powder
- 1 tsp (6 g) salt
- 2 large eggs
- 1 cup (240 ml) buttermilk
- 1/2 cup (120 ml) vegetable oil
- 2 tsp (10 ml) vanilla extract
- 1 cup (240 ml) hot brewed coffee
For the frosting, drip, and topping:
- 1 1/2 cups (340 g) unsalted butter, softened
- 4 cups (480 g) powdered sugar
- 3/4 cup (65 g) unsweetened cocoa powder
- 1/4 cup (60 ml) heavy cream for the frosting
- 2 tsp (10 ml) vanilla extract
- 1/2 cup (85 g) semisweet chocolate chips
- 1/3 cup (80 ml) heavy cream for the drip
- 2 tbsp (25 g) gold sprinkles
- 4 to 6 cake sparkler candles
Tools and Preparation
You’ll need three 6-inch (15 cm) round pans for a tall cake, or two 8-inch (20 cm) pans for a wider one. Also grab a mixer, an offset spatula, a bench scraper, and a squeeze bottle or spoon for the drip.
- Prep time: 40 minutes
- Bake time: 30 to 35 minutes
- Cooling and decorating: about 2 hours
- Total time: about 3 hours 15 minutes
- Serves: 12
Step-by-Step Instructions
- Heat the oven to 350°F (175°C). Grease and line the pans.
- Whisk the flour, sugar, cocoa, baking soda, baking powder, and salt in a large bowl.
- Add the eggs, buttermilk, oil, and vanilla and mix until smooth. Slowly stir in the hot coffee; the batter will be thin, and that’s right.
- Divide among the pans and bake for 30 to 35 minutes, until a toothpick comes out clean. Cool completely.
- Beat the butter until creamy, then add the powdered sugar and cocoa a little at a time. Add the cream and vanilla and beat for 3 minutes.
- Stack the layers with frosting, crumb coat, and chill for 20 minutes. Add a smooth final coat with the bench scraper and chill for 30 minutes more.
- Heat the drip cream until steaming, pour it over the chocolate chips, wait 2 minutes, and stir until glossy. Let it cool to about 90°F (32°C), or until it feels barely warm on your lip.
- Test one drip on the side of the cold cake. If it runs to the bottom, wait 5 more minutes, then drip around the edge and fill in the top.
- Add gold sprinkles and push the sparkler candles in just before serving.
Common Mistakes to Avoid
- Dripping onto a warm cake. The cake needs to be cold so the drip sets halfway down.
- Using outdoor sparklers. Only use sparklers labeled for cakes, and light them away from the balloons and anyone’s hair.
- Overheating the ganache. Too hot and it runs off the cake; too cool and it turns lumpy.
Variations, Storage, and Final Thoughts
Try a white chocolate drip tinted pink, or top the cake with chocolate truffles and mini macarons. For a grown-up party, swap 2 tbsp of the coffee for espresso.
Store covered in the fridge for up to 5 days, and let slices sit out for 30 minutes before eating. The cake also freezes well unfrosted for 2 months.
Key takeaway: cold cake, barely warm drip. Get those two right and this cake looks like it came from a bakery.
4. Strawberry Shortcake Picnic Cake
Why You’ll Love This Recipe
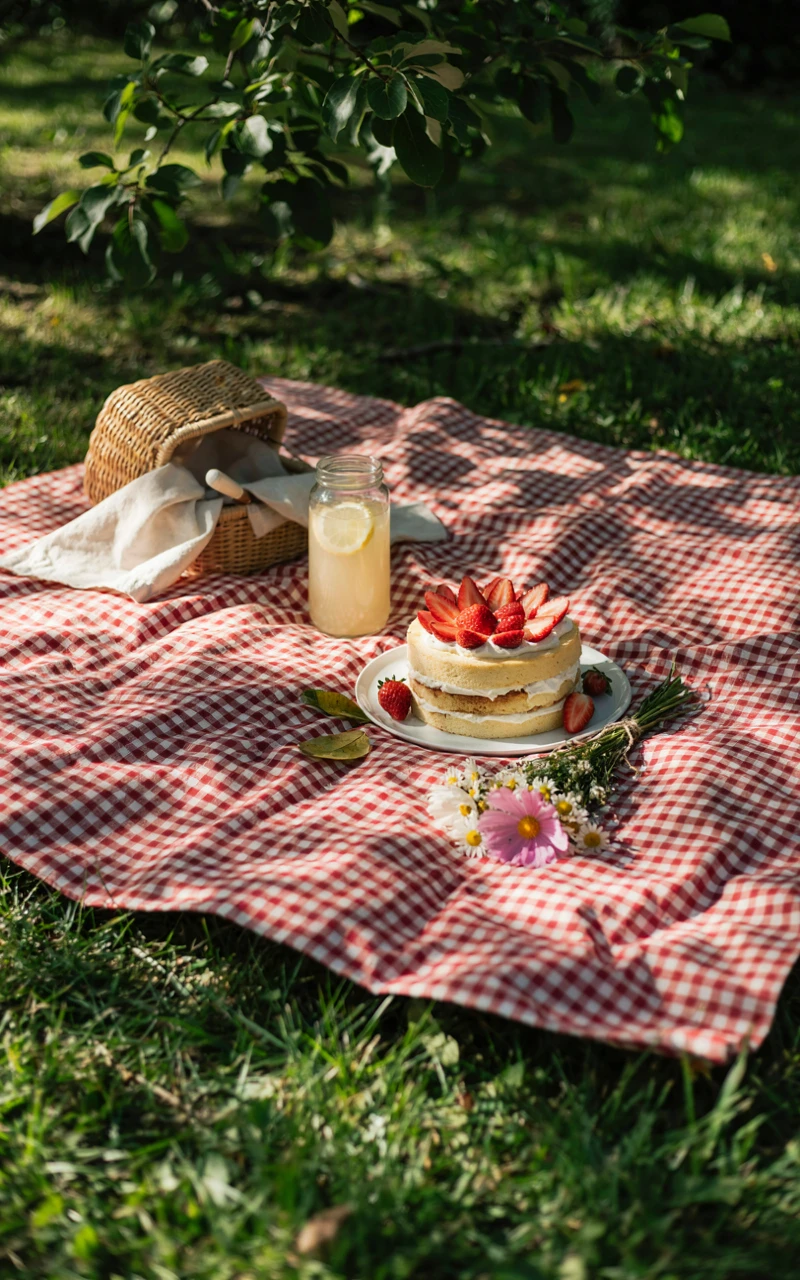
Not every birthday needs to happen indoors. This is a light, golden sponge layered with juicy strawberries and fluffy whipped cream, and it belongs on a picnic blanket in the sun.
The sponge is a hot milk cake, which is soft and springy and soaks up strawberry juice without turning soggy. Mascarpone in the cream helps it hold its shape longer than plain whipped cream.
Set the scene with a red gingham blanket, a wicker basket, a jar of wildflowers, and a few cushions on the grass. If you need more ideas for the space itself, my post on cozy backyard ideas has plenty of simple setups that work for a party, too.
Ingredients
For the sponge:
- 4 large eggs, room temperature
- 1 3/4 cups (350 g) granulated sugar
- 2 cups (250 g) all-purpose flour
- 2 tsp (8 g) baking powder
- 1/2 tsp (3 g) salt
- 1 cup (240 ml) whole milk
- 1/2 cup (113 g) unsalted butter
- 2 tsp (10 ml) vanilla extract
For the filling and cream:
- 1 1/2 lb (680 g) fresh strawberries, hulled and sliced, plus a few whole for the top
- 2 tbsp (25 g) granulated sugar
- 2 cups (480 ml) cold heavy cream
- 8 oz (225 g) cold mascarpone
- 1/2 cup (60 g) powdered sugar
- 1 tsp (5 ml) vanilla extract
Tools and Preparation
You’ll need two 8-inch (20 cm) round pans, a stand mixer or strong hand mixer, a small saucepan, and a large chilled bowl for the cream. A cake carrier is a lifesaver if you’re carrying this outside.
- Prep time: 35 minutes
- Bake time: 25 to 30 minutes
- Cooling and assembly: about 1 hour 30 minutes
- Total time: about 2 hours 30 minutes
- Serves: 10
Step-by-Step Instructions
- Heat the oven to 350°F (175°C). Grease and line the pans.
- Toss the sliced strawberries with 2 tbsp (25 g) sugar and set aside to get juicy while you bake.
- Beat the eggs and 1 3/4 cups (350 g) sugar on high for 5 minutes, until thick and pale and a ribbon of batter sits on top for a second.
- Whisk the flour, baking powder, and salt, then gently fold it into the eggs.
- Heat the milk and butter until the butter melts. Stir a big spoonful of batter into the hot milk, then fold the milk mixture and vanilla back into the batter.
- Bake for 25 to 30 minutes, until golden and springy to the touch. Cool completely on a rack.
- Whip the cream, mascarpone, powdered sugar, and vanilla until stiff peaks form, about 2 to 3 minutes.
- Place one sponge on a plate, spoon over some strawberry juice, then add half the berries and a thick layer of cream. Repeat with the second layer.
- Swirl the remaining cream on top and finish with whole strawberries.
Common Mistakes to Avoid
- Leaving it in the heat. Cream cakes shouldn’t sit out longer than 2 hours, or 1 hour above 90°F (32°C), according to the USDA’s food safety guidance. Keep it in a cooler until cake time.
- Overwhipping. Stop as soon as the cream holds stiff peaks, or it turns grainy.
- Stirring out the air. Fold the flour gently so the sponge stays light.
Variations, Storage, and Final Thoughts
Mix in raspberries and blueberries for a red, white, and blue version. You can also bake the sponge in a 9 x 13-inch (23 x 33 cm) pan and serve it in squares straight from the pan.
This cake is best on the day you make it. Leftovers keep covered in the fridge for 2 days, though the sponge gets softer as it sits.
Key takeaway: keep it cool, keep it simple, and let the sunshine and the berries do the work.
5. Lemon Blueberry Cake on a Fresh Flower Table
Why You’ll Love This Recipe
This cake tastes like a spring morning. It’s a bright lemon cake full of juicy blueberries, covered in tangy lemon cream cheese frosting.
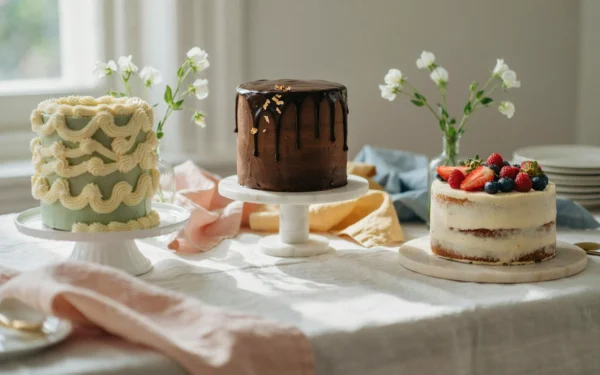
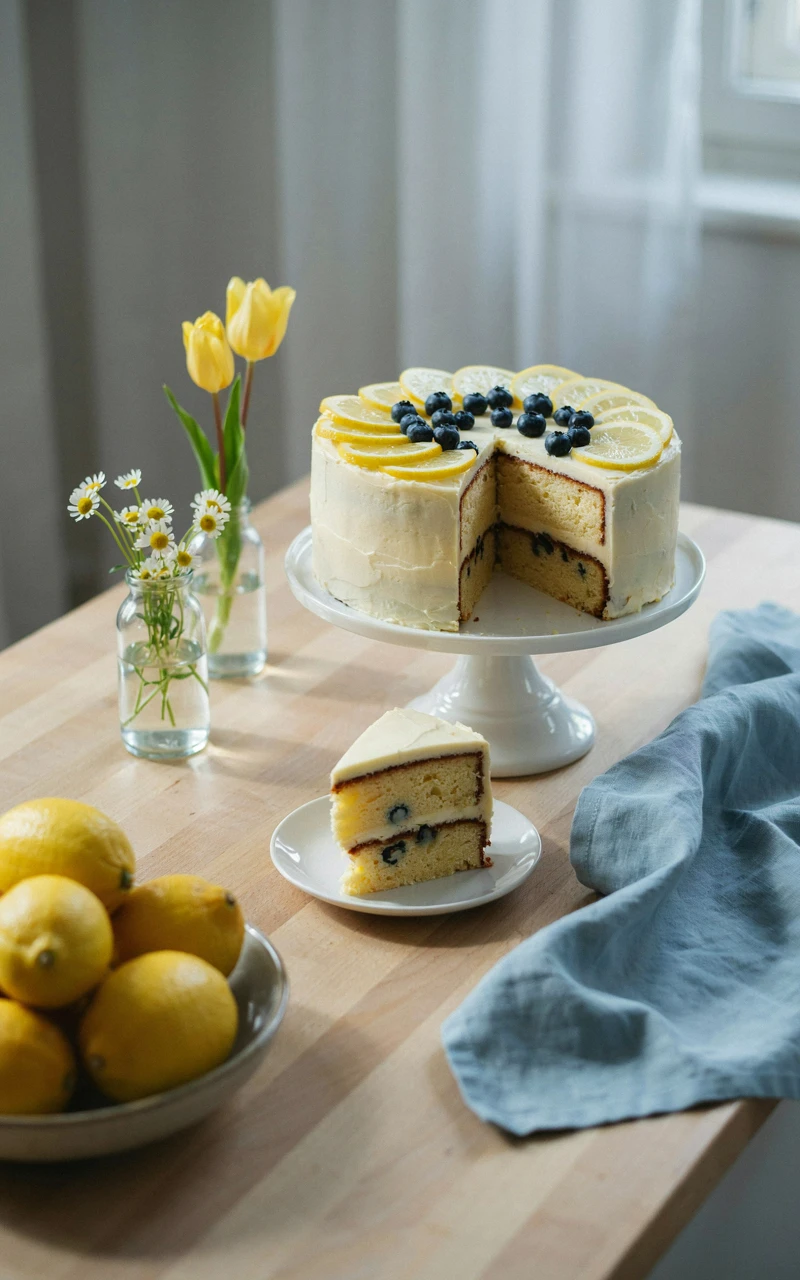
It’s one of my favorite aesthetic birthday cake ideas because the decoration comes straight from the garden or the grocery store. A few fresh flowers and some blueberries on top, and it looks finished without any piping skills at all.
For the table, line up small bud vases down the middle, each with one or two stems. White, yellow, and soft purple flowers look lovely next to the blue berries, and a plain white tablecloth keeps it fresh.
Ingredients
For the cake:
- 2 1/2 cups (315 g) all-purpose flour, plus 1 tbsp (8 g) for the berries
- 2 tsp (8 g) baking powder
- 1/2 tsp (3 g) baking soda
- 1/2 tsp (3 g) salt
- 3/4 cup (170 g) unsalted butter, softened
- 1 1/2 cups (300 g) granulated sugar
- 2 tbsp (12 g) lemon zest, from about 3 lemons
- 3 large eggs
- 1/4 cup (60 ml) fresh lemon juice
- 3/4 cup (180 ml) buttermilk
- 1 tsp (5 ml) vanilla extract
- 1 1/2 cups (220 g) fresh blueberries
For the frosting and topping:
- 8 oz (225 g) cream cheese, softened
- 1/2 cup (113 g) unsalted butter, softened
- 4 cups (480 g) powdered sugar
- 1 tbsp (15 ml) fresh lemon juice
- 1 tsp (2 g) lemon zest
- 1/2 cup (75 g) fresh blueberries
- A handful of edible flowers, such as pansies or violas
Tools and Preparation
You’ll need two 8-inch (20 cm) round pans, a zester, a mixer, and an offset spatula. Buy edible flowers from the produce section or a grower who sells them for food, since florist flowers are often sprayed.
- Prep time: 30 minutes
- Bake time: 30 to 35 minutes
- Cooling and decorating: about 1 hour 30 minutes
- Total time: about 2 hours 30 minutes
- Serves: 12
Step-by-Step Instructions
- Heat the oven to 350°F (175°C). Grease and line the pans.
- Rub the lemon zest into the sugar with your fingers until it smells strongly of lemon. Beat with the butter for 3 minutes until fluffy.
- Add the eggs one at a time, then the vanilla.
- Whisk the flour, baking powder, baking soda, and salt. Stir the lemon juice into the buttermilk.
- Add the dry mix and the buttermilk mix in alternating parts, mixing just until combined.
- Toss the blueberries with 1 tbsp (8 g) flour and fold them in gently.
- Bake for 30 to 35 minutes, until golden at the edges and a toothpick comes out clean. Cool completely.
- Beat the cream cheese and butter until smooth, then add the powdered sugar, lemon juice, and zest.
- Frost the cake with rustic swoops, pile blueberries on top, and tuck in the edible flowers right before serving.
Common Mistakes to Avoid
- Sinking berries. The flour coating helps keep them spread through the cake.
- Warm cream cheese. Soft is good, warm is runny. Pull it out about 45 minutes ahead.
- Non-edible stems touching the cake. If you use regular flowers for looks, wrap the stems in floral tape and lay them on top rather than pushing them in.
Variations, Storage, and Final Thoughts
Use raspberries instead of blueberries, or add a layer of lemon curd between the cakes. A simple lemon glaze works if you’d rather skip frosting.
Because of the cream cheese, keep this cake in the fridge, covered, for up to 4 days. Add fresh flowers on the day you serve it so they don’t wilt.
Key takeaway: fresh flowers on the cake and the table make it look like a garden party, even in a small apartment.
6. Funfetti Sheet Cake with a Streamer Curtain Backdrop
Why You’ll Love This Recipe
This is the cake for a crowd, a classroom, or anyone who still gets excited about sprinkles. It’s a soft white cake full of rainbow sprinkles, baked in one pan and frosted right in it.
No layers, no stacking, no stress. You can bake it the night before and frost it the morning of the party.
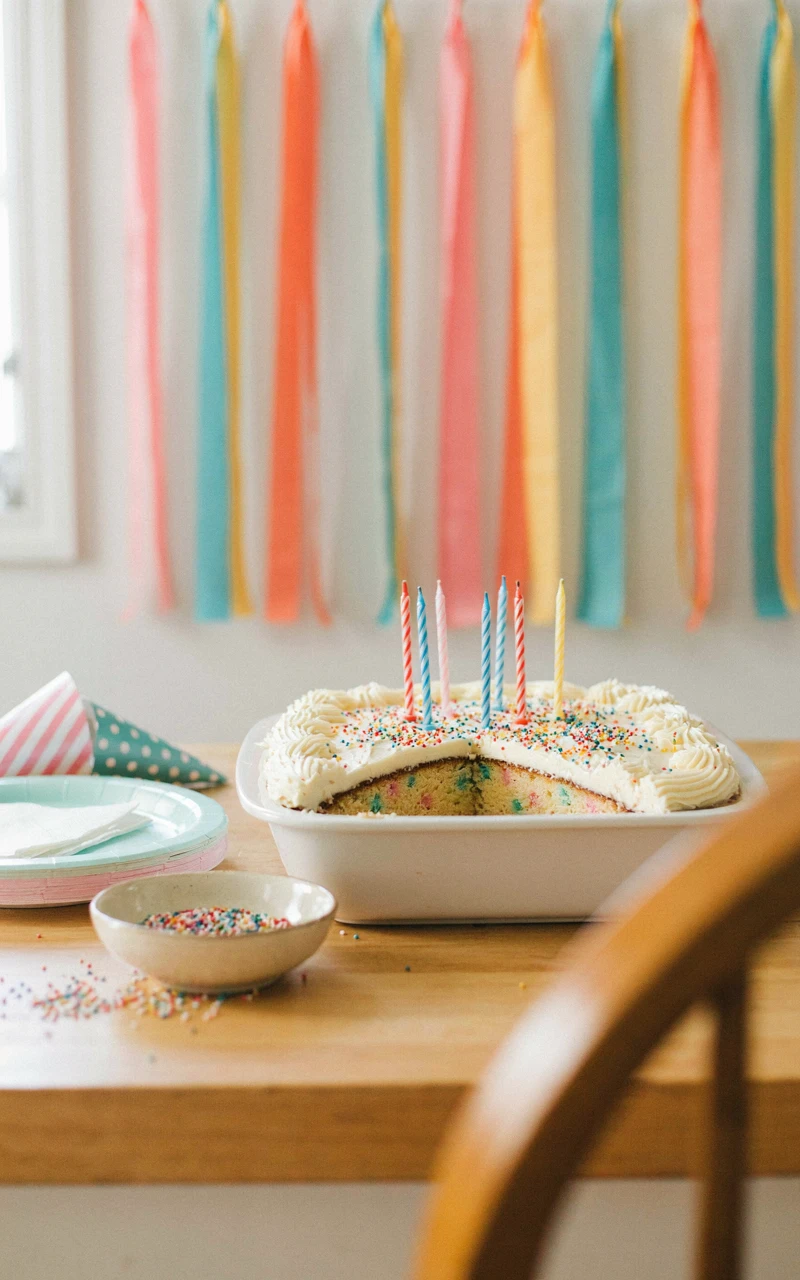
A streamer curtain is one of the cheapest birthday cake backdrop ideas out there. Tape crepe paper streamers in four or five colors along the top of a wall or a tension rod, twist each one, and let them hang to the floor about 2 inches (5 cm) apart. Set out some delicious snack recipes on the same table and you’ve got a full party spread.
Ingredients
For the cake:
- 2 3/4 cups (345 g) all-purpose flour
- 1 tbsp (12 g) baking powder
- 1/2 tsp (3 g) salt
- 1 cup (225 g) unsalted butter, softened
- 1 3/4 cups (350 g) granulated sugar
- 4 large egg whites, room temperature
- 1 tbsp (15 ml) vanilla extract
- 1 1/4 cups (300 ml) whole milk, room temperature
- 2/3 cup (110 g) rainbow jimmies (long sprinkles)
For the frosting:
- 1 cup (225 g) unsalted butter, softened
- 4 cups (480 g) powdered sugar
- 3 tbsp (45 ml) heavy cream
- 2 tsp (10 ml) vanilla extract
- 1 pinch salt
- 1/4 cup (45 g) extra rainbow sprinkles for the top
Tools and Preparation
All you need is a 9 x 13-inch (23 x 33 cm) baking pan, a mixer, and an offset spatula. For the backdrop, grab four or five rolls of crepe paper streamers and some painter’s tape so you don’t peel the paint.
- Prep time: 25 minutes
- Bake time: 30 to 35 minutes
- Cooling and frosting: about 1 hour 15 minutes
- Total time: about 2 hours 10 minutes
- Serves: 16
Step-by-Step Instructions
- Heat the oven to 350°F (175°C) and grease the pan.
- Whisk the flour, baking powder, and salt in a bowl.
- Beat the butter and sugar for 3 to 4 minutes, until fluffy. Add the egg whites in two parts, then the vanilla.
- Add the dry mix in three parts, alternating with the milk, and mix just until smooth.
- Fold in the jimmies with a spatula in just a few strokes.
- Spread the batter in the pan and bake for 30 to 35 minutes, until the top is lightly golden and a toothpick comes out clean.
- Cool completely in the pan, about 1 hour.
- Beat the butter for 3 minutes, then add the powdered sugar, cream, vanilla, and salt until fluffy.
- Spread the frosting over the cake in big swirls and shower it with sprinkles.
Common Mistakes to Avoid
- Using nonpareils. Those tiny round sprinkles bleed color into the batter, so stick with jimmies inside.
- Overmixing the sprinkles. Too much stirring makes streaks of color.
- Frosting a warm cake. The frosting will melt and slide, so be patient.
Variations, Storage, and Final Thoughts
Tint the frosting pastel pink or blue, or swap in chocolate frosting for a fun contrast. You can also bake the batter as 24 cupcakes for 18 to 20 minutes.
Cover the pan with foil and keep it at room temperature for up to 3 days. It actually tastes even softer on day two.
Key takeaway: a sheet cake and a streamer wall prove that a happy, colorful party doesn’t need a big budget.
7. Candlelit Dark Chocolate Raspberry Cake
Why You’ll Love This Recipe
Some birthdays call for a quiet dinner instead of balloons. This rich dark chocolate cake with tart raspberry filling and silky ganache is made for that kind of evening.
The raspberry cuts through all the chocolate, so it never feels too heavy. Melted chocolate and sour cream in the batter make it deep, dark, and fudgy.
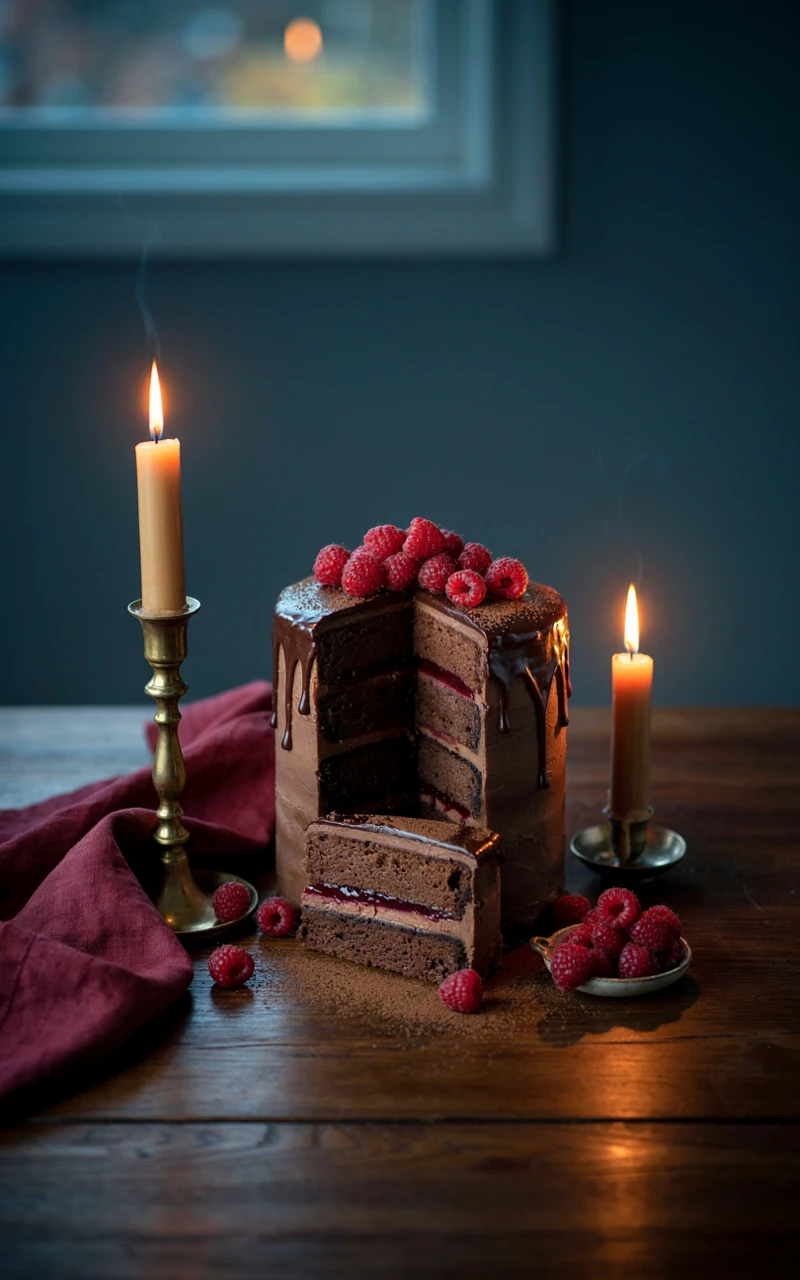
For the scene, dim the lights and set out tall taper candles in brass holders, a dark green or burgundy tablecloth, and a few loose raspberries around the cake stand. Keep real flames well away from the cake and use LED tea lights right next to it.
Ingredients
For the cake:
- 1 1/2 cups (190 g) all-purpose flour
- 1/2 cup (45 g) Dutch-process cocoa powder
- 1 1/2 tsp (8 g) baking soda
- 1/2 tsp (3 g) salt
- 4 oz (115 g) dark chocolate, chopped and melted
- 1/2 cup (113 g) unsalted butter, melted
- 1 1/2 cups (300 g) packed brown sugar
- 2 large eggs
- 3/4 cup (180 g) sour cream
- 3/4 cup (180 ml) hot water
- 2 tsp (10 ml) vanilla extract
For the filling, ganache, and topping:
- 12 oz (340 g) frozen raspberries
- 1/3 cup (65 g) granulated sugar
- 1 tbsp (8 g) cornstarch
- 1 tbsp (15 ml) lemon juice
- 12 oz (340 g) dark chocolate (60 to 70 percent), chopped
- 1 1/2 cups (360 ml) heavy cream
- 1 cup (125 g) fresh raspberries
Tools and Preparation
You’ll need two 8-inch (20 cm) round pans, a small saucepan, a heatproof bowl, a whisk, and an offset spatula. Make the raspberry filling first so it has time to chill.
- Prep time: 40 minutes
- Bake time: 30 to 35 minutes
- Cooling, setting, and assembly: about 2 hours 30 minutes
- Total time: about 3 hours 45 minutes
- Serves: 12
Step-by-Step Instructions
- Cook the frozen raspberries, sugar, cornstarch, and lemon juice over medium heat for 6 to 8 minutes, stirring, until thick enough to coat a spoon. Chill completely.
- Heat the oven to 350°F (175°C). Grease and line the pans.
- Whisk the flour, cocoa, baking soda, and salt.
- In another bowl, whisk the melted chocolate, butter, and brown sugar. Add the eggs, sour cream, and vanilla.
- Stir in the dry mix, then the hot water, until smooth and glossy.
- Bake for 30 to 35 minutes, until the tops spring back and a toothpick has a few moist crumbs. Cool completely.
- Heat the cream until steaming and pour it over the chopped chocolate. Wait 3 minutes, then whisk until smooth and let it thicken at room temperature for about 1 hour, until it spreads like frosting.
- Pipe a ring of ganache around the edge of the bottom layer, fill the center with raspberry filling, and add the top layer.
- Cover the cake with the rest of the ganache in soft swirls and pile fresh raspberries on top.
Common Mistakes to Avoid
- Skipping the ganache ring. Without it, the filling squeezes out the sides.
- Rushing the ganache. If it’s too runny to spread, give it more time instead of chilling it fast, which makes it uneven.
- Candles too close. Keep tapers at least a foot (30 cm) from the cake and anything that can catch.
Variations, Storage, and Final Thoughts
Swap the raspberries for cherries for a Black Forest feel, or add a pinch of chili to the ganache for warmth. A dusting of cocoa on top looks lovely in candlelight.
Store covered in the fridge for up to 4 days. Let slices sit out for 30 minutes so the ganache turns silky again.
Key takeaway: low light and a dark, glossy cake make an evening feel special without a single balloon.
8. Coconut Lime Cake with a Palm Leaf Backdrop
Why You’ll Love This Recipe
This cake feels like a beach vacation on a plate. It’s a soft coconut milk cake brushed with lime syrup and covered in lime cream cheese frosting and toasted coconut.
The lime keeps the coconut from being too sweet, and the syrup keeps every bite moist. It’s a great pick for a summer birthday or anyone who isn’t a big chocolate fan.
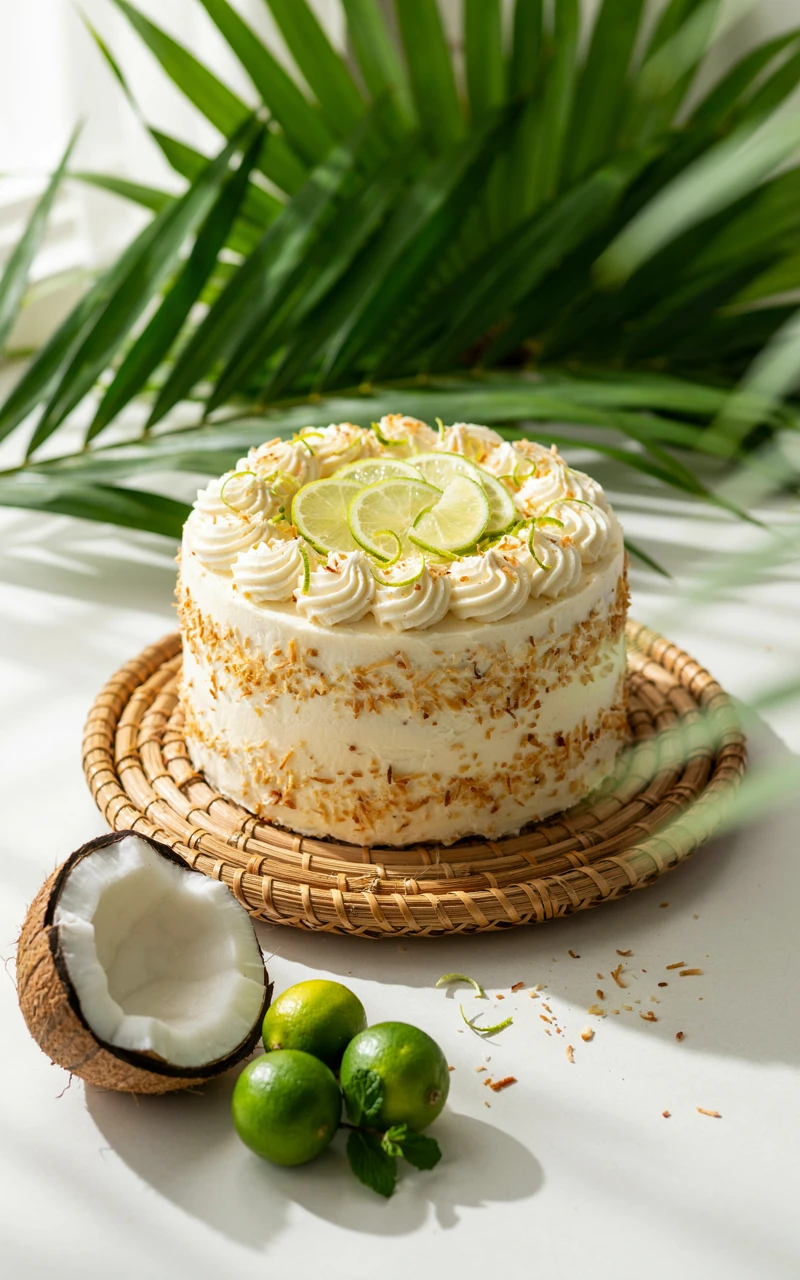
For the backdrop, tape a row of real or faux palm leaves and monstera leaves to the wall behind the table, then add a white or rattan cake stand. If you love leafy, all-green decorating, my green aesthetic post has more ideas you can borrow for the party.
Ingredients
For the cake:
- 2 1/2 cups (315 g) all-purpose flour
- 2 1/2 tsp (10 g) baking powder
- 1/2 tsp (3 g) salt
- 3/4 cup (170 g) unsalted butter, softened
- 1 1/2 cups (300 g) granulated sugar
- Zest of 2 limes
- 3 large eggs
- 1 cup (240 ml) canned full-fat coconut milk, stirred well
- 1 tsp (5 ml) vanilla extract
- 1/2 tsp (2.5 ml) coconut extract (optional)
- 1/2 cup (40 g) sweetened shredded coconut
For the syrup, frosting, and topping:
- 1/4 cup (60 ml) fresh lime juice
- 1/4 cup (50 g) granulated sugar
- 8 oz (225 g) cream cheese, softened
- 1/2 cup (113 g) unsalted butter, softened
- 4 cups (480 g) powdered sugar
- 1 tbsp (15 ml) fresh lime juice
- Zest of 1 lime
- 1 cup (60 g) unsweetened coconut flakes, toasted
- 1 lime, thinly sliced
Tools and Preparation
You’ll need two 8-inch (20 cm) round pans, a zester, a pastry brush, a small saucepan, and a baking sheet for toasting the coconut. Toast the flakes at 325°F (165°C) for 5 to 7 minutes, stirring once, until golden.
- Prep time: 35 minutes
- Bake time: 28 to 33 minutes
- Cooling and decorating: about 1 hour 30 minutes
- Total time: about 2 hours 30 minutes
- Serves: 12
Step-by-Step Instructions
- Heat the oven to 350°F (175°C). Grease and line the pans.
- Rub the lime zest into the sugar, then beat with the butter for 3 minutes until fluffy.
- Add the eggs one at a time, then the vanilla and coconut extract.
- Whisk the flour, baking powder, and salt. Add to the butter mix in three parts, alternating with the coconut milk.
- Fold in the shredded coconut and divide between the pans.
- Bake for 28 to 33 minutes, until lightly golden and a toothpick comes out clean.
- While the cakes bake, simmer the lime juice and sugar for 2 minutes until the sugar dissolves. Brush it over the warm cakes and let them cool completely.
- Beat the cream cheese and butter until smooth, then add the powdered sugar, lime juice, and zest.
- Stack and frost the cake, press toasted coconut onto the top and sides, and finish with lime slices.
Common Mistakes to Avoid
- Using light coconut milk. Full-fat gives the cake its richness and tender crumb.
- Burning the coconut. Flakes go from golden to burnt in under a minute, so stay close.
- Too much syrup. Brush, don’t pour, or the cake gets soggy.
Variations, Storage, and Final Thoughts
Add a layer of mango or passion fruit curd in the middle, or swap the lime for pineapple juice in the syrup. Dried pineapple flowers make a cute topper.
Keep the cake covered in the fridge for up to 4 days. Add the lime slices just before serving so they stay bright.
Key takeaway: a wall of leaves and a coconut cake make any backyard or living room feel like a tropical getaway.
9. Galaxy Mirror Glaze Cake – Birthday Cake Scene Ideas
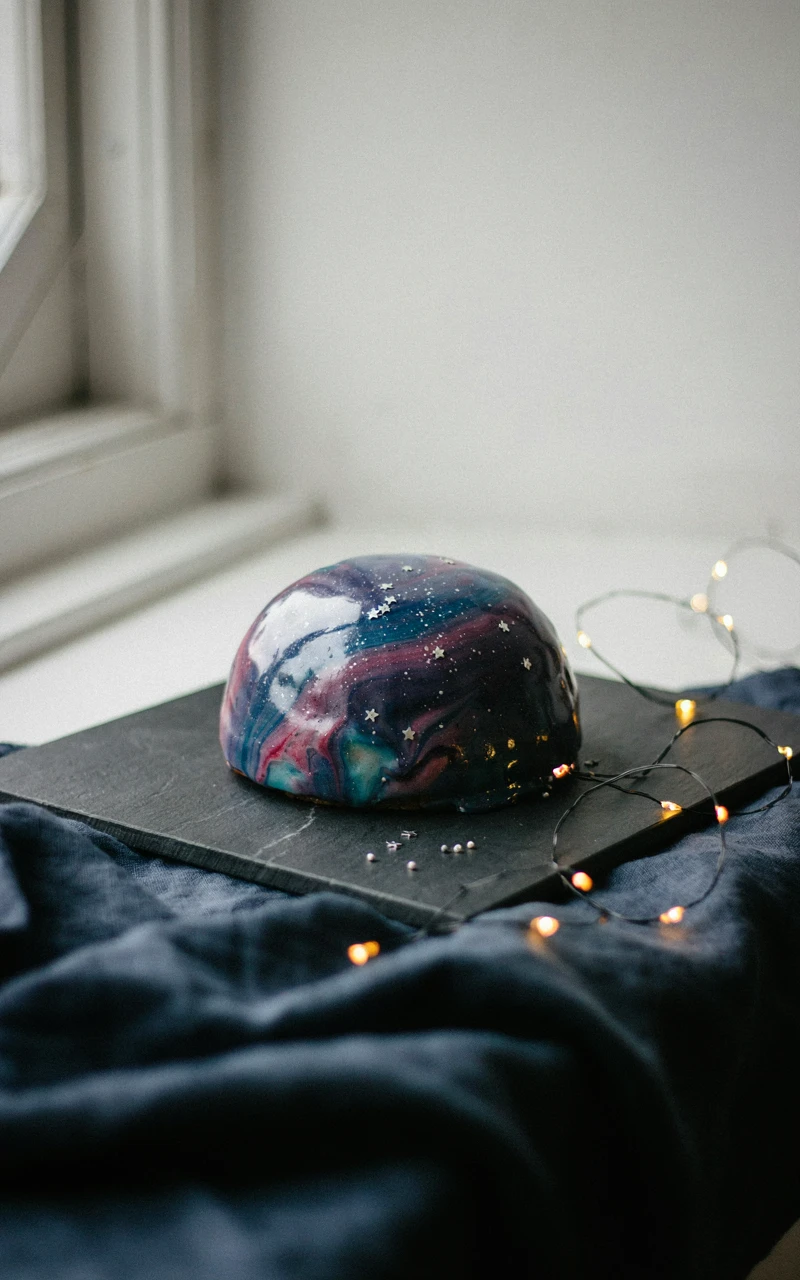
Why You’ll Love This Recipe
This is the showstopper. A mirror glaze is so shiny you can see your reflection in it, and swirling in black, blue, purple, and pink makes it look like a little piece of outer space.
It’s the hardest cake on this list, but the hard part is really just watching a thermometer. Once you get the glaze to the right temperature, pouring it is pure fun.
For the scene, hang a black fabric backdrop, string warm fairy lights behind it, and scatter star confetti on a dark tablecloth. A little lamp to the side will catch the shine on the glaze.
Ingredients
For the cake:
- 2 1/4 cups (280 g) all-purpose flour
- 2 tsp (8 g) baking powder
- 1/2 tsp (3 g) salt
- 1 1/2 cups (300 g) granulated sugar
- 3 large eggs
- 3/4 cup (180 ml) vegetable oil
- 1 cup (240 ml) buttermilk
- 2 tsp (10 ml) vanilla extract
For the buttercream coating:
- 1 cup (225 g) unsalted butter, softened
- 3 cups (360 g) powdered sugar
- 2 tbsp (30 ml) heavy cream
- 1 tsp (5 ml) vanilla extract
For the mirror glaze:
- 3 envelopes (3/4 oz / 21 g) unflavored powdered gelatin
- 1/2 cup (120 ml) cold water for blooming
- 1 cup (200 g) granulated sugar
- 1/2 cup (120 ml) water
- 2/3 cup (200 g) sweetened condensed milk
- 12 oz (340 g) white chocolate, finely chopped
- Gel food coloring in black, navy blue, purple, pink, and white
- 1 tsp edible star sprinkles or edible glitter
Tools and Preparation
You’ll need two 8-inch (20 cm) round pans, a bench scraper, an instant-read thermometer, an immersion blender, a fine strainer, a wire rack set over a rimmed baking sheet, and a cake board slightly smaller than the cake. Plan on freezing the frosted cake for at least 4 hours or overnight.
- Prep time: 1 hour
- Bake time: 30 to 35 minutes
- Freezing and glazing: 5 to 6 hours
- Total time: about 7 hours (best spread over two days)
- Serves: 12
Step-by-Step Instructions
- Heat the oven to 350°F (175°C). Grease and line the pans.
- Whisk the sugar, eggs, oil, buttermilk, and vanilla, then stir in the flour, baking powder, and salt. Bake for 30 to 35 minutes, until a toothpick comes out clean, and cool completely.
- Beat the buttercream ingredients until fluffy. Stack the cakes on the cake board and frost very smooth with straight sides.
- Freeze the cake until rock solid, at least 4 hours.
- Sprinkle the gelatin over the cold water and let it sit for 5 minutes. Bring the sugar, water, and condensed milk to a simmer, then stir in the gelatin until dissolved.
- Pour the hot mixture over the white chocolate, wait 3 minutes, and blend with the immersion blender held under the surface so you don’t add bubbles. Strain.
- Pour most of the glaze into one bowl and tint it black. Divide the rest into small cups and tint them navy, purple, pink, and white.
- Pour the colors into the black glaze in loose streaks without stirring. Let it cool to 90 to 95°F (32 to 35°C).
- Set the frozen cake on the rack, pour the glaze over the center in one steady motion so it flows down the sides, and add star sprinkles right away. Trim the drips from the bottom after 10 minutes and thaw in the fridge for 2 to 3 hours.
Common Mistakes to Avoid
- Glazing at the wrong temperature. Too hot and it’s see-through, too cool and it’s thick and lumpy.
- Bumpy frosting. The glaze shows every flaw, so take your time smoothing.
- Going back over it. Pour once and walk away; touching it ruins the shine.
Variations, Storage, and Final Thoughts
Try a sunset glaze in orange, pink, and yellow, or a soft marble in white and grey. Leftover glaze can be frozen and gently remelted for your next cake.
Keep the glazed cake in the fridge for up to 3 days, uncovered for the first few hours so nothing sticks to it. The shine is brightest on day one.
Key takeaway: trust your thermometer, pour once, and get ready for the gasps.
10. Hot Pink and Black Checkerboard Cupcake Tower for a Scene Birthday Party
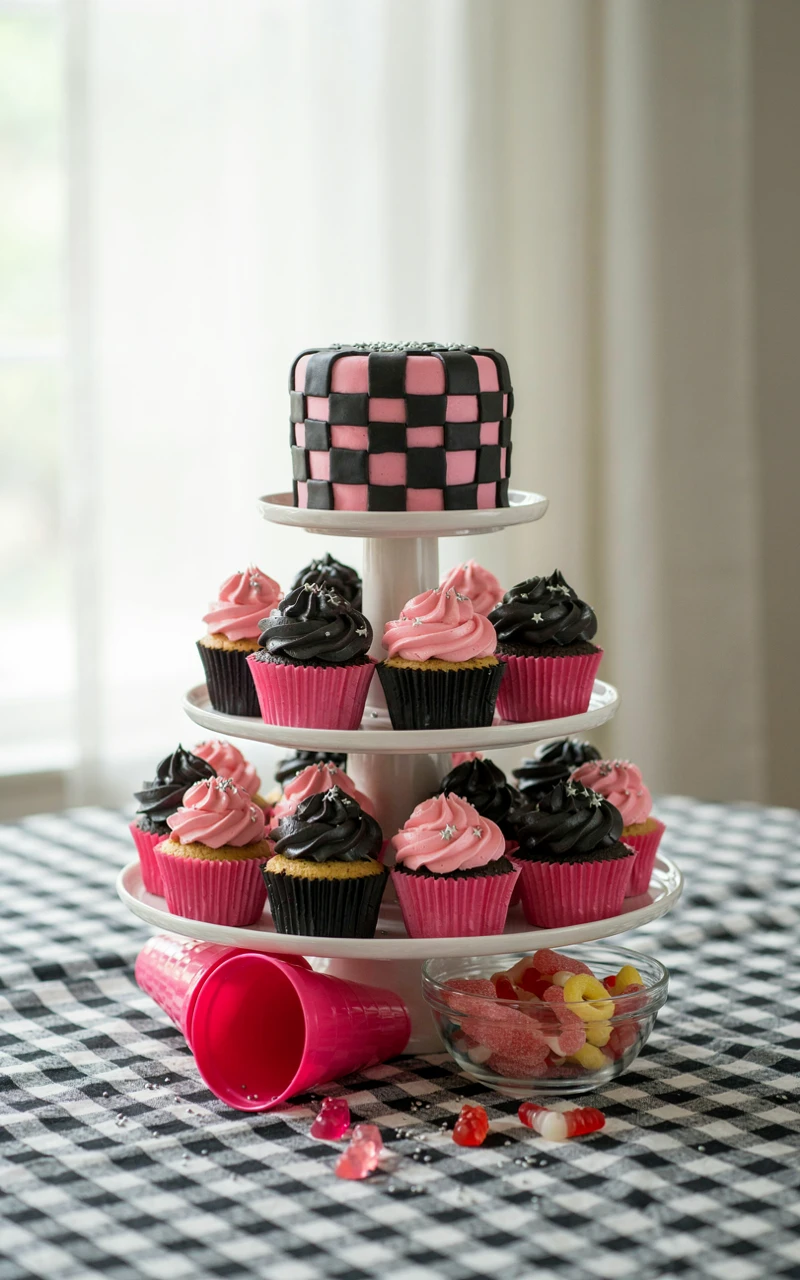
Why You’ll Love This Recipe
Checkerboard print was everywhere in scene style, so this tower is a natural fit. It’s 24 cupcakes, half hot pink and half black, lined up in a checkered pattern on a tiered stand.
Cupcakes mean no slicing, no plates, and no fighting over the corner piece. Everyone just grabs one and goes back to dancing.
For a scene birthday party, put a black and white checkered tablecloth under the tower, then add neon pink plates, studded bracelets as napkin rings, and a sprinkle of holographic confetti. Hang a few band posters on the wall behind it and you’re done.
Ingredients
For the cupcakes:
- 2 1/2 cups (315 g) all-purpose flour
- 2 tsp (8 g) baking powder
- 1/2 tsp (3 g) baking soda
- 1/2 tsp (3 g) salt
- 1 cup (225 g) unsalted butter, softened
- 1 1/2 cups (300 g) granulated sugar
- 3 large eggs
- 2 tsp (10 ml) vanilla extract
- 1 cup (240 ml) buttermilk
- 3 tbsp (15 g) black cocoa powder
- 2 tbsp (30 ml) milk
- Hot pink gel food coloring
For the frosting:
- 2 cups (450 g) unsalted butter, softened
- 7 cups (840 g) powdered sugar
- 1/4 cup (60 ml) heavy cream
- 1 tbsp (15 ml) vanilla extract
- 1 pinch salt
- 1/4 cup (20 g) black cocoa powder
- Black gel food coloring
- Hot pink gel food coloring
Tools and Preparation
You’ll need two 12-cup muffin pans, 12 black and 12 hot pink cupcake liners, two piping bags with large star tips (such as 1M), and a square three-tier cupcake stand. Make the black frosting a day ahead if you can.
- Prep time: 40 minutes
- Bake time: 18 to 20 minutes
- Cooling and decorating: about 1 hour 15 minutes
- Total time: about 2 hours 15 minutes
- Serves: 24
Step-by-Step Instructions
- Heat the oven to 350°F (175°C). Line one pan with black liners and one with pink.
- Whisk the flour, baking powder, baking soda, and salt.
- Beat the butter and sugar for 3 minutes, then add the eggs one at a time and the vanilla.
- Add the dry mix in three parts, alternating with the buttermilk, and mix until just smooth.
- Split the batter between two bowls. Stir the black cocoa and milk into one, and tint the other hot pink.
- Fill the black liners with black batter and the pink liners with pink batter, each about two-thirds full.
- Bake for 18 to 20 minutes, until the tops spring back and a toothpick comes out clean. Cool completely.
- Beat the frosting ingredients until fluffy, then split it in half. Mix black cocoa and black gel into one half and hot pink gel into the other.
- Pipe pink swirls on the black cupcakes and black swirls on the pink ones. Arrange them on the stand, alternating colors in rows like a checkerboard.
Common Mistakes to Avoid
- Overfilling liners. Two-thirds full gives you a nice dome without spilling over.
- Black teeth surprise. Black frosting stains, so keep the swirls modest and set out napkins.
- Losing the pattern. Plan your rows on the counter first, then move them to the stand.
Variations, Storage, and Final Thoughts
Go neon green and black, or add a tiny candy skull or star to every other cupcake. A big cake on the top tier turns it into a mini scene cake for the birthday person to blow out.
Store cupcakes in an airtight container at room temperature for 2 days or in the fridge for 4. Bring them to room temperature before serving.
Key takeaway: two colors and a simple pattern make a tower that looks way harder than it was.
11. Pink Champagne Cake with Gold Leaf
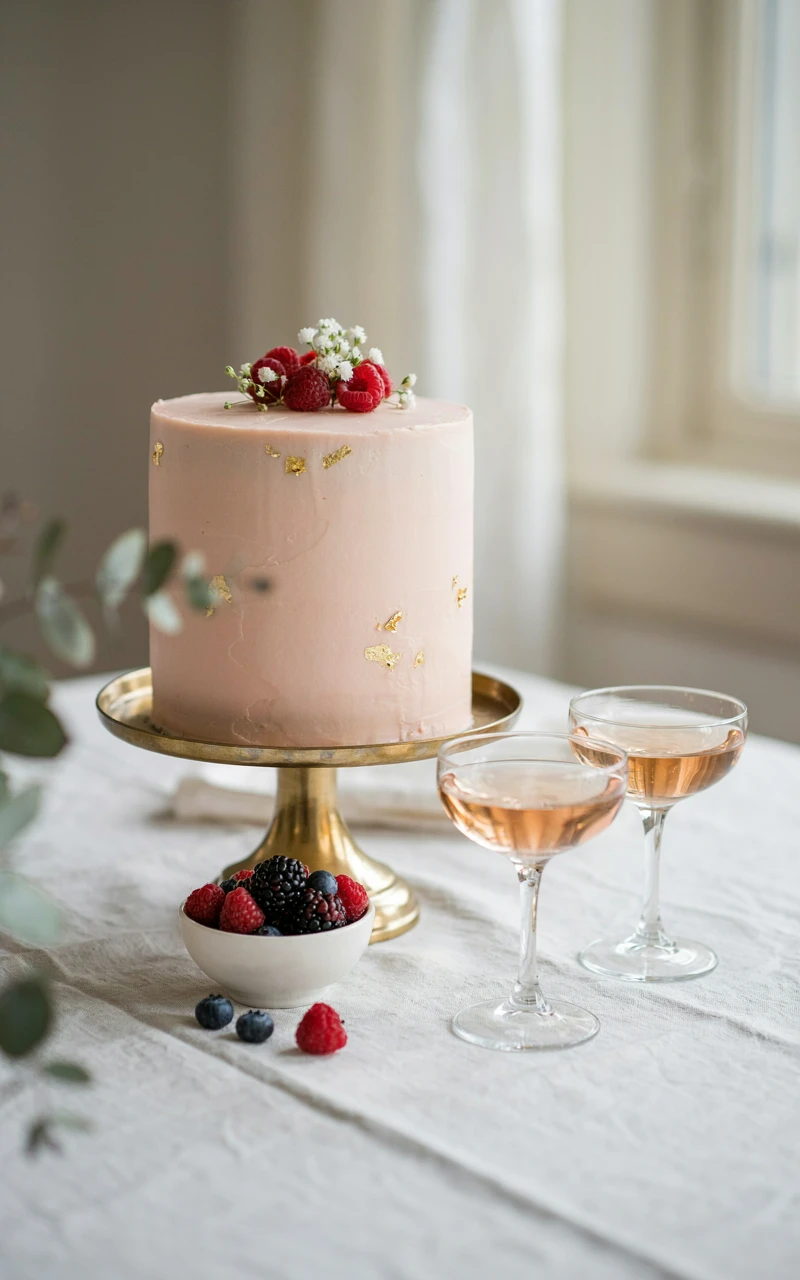
Why You’ll Love This Recipe
This is the cake for a milestone birthday, like a 21st, 30th, or 50th. It’s a soft pink cake made with real champagne, frosted with champagne buttercream, and finished with flakes of edible gold leaf.
The champagne gives the cake a light, fruity flavor and a fine, tender crumb. Most of the alcohol bakes off in the cake, but the buttercream keeps a little, so I’ve added a kid-friendly swap below.
For the scene, try going all-in on one color with a blush tablecloth, blush napkins, pink candles, and a pink wall behind the table. My post on color drenching explains how to make one color work across a whole room, and it works just as well for a party table. Add champagne coupes and a little gold, and it looks like a celebration.
Ingredients
For the cake:
- 2 1/2 cups (285 g) cake flour
- 2 1/2 tsp (10 g) baking powder
- 1/2 tsp (3 g) salt
- 3/4 cup (170 g) unsalted butter, softened
- 1 1/2 cups (300 g) granulated sugar
- 5 large egg whites, room temperature
- 1 tsp (5 ml) vanilla extract
- 3/4 cup (180 ml) pink champagne or sparkling rosé, room temperature
- 1/4 cup (60 ml) whole milk
- 1 to 2 drops pink gel food coloring
For the buttercream and decoration:
- 1 cup (240 ml) pink champagne or sparkling rosé, for reducing
- 1 1/2 cups (340 g) unsalted butter, softened
- 5 cups (600 g) powdered sugar
- 1 pinch salt
- 1 drop pink gel food coloring
- 3 to 4 sheets edible gold leaf (23 or 24 karat, labeled edible)
- 2 tbsp (25 g) white or gold pearl sprinkles
Tools and Preparation
You’ll need two 8-inch (20 cm) round pans, a small saucepan, a mixer, an offset spatula, tweezers, and a clean, dry, soft paintbrush for the gold leaf. Reduce the champagne first so it can cool.
- Prep time: 40 minutes
- Bake time: 25 to 30 minutes
- Cooling and decorating: about 1 hour 45 minutes
- Total time: about 3 hours
- Serves: 12
Step-by-Step Instructions
- Simmer 1 cup (240 ml) champagne for 10 to 15 minutes, until it’s reduced to about 1/4 cup (60 ml). Cool completely.
- Heat the oven to 350°F (175°C). Grease and line the pans.
- Whisk the cake flour, baking powder, and salt.
- Beat the butter and sugar for 3 to 4 minutes, until fluffy. Add the egg whites in two parts, then the vanilla and pink coloring.
- Stir the champagne and milk together. Add the dry mix in three parts, alternating with the champagne mix, and stop as soon as it’s smooth.
- Bake for 25 to 30 minutes, until the tops are pale golden at the edges and a toothpick comes out clean. Cool completely.
- Beat the butter for 5 minutes, then add the powdered sugar, salt, cooled champagne reduction, and a drop of pink until light and fluffy.
- Stack, crumb coat, chill for 20 minutes, and finish with a smooth coat.
- Lift small pieces of gold leaf with tweezers and lay them on the cake, then press gently with the dry brush. Add a ring of pearl sprinkles around the base.
Common Mistakes to Avoid
- Touching gold leaf with your fingers. It sticks to warm skin and tears, so use tweezers and a dry brush.
- Adding warm reduction. Hot liquid melts the butter and makes the frosting soupy.
- Using decorative gold. Only buy gold leaf clearly labeled as edible.
Variations, Storage, and Final Thoughts
For kids or anyone skipping alcohol, swap in sparkling white grape juice or sparkling cider for both the cake and the reduction. You can also add a layer of strawberry jam between the cakes.
Store covered in the fridge for up to 4 days and serve at room temperature. Add the gold leaf on the day of the party so it stays bright.
Key takeaway: a little gold goes a long way. A few flakes on a soft pink cake feel like pure celebration.
Bringing Your Cake Scene Together
Looking back at that bedsheet photo, I’m reminded that nobody remembers the lumps in the frosting. They remember the light, the laughter, and the moment the candles came out.
Pick one cake from this list that fits the person you’re celebrating. Then choose one simple thing for the wall behind it and one for the table, and stop there.
You don’t need a studio or a big budget to make a birthday feel special. You need a cake made with care and a little corner of your home set up to show it off.
You’ve got this. Tell me in the comments which cake you’re baking first, and I’d love to hear how your party turns out.