This post may contain affiliate links, which means I may receive a small commission should you decide to click that link and make a purchase. For more information please refer to the Terms & Conditions.
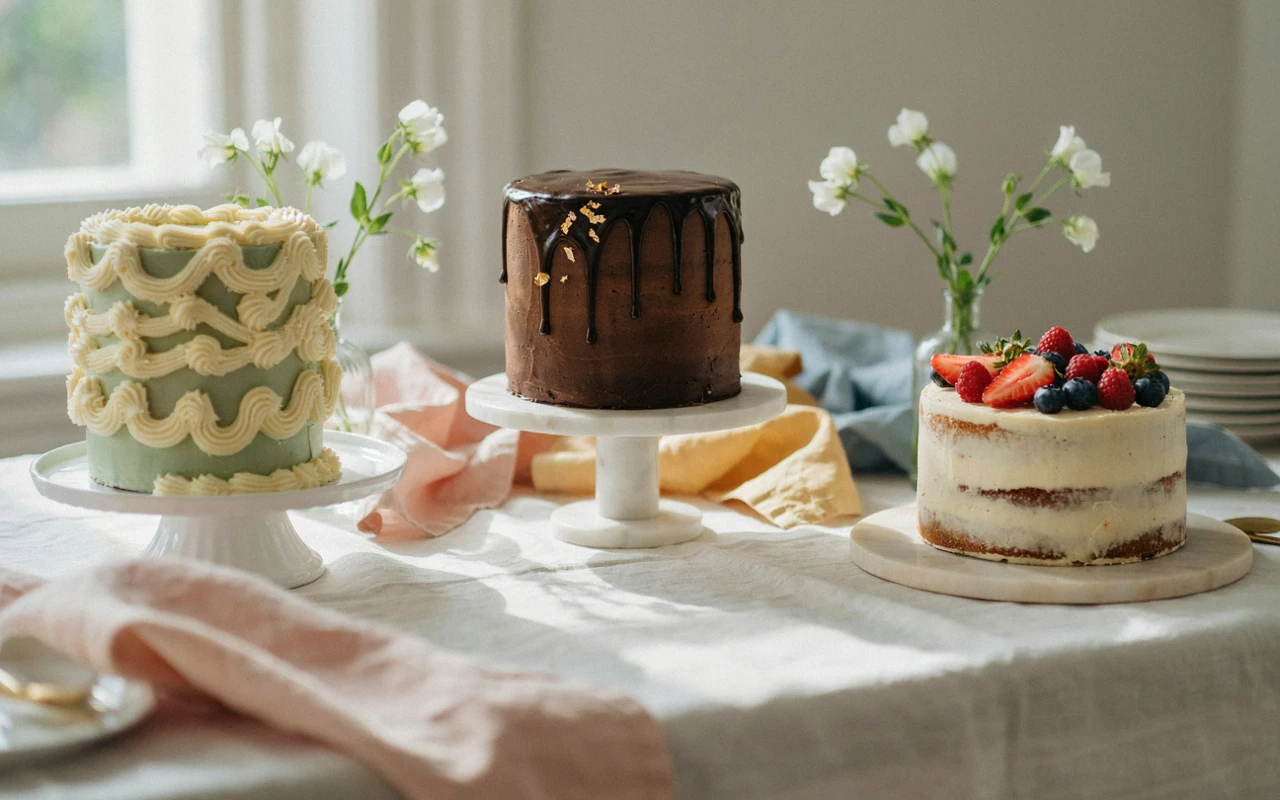
I still remember the first birthday cake I tried to make look “fancy.” It leaned like a tired tower, and the pink frosting slid down one side before anyone even lit the candles. My friend loved it anyway, and that’s when I went looking for Aesthetic Birthday Cake Ideas that would look good on a dreamy party table and still be doable in a normal home kitchen.
Since then I’ve baked a lot of cakes for friends, family, and a few very picky little nieces. Some of them were showstoppers. Some taught me what not to do.
The good news is that a cake doesn’t need fondant, a dozen tools, or a bakery job to look stunning. Most of the cakes people swoon over online come down to a good recipe, a chilled crumb coat, and one simple decorating idea done well.
Here’s a quick look at all nine so you can pick the one that fits your party, your time, and your skill level.
| Cake | Skill Level | Total Time | Serves |
|---|---|---|---|
| Vintage Lambeth Heart Cake | Intermediate | About 4 hours | 12 |
| Cute Mini Bento Cake | Beginner | About 2 hours | 2 |
| Pressed Edible Flower Cake | Beginner | About 3 hours 30 minutes, plus pressing | 12 |
| Watercolor Buttercream Cake | Intermediate | About 4 hours | 12 to 14 |
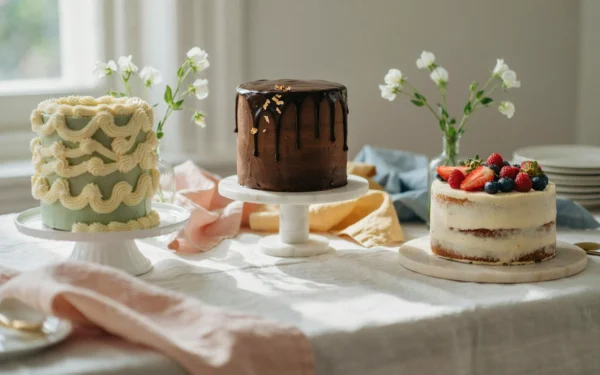
| Elegant Gold Leaf Chocolate Drip Cake | Intermediate | About 4 hours | 14 to 16 |
| Semi-Naked Berry Cake | Beginner | About 3 hours | 14 |
| Modern Palette Knife Buttercream Cake | Intermediate to advanced | About 4 hours 30 minutes | 12 |
| Meringue Cloud Cake | Intermediate | About 3 hours 30 minutes | 12 |
| Coquette Bow Cake with Cherries | Intermediate | About 4 hours | 12 |
Below you’ll find nine pretty birthday cakes, each with a full recipe and simple decorating steps, so you can make a dreamy party cake at home without stress.
1. Vintage Lambeth Heart Cake
Why You’ll Love This Recipe
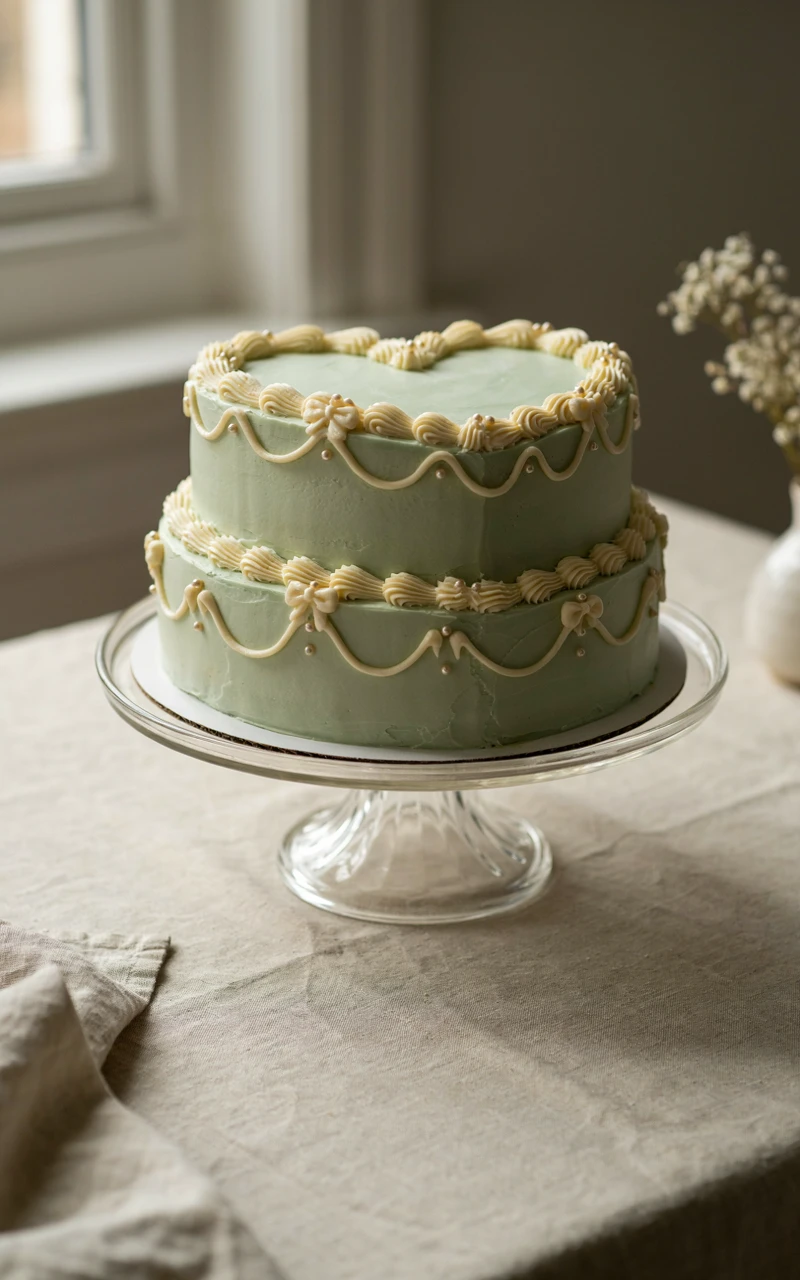
This is the cake that floods your feed every birthday season, and for good reason. The heart shape, the soft pink frosting, and the frilly piped borders look like something from a 1970s bakery window, but you only need three piping tips to pull it off.
The cake inside is a strawberry vanilla sponge made with freeze-dried strawberries, so it tastes as pink as it looks. A thin layer of strawberry jam in the middle keeps every slice moist.
It’s also forgiving. Lambeth-style piping is busy on purpose, so small wobbles disappear into all the ruffles and shells.
Ingredients
For the strawberry cake:
- 1 cup (25 g) freeze-dried strawberries, ground to a powder
- 2 1/2 cups (315 g) all-purpose flour
- 2 1/2 tsp (10 g) baking powder
- 1/2 tsp (3 g) salt
- 3/4 cup (170 g) unsalted butter, softened
- 1 1/2 cups (300 g) granulated sugar
- 3 large eggs, at room temperature
- 1 tbsp (15 ml) vanilla extract
- 1 cup (240 ml) whole milk, at room temperature
For the filling and frosting:
- 1/2 cup (160 g) strawberry jam
- 1 1/2 cups (340 g) unsalted butter, softened
- 5 cups (600 g) powdered sugar, sifted
- 3 tbsp (45 ml) heavy cream
- 2 tsp (10 ml) vanilla extract
- 1 pinch salt
- Pink gel food coloring
- 1/4 cup (40 g) white sugar pearls or sprinkles, for decorating
Tools and Preparation
- Two 8-inch (20 cm) heart-shaped cake pans
- Stand mixer or hand mixer
- Offset spatula and bench scraper
- Piping bags with tips 1M (open star), 16 (small star), and 32 (large star)
- Cake board or flat plate
Heat your oven to 350°F (175°C). Grease the heart pans, line the bottoms with parchment, and set your butter, eggs, and milk out about an hour ahead so they’re at room temperature.
Prep time: 1 hour 15 minutes. Bake time: 28 to 32 minutes. Cooling: 1 hour. Decorating: 1 hour. Total: about 4 hours. Serves 12.
Step-by-Step Instructions
- Whisk the strawberry powder, flour, baking powder, and salt in a bowl.
- Beat the butter and sugar on medium-high for 3 to 4 minutes until pale and fluffy.
- Add the eggs one at a time, then the vanilla.
- On low speed, add the dry mix in three parts, alternating with the milk, and stop as soon as you don’t see dry flour.
- Divide the batter between the pans and bake 28 to 32 minutes, until a toothpick in the center comes out with a few moist crumbs.
- Cool in the pans for 10 minutes, then turn out onto a rack and cool completely.
- Make the frosting: beat the butter for 3 minutes, add the powdered sugar a cup at a time, then the cream, vanilla, and salt. Beat 2 more minutes and tint it soft pink.
- Level the cake tops. Place one layer on the board, pipe a ring of frosting around the edge, and fill the middle with jam. Add the second layer.
- Spread a thin crumb coat all over and chill 20 minutes until firm.
- Add a smooth final coat and chill 15 minutes more.
- Pipe a shell border around the bottom with tip 32, a ruffled border along the top edge with tip 1M, and small stars or swags on the sides with tip 16.
- Finish with sugar pearls and pipe a name or “happy birthday” in the center.
Common Mistakes to Avoid
- Frosting a warm cake. Even slightly warm layers melt buttercream and make the heart lose its point.
- Skipping the jam dam. Without the ring of frosting, jam seeps out the sides.
- Piping with soft frosting. If your borders look droopy, chill the piping bag for 10 minutes.
- Too many colors. One shade of pink plus white keeps the vintage look clean.
Variations, Storage, and Final Thoughts
Swap the pink for butter yellow, mint, or lavender, or go all-red for a bold version. A vanilla cake with raspberry jam works just as well if you can’t find freeze-dried strawberries.
Keep the cake covered at cool room temperature for up to 1 day, or in the fridge for up to 4 days. Let it sit out for 1 hour before serving so the buttercream softens.
Key takeaway: chilled layers and three simple piping tips give you that bakery-window look with very little stress.
2. Cute Mini Bento Cake
Why You’ll Love This Recipe
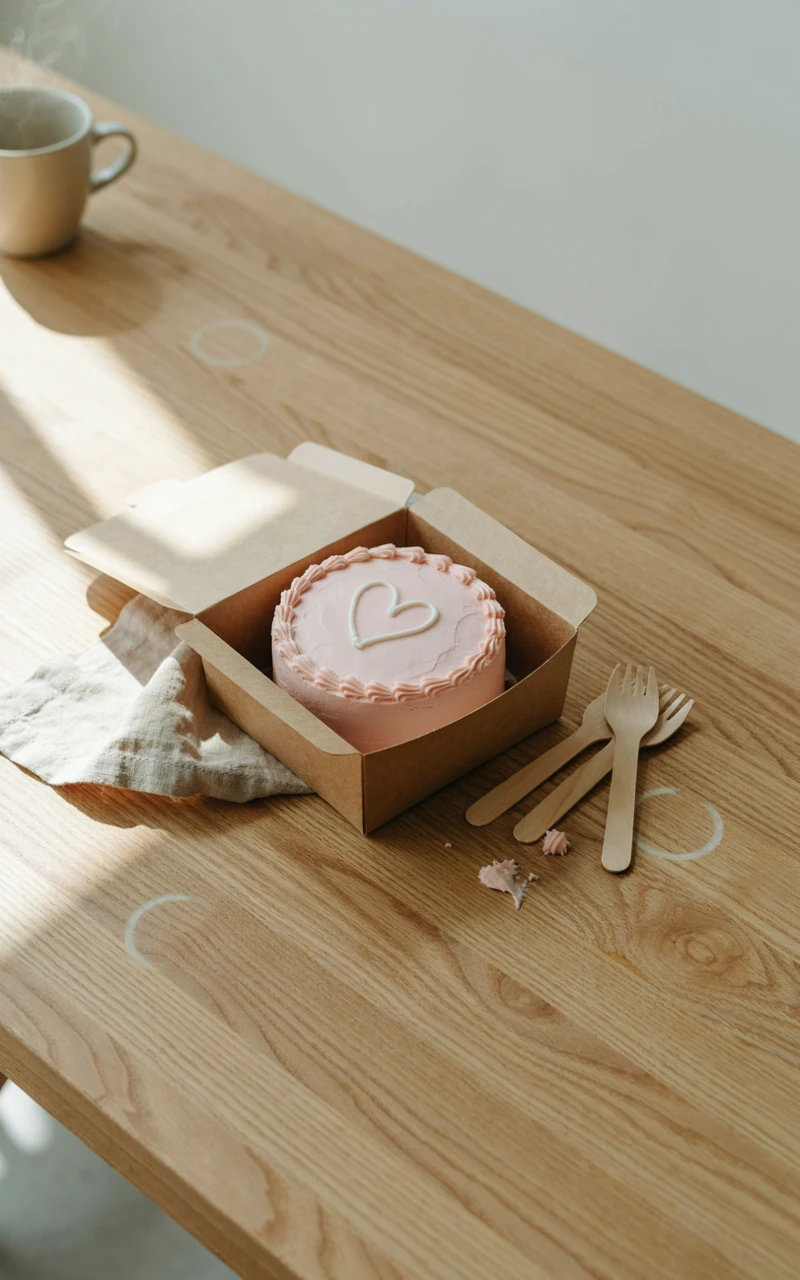
Bento cakes are tiny 4-inch cakes that come in a little clamshell box, often with a fork tucked inside. They’re one of the most cute birthday cake ideas out there, and they’re perfect when you’re celebrating for two or want a small cake just for the birthday person.
The recipe makes two mini layers, which means less baking, less frosting, and less waste. A short message piped on top, like “main character” or a simple date, does all the decorating work.
If you’ve never decorated a cake before, start here. A small surface is much easier to smooth than a big one.
Ingredients
For the mini vanilla cake:
- 3/4 cup (95 g) all-purpose flour
- 3/4 tsp (3 g) baking powder
- 1/8 tsp salt
- 1/4 cup (55 g) unsalted butter, softened
- 1/2 cup (100 g) granulated sugar
- 1 large egg, at room temperature
- 1 tsp (5 ml) vanilla extract
- 1/3 cup (80 ml) whole milk, at room temperature
For the frosting:
- 1/2 cup (115 g) unsalted butter, softened
- 1 1/2 cups (180 g) powdered sugar, sifted
- 1 tbsp (15 ml) heavy cream
- 1/2 tsp (2.5 ml) vanilla extract
- Gel food coloring in one main color and one contrast color
- 1 tbsp (12 g) sprinkles (optional)
Tools and Preparation
- Two 4-inch (10 cm) round cake pans
- Small offset spatula
- Piping bags with a #2 round tip and a small star tip
- A bento cake box (clamshell) and a 4-inch cake board
Heat the oven to 350°F (175°C). Grease the pans and line them with parchment circles.
Prep time: 30 minutes. Bake time: 20 to 22 minutes. Cooling: 45 minutes. Decorating: 25 minutes. Total: about 2 hours. Serves 2.
Step-by-Step Instructions
- Whisk the flour, baking powder, and salt.
- Beat the butter and sugar for 2 to 3 minutes until fluffy, then beat in the egg and vanilla.
- Mix in half the dry ingredients, then the milk, then the rest of the dry ingredients.
- Divide between the pans and bake 20 to 22 minutes, until the tops spring back when pressed.
- Cool 10 minutes in the pans, then completely on a rack.
- Beat the butter for 2 minutes, add the powdered sugar, cream, and vanilla, and beat until smooth.
- Scoop out 3 tbsp of frosting and tint it your contrast color. Tint the rest your main color.
- Stack the layers with a thin layer of frosting between them, crumb coat, and chill 15 minutes.
- Add the final coat and smooth with the offset spatula.
- Pipe a small shell or star border along the top edge, then write your message with the #2 tip.
- Chill 10 minutes, then place it in the bento box.
Common Mistakes to Avoid
- Writing too long a message. Three or four words fit best on a 4-inch top.
- Overbaking. Small cakes dry out fast, so start checking at 18 minutes.
- Using stiff frosting for writing. Add a few drops of cream so the lines flow smoothly.
Variations, Storage, and Final Thoughts
Try a chocolate version by swapping 2 tbsp (15 g) of the flour for cocoa powder. You can also pipe little hearts, a cherry, or a cartoon face instead of words.
Store the boxed cake in the fridge for up to 3 days and serve it at room temperature. Bento cakes pair nicely with a few delicious snack recipes if you’re hosting a small get-together.
Key takeaway: small cake, short message, one contrast color, and you’ve got a gift-worthy cake in about two hours.
3. Pressed Edible Flower Cake
Why You’ll Love This Recipe
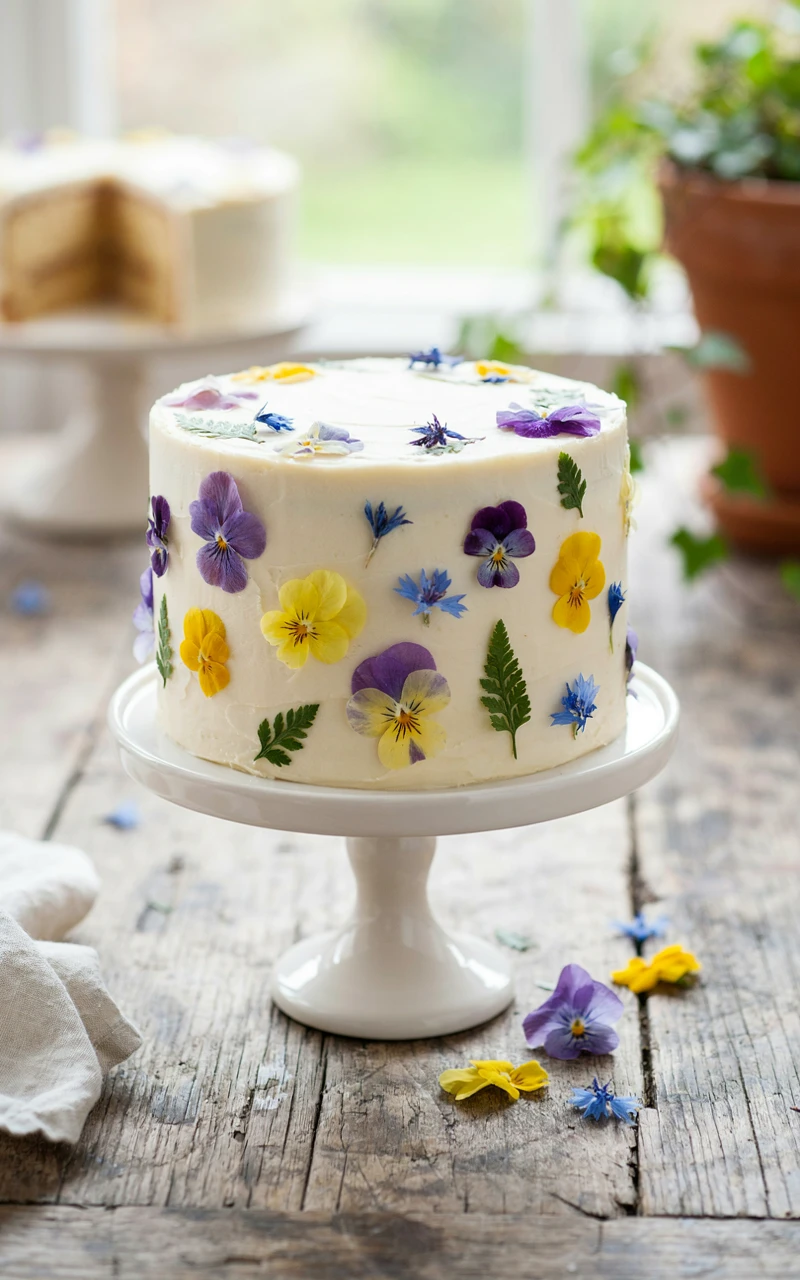
A white cake covered in flat, pressed flowers looks like a page from a garden journal. It’s one of the most elegant birthday cakes you can make, and the decorating is mostly just placing flowers with your fingers.
The cake is a bright lemon buttermilk sponge with lemon buttercream. The tart, fresh flavor suits the spring-garden look.
The only planning you need is a few days to press the flowers. After that, the whole cake comes together in an afternoon.
Ingredients
For the lemon cake:
- 2 1/4 cups (280 g) all-purpose flour
- 2 tsp (8 g) baking powder
- 1/2 tsp (3 g) salt
- 3/4 cup (170 g) unsalted butter, softened
- 1 1/4 cups (250 g) granulated sugar
- 2 tbsp (12 g) lemon zest (about 2 lemons)
- 3 large eggs, at room temperature
- 2 tbsp (30 ml) fresh lemon juice
- 3/4 cup (180 ml) buttermilk, at room temperature
For the frosting and decoration:
- 1 1/2 cups (340 g) unsalted butter, softened
- 5 cups (600 g) powdered sugar, sifted
- 3 tbsp (45 ml) fresh lemon juice
- 1 tsp (5 ml) vanilla extract
- 1 pinch salt
- 20 to 30 food-safe edible flowers, such as violas, pansies, and cornflowers
- 2 tbsp (40 g) light corn syrup or clear piping gel
Tools and Preparation
- Two 8-inch (20 cm) round cake pans
- Parchment paper and a heavy book
- Offset spatula, bench scraper, and cake turntable
- A small clean paintbrush and tweezers
Buy flowers sold as edible, grown without pesticides. Florist flowers are often sprayed and are not safe to eat.
Two to three days ahead, lay the flowers face down between sheets of parchment, close them inside a heavy book, and stack more books on top. They’re ready when they feel papery and completely flat. Heat the oven to 350°F (175°C) on baking day.
Prep time: 45 minutes, plus 2 to 3 days pressing. Bake time: 25 to 30 minutes. Cooling: 1 hour. Decorating: 45 minutes. Total: about 3 hours 30 minutes on baking day. Serves 12.
Step-by-Step Instructions
- Grease and line the pans. Whisk the flour, baking powder, and salt.
- Rub the lemon zest into the sugar with your fingers until it smells strongly of lemon.
- Beat the butter and lemon sugar for 3 to 4 minutes until light, then add the eggs one at a time.
- Stir the lemon juice into the buttermilk. Add the dry mix and buttermilk alternately in three parts on low speed.
- Bake 25 to 30 minutes, until golden at the edges and a toothpick comes out clean.
- Cool 10 minutes in the pans, then completely on a rack.
- Beat the butter, powdered sugar, lemon juice, vanilla, and salt for 3 minutes until smooth and creamy.
- Stack, crumb coat, and chill 20 minutes. Add a smooth final coat and chill 30 minutes so the surface is firm.
- Brush the back of each flower with a thin layer of corn syrup and press it gently onto the cake.
- Start with the biggest flowers, then fill gaps with small petals, and leave some white space so each flower stands out.
Common Mistakes to Avoid
- Using flowers that aren’t fully pressed. Any moisture left in the petals will make them curl and bleed color.
- Placing flowers on soft frosting. They slide and smudge, so chill first.
- Too much syrup. A thin layer is enough, and extra leaves shiny streaks.
Variations, Storage, and Final Thoughts
Try an orange or elderflower cake, or tint the frosting a pale sage. Pressed herbs like small mint leaves look lovely next to the flowers.
Store in the fridge, loosely covered, for up to 3 days. Decorate no more than a day ahead, because the petals slowly soak up moisture and start to wilt.
Key takeaway: fully pressed, food-safe flowers on a chilled cake give you a garden look without any piping at all.
4. Watercolor Buttercream Cake
Why You’ll Love This Recipe
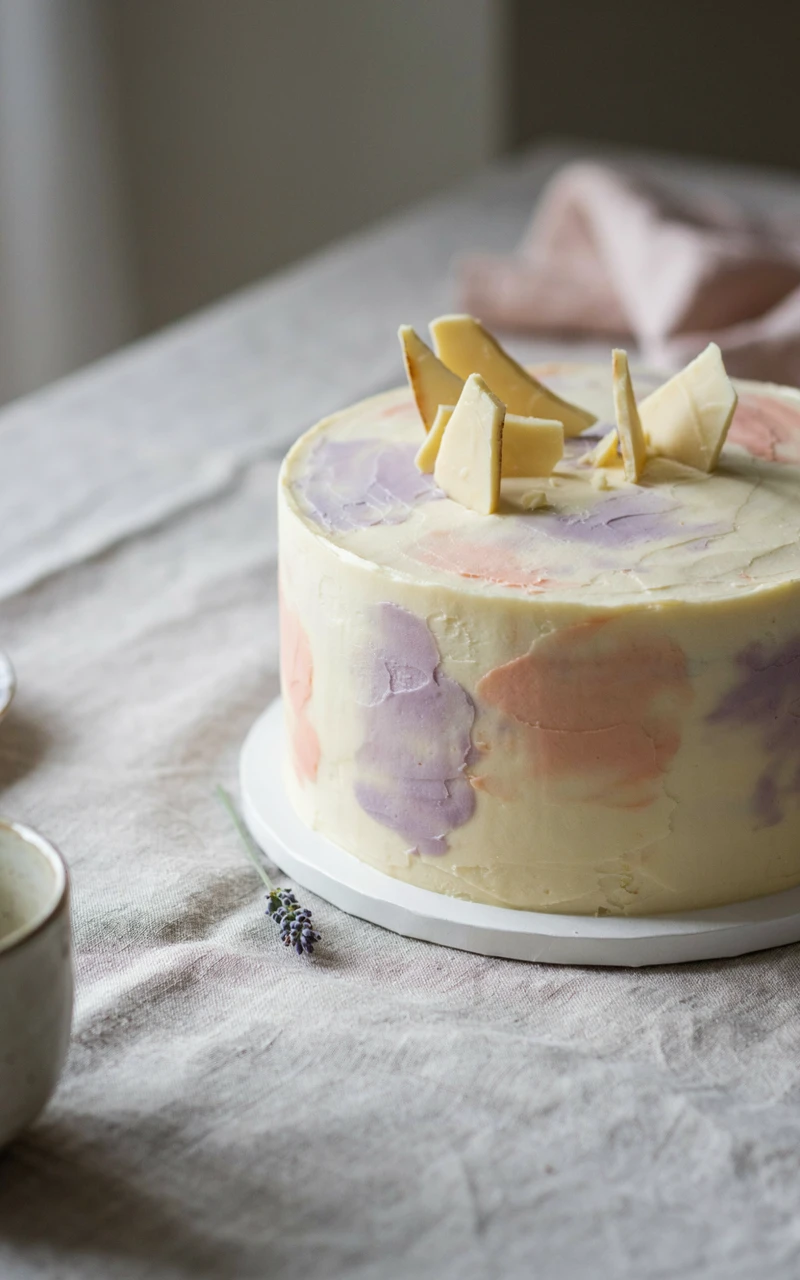
This tall cake has soft pastel colors that swirl together like a painting. It’s one of those trendy birthday cake designs that looks hard, but it’s really just dabs of tinted frosting smoothed with a scraper.
The cake is a vanilla bean sponge baked in three 6-inch pans, so you get a taller, slimmer cake that photographs beautifully. Every slice has those little black vanilla specks.
Best of all, there’s no wrong pattern. Each watercolor cake turns out a little different, which is part of the charm.
Ingredients
For the vanilla bean cake:
- 2 1/2 cups (315 g) all-purpose flour
- 2 1/2 tsp (10 g) baking powder
- 1/2 tsp (3 g) salt
- 3/4 cup (170 g) unsalted butter, softened
- 1 1/2 cups (300 g) granulated sugar
- 3 large eggs, at room temperature
- 1 tbsp (15 ml) vanilla bean paste
- 1 cup (240 ml) whole milk, at room temperature
For the frosting:
- 2 cups (450 g) unsalted butter, softened
- 6 1/2 cups (780 g) powdered sugar, sifted
- 1/4 cup (60 ml) heavy cream
- 2 tsp (10 ml) vanilla extract
- 1 pinch salt
- Gel food coloring in three pastel shades, such as pink, peach, and lilac
Tools and Preparation
- Three 6-inch (15 cm) round cake pans
- Cake turntable
- Tall bench scraper and small offset spatula
- Four small bowls for tinting
Heat the oven to 350°F (175°C). Grease and line the three pans.
Prep time: 1 hour. Bake time: 25 to 30 minutes. Cooling: 1 hour. Decorating: 1 hour 15 minutes. Total: about 4 hours. Serves 12 to 14.
Step-by-Step Instructions
- Whisk the flour, baking powder, and salt.
- Beat the butter and sugar for 3 to 4 minutes until pale. Add the eggs one at a time, then the vanilla bean paste.
- Add the dry mix in three parts, alternating with the milk, on low speed.
- Divide evenly between the pans (a kitchen scale helps) and bake 25 to 30 minutes, until a toothpick comes out clean.
- Cool 10 minutes in the pans, then completely on a rack.
- Make the frosting by beating the butter for 3 minutes, then adding the sugar, cream, vanilla, and salt.
- Set aside two-thirds of the frosting as white. Divide the rest into three bowls and tint each a different pastel.
- Stack the layers with white frosting between them, crumb coat, and chill 20 minutes.
- Spread a medium coat of white frosting all over and smooth it roughly.
- With the small spatula, dab patches of each color randomly around the sides and top edge.
- Hold the bench scraper straight against the cake and spin the turntable in one smooth motion. Scrape off excess, fill any gaps, and scrape again until the colors blend softly.
- Chill 15 minutes, then pipe a simple white border on top if you like.
Common Mistakes to Avoid
- Over-scraping. Every pass blends the colors more, so stop at 3 or 4 passes before it turns muddy.
- Colors that clash. Choose shades that sit next to each other, like pink and peach, rather than opposites.
- A tilted scraper. Keep it straight up and down for clean sides.
Variations, Storage, and Final Thoughts
For a soft sage-and-cream version, use green and ivory tints, and borrow color ideas from this green aesthetic post. Blues and grays make a lovely ocean-inspired cake too.
Keep at cool room temperature for 1 day or in the fridge for up to 4 days. Bring it out 1 hour before slicing.
Key takeaway: dab, scrape, and stop early, and the colors will do the pretty work for you.
5. Elegant Gold Leaf Chocolate Drip Cake
Why You’ll Love This Recipe
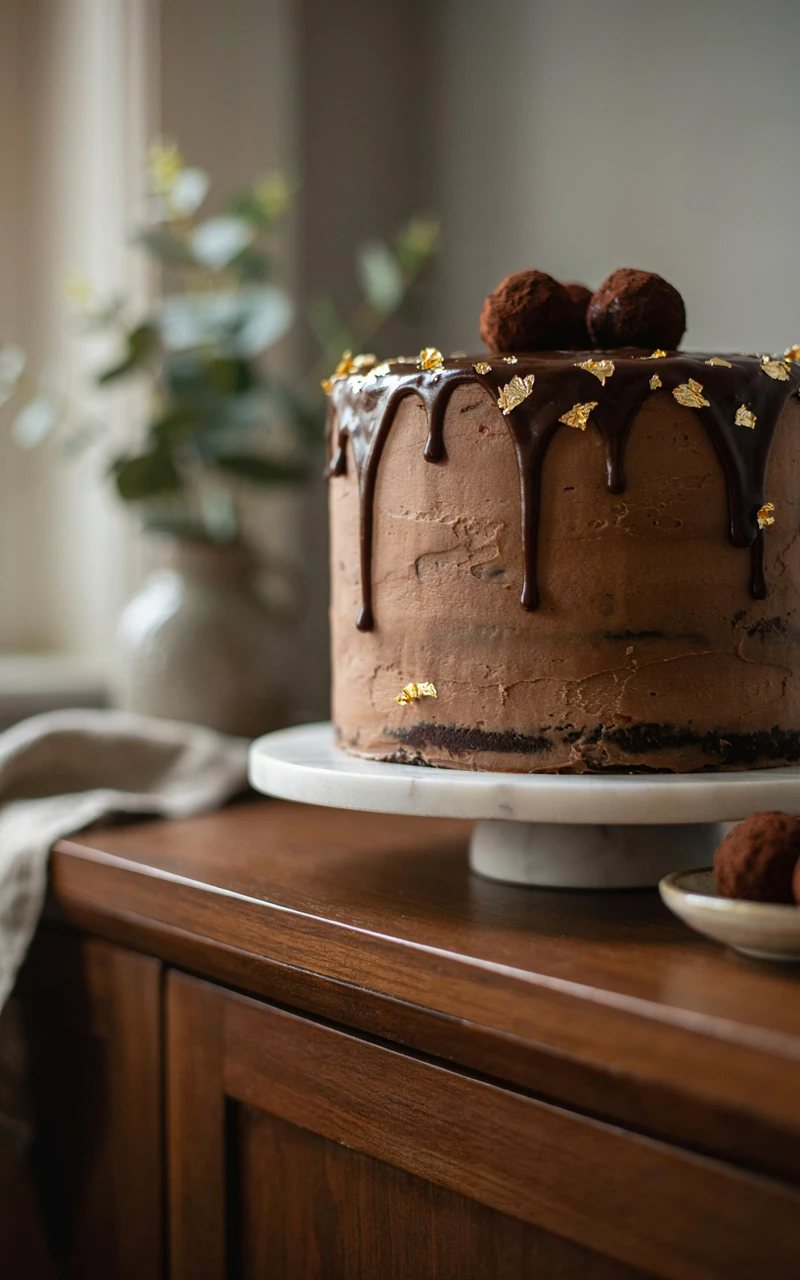
Deep chocolate cake, glossy ganache running down the sides, and a few flakes of gold on top make this the grown-up birthday cake of the list. It’s perfect for a milestone birthday or a dinner party.
The cake uses hot coffee to bring out the chocolate flavor, and you won’t taste the coffee itself. It stays moist for days.
The drip looks impressive but only takes two ingredients. Gold leaf is the finishing touch that makes guests stop and stare.
Ingredients
For the chocolate cake:
- 1 3/4 cups (220 g) all-purpose flour
- 2 cups (400 g) granulated sugar
- 3/4 cup (65 g) unsweetened cocoa powder
- 2 tsp (10 g) baking soda
- 1 tsp (4 g) baking powder
- 1 tsp (6 g) salt
- 2 large eggs, at room temperature
- 1 cup (240 ml) buttermilk, at room temperature
- 1/2 cup (120 ml) vegetable oil
- 2 tsp (10 ml) vanilla extract
- 1 cup (240 ml) hot brewed coffee
For the frosting, drip, and topping:
- 1 1/2 cups (340 g) unsalted butter, softened
- 4 cups (480 g) powdered sugar, sifted
- 3/4 cup (65 g) unsweetened cocoa powder
- 1/4 cup (60 ml) heavy cream
- 2 tsp (10 ml) vanilla extract
- 1 pinch salt
- 4 oz (115 g) dark chocolate (about 60%), finely chopped
- 1/2 cup (120 ml) heavy cream, for the ganache
- 3 to 5 sheets edible gold leaf
- Chocolate truffles or fresh figs, for the top (optional)
Tools and Preparation
- Two 8-inch (20 cm) round cake pans
- Squeeze bottle or spoon for the drip
- Offset spatula and bench scraper
- Small soft dry paintbrush and tweezers for the gold leaf
Only use gold leaf labeled edible. Craft gold leaf is not food-safe. Heat the oven to 350°F (175°C), then grease and line the pans.
Prep time: 1 hour. Bake time: 30 to 35 minutes. Cooling: 1 hour 15 minutes. Decorating: 1 hour. Total: about 4 hours. Serves 14 to 16.
Step-by-Step Instructions
- Whisk the flour, sugar, cocoa, baking soda, baking powder, and salt in a large bowl.
- In another bowl, whisk the eggs, buttermilk, oil, and vanilla. Stir into the dry ingredients.
- Slowly whisk in the hot coffee. The batter will be thin, and that’s correct.
- Pour into the pans and bake 30 to 35 minutes, until a toothpick comes out with just a few crumbs.
- Cool 15 minutes in the pans, then completely on a rack.
- For the frosting, beat the butter 3 minutes, then add the powdered sugar, cocoa, cream, vanilla, and salt. Beat until fluffy.
- Stack, crumb coat, and chill 20 minutes. Add a smooth final coat and chill at least 30 minutes. A cold cake gives clean drips.
- Heat the cream until it just simmers, pour it over the chopped chocolate, wait 3 minutes, and stir until glossy.
- Let the ganache cool to about 90°F (32°C). It should feel barely warm and flow like thick honey.
- Test one drip on the back of the cake. Then drip around the edge, letting each one slide down on its own, and fill the top.
- Chill 15 minutes. Lift pieces of gold leaf with tweezers, lay them on the cake, and press gently with the dry brush.
- Add truffles or figs on top if using.
Common Mistakes to Avoid
- Hot ganache. It races to the bottom and pools on the board.
- Touching gold leaf with your fingers. It sticks to warm skin and tears.
- A room-temperature cake. Drips spread and lose their shape.
Variations, Storage, and Final Thoughts
Use white chocolate tinted pale pink for the drip, or add 1 tsp (5 ml) orange extract to the frosting. Raspberries on top add a pop of color.
Store covered in the fridge for up to 5 days and serve at room temperature. It’s lovely next to an after-dinner drink like a Christmas eggnog cocktail if your birthday lands in December.
Key takeaway: cold cake, barely warm ganache, and tweezers for the gold make this one look straight out of a bakery.
6. Semi-Naked Berry Cake
Why You’ll Love This Recipe
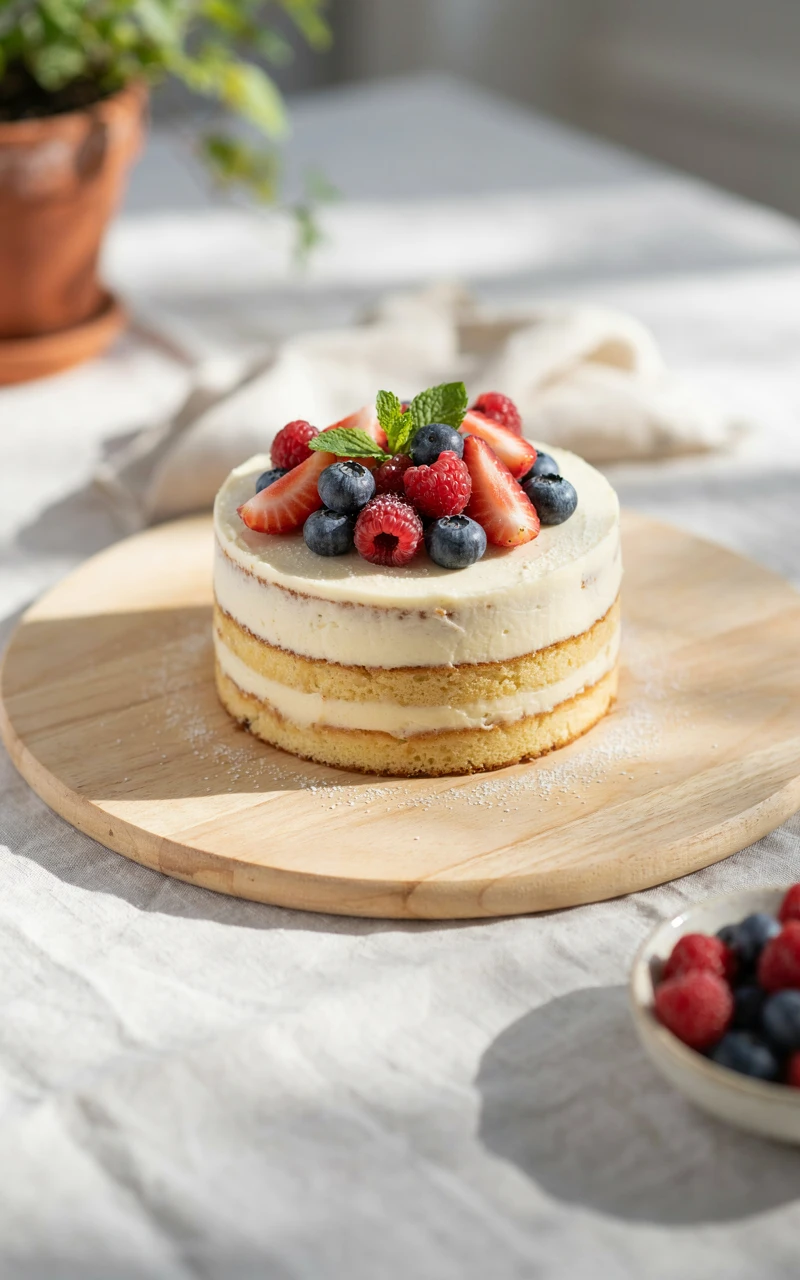
A semi-naked cake has just a thin layer of frosting scraped back so the cake shows through. Piled with fresh berries, it feels relaxed and summery, the kind of cake you’d see at a garden party.
The frosting is a whipped mascarpone cream, which is lighter and less sweet than buttercream. It goes perfectly with juicy berries and a fluffy vanilla sponge.
If smooth frosting scares you, this is your cake. The rustic look actually depends on not being perfect.
Ingredients
For the vanilla cake:
- 3 cups (375 g) all-purpose flour
- 1 tbsp (12 g) baking powder
- 3/4 tsp (4 g) salt
- 1 cup (225 g) unsalted butter, softened
- 1 3/4 cups (350 g) granulated sugar
- 4 large eggs, at room temperature
- 1 tbsp (15 ml) vanilla extract
- 1 1/4 cups (300 ml) whole milk, at room temperature
For the cream and berries:
- 8 oz (225 g) mascarpone, cold
- 1 1/2 cups (360 ml) heavy cream, cold
- 3/4 cup (90 g) powdered sugar
- 1 tsp (5 ml) vanilla extract
- 1/3 cup (100 g) raspberry jam
- 3 cups (about 450 g) mixed fresh berries, such as strawberries, raspberries, and blueberries
- A few sprigs fresh mint
- 1 tbsp (8 g) powdered sugar, for dusting
Tools and Preparation
- Three 8-inch (20 cm) round cake pans
- Stand mixer with whisk attachment
- Bench scraper and offset spatula
- Small fine-mesh sieve for dusting
Heat the oven to 350°F (175°C). Grease and line the pans, and chill your mixing bowl and whisk for 10 minutes before making the cream.
Prep time: 45 minutes. Bake time: 22 to 26 minutes. Cooling: 1 hour. Assembly: 45 minutes. Total: about 3 hours. Serves 14.
Step-by-Step Instructions
- Whisk the flour, baking powder, and salt.
- Beat the butter and sugar 3 to 4 minutes until fluffy. Add the eggs one at a time, then the vanilla.
- Add the dry mix and milk alternately in three parts on low speed.
- Divide among the pans and bake 22 to 26 minutes, until lightly golden and springy.
- Cool 10 minutes in the pans, then completely on a rack.
- Whip the mascarpone, cream, powdered sugar, and vanilla on medium-high for 2 to 3 minutes, until stiff peaks form.
- Place the first layer on a plate, spread a layer of cream, add a thin layer of jam, and scatter a handful of berries. Repeat with the second layer.
- Top with the last layer, bottom side up, for a flat top.
- Spread cream thinly around the sides, then scrape most of it away with the bench scraper so the cake peeks through.
- Spread a thicker layer on top and pile the berries in one corner or in a full crown.
- Tuck in mint sprigs and dust lightly with powdered sugar just before serving.
Common Mistakes to Avoid
- Overwhipping the cream. Stop at stiff peaks, or it turns grainy.
- Wet berries. Pat them completely dry or the cream will weep.
- Dusting too early. Powdered sugar melts into the berries within an hour.
Variations, Storage, and Final Thoughts
Try sliced peaches and thyme in late summer, or figs and honey in the fall. A lemon or almond sponge works just as well as vanilla.
Because of the cream, this cake must stay in the fridge and is best eaten within 2 days. Add the berries no more than 4 hours before serving.
Key takeaway: thin frosting, dry berries, and a last-minute dusting of sugar give you an easy, natural-looking cake.
7. Modern Palette Knife Buttercream Cake
Why You’ll Love This Recipe
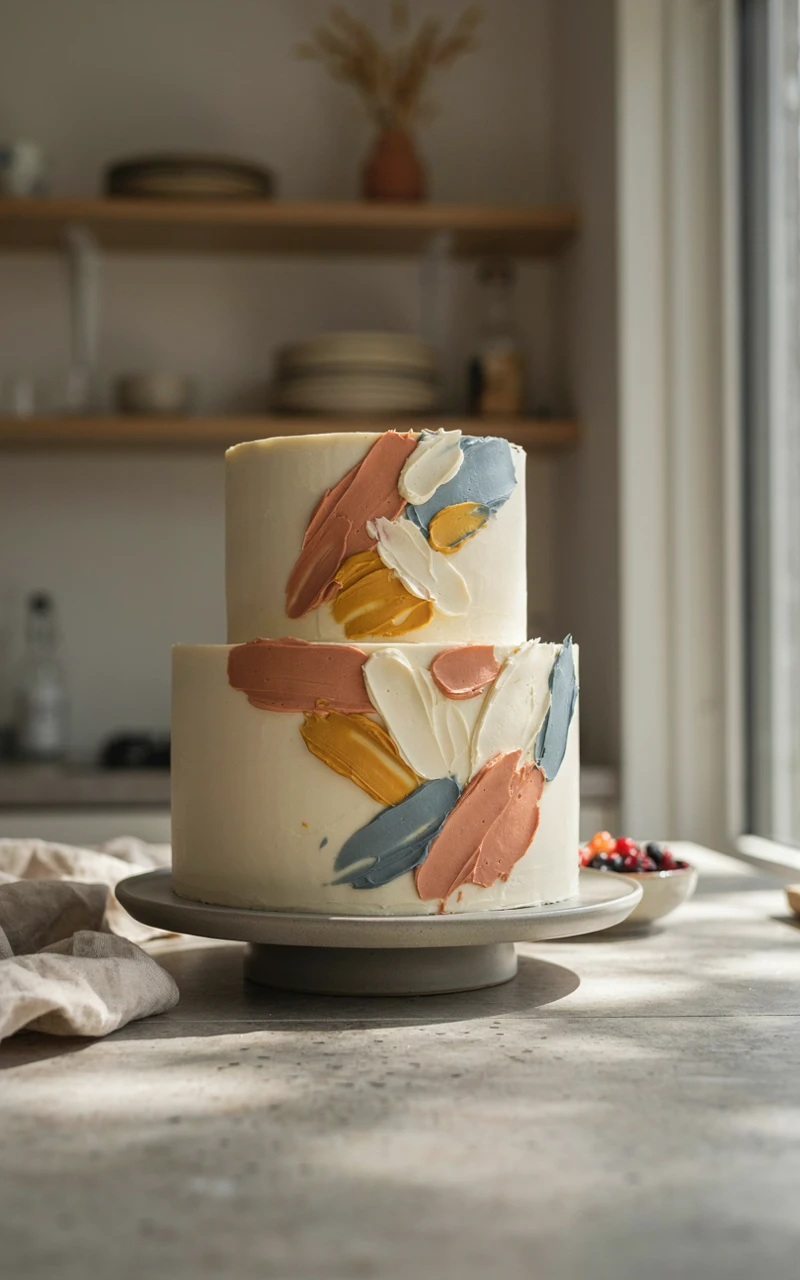
If you love art, this one’s for you. Swiss meringue buttercream is spread onto the cake with a small palette knife to make abstract petals and brushstrokes, so the cake looks like an oil painting.
Among modern birthday cakes, this style feels the most like a one-of-a-kind piece. No two will ever look the same.
Underneath is an orange olive oil cake, tender and lightly fruity. Swiss meringue buttercream is silky and not too sweet, and it holds sharp edges from the knife.
Ingredients
For the orange olive oil cake:
- 2 1/4 cups (280 g) all-purpose flour
- 1 1/4 cups (250 g) granulated sugar
- 2 tsp (8 g) baking powder
- 1/2 tsp (3 g) baking soda
- 1/2 tsp (3 g) salt
- 3 large eggs, at room temperature
- 3/4 cup (180 ml) mild olive oil
- 1 cup (240 ml) whole milk, at room temperature
- 1 tbsp (6 g) orange zest
- 2 tsp (10 ml) vanilla extract
For the Swiss meringue buttercream:
- 5 large egg whites (about 150 g)
- 1 1/4 cups (250 g) granulated sugar
- 1 3/4 cups (400 g) unsalted butter, cubed and softened
- 2 tsp (10 ml) vanilla extract
- 1 pinch salt
- Gel food coloring in 3 or 4 shades
Tools and Preparation
- Two 8-inch (20 cm) round cake pans
- Heatproof bowl and a saucepan for a double boiler
- Instant-read thermometer
- Small angled palette knife (about 2 to 3 inches, or 5 to 8 cm, long)
- Bench scraper and turntable
Heat the oven to 350°F (175°C), and grease and line the pans. You’ll heat the egg whites to 160°F (71°C), the temperature the FDA recommends for cooking eggs safely.
Prep time: 1 hour 15 minutes. Bake time: 28 to 32 minutes. Cooling: 1 hour. Decorating: 1 hour 30 minutes. Total: about 4 hours 30 minutes. Serves 12.
Step-by-Step Instructions
- Whisk the flour, sugar, baking powder, baking soda, and salt.
- In another bowl, whisk the eggs, olive oil, milk, orange zest, and vanilla. Pour into the dry ingredients and whisk until smooth.
- Bake 28 to 32 minutes, until golden and a toothpick comes out clean. Cool completely.
- For the buttercream, whisk the egg whites and sugar in a heatproof bowl over simmering water until the sugar dissolves and the mix reaches 160°F (71°C).
- Move to the mixer and whip on high for 8 to 10 minutes, until thick, glossy, and the bowl feels cool.
- Add the butter a few cubes at a time on medium speed. If it looks curdled, keep beating and it will turn silky. Beat in the vanilla and salt.
- Stack, crumb coat, and chill 20 minutes. Add a smooth final coat in a pale base color and chill 30 minutes.
- Tint small bowls of buttercream in your accent colors.
- Scoop a little frosting onto the tip of the palette knife, press it onto the cake, and drag it slightly toward you to make a petal shape.
- Layer petals in a cluster on one side of the cake, starting with the darkest color and adding lighter shades on top. Add a few loose strokes around the cluster.
- Chill 15 minutes to set.
Common Mistakes to Avoid
- Warm buttercream. If the petals lose their edges, chill the frosting for 10 minutes.
- Covering the whole cake. A cluster with open space looks more modern than petals everywhere.
- A greasy bowl. Any fat stops egg whites from whipping, so wipe the bowl with a little vinegar first.
Variations, Storage, and Final Thoughts
For a bold one-color look, tint the base and every petal in shades of the same color, a lot like color drenching a room. Black and white petals on a gray base look striking too.
Store in the fridge for up to 4 days and let it sit out 1 to 2 hours before serving so the buttercream softens.
Key takeaway: a small knife, chilled frosting, and a single cluster of petals give you a real piece of edible art.
8. Meringue Cloud Cake- Aesthetic Birthday Cake Ideas
Why You’ll Love This Recipe
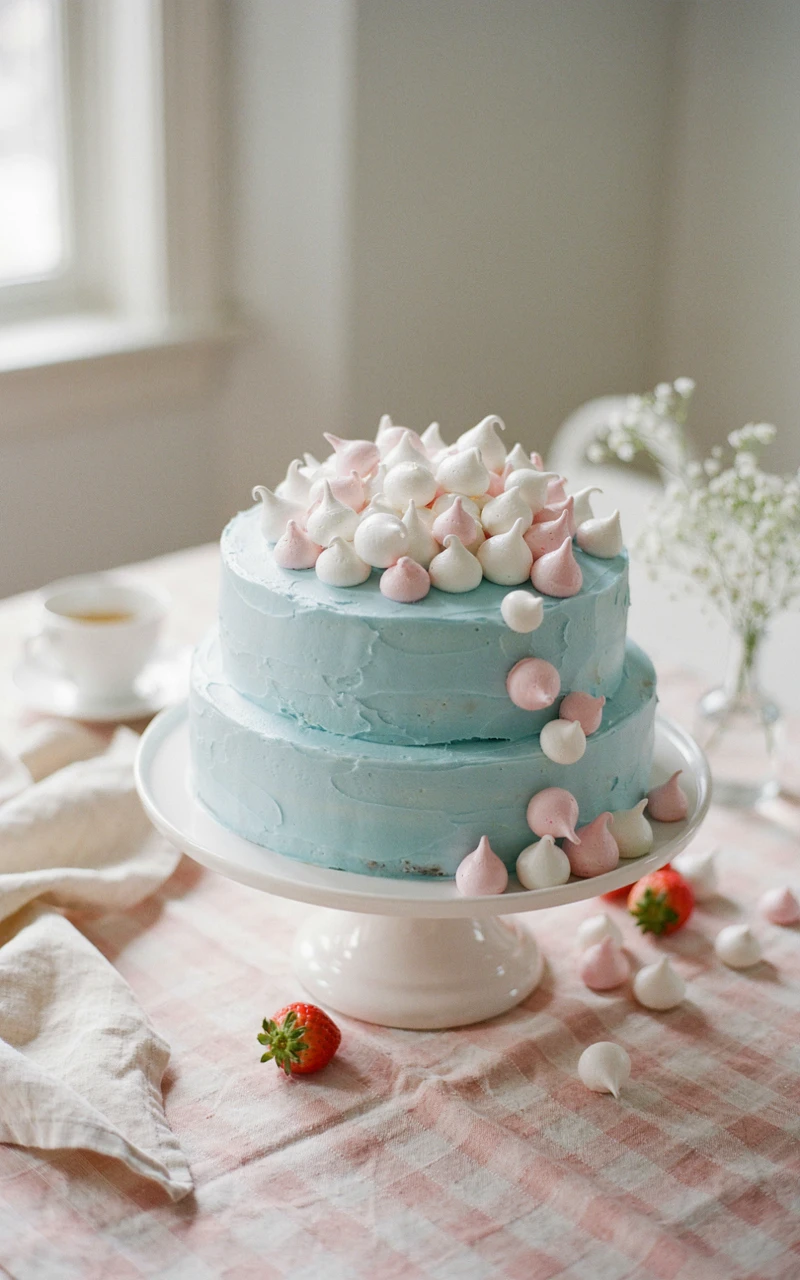
This cake is topped with big, fluffy swoops of toasted meringue that look like clouds at sunset. It’s soft, whimsical, and one of my favorite pieces of birthday cake inspiration for spring and summer parties.
Inside is a coconut cake filled with tangy lemon curd. The marshmallowy meringue on top balances the tart filling.
Toasting the meringue with a kitchen torch is honestly fun. Guests love watching it turn golden.
Ingredients
For the coconut cake:
- 2 1/4 cups (280 g) all-purpose flour
- 2 tsp (8 g) baking powder
- 1/2 tsp (3 g) salt
- 1/2 cup (115 g) unsalted butter, softened
- 1/4 cup (60 ml) vegetable oil
- 1 1/2 cups (300 g) granulated sugar
- 3 large eggs, at room temperature
- 1 cup (240 ml) full-fat coconut milk, well stirred
- 1 tsp (5 ml) vanilla extract
- 1/2 cup (40 g) sweetened shredded coconut
For the filling and meringue:
- 1 cup (320 g) lemon curd, homemade or store-bought
- 4 large egg whites (about 120 g)
- 1 cup (200 g) granulated sugar
- 1/4 tsp (1 g) cream of tartar
- 1 tsp (5 ml) vanilla extract
- 12 small store-bought meringue kisses (optional)
Tools and Preparation
- Two 8-inch (20 cm) round cake pans
- Heatproof bowl, saucepan, and instant-read thermometer
- Kitchen torch
- Large spoon or offset spatula for swooping
Heat the oven to 350°F (175°C). Grease and line the pans.
Prep time: 1 hour. Bake time: 28 to 32 minutes. Cooling: 1 hour. Assembly: 45 minutes. Total: about 3 hours 30 minutes. Serves 12.
Step-by-Step Instructions
- Whisk the flour, baking powder, and salt.
- Beat the butter, oil, and sugar for 3 minutes. Add the eggs one at a time, then the vanilla.
- Add the dry mix and coconut milk alternately in three parts, then fold in the shredded coconut.
- Bake 28 to 32 minutes, until golden and a toothpick comes out clean. Cool completely.
- Place the first layer on a plate and spread the lemon curd on top, leaving a 1/2-inch (1 cm) border. Add the second layer and chill 20 minutes.
- Whisk the egg whites, sugar, and cream of tartar over simmering water until they reach 160°F (71°C) and the sugar has dissolved.
- Whip on high for 6 to 8 minutes, until stiff, glossy, and cool. Beat in the vanilla.
- Pile the meringue on top and down the sides of the cake. Use the back of a spoon to pull up tall peaks and swirls.
- Toast with the torch, holding it 3 to 4 inches (8 to 10 cm) away and moving constantly, until the peaks are golden brown.
- Tuck meringue kisses into the clouds if you like.
Common Mistakes to Avoid
- Holding the torch still. Meringue goes from golden to burnt in seconds.
- Curd to the edge. It squeezes out once the top layer goes on.
- Making it a day early. Meringue starts to weep in the fridge after about 24 hours.
Variations, Storage, and Final Thoughts
Swap the lemon curd for passion fruit curd or raspberry jam. Tinting the meringue the palest pink makes the clouds look like cotton candy.
Store in the fridge and eat within 2 days, ideally on the day you torch it. Slice with a hot, wet knife for clean pieces.
Key takeaway: a fully heated meringue and a moving torch give you golden clouds that hold their shape.
9. Coquette Bow Cake with Cherries
Why You’ll Love This Recipe
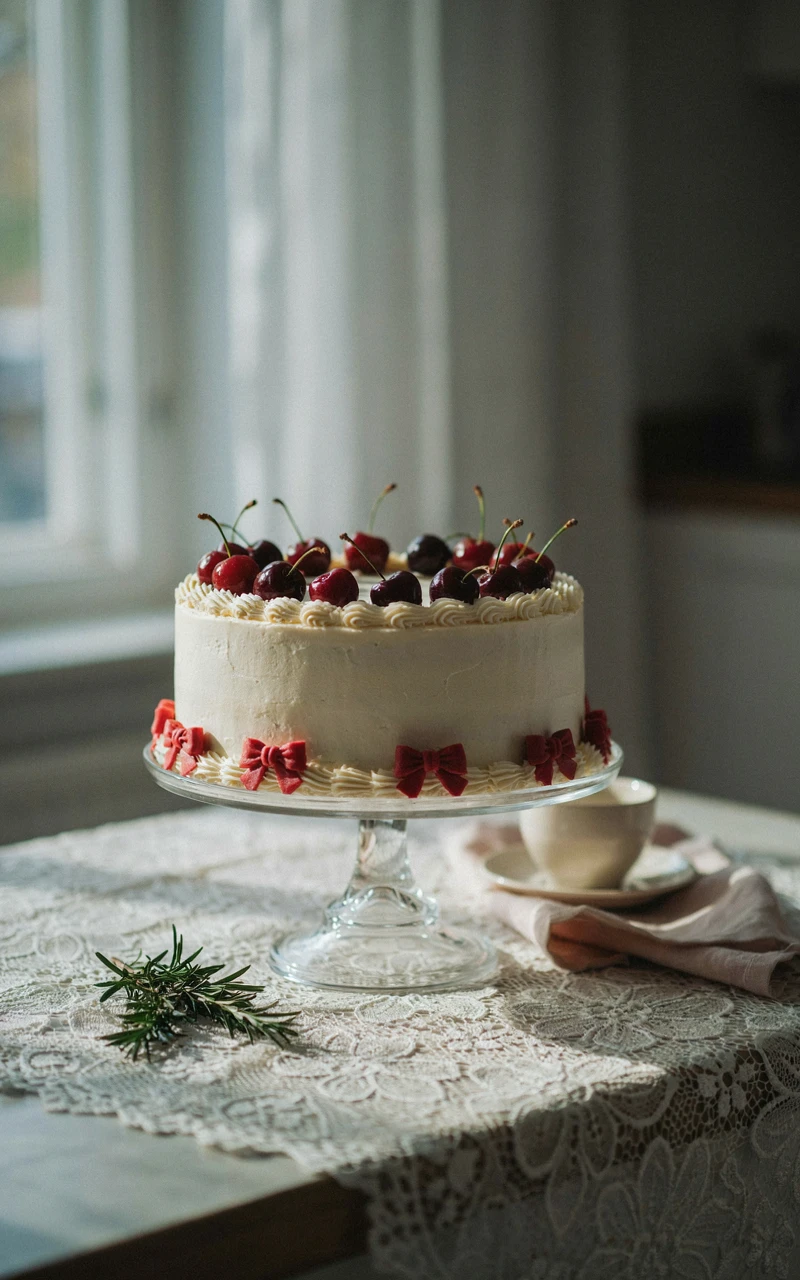
Pale pink frosting, piped ribbon bows, and shiny cherries on their stems make this cake sweet, girly, and very on trend. It’s the kind of cake people photograph before they eat it.
The inside is a cherry almond cake with little bits of chopped cherry baked in, so it ties the whole theme together. The almond flavor is gentle and goes beautifully with vanilla buttercream.
The bows look fancy, but each one is just two loops and two tails piped with a petal tip. After two or three practice bows, you’ll have it down.
Ingredients
For the cherry almond cake:
- 2 1/4 cups (280 g) all-purpose flour, plus 1 tbsp (8 g) for the cherries
- 2 tsp (8 g) baking powder
- 1/2 tsp (3 g) salt
- 3/4 cup (170 g) unsalted butter, softened
- 1 1/4 cups (250 g) granulated sugar
- 3 large eggs, at room temperature
- 1 tsp (5 ml) almond extract
- 1 tsp (5 ml) vanilla extract
- 3/4 cup (180 ml) whole milk, at room temperature
- 1/4 cup (60 ml) maraschino cherry juice
- 1/2 cup (90 g) maraschino cherries, chopped and patted dry
For the frosting and decoration:
- 1 1/2 cups (340 g) unsalted butter, softened
- 5 cups (600 g) powdered sugar, sifted
- 3 tbsp (45 ml) heavy cream
- 2 tsp (10 ml) vanilla extract
- 1 pinch salt
- Pink gel food coloring
- 8 to 10 fresh cherries with stems, washed and dried
Tools and Preparation
- Three 6-inch (15 cm) round cake pans
- Piping bags with a petal tip (104 or 125) and a small star tip
- Offset spatula, bench scraper, and turntable
- Paper towels for drying the cherries
Heat the oven to 350°F (175°C). Grease and line the pans, and toss the chopped cherries in 1 tbsp (8 g) flour so they don’t sink.
Prep time: 1 hour. Bake time: 30 to 35 minutes. Cooling: 1 hour. Decorating: 1 hour 15 minutes. Total: about 4 hours. Serves 12.
Step-by-Step Instructions
- Whisk 2 1/4 cups (280 g) flour, the baking powder, and the salt.
- Beat the butter and sugar for 3 to 4 minutes until pale. Add the eggs one at a time, then the almond and vanilla extracts.
- Mix the milk and cherry juice. Add the dry mix and milk alternately in three parts on low speed, then fold in the floured cherries.
- Divide among the pans and bake 30 to 35 minutes, until a toothpick comes out clean. Cool completely.
- Beat the frosting butter 3 minutes, add the powdered sugar, cream, vanilla, and salt, and beat until smooth.
- Tint two-thirds of the frosting very pale pink for the coat. Tint the rest a deeper pink for the bows.
- Stack the layers, crumb coat, and chill 20 minutes. Add a smooth pale pink coat and chill 30 minutes.
- Pipe a small star border around the base.
- For each bow, hold the petal tip with the wide end down. Pipe one loop to the left, one loop to the right, then two short tails hanging down from the center.
- Pipe 6 to 8 bows evenly around the top edge or along the sides, swagging a piped ribbon between them if you like.
- Place the fresh cherries on top just before serving, letting the stems stand up.
Common Mistakes to Avoid
- Wet cherries. Water on the fruit makes the frosting slide and streak.
- Sinking cherry bits. Pat them dry and coat them in flour before folding in.
- Forgetting to warn guests. Fresh cherries still have pits, so mention it when you serve.
Variations, Storage, and Final Thoughts
Try red bows on a white cake, or ivory bows on baby blue. Sugared cherries, rolled in white sugar after a quick dip in water, add a little sparkle.
Store in the fridge for up to 4 days, but add fresh cherries on the day you serve. Let the cake sit out for an hour so the buttercream softens and the flavors come through.
Key takeaway: a petal tip, a little practice, and dry cherries are all it takes to make a cake that looks like a gift.
Looking back over these nine cakes, I can see a little of every party I’ve baked for. There’s the heart cake my niece requested three years in a row, and the meringue cake I torched a bit too dark the first time and still served proudly.
What I’ve learned is that a beautiful cake rarely comes from fancy tools. It comes from chilling your layers, picking one simple idea, and giving yourself room to make a few wobbly bows along the way.
So pick the cake that makes you smile, set aside an afternoon, and trust your hands. Your friends and family will remember the love far longer than any tiny mistake.
I’d love to hear which cake you’re planning to bake, so tell me in the comments or send me a note. Happy baking, and happy birthday to whoever gets the first slice.