This post may contain affiliate links, which means I may receive a small commission should you decide to click that link and make a purchase. For more information please refer to the Terms & Conditions.

I love hosting the big November feast, but the hour right before the turkey comes out of the oven is always pure chaos. Everyone is hungry, the kitchen is crowded, and I am usually rushing to finish the gravy. That is exactly why I rely on a solid lineup of Thanksgiving appetizers to keep my family happy and out of my way.
Planning these bites ahead of time saves my sanity every single year. If you want to make your holiday hosting a little smoother, here are 10 Thanksgiving appetizers to start planning early.
1. Cranberry Brie Bites

Why You’ll Love This Recipe
These little bites are the perfect mix of sweet, tart, and creamy. When you are looking for Thanksgiving recipes, you want things that look impressive but take very little effort. The flaky pastry holds a warm pocket of melted cheese and bright fruit.
They are always the first thing to disappear from the snack table. Because they use store-bought puff pastry, you can pull them together in minutes.
Ingredients
- 1 sheet (245 g) frozen puff pastry, thawed
- 8 oz (225 g) brie cheese
- 1/2 cup (120 g) whole berry cranberry sauce
- 1/4 cup (30 g) chopped pecans
- 1 tbsp (3 g) fresh rosemary, finely chopped
Tools and Preparation
You will need a mini muffin tin and a sharp knife or pizza cutter. Prep time is about 15 minutes, and bake time is 15 minutes. This recipe makes 24 bites.
Step-by-Step Instructions
- Preheat your oven to 375°F (190°C) and lightly grease your mini muffin tin.
- Roll out the thawed puff pastry on a lightly floured surface and cut it into 24 small squares.
- Press one pastry square into each cup of the muffin tin, leaving the corners pointing up.
- Cut the brie into small cubes, leaving the rind on, and place one piece into each pastry cup.
- Top the cheese with a small spoonful of cranberry sauce and a sprinkle of chopped pecans.
- Bake for 12 to 15 minutes until the pastry is golden brown and the cheese is bubbling.
- Let them cool in the pan for 5 minutes, then garnish with fresh rosemary before serving.
Common Mistakes to Avoid
The biggest mistake is overfilling the pastry cups with cranberry sauce. If you add too much, the sauce will boil over the edges and make the pastry stick to the pan. Keep the filling to a modest half-teaspoon so the bites pop out easily.
Another common issue is letting the puff pastry get too warm before baking. If your kitchen is hot, pop the filled tin in the fridge for ten minutes before putting it in the oven.
Variations, Storage, and Final Thoughts
You can easily swap the cranberry sauce for fig jam or apricot preserves if you prefer a different flavor. To make these ahead, you can assemble them in the pan and keep them in the fridge for a few hours before baking.
Store any leftovers in an airtight container in the fridge for up to three days. Reheat them in the oven to crisp up the pastry again. These bites are a foolproof way to start your holiday meal.
2. Sweet Potato Crostini with Goat Cheese and Pecans

Why You’ll Love This Recipe
If you need gluten-free holiday appetizers, this recipe is a lifesaver. Instead of using bread, we use roasted slices of sweet potato as the base. The natural sweetness of the potato pairs beautifully with the tangy goat cheese.
It also brings a gorgeous pop of orange to your appetizer spread. These little rounds hold up well at room temperature, making them ideal for a grazing table.
Ingredients
- 2 large (450 g) sweet potatoes, scrubbed
- 2 tbsp (30 ml) olive oil
- 1/2 tsp (3 g) salt
- 4 oz (115 g) soft goat cheese
- 1/2 cup (60 g) chopped pecans, toasted
- 2 tbsp (30 ml) honey
- 1 tbsp (3 g) fresh thyme leaves
Tools and Preparation
You will need a sharp knife, a large baking sheet, and parchment paper. Prep time is 10 minutes, and roasting takes about 25 minutes. This recipe makes about 20 crostini.
Step-by-Step Instructions
- Preheat your oven to 400°F (200°C) and line a baking sheet with parchment paper.
- Slice the sweet potatoes into 1/4-inch (6 mm) thick rounds.
- Toss the slices with olive oil and salt, then arrange them in a single layer on the baking sheet.
- Roast for 10 minutes, flip each slice, and roast for another 10 to 15 minutes until tender and slightly browned.
- Let the sweet potato slices cool on the pan for 5 minutes.
- Spread a small dollop of goat cheese onto each sweet potato round.
- Top with toasted pecans, a drizzle of honey, and a sprinkle of fresh thyme.
Common Mistakes to Avoid
Cutting the sweet potatoes too thin is a quick way to ruin this dish. If the slices are paper-thin, they will burn in the oven and will not be sturdy enough to hold the toppings. Aim for a solid quarter-inch thickness.
Also, do not skip flipping them halfway through the cooking time. Flipping ensures both sides get a nice caramelized edge.
Variations, Storage, and Final Thoughts
If you are not a fan of goat cheese, whipped feta or even a sharp cheddar works wonderfully here. You can also add a small piece of crispy bacon on top for extra savory flavor.
The sweet potato rounds can be roasted a day ahead and kept in the fridge. When you are ready to serve, just warm them slightly and add your toppings.
3. Warm Spinach and Artichoke Dip
Why You’ll Love This Recipe
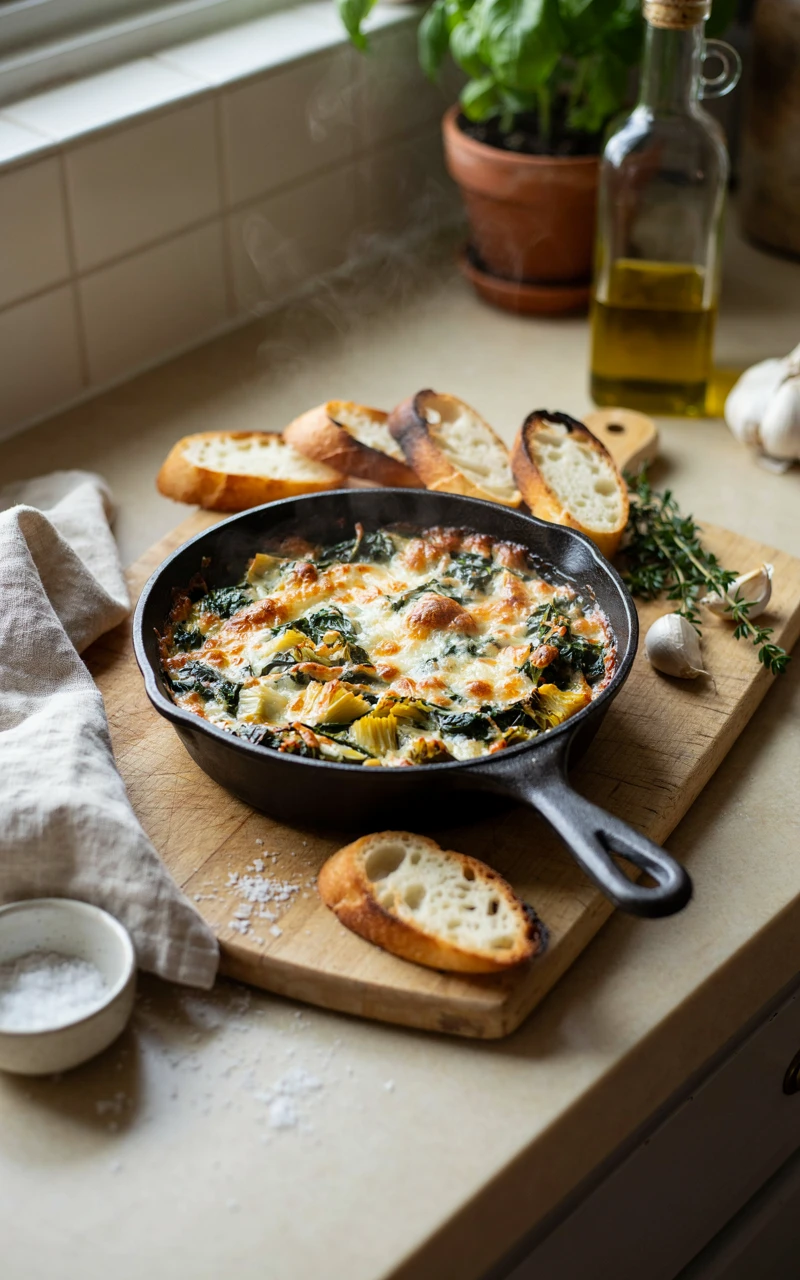
This is the ultimate party food that everyone looks for at a gathering. It is rich, creamy, and packed with flavor. Serving a warm dip gives your guests something comforting to snack on while the main meal finishes cooking.
The best part is that you can mix the whole thing together the day before. Just keep it in the fridge and bake it right before your guests arrive.
Ingredients
- 8 oz (225 g) cream cheese, softened
- 1/4 cup (60 g) sour cream
- 1/4 cup (60 g) mayonnaise
- 1 cup (100 g) grated parmesan cheese
- 1 cup (100 g) shredded mozzarella cheese
- 1 can (14 oz / 400 g) artichoke hearts, drained and chopped
- 10 oz (280 g) frozen chopped spinach, thawed and squeezed dry
- 2 cloves garlic, minced
Tools and Preparation
You will need a medium mixing bowl, a spatula, and a 1-quart (1 L) baking dish. Prep time is 10 minutes, and bake time is 25 minutes. This serves about 8 to 10 people.
Step-by-Step Instructions
- Preheat your oven to 350°F (175°C) and lightly grease your baking dish.
- In a mixing bowl, combine the softened cream cheese, sour cream, and mayonnaise until smooth.
- Stir in the parmesan cheese, half of the mozzarella cheese, and the minced garlic.
- Fold in the chopped artichoke hearts and the dry spinach until everything is evenly mixed.
- Spread the mixture into the prepared baking dish and smooth the top.
- Sprinkle the remaining mozzarella cheese evenly over the dip.
- Bake for 25 minutes until the cheese is melted and the edges are bubbling.
Common Mistakes to Avoid
Failing to squeeze the water out of the frozen spinach is a guaranteed way to end up with a watery, separated dip. Place the thawed spinach in a clean kitchen towel and wring it out completely before adding it to the bowl.
Make sure your cream cheese is fully softened at room temperature. Cold cream cheese will leave lumps in your dip that will not melt out in the oven.
Variations, Storage, and Final Thoughts
You can stir in half a cup of cooked, crumbled bacon for a smoky twist. Serve this dip with sturdy crackers, sliced baguette, or fresh vegetable sticks.
Store leftovers in the fridge for up to four days. It reheats beautifully in the microwave or back in the oven, making it a great snack for the long holiday weekend.
4. Bacon-Wrapped Brussels Sprouts
Why You’ll Love This Recipe
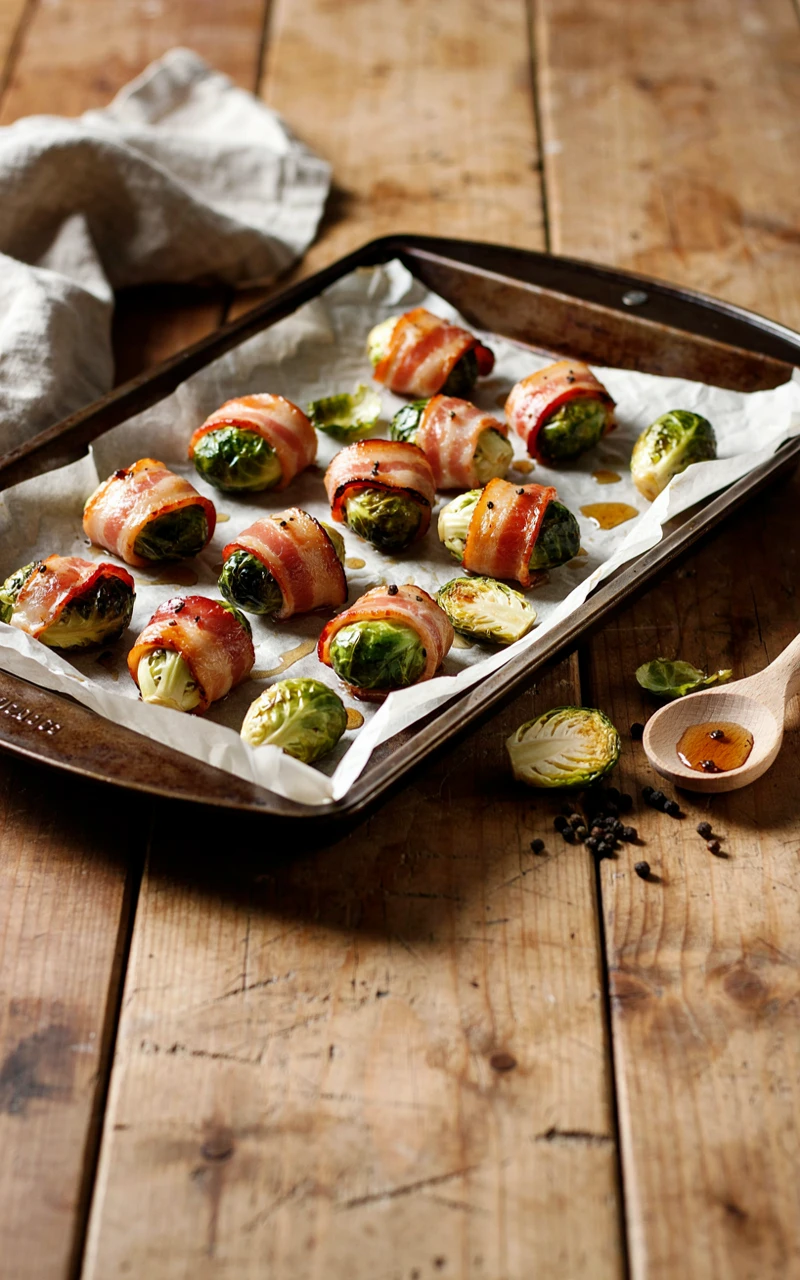
These crispy bites are known for converting people who think they hate Brussels sprouts. The salty bacon fat flavors the sprouts as they roast, while a touch of maple syrup adds a sticky, sweet finish.
They are fantastic holiday appetizers because they are easy to eat with your hands. You can prep the whole tray in the morning and just slide it into the oven when you need it.
Ingredients
- 1 lb (450 g) Brussels sprouts, trimmed and halved
- 12 slices (340 g) thin-cut bacon, cut in half
- 2 tbsp (30 ml) maple syrup
- 1/2 tsp (1 g) black pepper
Tools and Preparation
You will need a large baking sheet, parchment paper or foil, and wooden toothpicks. Prep time is 20 minutes, and bake time is 30 minutes. This makes about 24 pieces.
Step-by-Step Instructions
- Preheat your oven to 400°F (200°C) and line your baking sheet with foil for easy cleanup.
- Wash the Brussels sprouts, trim the hard stems, and cut them in half from top to bottom.
- Wrap a half-slice of bacon tightly around each Brussels sprout half.
- Secure the bacon by pushing a wooden toothpick through the center of the sprout.
- Place the wrapped sprouts on the baking sheet, leaving a little space between each one.
- Bake for 20 minutes, then remove the pan from the oven.
- Brush the tops with maple syrup and sprinkle with black pepper.
- Return to the oven for 10 more minutes until the bacon is crispy and the sprouts are tender.
Common Mistakes to Avoid
Using thick-cut bacon is a mistake here. Thick bacon takes too long to render its fat, meaning your Brussels sprouts will turn to mush before the bacon gets crispy. Stick to standard, thin-cut bacon.
Do not crowd the pan. If the sprouts are touching each other, the bacon will steam instead of crisping up.
Variations, Storage, and Final Thoughts
If you prefer a tangy finish over a sweet one, swap the maple syrup for a balsamic glaze. A sprinkle of red pepper flakes also adds a nice kick.
These are definitely best served warm right out of the oven. If you have leftovers, store them in the fridge and reheat them in an air fryer to get the bacon crispy again.
5. Butternut Squash Soup Shooters

Why You’ll Love This Recipe
Serving soup at a party can be messy, but serving it in small glasses makes it brilliant. These little shooters are elegant, cozy, and easy for guests to sip while standing and talking.
The soup is silky smooth and brings all the classic flavors of fall. It is a great way to offer something warm and comforting without filling your guests up too much before the turkey.
Ingredients
- 1 medium (900 g) butternut squash, peeled and cubed
- 1 medium (150 g) yellow onion, chopped
- 2 tbsp (30 ml) olive oil
- 3 cups (710 ml) vegetable broth
- 1/2 cup (120 ml) heavy cream
- 1/2 tsp (1 g) ground nutmeg
- 1 tsp (5 g) salt
Tools and Preparation
You will need a large pot, a blender or immersion blender, and small shot glasses or espresso cups for serving. Prep time is 15 minutes, and cook time is 25 minutes. This makes about 20 small shooters.
Step-by-Step Instructions
- Heat the olive oil in a large pot over medium heat.
- Add the chopped onion and cook for 5 minutes until soft and translucent.
- Add the cubed butternut squash, vegetable broth, and salt to the pot.
- Bring the mixture to a boil, then reduce the heat, cover, and simmer for 20 minutes until the squash is very tender.
- Remove the pot from the heat and carefully blend the soup until completely smooth.
- Stir in the heavy cream and ground nutmeg.
- Pour the warm soup into small glasses and serve immediately.
Common Mistakes to Avoid
Making the soup too thick is a problem when you want people to drink it from a glass. If your squash was particularly large, you might need to add an extra splash of broth to thin it out to a drinkable consistency.
Be very careful when blending hot liquids. If you are using a traditional blender, only fill it halfway and leave the vent open slightly so steam can escape.
Variations, Storage, and Final Thoughts
Top each shooter with a single toasted pumpkin seed or a tiny drop of sour cream for a finished look. You can also add a pinch of cayenne pepper if you like a little heat.
This soup can be made up to three days in advance and kept in the fridge. Simply reheat it on the stove and pour it into your glasses right before serving.
6. Sausage Stuffed Mushrooms

Why You’ll Love This Recipe
Stuffed mushrooms are a staple when it comes to classic Thanksgiving recipes. They are savory, earthy, and incredibly satisfying. The rich sausage filling pairs perfectly with the tender mushroom caps.
Because they are individually portioned, they are easy to grab off a tray. They also make your kitchen smell amazing while they bake.
Ingredients
- 24 large (450 g) cremini or white button mushrooms
- 1/2 lb (225 g) ground Italian sausage
- 4 oz (115 g) cream cheese, softened
- 1/4 cup (25 g) grated parmesan cheese
- 2 cloves garlic, minced
- 2 tbsp (10 g) fresh parsley, chopped
Tools and Preparation
You will need a skillet, a baking sheet, and a small spoon. Prep time is 20 minutes, and bake time is 20 minutes. This recipe makes 24 stuffed mushrooms.
Step-by-Step Instructions
- Preheat your oven to 375°F (190°C) and lightly grease a baking sheet.
- Wipe the mushrooms clean with a damp paper towel and carefully pop out the stems.
- Chop the mushroom stems finely and set them aside.
- In a skillet over medium heat, cook the Italian sausage, breaking it into very small pieces.
- Add the chopped mushroom stems and minced garlic to the skillet, cooking for 3 more minutes.
- Drain any excess fat from the skillet, then transfer the mixture to a bowl.
- Stir the softened cream cheese, parmesan, and parsley into the warm sausage mixture until combined.
- Spoon the filling into the mushroom caps, pressing it down gently, and place them on the baking sheet.
- Bake for 20 minutes until the mushrooms are tender and the filling is browned on top.
Common Mistakes to Avoid
Do not wash your mushrooms under running water. Mushrooms act like sponges, and if they soak up water, they will turn soggy and release a puddle of liquid onto your baking sheet. Always wipe them clean with a damp cloth instead.
Make sure your sausage is fully cooked before mixing it with the cheese. According to USDA safe minimum internal temperature guidelines, ground sausage needs to reach 160°F (71°C).
Variations, Storage, and Final Thoughts
You can use spicy Italian sausage if your family likes a little heat. If you end up with leftover filling, it actually makes a great base for healthy fall dinner ideas later in the week when mixed with pasta.
Store leftover mushrooms in an airtight container in the fridge for up to three days. Reheat them in the oven rather than the microwave so they do not get rubbery.
7. Caramelized Onion and Gruyère Tartlets

Why You’ll Love This Recipe
These tartlets taste exactly like a bowl of French onion soup baked into a crispy crust. The sweetness of the slow-cooked onions balances perfectly with the nutty, salty flavor of the Gruyère cheese.
They look incredibly fancy, but using store-bought pie crust keeps the process simple. They are a wonderful savory addition to your appetizer spread.
Ingredients
- 1 package (400 g) refrigerated pie crust (2 crusts)
- 2 large (400 g) yellow onions, thinly sliced
- 2 tbsp (30 g) butter
- 1 tbsp (15 ml) olive oil
- 1 cup (100 g) shredded Gruyère cheese
- 1 tsp (1 g) fresh thyme leaves
- 1/4 tsp (1 g) salt
Tools and Preparation
You will need a large skillet, a mini muffin tin, and a round cookie cutter. Prep time is 35 minutes, and bake time is 15 minutes. This makes 24 tartlets.
Step-by-Step Instructions
- Melt the butter and olive oil in a large skillet over medium-low heat.
- Add the sliced onions and salt, cooking slowly for 30 minutes and stirring occasionally until they are deep golden brown and soft.
- Preheat your oven to 400°F (200°C) and unroll the pie crusts.
- Use a 2.5-inch (6 cm) round cutter to cut 24 circles out of the pie dough.
- Press one dough circle into each cup of a mini muffin tin.
- Place a small spoonful of the caramelized onions into each dough cup.
- Top the onions with a generous pinch of shredded Gruyère cheese and a few thyme leaves.
- Bake for 12 to 15 minutes until the crust is golden and the cheese is melted and bubbly.
Common Mistakes to Avoid
Rushing the onions is the quickest way to ruin this recipe. If you turn the heat up to cook them faster, they will burn rather than caramelize. True caramelization takes time, so be patient and let them cook low and slow.
Do not overfill the tartlets. The cheese will expand as it melts, and if the cups are too full, it will run over the edges and stick to the pan.
Variations, Storage, and Final Thoughts
You can use puff pastry instead of pie crust if you prefer a flakier base. Adding a splash of balsamic vinegar to the onions right at the end of cooking also adds a great depth of flavor.
These tartlets are great warm or at room temperature. You can caramelize the onions a few days in advance to save time on Thanksgiving day.
8. Maple Glazed Pecans
Why You’ll Love This Recipe
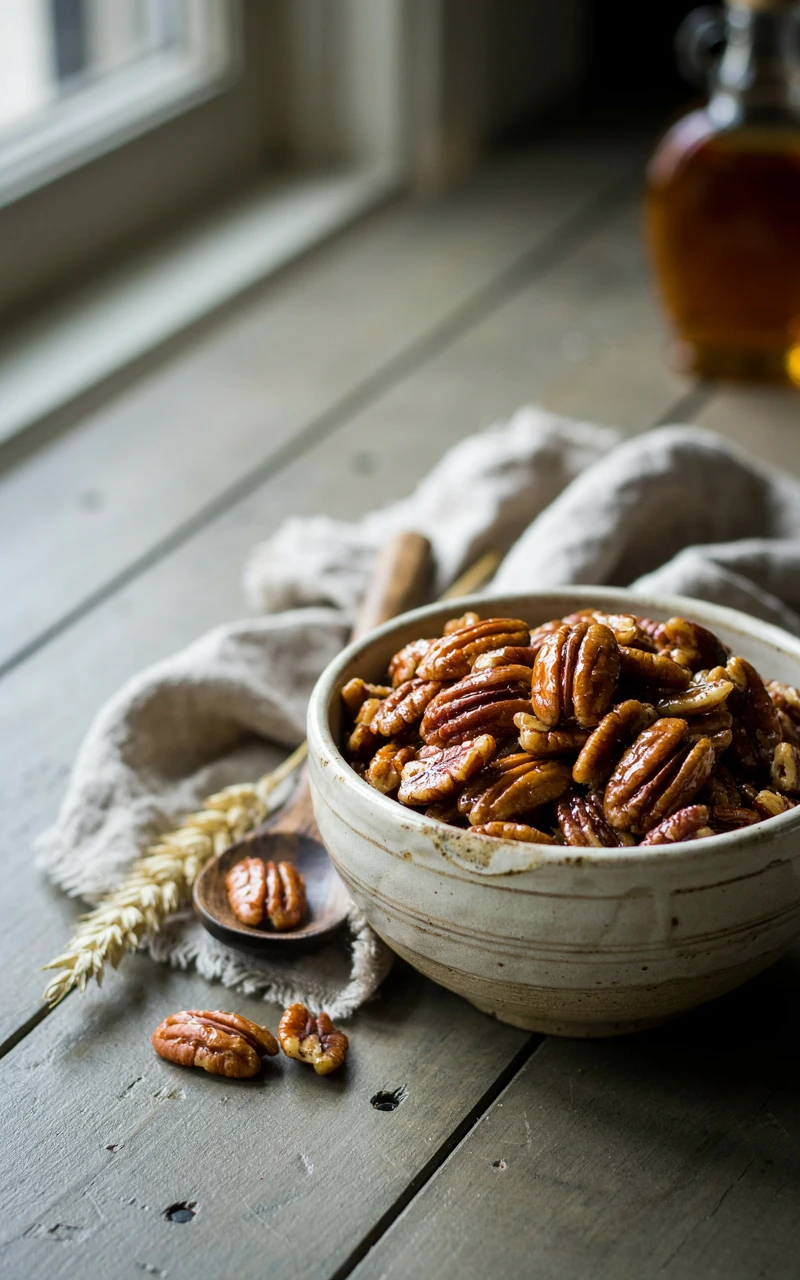
Every party needs a good bowl of nuts to snack on. These pecans are crunchy, sweet, and lightly salted. They are incredibly easy to make and require zero oven space.
Having a few bowls of these scattered around the living room keeps people happy while they wait for the main event. They also make your house smell like a bakery.
Ingredients
- 2 cups (200 g) pecan halves
- 3 tbsp (45 ml) maple syrup
- 1 tbsp (15 g) brown sugar
- 1/2 tsp (1 g) ground cinnamon
- 1/2 tsp (3 g) flaky sea salt
Tools and Preparation
You will need a medium skillet, a rubber spatula, and a piece of parchment paper. Prep time is 2 minutes, and cook time is 5 minutes. This makes 2 cups of nuts.
Step-by-Step Instructions
- Place a medium skillet over medium heat and add the pecan halves.
- Toast the pecans dry for 2 to 3 minutes, stirring frequently until they smell fragrant.
- In a small bowl, quickly mix the maple syrup, brown sugar, and cinnamon.
- Pour the syrup mixture over the pecans in the skillet and stir constantly.
- Cook for 1 to 2 minutes until the liquid bubbles, thickens, and coats the nuts completely.
- Immediately pour the coated nuts onto a sheet of parchment paper and spread them into a single layer.
- Sprinkle the flaky sea salt over the warm nuts and let them cool completely.
Common Mistakes to Avoid
Walking away from the stove is a bad idea here. Nuts go from perfectly toasted to burned in a matter of seconds. Keep stirring them constantly once they are in the pan.
Make sure you separate the nuts on the parchment paper while they are still hot. If they cool in a big pile, they will harden into one giant brittle block.
Variations, Storage, and Final Thoughts
If you like a sweet and spicy combination, add a quarter teaspoon of cayenne pepper to the syrup mixture. You can also mix in walnuts or almonds if you want a variety.
These can be made up to a week in advance. Store them in an airtight container at room temperature, and you will have a perfect snack ready to go on Thanksgiving morning.
9. Savory Pumpkin Hummus
Why You’ll Love This Recipe
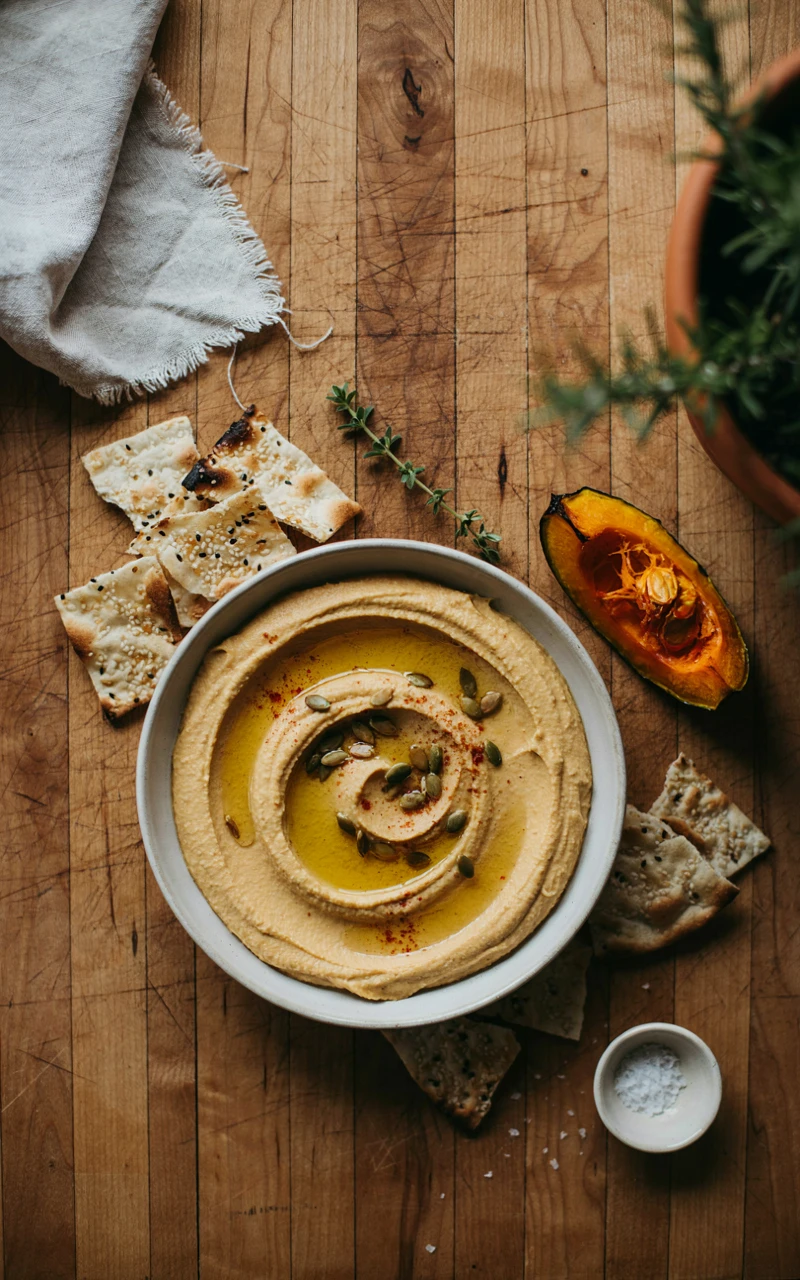
If you want a fast and colorful addition to your spread, this hummus is a winner. It brings a bright orange hue to the table and tastes incredibly fresh. Serving traditional Thanksgiving food can sometimes feel a bit heavy, so having a lighter dip is always a nice change of pace.
Plus, it comes together in minutes using mostly pantry staples. It is a great vegan option for your guests, too.
Ingredients
- 1 can (15 oz / 425 g) chickpeas, rinsed and drained
- 1 cup (225 g) plain pumpkin puree
- 1/4 cup (60 ml) tahini
- 2 tbsp (30 ml) olive oil
- 2 tbsp (30 ml) fresh lemon juice
- 2 cloves garlic, minced
- 1 tsp (2 g) ground cumin
- 1/2 tsp (3 g) salt
Tools and Preparation
You will need a food processor or a strong blender. Prep time is 10 minutes. This makes about 2 cups of hummus.
Step-by-Step Instructions
- Place the rinsed chickpeas, pumpkin puree, and tahini into the bowl of your food processor.
- Add the olive oil, lemon juice, minced garlic, cumin, and salt.
- Blend on high for 2 to 3 minutes, stopping to scrape down the sides of the bowl as needed.
- If the hummus is too thick, add one tablespoon of warm water at a time until you reach your desired consistency.
- Transfer the hummus to a serving bowl.
- Use the back of a spoon to create a shallow well in the center, and drizzle a little extra olive oil on top.
Common Mistakes to Avoid
The most common error is buying the wrong kind of canned pumpkin. You need plain pumpkin puree, not pumpkin pie filling. If you have leftover puree from making easy pumpkin bread, this is the perfect way to use it up.
Also, do not skip rinsing the chickpeas. The liquid in the can is very thick and salty, and leaving it on the beans will throw off the flavor of your hummus.
Variations, Storage, and Final Thoughts
Garnish the bowl with toasted pepitas (pumpkin seeds) or a sprinkle of smoked paprika for extra flavor. Serve this dip with pita chips, apple slices, or thick carrot sticks.
You can make this hummus up to four days in advance. Keep it covered in the fridge, and just give it a quick stir before setting it out for your guests.
10. Prosciutto-Wrapped Asparagus
Why You’ll Love This Recipe
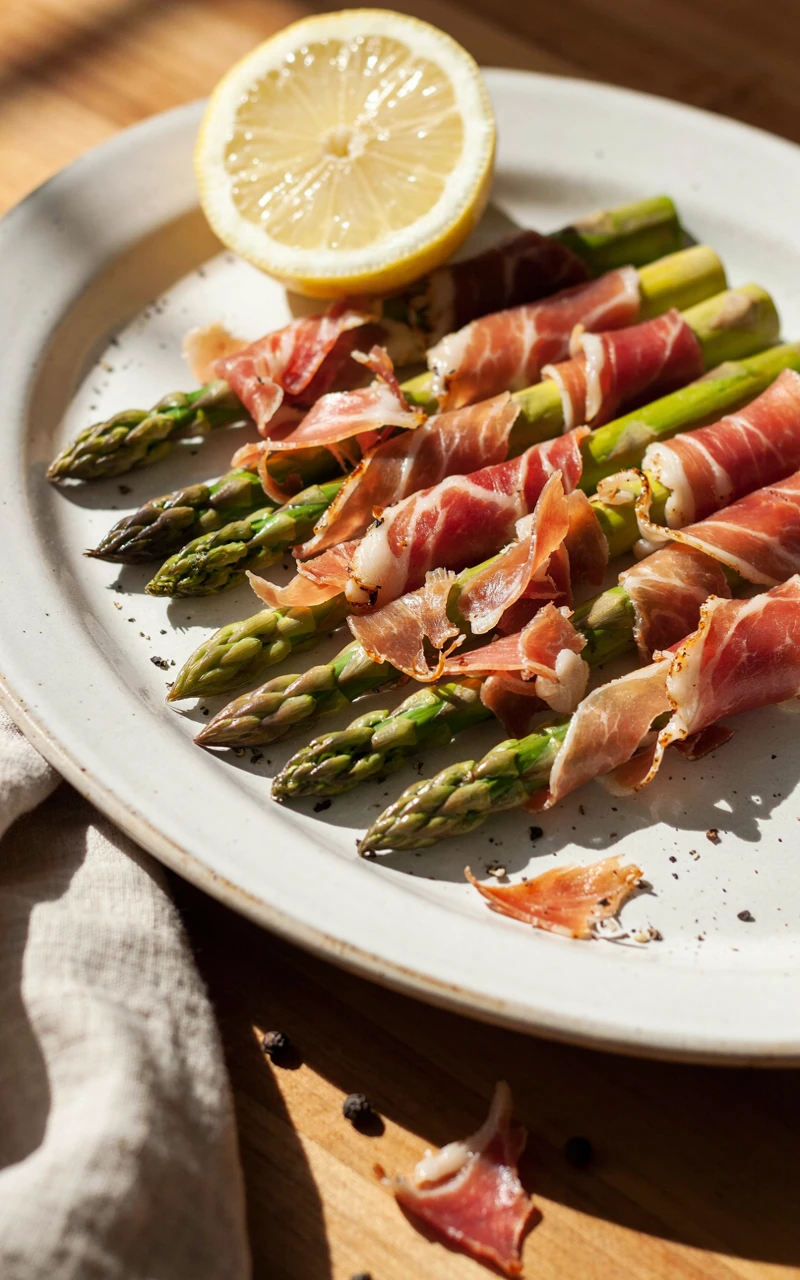
When you are looking for simple appetizer recipes, it is hard to beat something that only requires three ingredients. The salty, crispy prosciutto wraps tightly around the tender asparagus spears for a perfect bite.
They look very elegant on a platter but take almost no effort to make. They also bake at a high temperature, meaning they cook fast and get out of the oven quickly.
Ingredients
- 1 bunch (about 1 lb / 450 g) fresh asparagus
- 4 oz (115 g) thinly sliced prosciutto
- 1 tbsp (15 ml) olive oil
- 1/4 tsp (1 g) black pepper
Tools and Preparation
You will need a large baking sheet and parchment paper. Prep time is 10 minutes, and bake time is 12 minutes. This makes about 15 to 20 wrapped spears.
Step-by-Step Instructions
- Preheat your oven to 400°F (200°C) and line a baking sheet with parchment paper.
- Wash the asparagus and snap off the tough, woody ends of each spear.
- Cut each slice of prosciutto in half lengthwise to create long, thin strips.
- Starting just below the tip, wrap one strip of prosciutto tightly in a spiral down the length of each asparagus spear.
- Place the wrapped spears on the baking sheet in a single layer.
- Lightly brush the exposed asparagus tips with olive oil and sprinkle with black pepper.
- Bake for 10 to 12 minutes until the asparagus is tender and the prosciutto is crispy.
Common Mistakes to Avoid
Do not use thick asparagus spears if you can avoid it. Very thick spears will still be crunchy by the time the prosciutto is fully cooked. Look for medium or thin spears at the store.
Avoid wrapping the meat too thickly in one spot. If the prosciutto overlaps itself too much, it will steam instead of getting crispy in the oven.
Variations, Storage, and Final Thoughts
If you want to add a little cheese, sprinkle some grated parmesan over the spears right after they come out of the oven. A squeeze of fresh lemon juice also brightens them up.
These are best eaten fresh, but you can wrap the spears in the morning and leave them on the baking sheet in the fridge until you are ready to cook them.
Planning the food for a big holiday does not have to be stressful if you get a head start on the small bites. Having a few of these recipes ready to go means you can actually enjoy the day with your family instead of hiding in the kitchen. I always feel much more relaxed when I know the snacks are handled. Pick two or three of these to try this year, and let me know in the comments which ones your family loved the most!