This post may contain affiliate links, which means I may receive a small commission should you decide to click that link and make a purchase. For more information please refer to the Terms & Conditions.

Unique Christmas cookie ideas are a simple way to make your baking feel like a creative holiday instead of the same routine.
I love the idea of setting out a cookie plate where every single cookie looks and tastes a little different.
You don’t need fancy skills or special tools to bake something new this year.
Most of these recipes start with butter, sugar, flour, and eggs.
A few fun add-ins, like crushed candy, warm spices, citrus zest, or a jar of jam, do most of the work.
Below, you’ll find 15 unique Christmas cookies to bake this season.
Each one comes with ingredients, tools, numbered steps, and tips to help you fill your cookie tin with shapes and flavors your family will remember.
1. Ugly Christmas Sweater Sugar Cookies
Why You’ll Love This Recipe
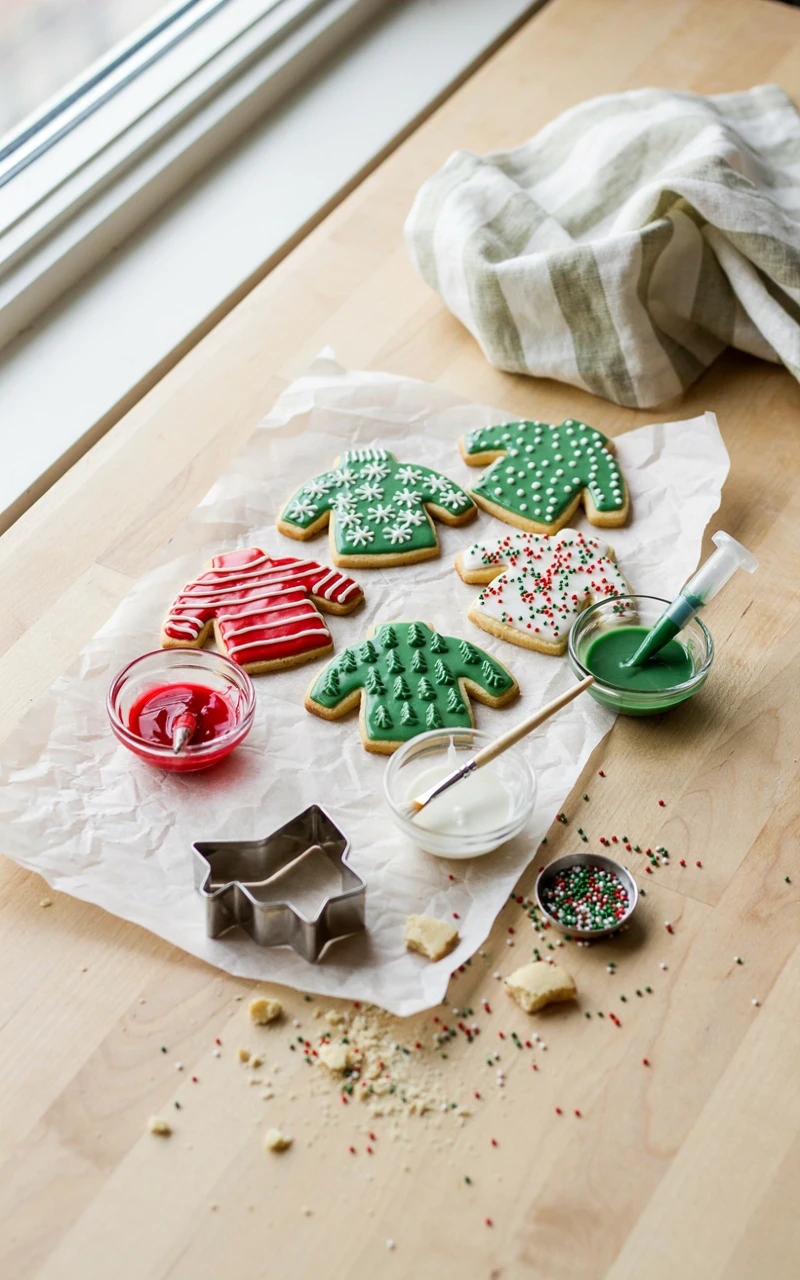
These cookies are pure fun. You bake a soft, sturdy sugar cookie in the shape of a sweater, then go wild with icing, sprinkles, and silly patterns.
They’re one of the best Christmas cookie shape ideas for a family decorating night. Kids can pipe zigzags and polka dots, and nobody can mess them up, because the uglier the sweater, the better.
Ingredients
For the cookies:
- 3 cups (360 g) all-purpose flour
- 1/2 tsp (2 g) baking powder
- 1/4 tsp (1.5 g) salt
- 1 cup (226 g) unsalted butter, softened
- 1 cup (200 g) granulated sugar
- 1 large egg, at room temperature
- 2 tsp (10 ml) vanilla extract
- 1/2 tsp (2.5 ml) almond extract
For the royal icing:
- 3 cups (360 g) powdered sugar
- 2 tbsp (20 g) meringue powder
- 5 to 6 tbsp (75 to 90 ml) warm water
- Gel food coloring in red, green, and white
- Sprinkles, nonpareils, and small candies
Tools and Preparation
- Stand mixer or hand mixer
- Rolling pin and parchment paper
- Sweater-shaped cookie cutter, about 3.5 inches (9 cm)
- Piping bags with small round tips, or zip-top bags
- Two baking sheets lined with parchment
Prep takes about 30 minutes, plus 1 hour of chilling. Each batch bakes for 9 to 11 minutes, and decorating takes as long as you want it to. This recipe makes about 20 cookies.
No sweater cutter? Cut a rectangle with a knife and add two short sleeves on the sides. A paper template laid on the dough works well too.
Step-by-Step Instructions
- Whisk the flour, baking powder, and salt in a bowl.
- Beat the butter and sugar for 2 to 3 minutes until pale and fluffy. Add the egg, vanilla, and almond extract and beat until smooth.
- Mix in the dry ingredients on low just until the dough comes together.
- Split the dough in half, roll each half between two sheets of parchment to 1/4 inch (6 mm) thick, and chill for 1 hour.
- Heat the oven to 350°F (175°C). Cut out sweaters and place them 1 inch (2.5 cm) apart on the lined sheets.
- Bake 9 to 11 minutes, until the edges look set but not brown. Cool 5 minutes on the sheet, then move to a rack.
- Beat the powdered sugar, meringue powder, and water for 4 to 5 minutes until glossy. Tint small bowls of it with gel color.
- Outline and fill each sweater, add sprinkles while the icing is wet, then pipe stripes, trees, and snowflakes on top once the base has set for about 1 hour.
Common Mistakes to Avoid
- Skipping the chill. Warm dough spreads, and your sweaters lose their sleeves.
- Overbaking. Pull them while the tops are still pale for a soft bite.
- Icing warm cookies. The icing will melt and slide right off.
Variations, Storage, and Final Thoughts
Swap the almond extract for 1 tsp of orange zest, or make a chocolate version by trading 1/2 cup (60 g) of flour for cocoa powder. You can also use the same dough for mittens and hats.
Let the icing dry overnight, then store the cookies in a single layer in an airtight tin for up to 1 week. Undecorated cookies freeze well for 3 months.
Hand out prizes for the silliest sweater. It’s a sweet way to get everyone at the table laughing.
2. Stained Glass Star Cookies
Why You’ll Love This Recipe
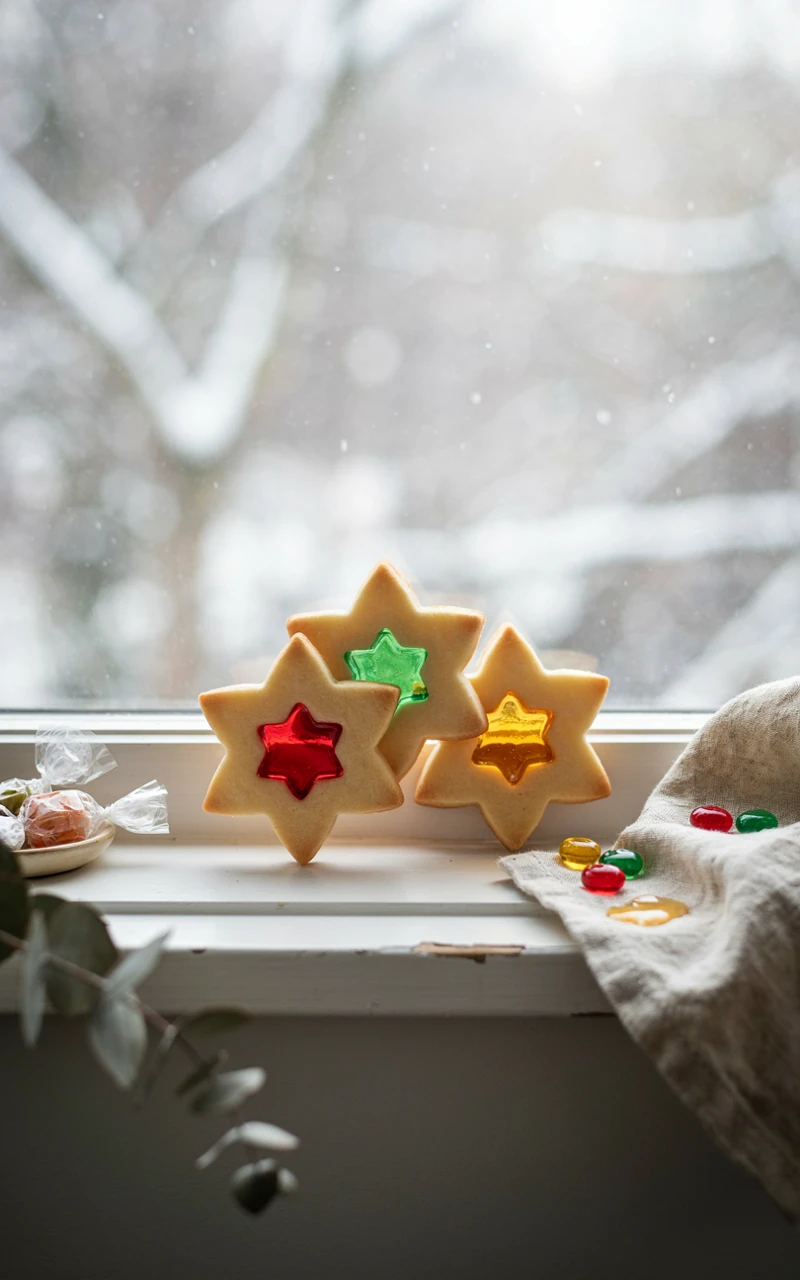
These cookies have a little window of melted candy in the middle that glows when the light hits it. They look like tiny ornaments, and they’re much easier than they look.
The lemon zest in the dough keeps the cookie bright and fresh next to the sweet candy center. If you poke a hole at the top before baking, you can even hang them on the tree.
Ingredients
- 2 3/4 cups (330 g) all-purpose flour
- 1/2 tsp (3 g) salt
- 3/4 cup (170 g) unsalted butter, softened
- 3/4 cup (150 g) granulated sugar
- 1 large egg
- 1 tsp (5 ml) vanilla extract
- Zest of 1 lemon
- 20 clear hard candies, about 3.5 oz (100 g), in mixed colors
Tools and Preparation
- Large star cookie cutter, about 3 inches (7.5 cm)
- Small star or circle cutter, about 1 inch (2.5 cm), for the window
- Zip-top bags and a rolling pin for crushing candy
- Parchment paper or a silicone baking mat (this part matters)
Prep takes 30 minutes plus 1 hour of chilling, and each batch bakes for 8 to 10 minutes. You’ll get about 24 cookies.
Sort the candies by color into separate bags, then crush them into small, gravel-sized bits. Fine dust melts cloudy, so leave a little crunch in there.
Step-by-Step Instructions
- Whisk the flour and salt together.
- Beat the butter, sugar, and lemon zest until fluffy, about 2 minutes. Beat in the egg and vanilla.
- Add the flour mixture on low until just combined. Roll between parchment to 1/4 inch (6 mm) and chill 1 hour.
- Heat the oven to 350°F (175°C).
- Cut the large stars and place them on a parchment-lined sheet. Cut a small window from the center of each.
- Fill each window with crushed candy, level with the dough. Don’t heap it.
- Bake 8 to 10 minutes, until the candy has melted smooth and the edges are just barely golden.
- Cool completely on the sheet, about 20 minutes, before you move them. The candy needs that time to harden.
Common Mistakes to Avoid
- Baking on a bare pan. The candy will glue itself to the metal.
- Overfilling the window. Extra candy bubbles over onto the cookie.
- Moving them too soon. Warm candy bends and cracks.
Variations, Storage, and Final Thoughts
Try hearts, snowflakes, or trees instead of stars. You can also mix two candy colors in one window for a swirled look.
Store the cookies in a single layer, in an airtight tin, somewhere cool and dry. Humidity makes the candy sticky, so plan to eat them within 5 days.
If you hang a few on the tree or tie them onto gifts, they pair nicely with other unique Christmas decorations around the house.
3. Candy Cane Twist Cookies
Why You’ll Love This Recipe
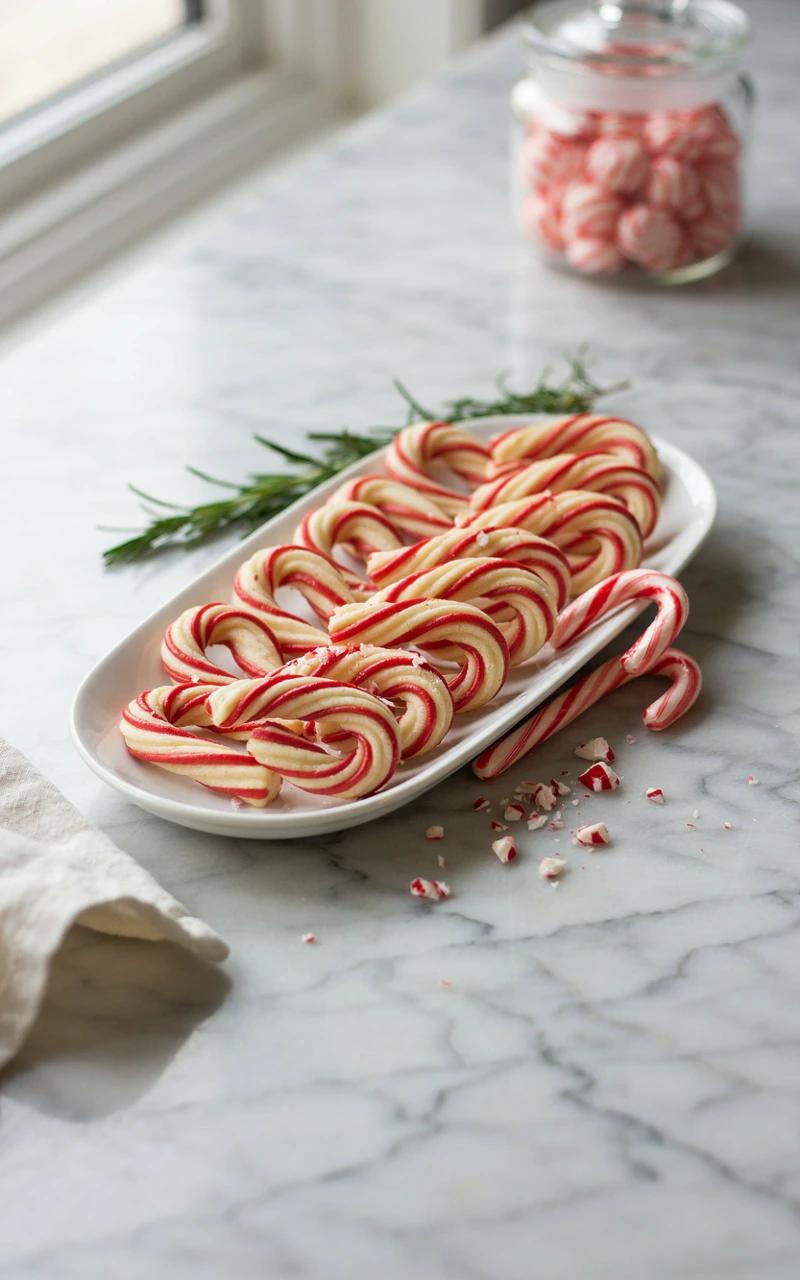
These cookies are buttery, minty, and shaped just like a little candy cane. Two colors of dough are rolled into ropes, twisted together, and bent into a hook.
They’re tender like shortbread and sprinkled with crushed candy cane sugar for a little sparkle. Kids love rolling the ropes, and the result always looks impressive.
Ingredients
- 1 cup (226 g) unsalted butter, softened
- 1 cup (120 g) powdered sugar
- 1 large egg
- 1 tsp (5 ml) vanilla extract
- 1 tsp (5 ml) peppermint extract
- 1/2 tsp (3 g) salt
- 2 1/2 cups (300 g) all-purpose flour
- 1/2 tsp red gel food coloring
- 1/4 cup (50 g) granulated sugar, for topping
- 2 candy canes, crushed, about 1 oz (30 g)
Tools and Preparation
- Mixer and two bowls
- Plastic wrap
- Two parchment-lined baking sheets
Prep takes 40 minutes, and each batch bakes for about 9 minutes. This makes about 30 cookies.
Mix the crushed candy cane with the granulated sugar in a small bowl before you start shaping.
Step-by-Step Instructions
- Heat the oven to 375°F (190°C).
- Beat the butter and powdered sugar until creamy. Add the egg, vanilla, peppermint, and salt.
- Mix in the flour until a soft dough forms.
- Split the dough in half. Knead the red gel into one half until the color is even.
- Roll 1 tsp of each dough into a 4 inch (10 cm) rope. Lay the two ropes side by side, pinch the ends, and twist gently.
- Place on the sheet and bend the top into a hook.
- Bake about 9 minutes, until the bottoms are lightly golden and the tops still look pale.
- Sprinkle with the candy cane sugar right away, then cool on the sheet for 5 minutes.
Common Mistakes to Avoid
- Ropes that are too thin. They break when you twist them. Keep them about pencil thickness.
- Warm dough. If the dough gets soft and sticky, chill it for 15 minutes.
- Too much extract. Peppermint is strong, so stick to 1 tsp.
Variations, Storage, and Final Thoughts
Swap the red for green and the peppermint for almond for a different look. You can also dip the bottom of each cane in melted white chocolate.
Keep them in an airtight tin for up to 1 week, or freeze for up to 2 months. They travel well in cookie swaps because they’re sturdy.
These are a nice, easy win for younger bakers. Just give everyone a ball of red and a ball of white and let them twist away.
4. Matcha Spritz Wreath Cookies
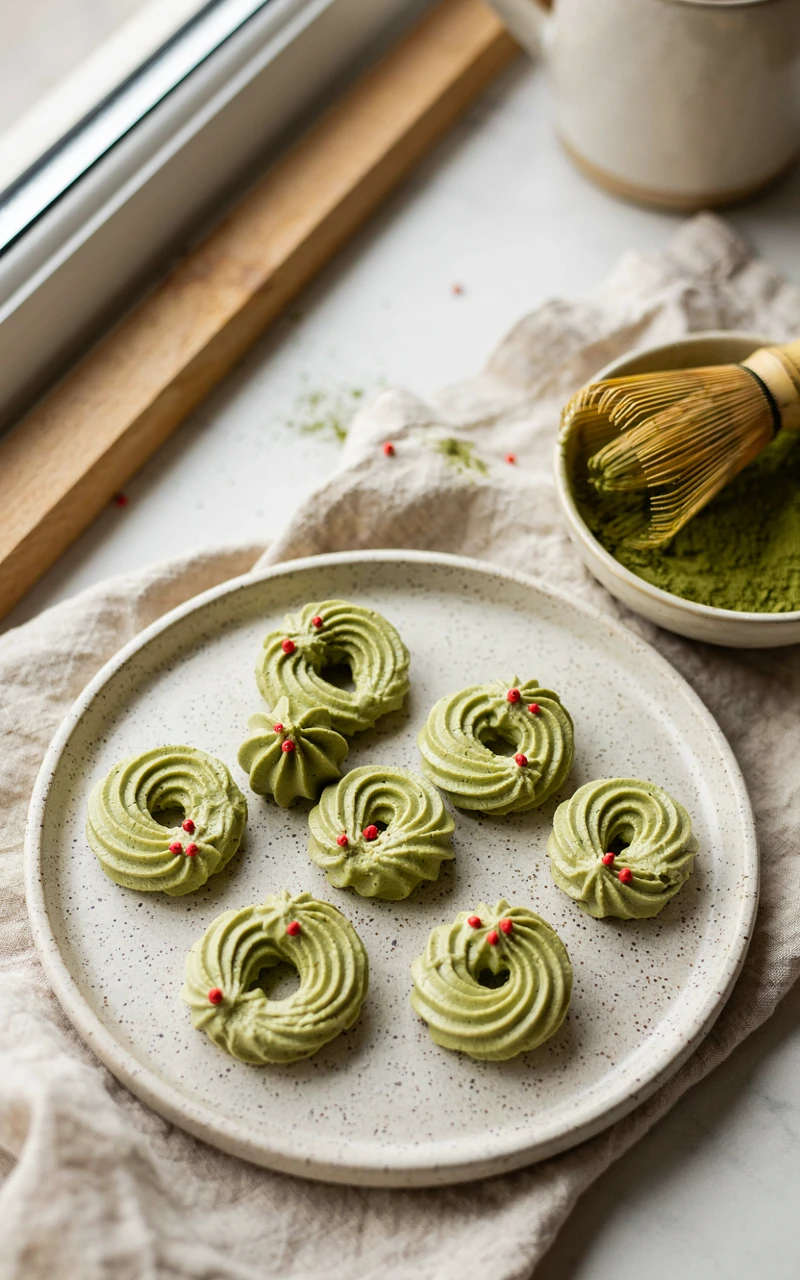
Why You’ll Love This Recipe
Spritz cookies are an old classic, and matcha gives them a natural green color with no food dye. Piped into little rings, they look like tiny wreaths.
The matcha flavor is mild and a little earthy, which keeps these buttery cookies from tasting too sweet. They’re a great pick when you want Christmas cookie flavor ideas that feel new but still cozy.
Ingredients
- 1 cup (226 g) unsalted butter, softened
- 2/3 cup (135 g) granulated sugar
- 1 large egg
- 1 tsp (5 ml) vanilla extract
- 1/4 tsp (1.5 g) salt
- 1 tbsp (6 g) culinary-grade matcha powder
- 2 1/4 cups (270 g) all-purpose flour
- 1 to 2 tbsp (15 to 30 ml) milk, if piping
- Red cinnamon candies or red nonpareils, for berries
Tools and Preparation
- Cookie press with a wreath or star disk, or a piping bag with a large open star tip
- Two ungreased, unlined baking sheets for a cookie press
- Parchment-lined sheets if piping
- Fine mesh sieve
Prep takes 25 minutes, and each batch bakes for 8 to 10 minutes. You’ll get about 48 small cookies.
Sift the matcha with the flour so you don’t get green clumps in the dough.
Step-by-Step Instructions
- Heat the oven to 375°F (190°C).
- Sift the flour, matcha, and salt together.
- Beat the butter and sugar until fluffy, about 2 minutes. Add the egg and vanilla.
- Mix in the dry ingredients until just combined. If you’re piping, add milk 1 tbsp at a time until the dough pipes smoothly.
- Fill the press or piping bag. Press cookies directly onto the cold sheet, or pipe 2 inch (5 cm) rings.
- Press 2 or 3 red candies onto each wreath.
- Bake 8 to 10 minutes, until the bottoms are just turning golden. The tops should stay green.
- Cool 2 minutes on the sheet, then move to a rack.
Common Mistakes to Avoid
- Chilling the dough. Spritz dough needs to be soft and room temperature to come out of the press.
- Using parchment with a press. The cookies need a bare pan to grab onto.
- Overbaking. Matcha turns dull and brown when the cookies bake too long.
Variations, Storage, and Final Thoughts
For a plain version, skip the matcha and add a drop of green gel color. You can also dip half of each wreath in melted white chocolate.
Store the cookies in an airtight tin for up to 2 weeks. They also freeze well for 3 months.
A cookie press can feel tricky at first. Your first two or three cookies might be wonky, so just scrape them back into the dough and keep going.
5. Christmas Tree Meringue Cookies

Why You’ll Love This Recipe
These little piped trees are crisp on the outside and melt in your mouth. They’re made from egg whites and sugar, so they’re naturally gluten-free and very light.
A swirl of green and a few sprinkle “ornaments” make them look like a tiny forest on your cookie plate. They’re a good choice for guests who want something sweet that isn’t heavy.
Ingredients
- 3 large egg whites, about 3 oz (90 g), at room temperature
- 1/4 tsp (1 g) cream of tartar
- Pinch of salt
- 3/4 cup (150 g) superfine sugar
- 1/2 tsp (2.5 ml) vanilla or peppermint extract
- Green gel food coloring
- Small sprinkles or nonpareils
Tools and Preparation
- Spotlessly clean metal or glass bowl
- Stand mixer or hand mixer
- Piping bag with a large open star tip
- Two parchment-lined baking sheets
Prep takes 20 minutes. They bake for 1.5 to 2 hours and then sit in the oven for another hour, so plan about 3.5 hours total. This makes about 36 trees.
Wipe your bowl and whisk with a little vinegar first. Any grease will keep the whites from whipping.
Step-by-Step Instructions
- Heat the oven to 200°F (95°C).
- Beat the egg whites, cream of tartar, and salt on medium until foamy.
- Raise the speed to high and add the sugar 1 tbsp at a time, waiting a few seconds between each.
- Beat until the meringue is thick, glossy, and holds stiff peaks, about 5 to 7 minutes. Rub a bit between your fingers; it should not feel gritty.
- Beat in the extract and a few drops of green gel.
- Pipe trees by starting wide at the bottom and pulling up in a swirl, about 2 inches (5 cm) tall.
- Add sprinkles right away.
- Bake 1.5 to 2 hours, until the trees lift off the parchment cleanly. Turn off the oven and leave them inside for 1 hour.
Common Mistakes to Avoid
- Any yolk in the whites. Even a tiny bit stops them from whipping.
- Adding sugar too fast. The meringue can turn runny and weepy.
- Baking on a humid day. Meringues soak up moisture and get sticky.
Variations, Storage, and Final Thoughts
Try white trees with silver sprinkles for a snowy look, or fold in 1 tbsp (5 g) of cocoa for chocolate meringues. A pinch of crushed candy cane on top adds crunch.
Store them in an airtight container at room temperature for up to 2 weeks. Never put them in the fridge, since they’ll go soft.
These trees also make a cute topper. If you’re planning a holiday cake, they fit right in with these Christmas cake designs.
6. Reindeer Peanut Butter Pretzel Cookies

Why You’ll Love This Recipe
This is a soft, chewy peanut butter cookie with pretzel antlers, candy eyes, and a shiny red nose. It’s one of those fun Christmas cookie ideas that kids ask for every year.
The salty pretzel and sweet peanut butter go together really well. Decorating is quick, because everything gets pressed in while the cookies are still warm.
Ingredients
- 1 1/2 cups (180 g) all-purpose flour
- 1/2 tsp (3 g) baking soda
- 1/4 tsp (1.5 g) salt
- 1/2 cup (113 g) unsalted butter, softened
- 1/2 cup (130 g) creamy peanut butter
- 1/2 cup (100 g) packed brown sugar
- 1/2 cup (100 g) granulated sugar
- 1 large egg
- 1 tsp (5 ml) vanilla extract
- 24 small pretzel twists, broken in half
- 48 candy eyes
- 24 red candy-coated chocolates
Tools and Preparation
- Mixer
- 1.5 tbsp cookie scoop
- Two parchment-lined baking sheets
Prep takes 20 minutes, and each batch bakes for 9 to 10 minutes. You’ll get 24 reindeer.
Break all the pretzels and sort the eyes and noses into little bowls before the cookies come out. You’ll need to move fast.
Step-by-Step Instructions
- Heat the oven to 350°F (175°C).
- Whisk the flour, baking soda, and salt.
- Beat the butter, peanut butter, and both sugars until creamy. Add the egg and vanilla.
- Mix in the dry ingredients until just combined.
- Scoop balls and roll them into slight ovals so they bake into a face shape. Space them 2 inches (5 cm) apart.
- Bake 9 to 10 minutes, until the edges are set and the centers look a little soft.
- Right away, press two pretzel halves into the top for antlers, two eyes in the middle, and a red nose near the bottom.
- Cool on the sheet for 10 minutes so the decorations set.
Common Mistakes to Avoid
- Using natural peanut butter. The oil separates and the cookies spread flat.
- Waiting to decorate. Cooled cookies crack when you press things in.
- Overbaking. They firm up as they cool, so pull them while soft.
Variations, Storage, and Final Thoughts
Use a chocolate cookie base for darker reindeer, or swap the pretzels for mini chocolate-covered pretzels. Sunflower seed butter works for a nut-free version.
Store them in an airtight container for up to 5 days. The pretzels soften after that.
Line them up on a platter so they look like a herd. It’s a simple touch that makes everyone smile.
7. Hot Cocoa Marshmallow Cookies

Why You’ll Love This Recipe
These cookies taste like a mug of hot chocolate. A soft chocolate cookie gets a toasty marshmallow on top and a drizzle of melted chocolate.
They’re gooey, rich, and perfect with a glass of cold milk. If you’re setting up a cocoa bar or a cozy Christmas home for movie night, these belong on the tray.
Ingredients
- 1 1/2 cups (180 g) all-purpose flour
- 1/2 cup (45 g) unsweetened cocoa powder
- 1 packet (1 oz / 28 g) hot cocoa mix
- 1 tsp (6 g) baking soda
- 1/2 tsp (3 g) salt
- 1/2 cup (113 g) unsalted butter, softened
- 3/4 cup (150 g) packed brown sugar
- 1/4 cup (50 g) granulated sugar
- 1 large egg
- 1 tsp (5 ml) vanilla extract
- 2 tbsp (30 ml) milk
- 12 large marshmallows, cut in half
- 1/2 cup (85 g) semisweet chocolate chips, melted, for drizzling
Tools and Preparation
- Mixer
- Kitchen scissors for the marshmallows
- 1.5 tbsp cookie scoop
- Small zip-top bag for drizzling
- Two parchment-lined baking sheets
Prep takes 20 minutes, and each batch bakes for about 10 minutes. You’ll get 24 cookies.
Dip your scissors in water before cutting the marshmallows. They won’t stick as much.
Step-by-Step Instructions
- Heat the oven to 350°F (175°C).
- Whisk the flour, cocoa, cocoa mix, baking soda, and salt.
- Beat the butter and sugars until fluffy. Add the egg, vanilla, and milk.
- Mix in the dry ingredients until no streaks remain.
- Scoop balls onto the sheets 2 inches (5 cm) apart.
- Bake 8 minutes. Press one marshmallow half, cut side down, onto each cookie.
- Bake 2 more minutes, until the marshmallow puffs and softens.
- Cool completely, then drizzle with the melted chocolate from a snipped zip-top bag.
Common Mistakes to Avoid
- Adding marshmallows at the start. They melt into puddles.
- Using the broiler. Marshmallows go from golden to burnt in seconds.
- Stacking warm cookies. They’ll glue together.
Variations, Storage, and Final Thoughts
Add 1/2 tsp of peppermint extract for peppermint mocha, or a pinch of cinnamon and chili for Mexican hot chocolate. Mini marshmallows work too; use 4 or 5 per cookie.
Store them in a single layer in an airtight container for up to 4 days. The marshmallow gets chewier over time, which some people actually prefer.
Warm one in the microwave for 8 seconds before eating. It tastes like it just came out of the oven.
8. Eggnog Snickerdoodles

Why You’ll Love This Recipe
Snickerdoodles are already cozy, and a splash of eggnog makes them taste like the holidays. They’re soft in the middle with crackly, sugar-coated tops.
Nutmeg in both the dough and the coating gives them that eggnog flavor in every bite. They’re simple to make but still feel special on a cookie tray.
Ingredients
For the cookies:
- 3 cups (360 g) all-purpose flour
- 2 tsp (6 g) cream of tartar
- 1 tsp (6 g) baking soda
- 1/2 tsp (3 g) salt
- 1/2 tsp ground nutmeg
- 1 cup (226 g) unsalted butter, softened
- 1 1/2 cups (300 g) granulated sugar
- 1 large egg
- 1/4 cup (60 ml) eggnog
- 1 tsp (5 ml) vanilla extract
- 1/2 tsp (2.5 ml) rum extract (optional)
For the coating:
- 1/4 cup (50 g) granulated sugar
- 1 tsp ground cinnamon
- 1/2 tsp ground nutmeg
Tools and Preparation
- Mixer
- Small bowl for the coating
- Two parchment-lined baking sheets
Prep takes 15 minutes, plus 30 minutes of chilling. Each batch bakes for 10 to 11 minutes, and the recipe makes about 30 cookies.
Cream of tartar gives snickerdoodles their tang and chew, so don’t skip it.
Step-by-Step Instructions
- Whisk the flour, cream of tartar, baking soda, salt, and nutmeg.
- Beat the butter and sugar until light, about 3 minutes. Add the egg, eggnog, vanilla, and rum extract.
- Mix in the dry ingredients until just combined. Chill the dough for 30 minutes.
- Heat the oven to 350°F (175°C). Stir the coating ingredients together.
- Roll the dough into 1.5 inch (4 cm) balls and roll each one in the coating.
- Place 2 inches (5 cm) apart on the sheets.
- Bake 10 to 11 minutes, until puffed and cracked on top, with centers that still look soft.
- Cool 5 minutes on the sheet. They’ll settle and wrinkle as they cool.
Common Mistakes to Avoid
- Skipping the chill. The eggnog makes the dough soft, and warm dough spreads thin.
- Baking until golden. They should look pale, or they’ll turn crunchy.
- Old nutmeg. Nutmeg fades fast, so fresh or freshly grated tastes best.
Variations, Storage, and Final Thoughts
Drizzle them with a glaze made from 1 cup (120 g) powdered sugar and 2 tbsp (30 ml) eggnog. You can also roll them in sparkling sugar for extra shine.
Store them in an airtight container for up to 1 week. Tuck a slice of bread inside to keep them soft.
Serve them with a small glass of eggnog on the side. It’s a simple pairing that feels very festive.
9. Cranberry Orange Shortbread Slices

Why You’ll Love This Recipe
This is a buttery shortbread log dotted with tart cranberries and fresh orange zest. You make it ahead, keep it in the fridge or freezer, and slice off cookies whenever you need them.
The sugar-coated edges look pretty and give each cookie a little crunch. They’re a great choice for busy weeks, since the work is done before the baking day.
Ingredients
- 1 cup (226 g) salted butter, softened
- 2/3 cup (80 g) powdered sugar
- Zest of 1 large orange
- 1/2 tsp (2.5 ml) vanilla extract
- 1/4 tsp (1.5 g) salt
- 2 cups (240 g) all-purpose flour
- 2/3 cup (80 g) dried cranberries, finely chopped
- 1/4 cup (50 g) coarse sparkling sugar, for rolling
Tools and Preparation
- Mixer
- Plastic wrap or parchment
- Sharp knife
- Two parchment-lined baking sheets
Prep takes 15 minutes, plus at least 2 hours of chilling. Each batch bakes for 12 to 14 minutes, and you’ll get about 36 slices.
Rub the orange zest into the powdered sugar with your fingers first. It pulls out the oils and makes the orange flavor stronger.
Step-by-Step Instructions
- Beat the butter, powdered sugar, and zest until creamy, about 2 minutes. Add the vanilla and salt.
- Mix in the flour on low until crumbly, then stir in the cranberries.
- Press the dough together and shape it into two logs about 1.5 inches (4 cm) wide.
- Roll each log in the sparkling sugar, wrap tightly, and chill for 2 hours.
- Heat the oven to 350°F (175°C).
- Slice the logs into 1/4 inch (6 mm) rounds, turning the log a little after each cut to keep it round.
- Bake 12 to 14 minutes, until the edges are pale golden.
- Cool 5 minutes on the sheet, then move to a rack.
Common Mistakes to Avoid
- Whole cranberries. They make the slices crumble. Chop them small.
- Slicing soft dough. If it squishes, put it back in the fridge for 20 minutes.
- Overmixing after adding flour. Shortbread gets tough instead of tender.
Variations, Storage, and Final Thoughts
Swap the cranberries for chopped pistachios, or dip half of each cookie in melted white chocolate. Lemon zest works in place of orange too.
Baked cookies keep for 2 weeks in a tin. The unbaked logs last 1 week in the fridge or 3 months in the freezer; just slice and bake from frozen, adding 1 to 2 minutes.
Keep one log in the freezer all season. You’ll always have fresh cookies ready for drop-in guests.
10. Chai Spice Pinwheel Cookies
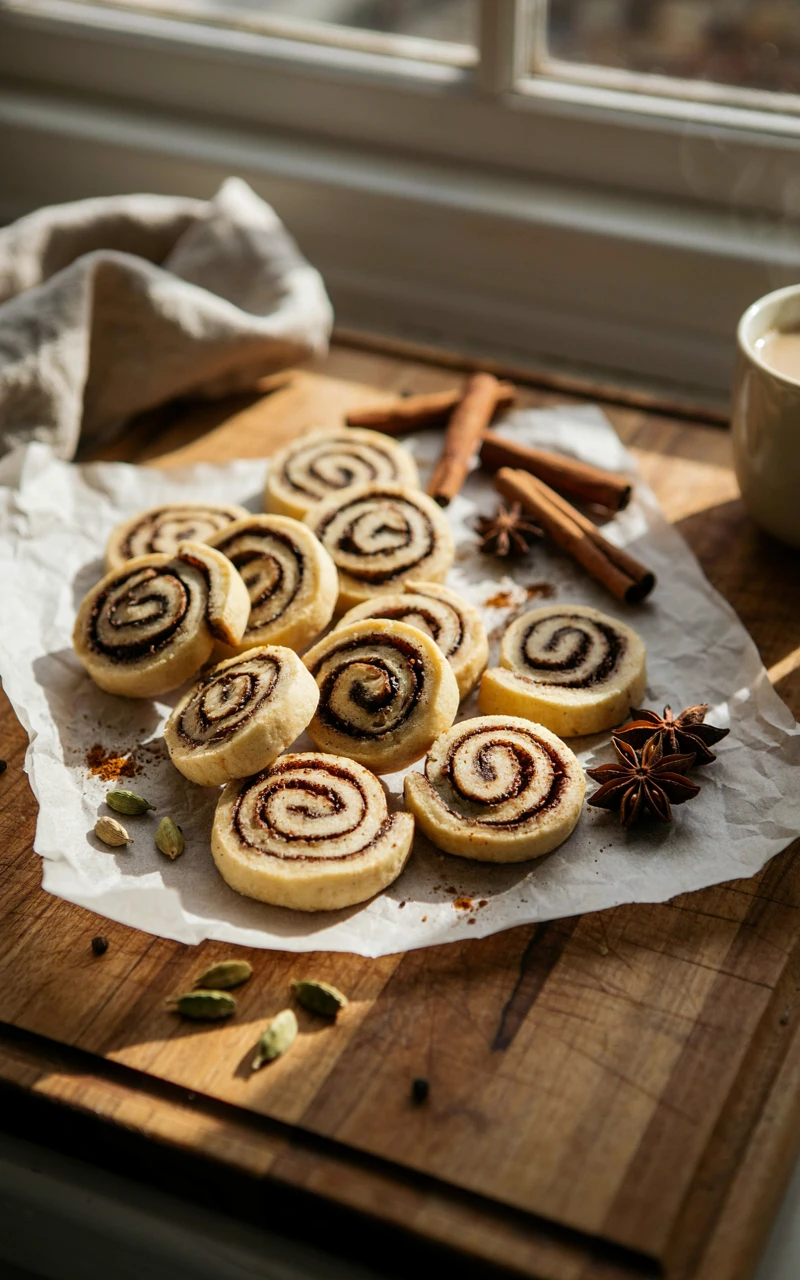
Why You’ll Love This Recipe
These cookies have a pretty spiral of plain vanilla dough and warm chai-spiced dough. They look like they came from a bakery, but the method is just rolling and stacking.
The chai flavor of cinnamon, ginger, cardamom, and a pinch of black pepper is cozy without being too strong. They’re one of my favorite creative Christmas cookie ideas for a gift box.
Ingredients
For the dough:
- 2 1/2 cups (300 g) all-purpose flour
- 1/2 tsp (2 g) baking powder
- 1/4 tsp (1.5 g) salt
- 3/4 cup (170 g) unsalted butter, softened
- 3/4 cup (150 g) granulated sugar
- 1 large egg
- 1 tsp (5 ml) vanilla extract
For the chai spice:
- 1 tsp ground cinnamon
- 1/2 tsp ground ginger
- 1/4 tsp ground cardamom
- 1/4 tsp ground cloves
- Pinch of black pepper
- 1 tsp (2 g) cocoa powder, for a deeper color
- 1 tbsp (12 g) brown sugar
Tools and Preparation
- Mixer
- Rolling pin and parchment
- Ruler
- Sharp knife
Prep takes 40 minutes, plus 2 hours of chilling. Each batch bakes for 10 to 12 minutes, and you’ll get about 36 cookies.
Step-by-Step Instructions
- Whisk the flour, baking powder, and salt.
- Beat the butter and sugar until fluffy. Add the egg and vanilla, then mix in the dry ingredients.
- Split the dough in half. Knead the chai spice mix into one half until the color is even.
- Roll each half between parchment into a 9 x 12 inch (23 x 30 cm) rectangle. Chill both for 15 minutes.
- Peel off the top parchment and flip the chai layer onto the vanilla layer. Trim the edges.
- Roll up tightly from the long side, using the parchment to help. Wrap and chill for 2 hours.
- Heat the oven to 350°F (175°C). Slice into 1/4 inch (6 mm) rounds.
- Bake 10 to 12 minutes, until the edges are firm and the vanilla dough is barely golden.
Common Mistakes to Avoid
- Rolling uneven layers. Your spiral will look lopsided. Use a ruler.
- Rolling the log loosely. Gaps form inside. Press as you roll.
- Cutting warm dough. The spiral smears.
Variations, Storage, and Final Thoughts
Try red and white dough with peppermint for a candy look, or chocolate and vanilla for a classic pinwheel. Rolling the log in sprinkles adds a fun edge.
Store baked cookies in a tin for up to 2 weeks. The unbaked log freezes for 3 months.
Stack a few in a clear bag tied with ribbon. The spiral shows through and looks lovely as a gift.
11. Peppermint Brownie Crinkle Cookies
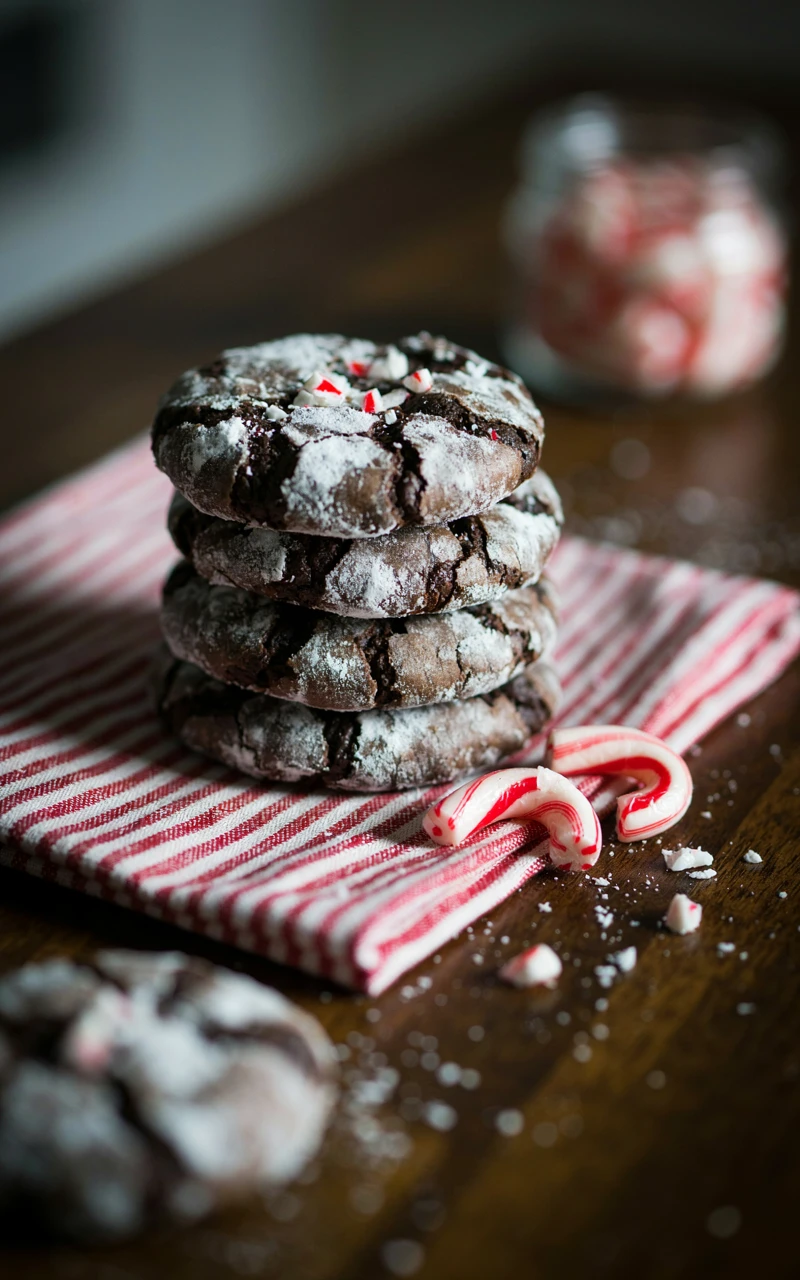
Why You’ll Love This Recipe
These taste like a fudgy brownie in cookie form. The tops crack open as they bake, showing dark chocolate under a snowy coat of powdered sugar.
Peppermint extract and chopped peppermint candies make them cool and bright. Chocolate lovers always reach for these first.
Ingredients
- 4 oz (115 g) bittersweet chocolate, chopped
- 1/4 cup (57 g) unsalted butter
- 3/4 cup (150 g) packed brown sugar
- 2 large eggs
- 1 tsp (5 ml) vanilla extract
- 1/2 tsp (2.5 ml) peppermint extract
- 1 cup (120 g) all-purpose flour
- 1/4 cup (22 g) unsweetened cocoa powder
- 1 tsp (4 g) baking powder
- 1/4 tsp (1.5 g) salt
- 1/2 cup (80 g) chopped chocolate mint candies or peppermint baking chips
- 1/4 cup (50 g) granulated sugar, for rolling
- 1/2 cup (60 g) powdered sugar, for rolling
Tools and Preparation
- Microwave-safe bowl
- Whisk and spatula
- Two small bowls for coating
- Two parchment-lined baking sheets
Prep takes 20 minutes, plus 1 hour of chilling. Each batch bakes for 10 to 11 minutes, and you’ll get about 24 cookies.
Step-by-Step Instructions
- Melt the chocolate and butter in 30-second bursts, stirring until smooth. Cool for 5 minutes.
- Whisk in the brown sugar, then the eggs one at a time, then the vanilla and peppermint.
- Stir in the flour, cocoa, baking powder, and salt. Fold in the mint candies.
- Cover and chill for 1 hour, until scoopable.
- Heat the oven to 350°F (175°C).
- Roll 1.5 inch (4 cm) balls in the granulated sugar first, then coat thickly in powdered sugar.
- Bake 10 to 11 minutes, until the cracks spread and the edges are set. The centers should look a little underdone.
- Cool 10 minutes on the sheet before moving them.
Common Mistakes to Avoid
- Skipping the sugar layer. The granulated sugar keeps the powdered sugar from melting into the dough.
- Crushed hard candy in the dough. It melts and sticks to the pan. Use chocolate mints or baking chips.
- Baking until firm. You’ll lose the fudgy center.
Variations, Storage, and Final Thoughts
Leave out the peppermint for a classic chocolate crinkle, or add 1 tsp of orange zest instead. A pinch of espresso powder deepens the chocolate.
Store them in an airtight container for up to 5 days, or freeze for 2 months. The powdered sugar may fade a little, so dust with more before serving.
These look especially nice next to lighter cookies on a platter. The dark and white contrast catches the eye.
12. Brown Butter Maple Pecan Cookies

Why You’ll Love This Recipe
Browning the butter gives these cookies a nutty, toffee-like flavor. Add maple syrup and toasted pecans, and you get a chewy cookie that tastes like a cozy weekend breakfast.
A thin maple glaze on top makes them shine. They’re a good pick for anyone who likes sweet and nutty more than chocolate.
Ingredients
For the cookies:
- 1 cup (226 g) unsalted butter
- 1 cup (200 g) packed brown sugar
- 1/4 cup (50 g) granulated sugar
- 1 large egg plus 1 egg yolk
- 2 tbsp (30 ml) pure maple syrup
- 1 tsp (5 ml) maple extract
- 2 1/2 cups (300 g) all-purpose flour
- 1 tsp (6 g) baking soda
- 1/2 tsp (3 g) salt
- 1 cup (115 g) pecans, toasted and chopped
For the glaze:
- 1 cup (120 g) powdered sugar
- 2 to 3 tbsp (30 to 45 ml) pure maple syrup
Tools and Preparation
- Light-colored saucepan, so you can see the butter change color
- Mixer or whisk
- Cookie scoop
- Two parchment-lined baking sheets
Prep takes 30 minutes, plus 1 hour to cool and chill. Each batch bakes for 10 to 11 minutes, and you’ll get about 24 cookies.
Toast the pecans at 350°F (175°C) for 7 to 8 minutes, until they smell nutty.
Step-by-Step Instructions
- Melt the butter over medium heat, swirling often. After 5 to 7 minutes, it will foam, then turn golden with brown bits at the bottom and smell nutty.
- Pour it into a bowl, scraping in the brown bits, and cool for 20 minutes.
- Whisk in both sugars, then the egg, yolk, maple syrup, and maple extract.
- Stir in the flour, baking soda, and salt, then fold in the pecans. Chill for 1 hour.
- Heat the oven to 350°F (175°C).
- Scoop 2 tbsp balls 2 inches (5 cm) apart.
- Bake 10 to 11 minutes, until the edges are golden and the centers look puffy.
- Cool completely, then whisk the glaze and drizzle it over the tops.
Common Mistakes to Avoid
- Walking away from the butter. It goes from brown to burnt quickly.
- Using hot butter. It scrambles the egg and melts the sugar into a greasy dough.
- Pancake syrup. It doesn’t have real maple flavor, so use pure maple syrup.
Variations, Storage, and Final Thoughts
Swap pecans for walnuts, or add 1/2 cup (85 g) of white chocolate chips. A sprinkle of flaky salt on the glaze is lovely.
Store the cookies in an airtight container for up to 1 week. Freeze unglazed cookies for 3 months, and glaze them after thawing.
The smell of browning butter is half the fun here. Take your time with that first step.
13. Lemon Rosemary Snowball Cookies
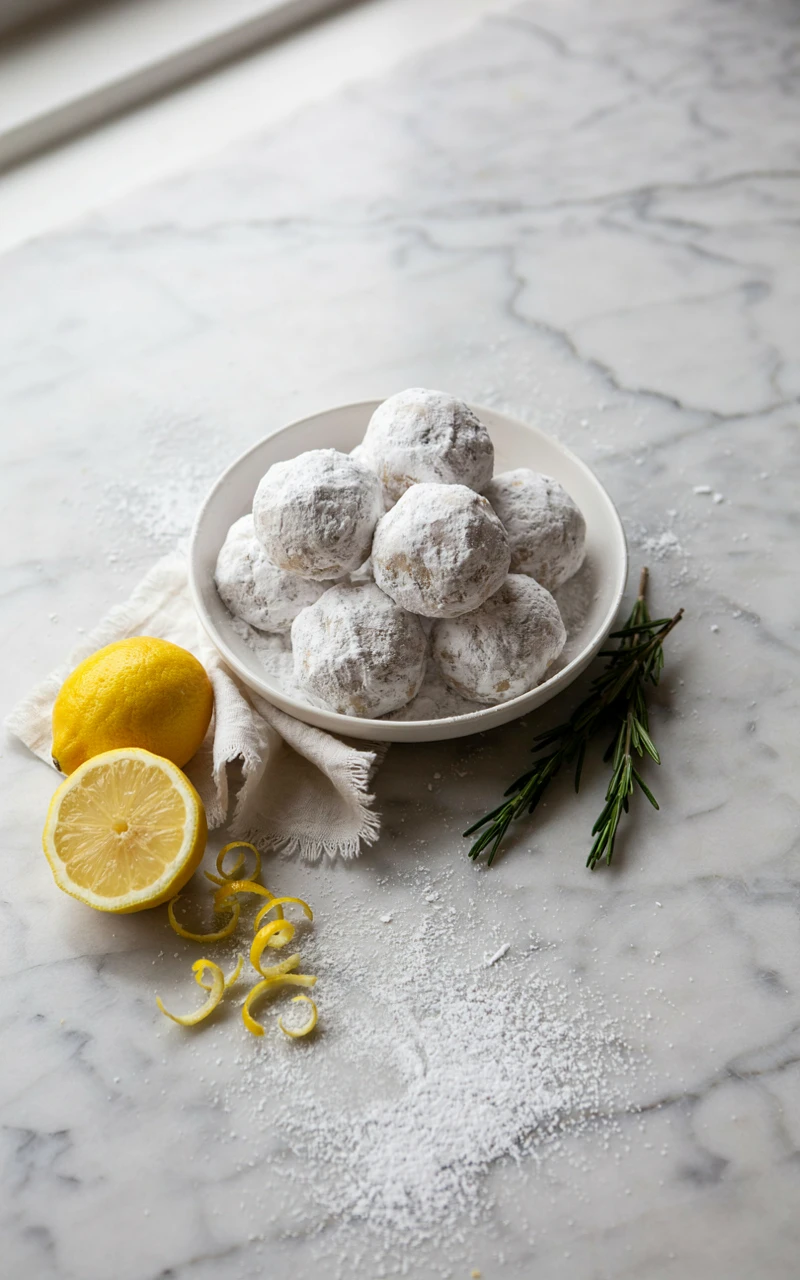
Why You’ll Love This Recipe
Snowball cookies are soft, nutty, and rolled in powdered sugar. This version adds lemon zest and a little fresh rosemary, which tastes bright and a bit like a pine tree.
They’re one of those unusual Christmas cookies that surprise people in a good way. The herb flavor is gentle, so even picky eaters usually go back for seconds.
Ingredients
- 1 cup (226 g) unsalted butter, softened
- 1/2 cup (60 g) powdered sugar
- Zest of 2 lemons
- 1 tbsp (2 g) fresh rosemary, very finely chopped
- 1 tsp (5 ml) vanilla extract
- 1/4 tsp (1.5 g) salt
- 2 1/4 cups (270 g) all-purpose flour
- 3/4 cup (85 g) almonds or walnuts, finely chopped
- 1 1/2 cups (180 g) powdered sugar, for rolling
Tools and Preparation
- Mixer
- Sharp knife or small food processor for the nuts and rosemary
- Shallow bowl for rolling
- Two parchment-lined baking sheets
Prep takes 25 minutes, and each batch bakes for 12 to 14 minutes. You’ll get about 36 snowballs.
Chop the rosemary as fine as you can. Big pieces feel like pine needles in your mouth.
Step-by-Step Instructions
- Heat the oven to 350°F (175°C).
- Beat the butter, 1/2 cup powdered sugar, lemon zest, and rosemary until creamy. Add the vanilla and salt.
- Mix in the flour and nuts until a soft dough forms.
- Roll into 1 inch (2.5 cm) balls and place 1 inch (2.5 cm) apart.
- Bake 12 to 14 minutes, until the bottoms are lightly golden and the tops are still pale.
- Cool 5 minutes, then roll the warm cookies in powdered sugar.
- Let them cool completely on a rack.
- Roll them in powdered sugar a second time for a thick, snowy coat.
Common Mistakes to Avoid
- Too much rosemary. It can taste soapy. Start with 1 tbsp.
- Rolling hot cookies. They’re fragile right out of the oven, so wait 5 minutes.
- Only one sugar coat. The first layer soaks in; the second one gives the snowy look.
Variations, Storage, and Final Thoughts
Try orange zest with thyme, or keep it simple with lemon only. Pecans give a richer, more classic snowball.
Store them in an airtight tin for up to 2 weeks. They also freeze well for 3 months; give them a fresh roll in sugar after thawing.
Tuck a small sprig of rosemary on the plate when you serve them. It hints at the flavor and looks pretty.
14. Pistachio Cardamom Raspberry Thumbprints
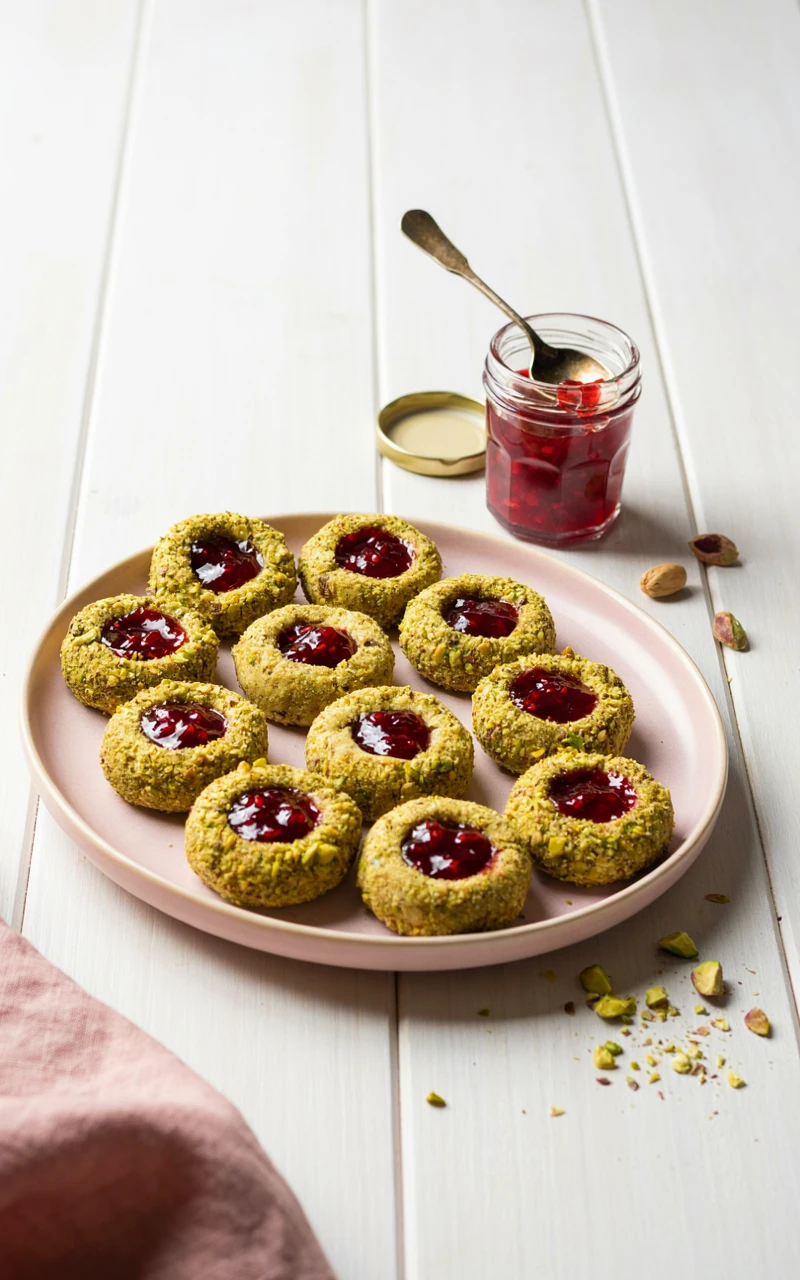
Why You’ll Love This Recipe
These thumbprints are rolled in green pistachios and filled with red raspberry jam, so they look like Christmas on their own. The cardamom in the dough adds a warm, slightly floral flavor.
They’re tender, buttery, and a little crunchy on the outside. They always look homemade in the best way.
Ingredients
- 1 cup (226 g) unsalted butter, softened
- 2/3 cup (135 g) granulated sugar
- 2 large egg yolks (save 1 white)
- 1 tsp (5 ml) vanilla extract
- 1 tsp (2 g) ground cardamom
- 1/4 tsp (1.5 g) salt
- 2 cups (240 g) all-purpose flour
- 1 large egg white, lightly beaten
- 1 cup (125 g) shelled pistachios, finely chopped
- 1/2 cup (160 g) seedless raspberry jam
Tools and Preparation
- Mixer
- Two shallow bowls, one for egg white and one for pistachios
- Round 1/2 tsp measuring spoon or the end of a wooden spoon
- Small zip-top bag for the jam
- Two parchment-lined baking sheets
Prep takes 30 minutes, and each batch bakes for 14 to 16 minutes total. You’ll get about 30 cookies.
Step-by-Step Instructions
- Heat the oven to 350°F (175°C).
- Beat the butter and sugar until fluffy. Add the yolks, vanilla, cardamom, and salt.
- Mix in the flour until a soft dough forms. If it’s sticky, chill for 15 minutes.
- Roll into 1 inch (2.5 cm) balls. Dip each in egg white, then roll in pistachios.
- Place on the sheet and press a dent in the middle with the back of the spoon.
- Bake 8 minutes. Take them out and gently press the dents again.
- Pipe about 1/2 tsp of jam into each dent.
- Bake 6 to 8 more minutes, until the bottoms are golden and the jam is bubbling slightly. Cool on the sheet for 10 minutes.
Common Mistakes to Avoid
- Filling before baking. The jam can boil over and burn. Adding it halfway keeps it shiny.
- Too much jam. It runs down the sides. Fill just to the rim.
- Salted pistachios. Use unsalted, or skip the salt in the dough.
Variations, Storage, and Final Thoughts
Swap the raspberry jam for apricot, cherry, or lemon curd. Almonds or walnuts work in place of pistachios if that’s what you have.
Store them in a single layer in an airtight container for up to 5 days. Freeze unfilled cookies for up to 2 months, then add jam after thawing.
Mix a few different jams on one tray. The pops of red, orange, and yellow look so cheerful.
15. Biscoff-Stuffed Gingerbread Cookies
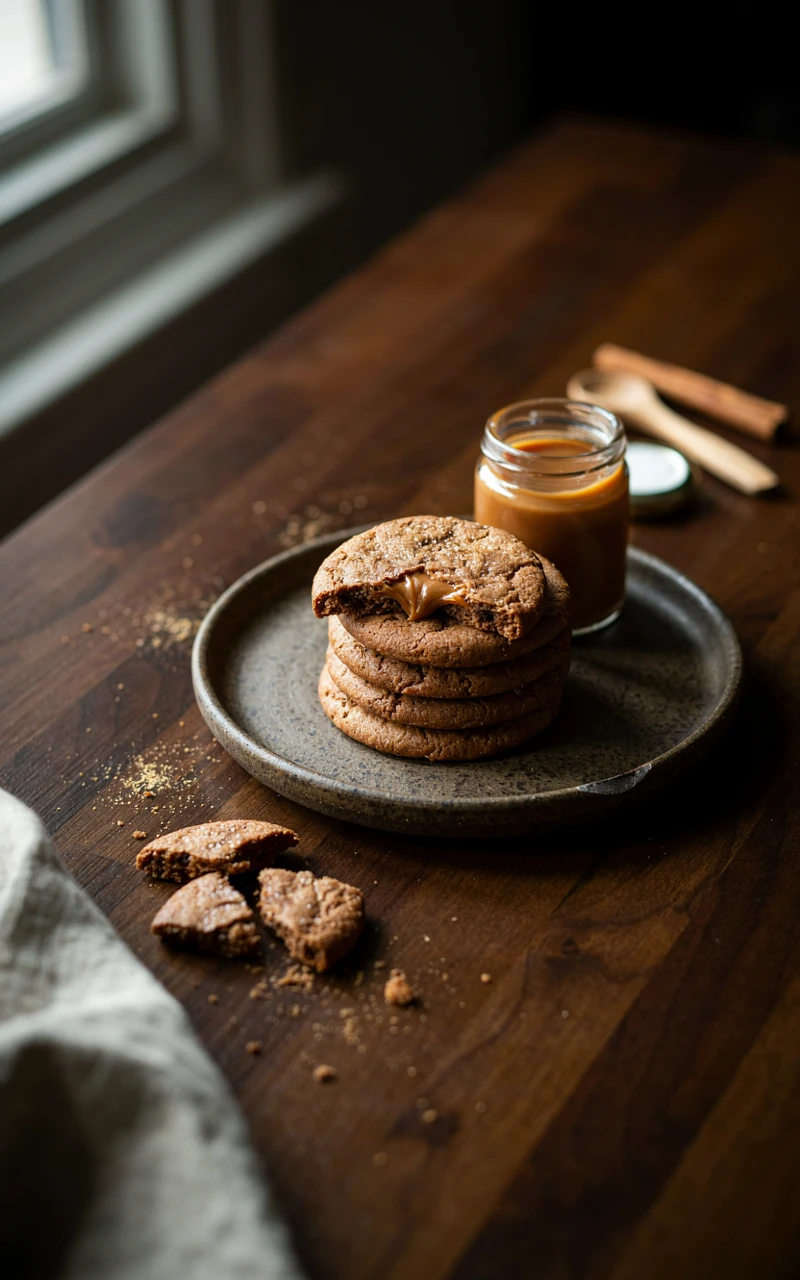
Why You’ll Love This Recipe
These soft gingerbread cookies hide a gooey center of Biscoff cookie butter. You bite into warm spices and molasses, then hit a pocket of sweet, caramel-like spread.
The trick is freezing the filling first, so it stays inside while the cookies bake. They’re a fun twist on gingerbread that feels a little bit fancy.
Ingredients
For the filling:
- 1/2 cup (125 g) Biscoff cookie butter spread
For the cookies:
- 2 1/4 cups (270 g) all-purpose flour
- 1 tsp (6 g) baking soda
- 1/2 tsp (3 g) salt
- 2 tsp ground ginger
- 1 tsp ground cinnamon
- 1/4 tsp ground cloves
- 3/4 cup (170 g) unsalted butter, softened
- 1 cup (200 g) packed brown sugar
- 1 large egg
- 1/4 cup (60 ml) molasses
- 1/3 cup (65 g) granulated sugar, for rolling
- 4 Biscoff cookies, crushed, for topping
Tools and Preparation
- Small baking sheet that fits in your freezer
- Teaspoon and cookie scoop
- Mixer
- Two parchment-lined baking sheets
Prep takes 30 minutes, plus 1 hour to freeze the filling. Each batch bakes for 11 to 12 minutes, and you’ll get 18 large cookies.
Scoop the cookie butter into 18 small mounds, about 1 tsp each, on a parchment-lined plate. Freeze until solid, at least 1 hour.
Step-by-Step Instructions
- Whisk the flour, baking soda, salt, ginger, cinnamon, and cloves.
- Beat the butter and brown sugar until fluffy. Add the egg and molasses.
- Mix in the dry ingredients until just combined.
- Heat the oven to 350°F (175°C).
- Scoop 2 tbsp of dough, flatten it in your palm, set a frozen Biscoff mound in the middle, and wrap the dough around it. Seal the seams well.
- Roll each ball in granulated sugar and place 3 inches (7.5 cm) apart.
- Bake 11 to 12 minutes, until the edges are set and the tops are crackled. Sprinkle the crushed Biscoff on right away.
- Cool 10 minutes on the sheet. The center is very hot, so wait before biting in.
Common Mistakes to Avoid
- Skipping the freeze. Soft cookie butter leaks out and burns on the pan.
- Thin spots in the dough. The filling bursts through. Keep the wrap even.
- Tasting the dough raw. Raw flour and raw egg can make you sick, as the FDA explains in its raw dough safety guide, so save your sampling for the baked cookies.
Variations, Storage, and Final Thoughts
Stuff them with Nutella, salted caramel, or a cube of white chocolate instead. A drizzle of white chocolate on top makes them look extra festive.
Store them in an airtight container for up to 5 days. Warm one for 10 seconds in the microwave to make the center gooey again.
These are a great last cookie to bake. They make the whole kitchen smell like gingerbread.
That’s the full list of 15 cookies, from silly sweaters to gooey gingerbread.
I hope you found a few that made you want to grab your mixing bowl today.
Here’s a quick look to help you plan your baking days:
| Cookie | Best For | Make Ahead? |
|---|---|---|
| Ugly Christmas Sweater Sugar Cookies | Family decorating night | Yes, freeze undecorated |
| Stained Glass Star Cookies | Hanging on the tree | Bake up to 5 days ahead |
| Candy Cane Twist Cookies | Cookie swaps | Yes, freeze 2 months |
| Matcha Spritz Wreath Cookies | Big batches | Yes, freeze 3 months |
| Christmas Tree Meringue Cookies | Gluten-free guests | Up to 2 weeks |
| Reindeer Peanut Butter Pretzel Cookies | Kids | Up to 5 days |
| Hot Cocoa Marshmallow Cookies | Movie night | Up to 4 days |
| Eggnog Snickerdoodles | A cozy classic | Up to 1 week |
| Cranberry Orange Shortbread Slices | Busy weeks | Freeze the log |
| Chai Spice Pinwheel Cookies | Gift boxes | Freeze the log |
| Peppermint Brownie Crinkle Cookies | Chocolate lovers | Yes, freeze 2 months |
| Brown Butter Maple Pecan Cookies | Nut lovers | Freeze unglazed |
| Lemon Rosemary Snowball Cookies | Something different | Yes, freeze 3 months |
| Pistachio Cardamom Raspberry Thumbprints | Pretty platters | Freeze unfilled |
| Biscoff-Stuffed Gingerbread Cookies | Gooey treat fans | Up to 5 days |
Key takeaways:
- Chill your dough when a recipe asks. It keeps your shapes neat.
- Pull most cookies while the centers still look a little soft.
- Slice-and-bake logs and frozen dough balls save you time later in the season.
- Mixing shapes, colors, and flavors on one plate makes it look special with little extra work.
Pick two or three to start, and don’t worry if your first batch isn’t perfect.
Homemade cookies are meant to look homemade, and that’s part of their charm.
While your cookies cool, you might enjoy browsing these Christmas decoration ideas to set the table.
Then tell me in the comments which cookie you’re baking first.