This post may contain affiliate links, which means I may receive a small commission should you decide to click that link and make a purchase. For more information please refer to the Terms & Conditions.
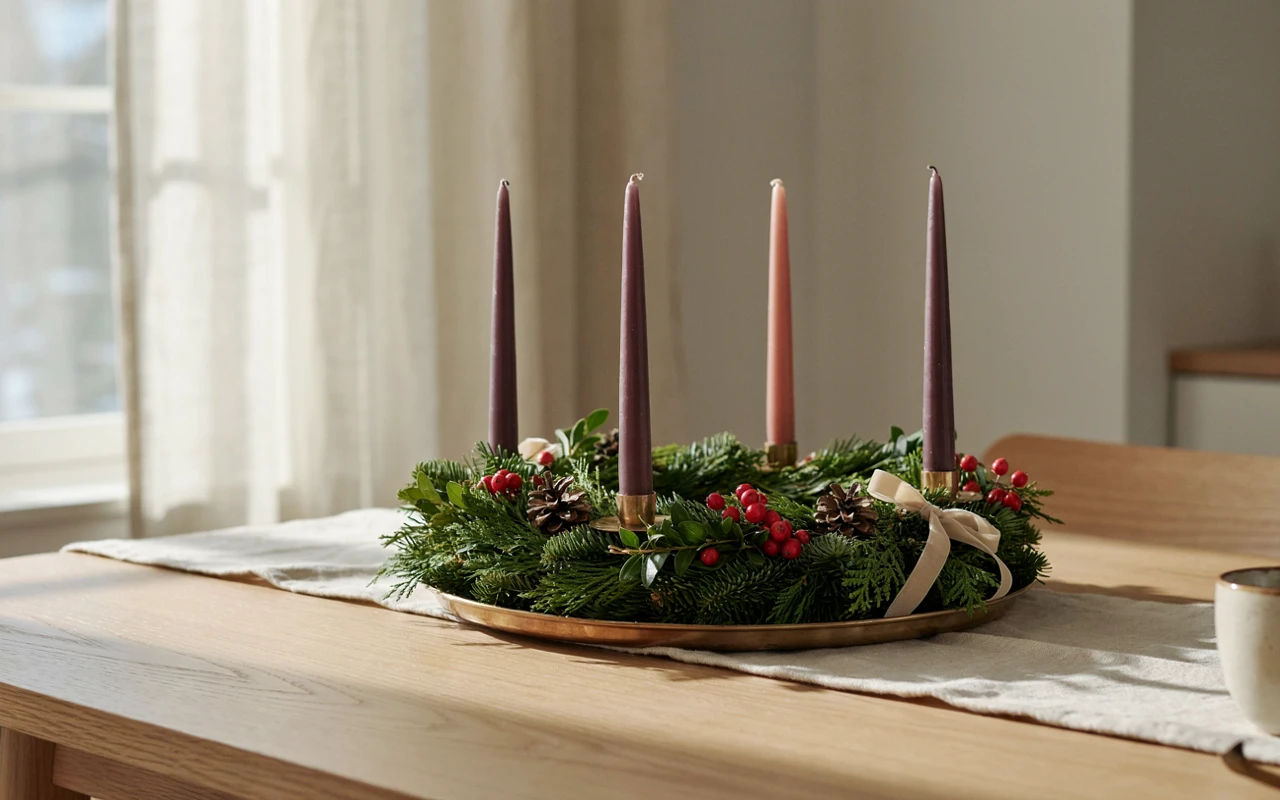
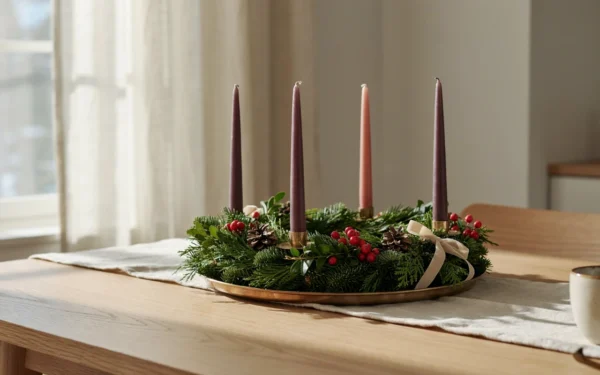
Making an Advent wreath for Christmas is a lovely way to bring a little holiday tradition into your home.
I love how a simple arrangement of fresh greenery and four candles can become such a beautiful centerpiece for the season.
You don’t need florist skills or expensive supplies to make one, either.
A few simple tricks can help you create a full, balanced wreath that looks beautiful on your table.
Choose your greenery, prepare the base, and position the candles before adding too many decorations.
Below, you’ll find an easy step-by-step guide to making your own beautiful Advent wreath for Christmas.
With a little patience and a few simple materials, you can create a festive centerpiece to enjoy throughout December.
Advent Wreath Materials and Tools You’ll Need
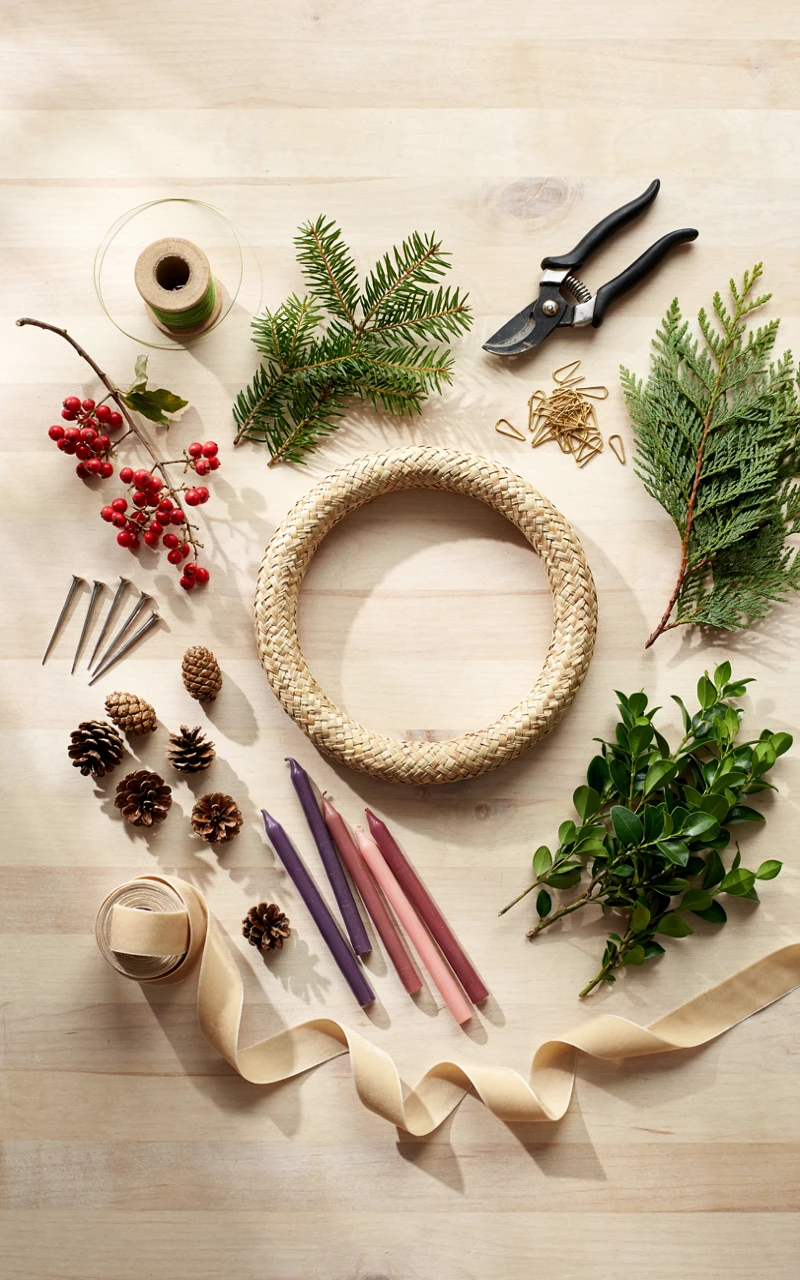
Before you start, gather everything in one spot. A homemade wreath comes together in about an hour, but only if you aren’t running around the house looking for scissors halfway through.
The good news is that most Advent wreath materials are cheap and easy to find. A craft store, a garden center, or even your own backyard can cover almost everything on this list.
The Base and Frame
Your base holds everything together, so pick it first. Each type works a little differently, and the right one depends on how fresh you want your greens to stay.
| Base Type | Best For | Keeps Greens Fresh? | Typical Cost |
|---|---|---|---|
| Wet floral foam ring | Beginners and fresh greenery | Yes, for 2 to 3 weeks with misting | $8 to $15 |
| Straw ring | A full, rustic look | Somewhat, if you mist daily | $5 to $12 |
| Grapevine ring | A loose, natural style | No, best with dried or faux greens | $6 to $15 |
| Metal wire frame | A classic wreath you can reuse | Somewhat, with misting | $4 to $10 |
For a tabletop wreath, a ring about 12 to 14 inches (30 to 35 cm) across is a lovely size. It fits on most dining tables and still leaves room for plates and serving dishes.
Your Full Supply List
- A wreath base about 12 to 14 inches (30 to 35 cm) across
- Four taper candles, about 10 to 12 inches (25 to 30 cm) tall: three purple and one pink, or four white
- One pillar candle for the center (optional), white, about 3 x 6 inches (7.5 x 15 cm)
- Candle holders or candle spikes made to fit your base
- Fresh greenery: about 2 to 3 large bundles of fir, pine, cedar, boxwood, or a mix
- Paddle wire (22 or 24 gauge) in green
- Floral pins (also called U-pins), about 30 to 50
- Sharp garden pruners for thick stems
- Scissors for ribbon and thin stems
- A shallow tray or plate a little wider than your wreath
- A spray bottle filled with water
- Decorations of your choice: pinecones, berries, dried orange slices, ribbon
- Garden gloves to protect your hands from sap and prickly holly
Choosing Your Candles
Traditionally, an Advent wreath holds three purple candles and one pink one. You light one candle each Sunday during the four weeks of Advent, and the pink candle is lit on the third Sunday as a sign of joy.
Some families add a white candle in the middle, lit on Christmas Eve or Christmas Day. If you prefer a simpler look, four white or cream candles look just as pretty.
Pick dripless taper candles if you can. They burn cleaner and won’t leave wax all over your greenery.
Real or Faux?
Fresh greens smell wonderful and look full, but they need a little care. Faux greens last for years and are easy, though they don’t give you that piney smell.
You can also mix the two. I often use a faux base layer with a few fresh sprigs of cedar or eucalyptus tucked on top for scent.
Key takeaways:
- Pick your base first, since it decides how fresh your greens will stay.
- A 12 to 14 inch (30 to 35 cm) ring suits most tables.
- Choose dripless taper candles and holders that fit your base snugly.
The Finished Look: everything is laid out on a covered table, your candles fit snugly in their holders, and your greens are sitting in a bucket of water, ready to go.
Prepare the Base for Your Homemade Advent Wreath
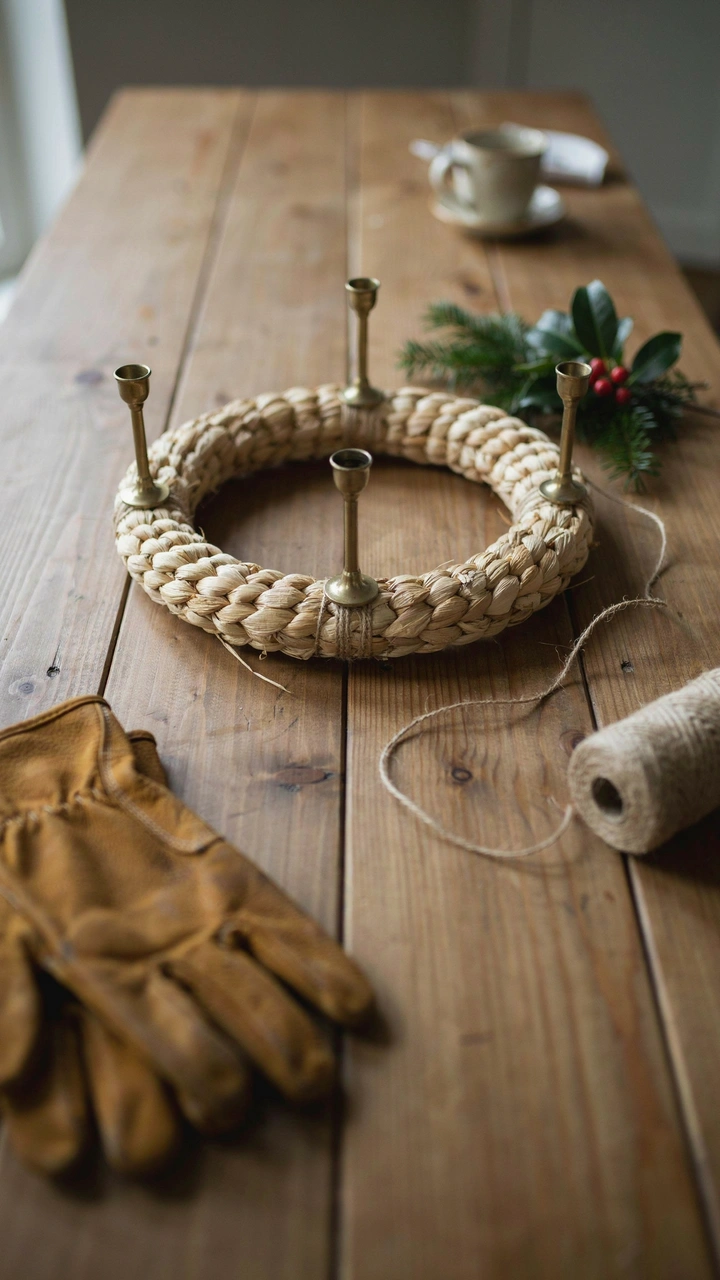
A strong base is the secret to a homemade Advent wreath that looks full and stays put. If the base is shaky or dry, everything you add on top will droop or slide around.
This part is quick, but don’t rush it. Ten extra minutes here saves you from wobbly candles later.
If You’re Using a Wet Floral Foam Ring
Floral foam needs to soak up water before you add anything. The trick is to let it sink on its own instead of pushing it down, because pushing traps dry pockets of air inside.
- Fill a sink or a large bowl with cool water, deep enough to cover the ring.
- Set the foam ring on top of the water, foam side down.
- Leave it alone until it sinks and turns dark green all the way through, usually 1 to 3 minutes.
- Lift it out and let extra water drip off for about 2 minutes.
- Set the ring on your tray or plate to protect your table.
Check the foam by pressing a finger into it gently. It should feel heavy and damp, with no dry, pale spots.
If You’re Using a Straw Ring
Most straw rings come wrapped in plastic. Leave the plastic on, since it holds the straw together and keeps the ring from shedding all over your table.
- Wrap green paddle wire around the ring once and twist the end to secure it.
- Mist the straw lightly with your spray bottle so it isn’t bone dry.
- Set the ring on your tray where you plan to work.
If You’re Using a Grapevine or Wire Frame
A grapevine ring is ready to use right out of the bag. Just give it a gentle shake to loosen any bits of bark.
A metal wire frame works best if you fill it first. Pack a layer of damp moss, about 1 inch (2.5 cm) thick, into the frame and wrap paddle wire around it every 2 inches (5 cm) to hold it in.
Mark Your Candle Spots Now
This is the step most people skip, and it’s the one I wish someone had told me about years ago. Mark where your candles will go before you add any greenery.
- Imagine your ring as a clock face.
- Push a floral pin into the base at 12, 3, 6, and 9 o’clock.
- Step back and check from above that the four pins are evenly spaced.
- Adjust any pin that looks off.
These little pins act as markers. Once the greenery goes on, you’ll know exactly where to leave space for each candle.
Protect Your Table
A damp base can leave water rings on wood. Set your wreath on a tray, a large plate, or a cake stand with a lip.
If you want something prettier than a plain plate, a wooden board or a round brass tray looks lovely. Just make sure it’s at least 1 to 2 inches (2.5 to 5 cm) wider than your wreath all the way around so drips and fallen needles land on the tray, not the table.
Key takeaways:
- Let foam sink on its own; never push it under.
- Mark four evenly spaced candle spots before adding greens.
- Always work and display the wreath on a tray.
The Finished Look: your base sits flat on its tray, it feels damp (if foam or moss), and four pins mark evenly spaced candle spots around the ring.
Add the Fresh Greenery
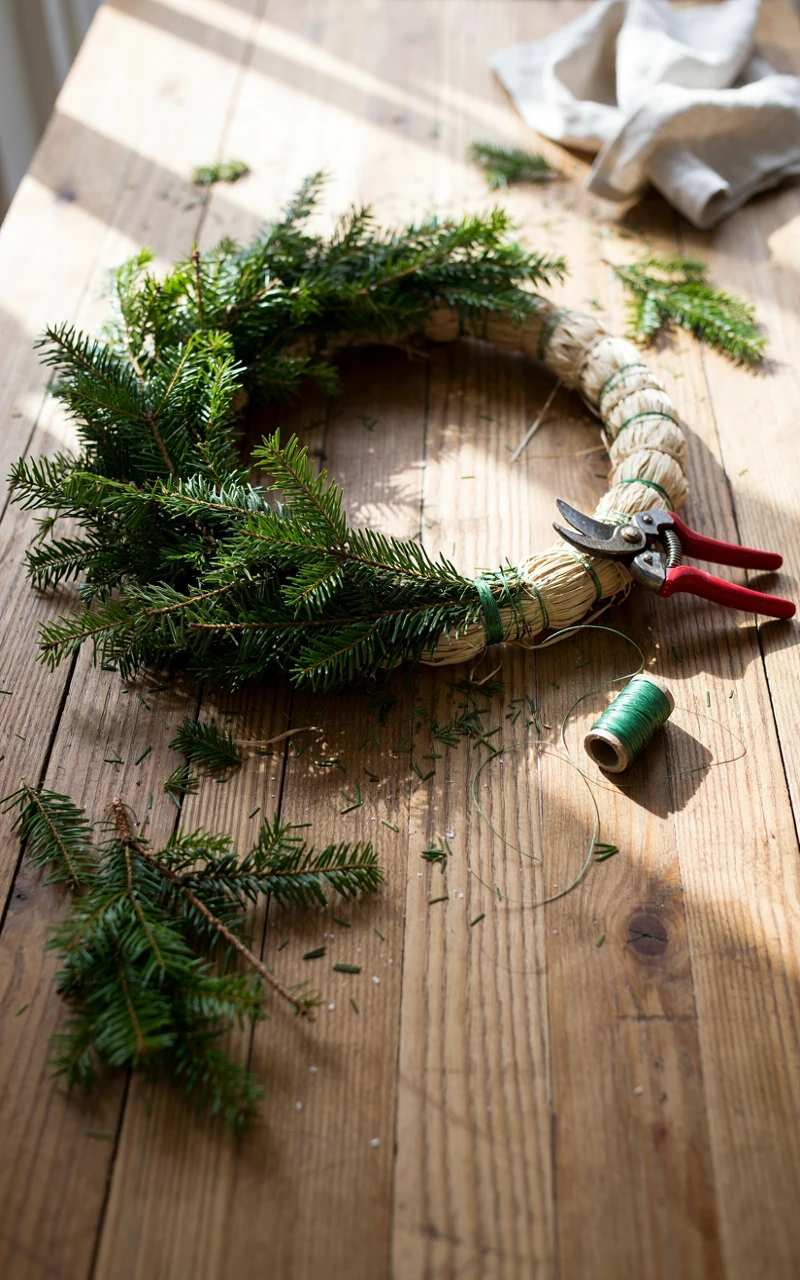
Now for my favorite part. This is when your DIY Advent wreath starts to look like the real thing, and your kitchen will smell like a pine forest.
The trick to a full wreath is short pieces and lots of them. Long branches look sparse and stick out in odd directions, but short sprigs layer together nicely.
Pick Your Greens
Mixing two or three kinds of greenery gives your wreath more depth. Here are the ones I reach for most and how they hold up.
| Greenery | Look | How Long It Lasts |
|---|---|---|
| Fraser or noble fir | Soft, full, classic | 3 to 4 weeks |
| White pine | Long, soft needles | 2 to 3 weeks |
| Cedar | Flat, lacy, smells lovely | 2 to 3 weeks |
| Boxwood | Small, round leaves, very neat | 3 to 4 weeks |
| Eucalyptus | Silvery green, fresh scent | 2 to 3 weeks, then dries nicely |
| Holly | Shiny leaves, red berries | 1 to 2 weeks |
Fir and boxwood make a great sturdy base layer. Cedar, eucalyptus, and holly work best as accents on top.
Prep Your Greens the Night Before
If you can, give your greens a long drink before you use them. Freshly watered stems last days longer on the wreath.
- Snip about 1 inch (2.5 cm) off the end of each branch with your pruners.
- Stand the branches in a bucket of cool water.
- Leave them in a cool spot, like a garage or porch, overnight or for at least 4 hours.
Cut and Attach the Sprigs
Put on your gloves for this part, especially if you’re working with holly or pine. Sap is sticky and hard to wash off.
- Cut your branches into sprigs about 4 to 6 inches (10 to 15 cm) long.
- Strip the needles or leaves from the bottom 1 inch (2.5 cm) of each stem.
- Gather 3 or 4 sprigs into a small bundle.
- For foam, push the bare stem end about 1 inch (2.5 cm) into the foam at a slight angle. For straw or wire, lay the bundle on the ring and wrap paddle wire around the stems two or three times.
- Place the next bundle so it overlaps the first and covers its stems.
- Keep working in one direction around the ring, clockwise or counterclockwise, until you’re back where you started.
- Tuck the last bundle’s stems under the leaves of the first one.
Work the inside edge, the top, and the outside edge of the ring. If you only cover the top, the sides will show bare foam or straw.
Leave Room for the Candles
As you go, keep an eye on those four marker pins. Leave a small clear patch, about 2 inches (5 cm) wide, around each one.
You’ll tuck short sprigs back in around the candles later. For now, those open spots just make the next stage much easier.
Fill the Gaps
Once you’ve gone all the way around, step back and look at the wreath from above and from the side. Hold your phone up and take a quick photo, which shows bare spots surprisingly well.
Fill any gaps with single sprigs of your accent greens, like cedar or eucalyptus. Point them in the same direction as the rest so the wreath looks like it flows.
Key takeaways:
- Use short sprigs, 4 to 6 inches (10 to 15 cm) long, and lots of them.
- Overlap bundles in one direction to hide the stems.
- Leave a clear patch around each candle marker.
The Finished Look: the base is fully hidden from the top and sides, the greens flow in one direction, and four small open spots wait for your candles.
Set the Candles in Place
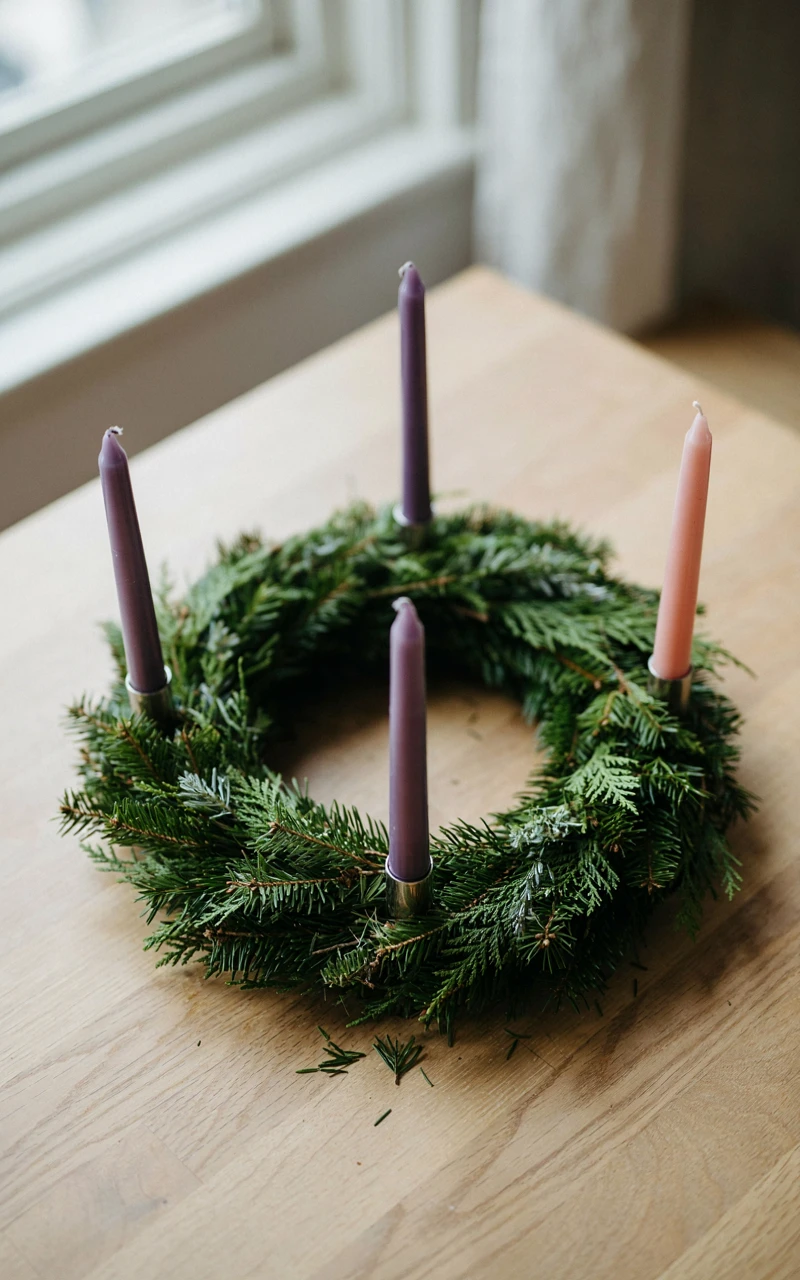
The candles are the heart of any Christmas candle wreath, so they need to stand tall and stay steady. A tilted candle looks messy, and it can drip wax onto your greens or even tip over.
That’s why I always say: get the holder in firmly, and the candle will take care of itself.
Choose the Right Holder
Different bases need different holders. Here’s a quick guide.
- Foam ring: plastic candle holders with a spike on the bottom, often sold right next to the foam rings.
- Straw ring: metal candle holders with long prongs, or plastic spike holders pushed in deep.
- Grapevine or wire frame: small metal cups wired to the frame, or a frame with built-in candle cups.
- Any base: separate glass votive holders or short candlesticks set just inside or on top of the ring.
Look for holders made of metal or glass if you can. They hold up better to heat than thin plastic ones.
Put the Candles In
- Pull out one marker pin.
- Push the candle holder straight down into that spot until it feels firm, about 1.5 to 2 inches (4 to 5 cm) deep.
- Repeat for the other three spots.
- Set a candle into each holder and twist it gently until it sits snug.
- Crouch down to eye level and check that each candle stands straight.
- Straighten any that lean by pressing the holder deeper on the low side.
If a candle is loose in its holder, wrap a small strip of floral putty around the bottom. You can also warm the base of the candle with a hair dryer for about 10 seconds and press it in so it molds to the holder.
Arrange the Candle Colors
If you’re using the traditional colors, place the pink candle so it isn’t right next to where you’ll start. Many families light the purple candles in order going around the wreath, with the pink one in the third spot.
For a center candle, set your white pillar on a small glass plate in the middle of the ring. The plate catches drips and keeps the candle steady.
Tuck Greens Back Around Each Candle
Now fill in those open patches you left. Use a few very short sprigs, about 3 inches (7.5 cm) long, to hide the holders.
Keep greenery at least 2 inches (5 cm) below the top of each candle holder and pointing away from the flame. As the candles burn down over four weeks, you’ll want that space so the flame never gets close to the greens.
A Quick Word on Safety
Fresh greens dry out over time, and dry greenery catches fire easily. So keep these simple rules in mind every time you light your wreath.
- Never leave lit candles unattended, even for a minute.
- Keep the wreath away from curtains, paper, and anything that hangs low.
- Blow candles out before they burn within 2 inches (5 cm) of the greens.
- Replace tall candles once they get short instead of letting them burn down into the wreath.
- Keep pets and little hands away from the flames.
If you have young children or a curious cat, flameless LED taper candles are a smart swap. Many look very real now, and some even come with timers.
Key takeaways:
- Push holders in firmly, about 1.5 to 2 inches (4 to 5 cm) deep.
- Check that every candle stands straight at eye level.
- Keep greens well below the flame and pointing away from it.
The Finished Look: four candles stand tall and straight, the holders are hidden under short sprigs, and no greenery reaches up toward the wicks.
Add Your Advent Wreath Decorations

This is where your wreath starts to feel like yours. Advent wreath decorations can be simple and natural, or bright and playful, and there’s no wrong choice.
My one tip is to pick two or three kinds of decorations and repeat them. Using too many different things makes the wreath look busy, while repeating a few makes it look planned and pretty.
Natural Decorations
These are my favorites because they look lovely next to fresh greens and many cost nothing at all.
- Pinecones, small ones about 2 inches (5 cm) long
- Dried orange slices, which you can make at home
- Cinnamon sticks tied in small bundles
- Faux or real berries, like red holly berries or white snowberries
- Dried hydrangea heads broken into small clusters
- Whole nuts, like walnuts or chestnuts, wired at the base
To make dried orange slices, cut oranges into rounds about 1/4 inch (6 mm) thick. Pat them dry and bake them on a rack at 200°F (95°C) for 3 to 4 hours, turning once, until they feel dry and leathery.
How to Attach Decorations
- Wrap a 6 inch (15 cm) piece of paddle wire around the base of a pinecone, tucking it between the bottom scales.
- Twist the wire ends together to form a stem.
- Push the wire stem into the foam, or wrap it around the straw or frame.
- For orange slices, thread a floral pin through the slice near the edge and press it into the base.
- For cinnamon bundles, tie three sticks together with twine and attach with a floral pin.
- For berry picks, simply push the stem into the base or wire it on.
Placing Your Decorations
Odd numbers look more natural, so try groups of three. Place one cluster between each pair of candles, and you’ll have four clusters that look balanced without being stiff.
Set some pieces slightly toward the inside of the ring and some toward the outside. This keeps the wreath from looking flat.
Keep anything dry, like orange slices, cinnamon, or paper ribbon, well away from the candles. These pieces catch fire more easily than fresh greens.
Adding Ribbon
Ribbon is a quick way to add color. A wired ribbon about 1.5 inches (4 cm) wide holds its shape best.
- Tie small bows and pin them between the candles.
- Wrap ribbon loosely around the outside edge of the wreath.
- Tie a single bow at the base of the pink candle to make it stand out.
Style Ideas to Try
If you’d like a starting point, here are a few combinations I love.
| Style | Greens | Decorations | Candles |
|---|---|---|---|
| Classic | Fir and holly | Red berries, pinecones | Three purple, one pink |
| Rustic | Pine and cedar | Orange slices, cinnamon, twine | Four cream |
| Simple and modern | Eucalyptus only | A few white berries | Four white |
| Woodland | Fir and boxwood | Pinecones, nuts, dried moss | Four deep green |
For even more looks, you can browse my Advent wreath ideas for different styles and colors. And if you want the rest of the room to match, my roundup of Christmas decoration ideas has plenty of easy ways to tie it all together.
Key takeaways:
- Choose two or three decorations and repeat them around the ring.
- Group pieces in threes between the candles.
- Keep dry decorations and ribbon away from the flames.
The Finished Look: the wreath looks balanced from every side, decorations sit in neat clusters between the candles, and nothing dry or flammable is near a wick.
Display and Care for Your Wreath Through Advent
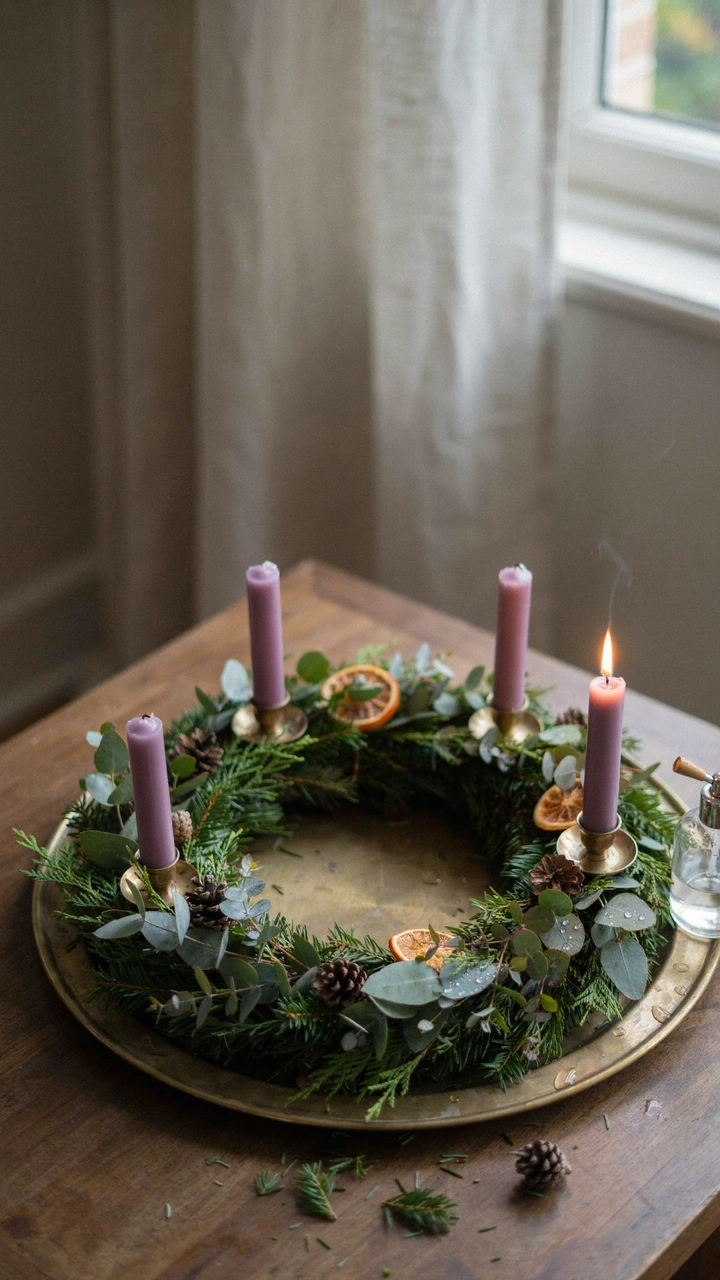
Your wreath is done, and now it gets to shine for the next four weeks. A little care each day keeps the greens green and the candles safe right up to Christmas.
Advent starts on the fourth Sunday before Christmas, so plan to finish your wreath the day before. That way it’s fresh and ready for the first candle lighting.
Where to Display It
A dining table is the classic spot, since that’s where many families gather to light the candles. A coffee table or a kitchen island works well too.
- Pick a spot away from heaters, fireplaces, and radiators, which dry greens out fast.
- Keep it out of direct sunlight.
- Avoid drafty spots near doors or vents, which make flames flicker and drip.
- Make sure there’s nothing hanging above it, like a low lamp shade or garland.
A cool room helps the greens last much longer. If you’d like ideas for setting up the rest of the room around it, my guide to a cozy Christmas home walks through simple touches that pair nicely with a wreath.
Your Daily and Weekly Care Routine
- Every day: mist the greens lightly with your spray bottle, about 8 to 10 sprays around the ring.
- Every 2 to 3 days: press a finger into the foam or moss. If it feels dry, slowly pour about 1/2 cup (120 ml) of water into the base, a little at a time.
- Every week: pull out any sprigs that look brown or crispy and tuck in fresh ones.
- Before each lighting: check that no greens have drifted toward the candles.
- As needed: swap out candles that have burned low.
Don’t mist the candles themselves. Water on the wicks makes them hard to light and can make them sputter.
Lighting the Candles Each Week
On the first Sunday, light one purple candle. Each Sunday after that, light one more, so all four glow by the fourth week.
- Week 1: one purple candle
- Week 2: two purple candles
- Week 3: two purple candles and the pink candle
- Week 4: all four candles
- Christmas Eve or Day: all four, plus the white center candle if you have one
Because the first candle burns the longest, it gets shorter than the rest. That’s part of the charm, but if it gets too low, swap in a fresh one.
Common Questions
How long will a fresh Advent wreath last?
With daily misting and a cool spot, a fresh wreath usually lasts 3 to 4 weeks. Fir and boxwood hold up the longest.
Can I make my wreath early?
Yes, up to about 3 days ahead. Store it somewhere cool, like a garage or porch, and mist it well until you bring it inside.
Should I use real flames or LED candles?
Both work. Real flames feel more traditional, while LED candles are the safer choice around kids and pets.
What do I do with my wreath after Christmas?
Remove the candles and decorations and save them for next year. Fresh greens can go in your compost or yard waste bin.
Key takeaways:
- Display your wreath in a cool spot away from heat and sunlight.
- Mist daily and water the base every 2 to 3 days.
- Check the space around each flame before every lighting.
The Finished Look: by Christmas Eve, your greens are still green, all four candles have been lit, and your wreath looks almost as fresh as the day you made it.
A Last Word From Me
Making an Advent wreath has turned into one of my favorite little traditions. It’s simple, a bit messy, and so worth it every single year.
You now know how to make an Advent wreath from start to finish, from soaking the base to lighting that last candle. Your first one might not look perfect, and mine certainly didn’t.
But I promise it’ll feel special the moment that first flame flickers on. Give it a try this year, and tell me in the comments which greens and decorations you picked.