This post may contain affiliate links, which means I may receive a small commission should you decide to click that link and make a purchase. For more information please refer to the Terms & Conditions.
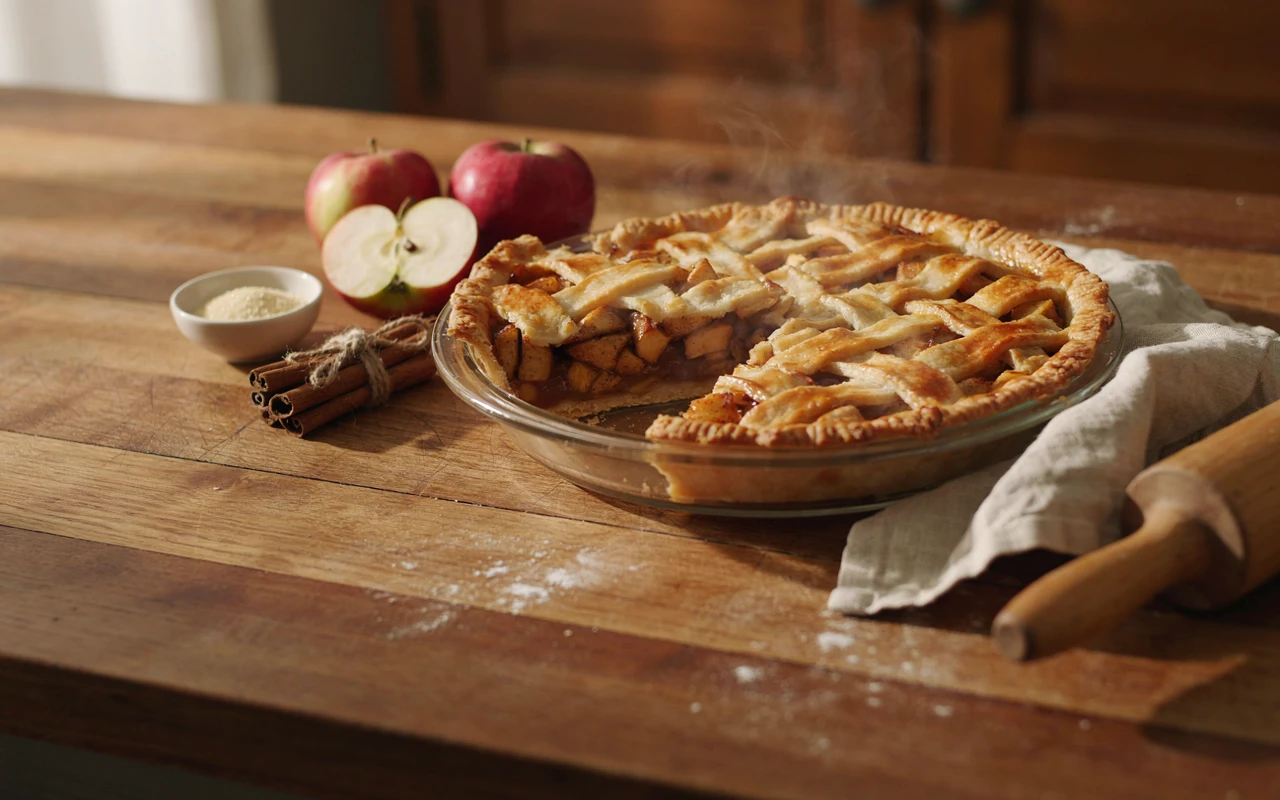
The first chilly Saturday in October always sends me to the orchard, and I come home with far more apples than one kitchen needs. That habit is how I ended up with these 12 easy apple pie ideas for cozy fall baking days, from a classic double crust to a pie baked right in a cast iron skillet.
For years I was a little scared of pie. My crusts shrank, my filling ran all over the plate, and I figured some people just had the knack and I didn’t.
What changed things was a handful of small habits, like keeping the dough cold, using a mix of apples, and letting the pie cool before slicing it. Once those clicked, pie stopped feeling like a test and started feeling like a nice way to spend a Sunday.
Below you’ll find twelve apple pies and pie-style treats, each with its own ingredient list, simple numbered steps, and the mistakes to skip. You get a pie you’re proud of without the stress the word “pie” tends to bring.
1. Classic Double Crust Easy Apple Pie
Why You’ll Love This Recipe
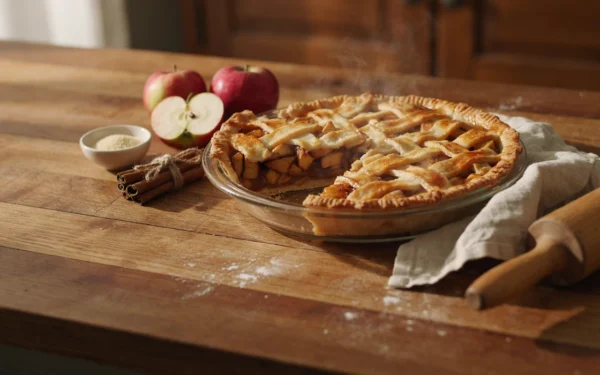
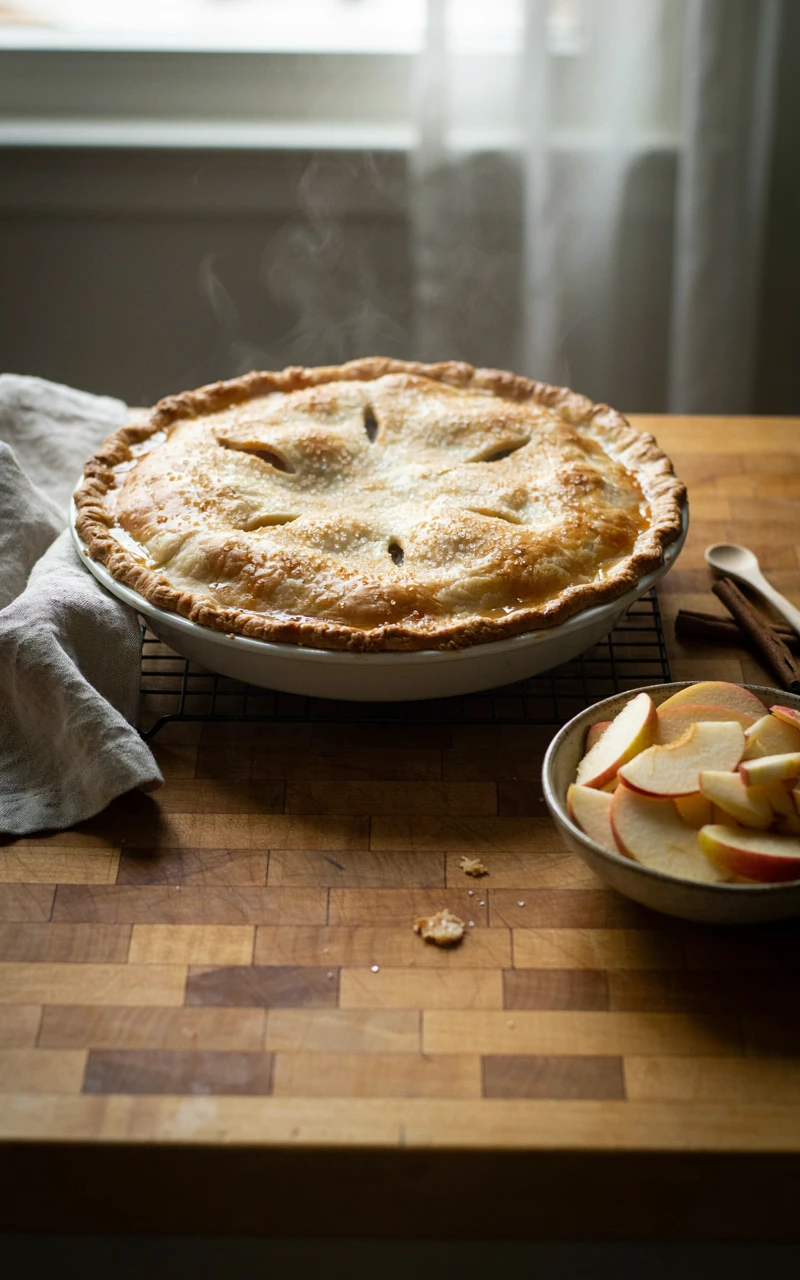
This is the pie most of us picture when someone says “apple pie.” It has a golden top crust, a tender filling that holds its shape, and a warm cinnamon smell that fills the whole house.
Store-bought refrigerated crust keeps it truly easy, and nobody at the table will know or care. If you only bake one pie this season, start here, because every other recipe on this list builds on these same basics.
Ingredients
- 1 package (14.1 oz / 400 g) refrigerated pie crusts, 2 crusts total
- 6 to 7 medium apples, about 3 lb (1.4 kg), a mix of tart and sweet
- 1/2 cup (100 g) granulated sugar
- 1/4 cup (50 g) packed light brown sugar
- 3 tbsp (24 g) all-purpose flour
- 1 tbsp (15 ml) lemon juice
- 1 1/2 tsp (4 g) ground cinnamon
- 1/4 tsp ground nutmeg
- 1/4 tsp (1.5 g) fine salt
- 2 tbsp (28 g) cold unsalted butter, cut into small pieces
- 1 large egg beaten with 1 tbsp (15 ml) milk, for brushing
- 1 tbsp (12 g) coarse sugar, for sprinkling
Tools and Preparation
You’ll need a 9-inch (23 cm) deep-dish pie plate, a large bowl, a peeler, a sharp knife, a rimmed baking sheet, and a strip of foil. Prep time: 30 minutes. Bake time: 60 to 70 minutes. Cooling: 3 hours. Total: about 4 hours 40 minutes. Serves: 8.
The apples you pick make a bigger difference than anything else. Here’s a quick guide to the ones I reach for most.
| Apple | Flavor | Texture After Baking | Best Use |
|---|---|---|---|
| Granny Smith | Tart | Holds its shape well | Base of almost any pie |
| Honeycrisp | Sweet and tangy | Firm, slightly juicy | Mixing with tart apples |
| Braeburn | Sweet-tart and spicy | Stays firm | Great on its own |
| Golden Delicious | Mild and sweet | Softens a little | Adding sweetness to a mix |
| McIntosh | Tangy | Turns soft and saucy | Only in small amounts |
Step-by-Step Instructions
- Set a rack in the lower third of the oven, put the baking sheet on it, and heat the oven to 425°F (220°C).
- Let the crusts sit on the counter for about 15 minutes so they unroll without cracking.
- Peel, core, and slice the apples about 1/4 inch (6 mm) thick.
- In the large bowl, toss the apples with both sugars, flour, lemon juice, cinnamon, nutmeg, and salt.
- Press one crust into the pie plate, then pile in the apples, mounding them a little higher in the center. Dot the top with the butter.
- Lay the second crust over the top, trim the edges to a 1/2-inch (1 cm) overhang, tuck them under, and crimp with your fingers or a fork.
- Cut four or five slits in the top crust, brush with the egg mixture, and sprinkle with coarse sugar.
- Bake on the hot baking sheet for 20 minutes, then lower the heat to 375°F (190°C) and bake another 40 to 50 minutes.
- If the edges brown too fast, cover them with a ring of foil. The pie is done when the crust is deep golden and thick juice bubbles slowly through the slits.
- Cool on a rack for at least 3 hours before slicing.
Common Mistakes to Avoid
- Cutting it warm. The filling needs time to set, or it floods the plate.
- Using only soft apples. McIntosh alone turns to applesauce, so keep it to one or two in the mix.
- Pulling it too early. If the juice is thin and fast-bubbling, the flour hasn’t thickened it yet. Give it ten more minutes.
- Skipping the slits. Steam has to escape, or the top crust puffs and cracks.
Variations, Storage, and Final Thoughts
Swap half the cinnamon for apple pie spice, or add 1/2 teaspoon of grated fresh ginger for a little warmth. A handful of raisins tossed into the filling is old-fashioned in the best way.
Cover the cooled pie loosely and keep it on the counter for up to 2 days, or in the fridge for up to 4 days. The USDA’s FoodKeeper guide backs up those same windows for fruit pies, and you can also freeze a baked pie, wrapped well, for up to 4 months.
Key takeaway: a mix of apples, a hot oven to start, and patience while it cools are what make a classic pie work. Master this one and the rest of the list feels easy.
2. Dutch Apple Pie with Brown Sugar Crumb Topping
Why You’ll Love This Recipe
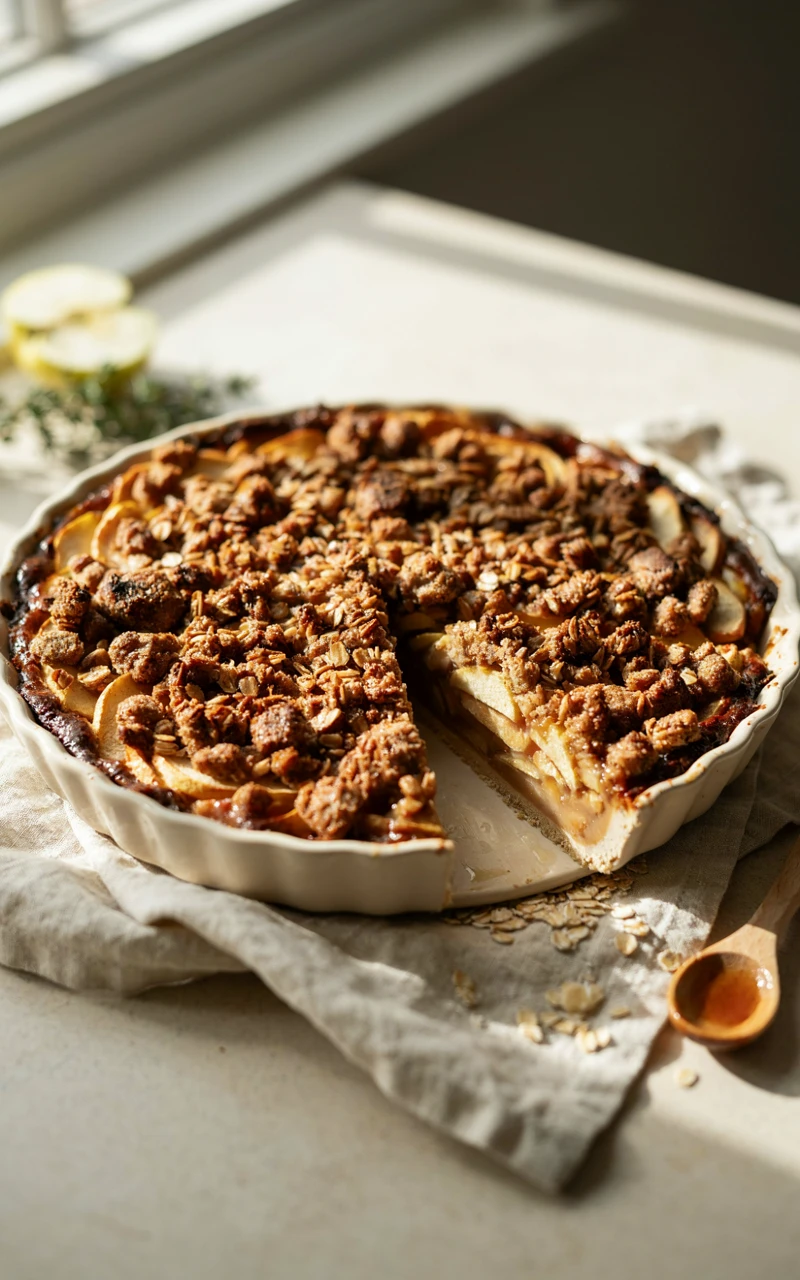
If top crusts make you nervous, this is your pie. You only need one crust on the bottom, and the top is a buttery brown sugar crumb you just scatter on with your hands.
The crumb bakes into crunchy little clusters that soak up a bit of the apple juice underneath. My family actually asks for this one more than the classic.
Ingredients
For the filling:
- 1 refrigerated pie crust (half of a 14.1 oz / 400 g package)
- 6 medium apples, about 2 1/2 lb (1.1 kg), sliced 1/4 inch (6 mm) thick
- 1/3 cup (65 g) granulated sugar
- 2 tbsp (16 g) all-purpose flour
- 1 tsp (3 g) ground cinnamon
- 1 tbsp (15 ml) lemon juice
- Pinch of salt
For the crumb topping:
- 3/4 cup (95 g) all-purpose flour
- 1/2 cup (100 g) packed light brown sugar
- 1/2 cup (40 g) old-fashioned rolled oats
- 1/2 tsp ground cinnamon
- 1/4 tsp (1.5 g) salt
- 6 tbsp (85 g) cold unsalted butter, cubed
Tools and Preparation
Grab a 9-inch (23 cm) deep-dish pie plate, two bowls, a pastry blender or fork, a baking sheet, and foil. Prep time: 25 minutes. Bake time: 55 to 65 minutes. Cooling: 2 hours. Total: about 3 hours 30 minutes. Serves: 8.
Make the crumb first and pop it in the fridge while you slice the apples. Cold crumb holds its little lumps in the oven instead of melting flat.
Step-by-Step Instructions
- Heat the oven to 375°F (190°C) with a baking sheet on the lower rack.
- In one bowl, stir the flour, brown sugar, oats, cinnamon, and salt. Cut in the cold butter until the mix looks like wet sand with pea-sized lumps, then chill it.
- Press the crust into the pie plate and crimp the edge.
- In the other bowl, toss the apples with the sugar, flour, cinnamon, lemon juice, and salt. Pour them into the crust.
- Squeeze handfuls of crumb to make clumps and scatter them evenly over the apples.
- Bake on the hot baking sheet for 30 minutes, then lay a loose sheet of foil over the top.
- Bake 25 to 35 minutes more, until the juice bubbles at the edges and a knife slides easily into the apples.
- Cool for at least 2 hours before cutting.
Common Mistakes to Avoid
- Using melted butter in the crumb. It turns greasy and sandy instead of crunchy.
- Forgetting the foil. Brown sugar burns quickly, so cover it once it’s golden.
- Packing the topping down. Loose clumps give you crunch, while a pressed layer bakes into a hard lid.
Variations, Storage, and Final Thoughts
Add 1/2 cup (55 g) chopped walnuts to the crumb, or swap the oats for more flour if you want a finer topping. A spoonful of vanilla in the filling is lovely, too.
Store it covered at room temperature for 2 days or in the fridge for 4. Warm slices in a 350°F (180°C) oven for 10 minutes to crisp the crumb back up.
Key takeaway: cold butter makes the crumb. This is one of those easy fall desserts that looks bakery-made with almost no skill needed.
3. Salted Caramel Apple Pie
Why You’ll Love This Recipe
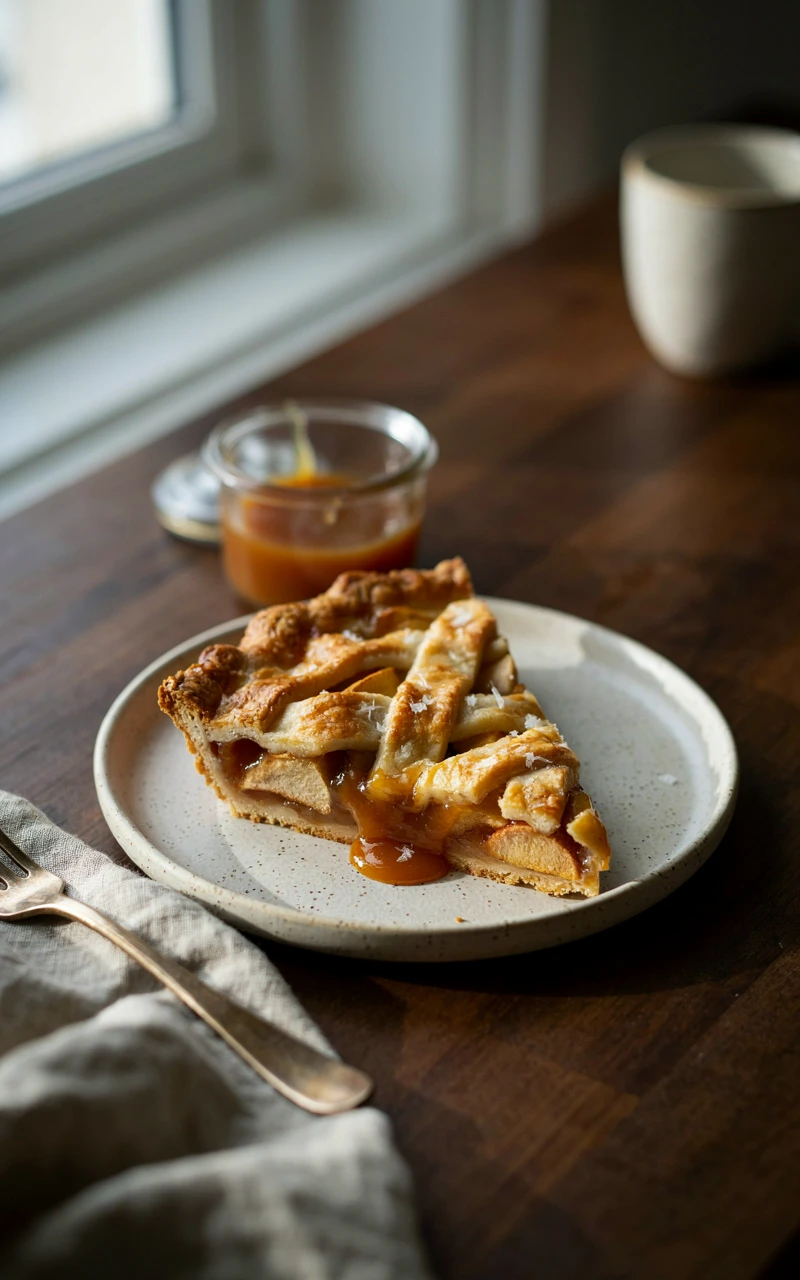
This pie tastes like a caramel apple from the county fair, only warm and with a flaky crust. A ribbon of salted caramel runs through the filling and gets drizzled on top after baking.
The salt is what makes it work. It cuts the sweetness so each bite tastes rich instead of sugary, and it’s a pie that gets people talking at the table.
Ingredients
- 1 package (14.1 oz / 400 g) refrigerated pie crusts, 2 crusts total
- 6 to 7 medium apples, about 3 lb (1.4 kg), mostly Granny Smith
- 1/3 cup (65 g) packed light brown sugar
- 3 tbsp (24 g) all-purpose flour
- 1 tsp (3 g) ground cinnamon
- 1 tbsp (15 ml) lemon juice
- 3/4 cup (180 ml) thick salted caramel sauce, divided
- 1 tsp flaky sea salt, divided
- 1 large egg beaten with 1 tbsp (15 ml) milk
Tools and Preparation
Use a 9-inch (23 cm) deep-dish pie plate, a large bowl, a spoon, a baking sheet, and foil. Prep time: 30 minutes. Bake time: 60 to 70 minutes. Cooling: 3 hours. Total: about 4 hours 40 minutes. Serves: 8.
Pick a thick jarred caramel, the kind that barely moves when you tip the jar. Thin ice cream topping makes the filling runny.
Step-by-Step Instructions
- Heat the oven to 425°F (220°C) with a baking sheet on the lower rack.
- Toss the sliced apples with brown sugar, flour, cinnamon, and lemon juice.
- Press one crust into the pie plate. Add half the apples, drizzle with 1/4 cup (60 ml) caramel, and sprinkle with 1/4 tsp flaky salt.
- Add the rest of the apples and another 1/4 cup (60 ml) caramel.
- Top with the second crust, crimp, cut slits, and brush with egg wash.
- Bake 20 minutes, then lower the heat to 375°F (190°C) and bake 40 to 50 minutes more, until the crust is deep golden and thick juice bubbles through the slits.
- Cool for 3 hours. Warm the last 1/4 cup (60 ml) caramel, drizzle it over the top, and finish with the remaining flaky salt.
Common Mistakes to Avoid
- Adding too much sugar to the apples. The caramel is already sweet, so keep the sugar low.
- Using very sweet apples. Tart apples balance the caramel best.
- Salting with fine table salt. It tastes harsh. Flaky salt gives little pops of flavor instead.
Variations, Storage, and Final Thoughts
Try a crumb top from the Dutch pie instead of a second crust, or stir 1/4 cup (30 g) chopped toasted pecans into the filling. A splash of bourbon in the warm caramel is nice for a grown-up table.
Keep it covered on the counter for 2 days or refrigerated for 4. Add the top drizzle right before serving so it stays glossy.
Key takeaway: thick caramel and tart apples are the whole secret. It’s a show-off pie that’s no harder than the classic.
4. Sheet Pan Apple Slab Pie
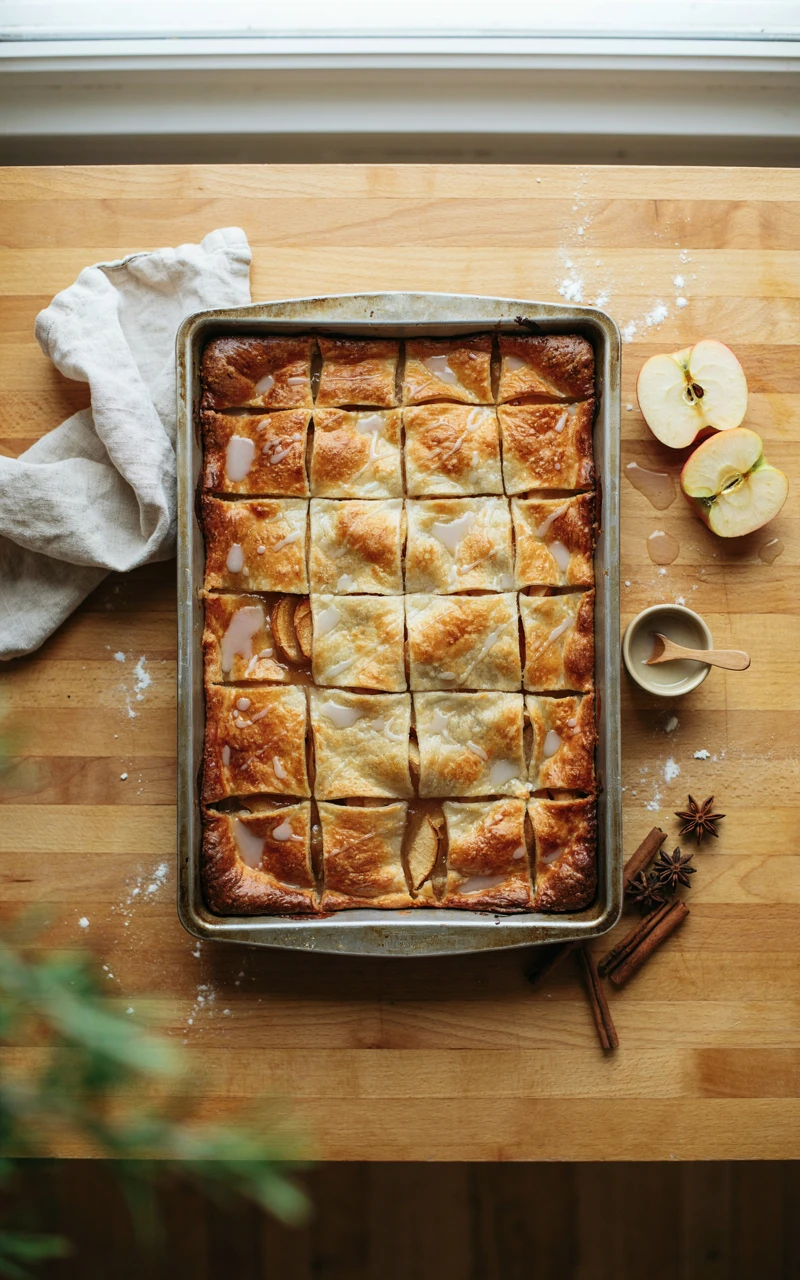
Why You’ll Love This Recipe
When you need to feed a crowd, a slab pie is the answer. It bakes in one rimmed pan and cuts into neat squares that people can grab with their hands at a party.
You get more crust in every bite, which is honestly the best part. It’s my go-to for potlucks, school events, and big family dinners.
Ingredients
- 2 packages (14.1 oz / 400 g each) refrigerated pie crusts, 4 crusts total
- 10 to 12 medium apples, about 5 lb (2.3 kg), sliced 1/4 inch (6 mm) thick
- 3/4 cup (150 g) granulated sugar
- 1/2 cup (100 g) packed light brown sugar
- 1/3 cup (40 g) all-purpose flour
- 2 tbsp (30 ml) lemon juice
- 2 tsp (5 g) ground cinnamon
- 1/2 tsp (3 g) salt
- 1 large egg beaten with 1 tbsp (15 ml) milk
- 1 cup (120 g) powdered sugar
- 2 tbsp (30 ml) milk, for the glaze
Tools and Preparation
You’ll need a 10 x 15-inch (25 x 38 cm) rimmed jelly roll pan, a rolling pin, a very large bowl, and a whisk. Prep time: 40 minutes. Bake time: 45 to 50 minutes. Cooling: 1 hour. Total: about 2 hours 20 minutes. Serves: 20.
Lightly flour the counter before you start. You’ll be pressing two crusts together for the bottom and two for the top.
Step-by-Step Instructions
- Heat the oven to 400°F (200°C).
- Overlap two crusts on the floured counter by about 2 inches (5 cm), press the seam together, and roll into a rectangle about 13 x 18 inches (33 x 46 cm).
- Ease it into the pan so it covers the bottom and comes up the sides.
- Toss the apples with both sugars, flour, lemon juice, cinnamon, and salt, then spread them evenly in the pan.
- Roll the remaining two crusts the same way to about 11 x 16 inches (28 x 41 cm) and lay them over the top. Fold the bottom edge over the top edge and crimp.
- Cut about a dozen slits across the top, then brush with egg wash.
- Bake 45 to 50 minutes, until golden brown and bubbling through the slits.
- Cool 1 hour, whisk the powdered sugar and milk together, and drizzle the glaze over the top.
Common Mistakes to Avoid
- Thin seams. Overlap the crusts generously so they don’t split in the oven.
- Too few vents. A big pie makes a lot of steam, so cut plenty of slits.
- Glazing while hot. The glaze melts and soaks in instead of setting.
Variations, Storage, and Final Thoughts
Skip the glaze and sprinkle the top with cinnamon sugar before baking. You can also cut the top crust into strips for a quick lattice look.
Cover the pan with foil and keep it on the counter for 2 days or in the fridge for 4. Squares freeze well, too, wrapped one by one.
Key takeaway: two crusts pressed together fit a sheet pan perfectly. Of all the pie recipes here, this one feeds the most people with the least fuss.
5. Apple Pie Bars with a Shortbread Crust
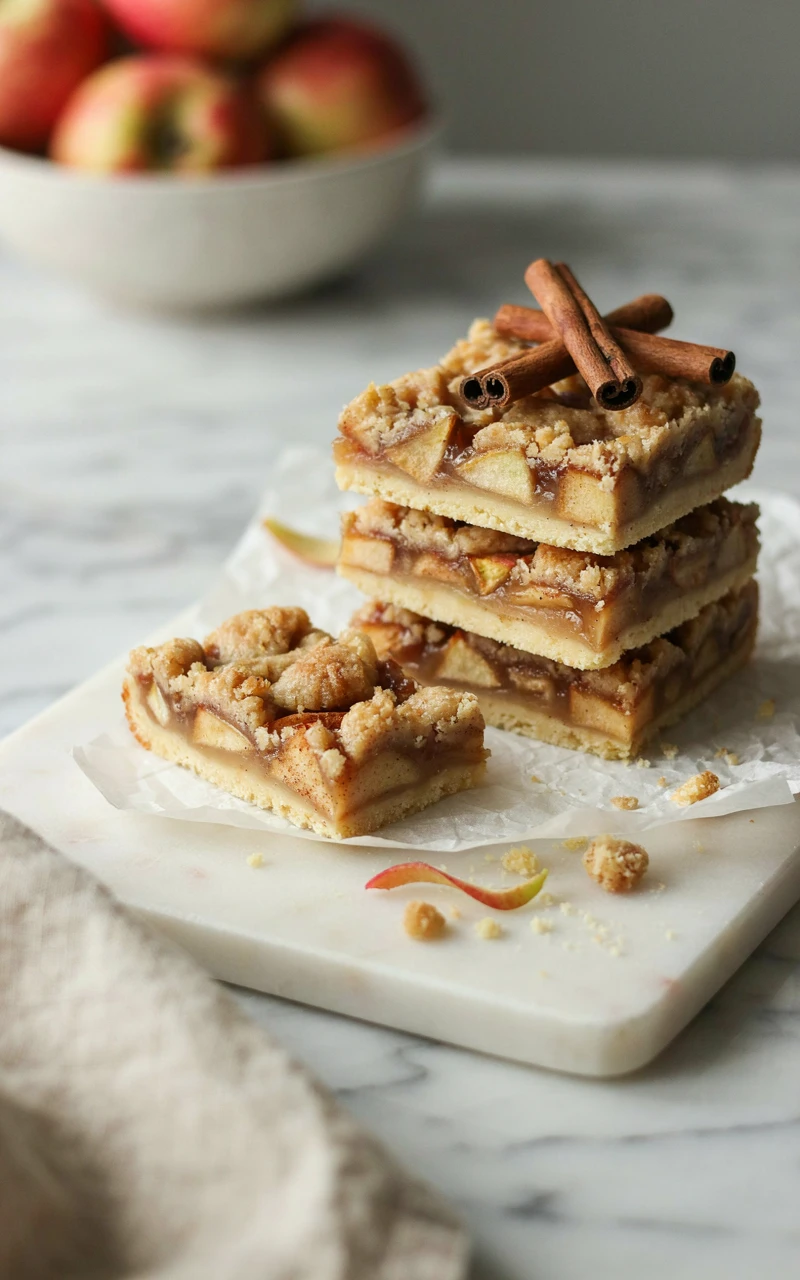
Why You’ll Love This Recipe
These bars have a buttery shortbread base, a layer of soft cinnamon apples, and a crumbly topping made from the same dough. There’s no rolling and no crimping at all.
They slice into neat squares, pack well, and travel without falling apart. They’re one of my favorite easy apple recipes for bake sales.
Ingredients
For the shortbread:
- 2 1/2 cups (315 g) all-purpose flour
- 1/2 cup (100 g) granulated sugar
- 1/2 tsp (3 g) salt
- 1 cup (225 g) cold unsalted butter, cubed
- 1/2 cup (40 g) old-fashioned rolled oats, for the topping
- 1/4 cup (50 g) packed light brown sugar, for the topping
For the filling:
- 5 medium apples, about 2 lb (900 g), peeled and diced 1/2 inch (1 cm)
- 1/3 cup (65 g) granulated sugar
- 2 tbsp (16 g) all-purpose flour
- 1 tsp (3 g) ground cinnamon
- 1 tbsp (15 ml) lemon juice
Tools and Preparation
Use a 9 x 13-inch (23 x 33 cm) metal baking pan, parchment paper, two bowls, and a pastry blender or your fingertips. Prep time: 25 minutes. Bake time: 50 to 55 minutes. Cooling: 2 hours. Total: about 3 hours 15 minutes. Makes: 24 bars.
Line the pan with parchment, leaving extra hanging over two sides. Those handles let you lift the whole slab out for clean cutting.
Step-by-Step Instructions
- Heat the oven to 350°F (180°C).
- Mix the flour, sugar, and salt, then rub in the butter until the dough looks crumbly and holds together when squeezed.
- Set aside 1 1/2 cups of the crumbs. Press the rest firmly into the pan.
- Bake the base for 15 minutes, until the edges just turn pale gold.
- Meanwhile, toss the apples with sugar, flour, cinnamon, and lemon juice.
- Stir the oats and brown sugar into the reserved crumbs.
- Spread the apples over the warm base and scatter the topping over them.
- Bake 35 to 40 minutes, until the top is golden and the apples are tender when poked.
- Cool completely, then chill 30 minutes before lifting out and cutting.
Common Mistakes to Avoid
- Skipping the pre-bake. An unbaked base gets soggy under the apples.
- Cutting apples too big. Large chunks won’t soften in time and make the bars fall apart.
- Using a glass pan. Glass bakes slower, so add 5 to 10 minutes if that’s all you have.
Variations, Storage, and Final Thoughts
Drizzle the cooled bars with the glaze from the slab pie, or add a pinch of cardamom to the filling. A little caramel on top is never a bad idea.
Store the bars in an airtight container at room temperature for 2 days or refrigerated for 5. They taste great cold, straight from the fridge.
Key takeaway: one dough makes both the base and the topping. If pie dough stresses you out, start here.
6. Mini Muffin Tin Apple Pies
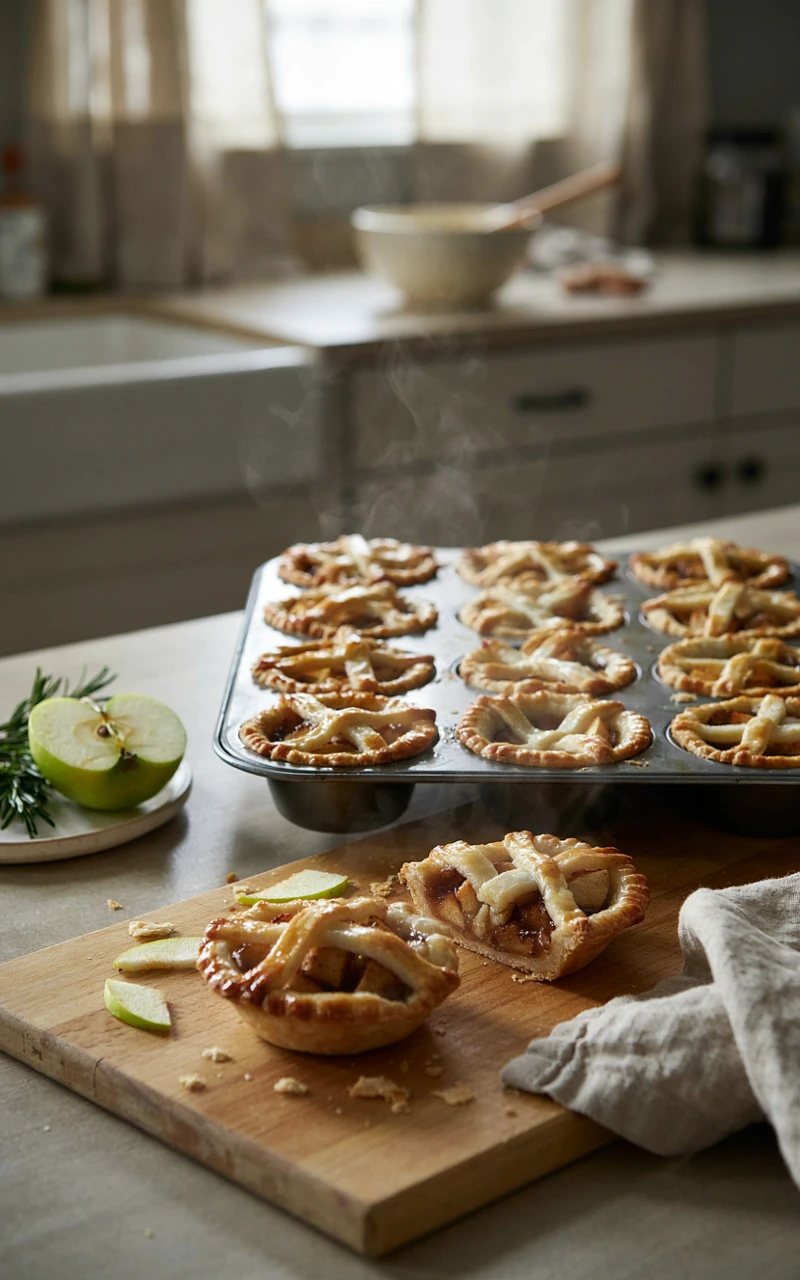
Why You’ll Love This Recipe
These little pies bake in a regular 12-cup muffin tin, and everyone gets their own. Kids love them, and they’re much easier to serve than slicing a full pie.
They bake in about 25 minutes, so you can make them on a weeknight. They also look adorable on a dessert table.
Ingredients
- 1 package (14.1 oz / 400 g) refrigerated pie crusts, 2 crusts total
- 3 medium apples, about 1 lb (450 g), peeled and diced 1/4 inch (6 mm)
- 1/4 cup (50 g) packed light brown sugar
- 1 tbsp (8 g) all-purpose flour
- 1 tsp (3 g) ground cinnamon
- 1 tsp (5 ml) lemon juice
- 1 tbsp (14 g) unsalted butter, melted
- 1 large egg beaten with 1 tbsp (15 ml) milk
- 2 tsp (8 g) cinnamon sugar, for sprinkling
Tools and Preparation
You’ll need a standard 12-cup muffin tin, cooking spray, a 4-inch (10 cm) round cutter or a glass that size, and a small star or leaf cutter for the tops. Prep time: 25 minutes. Bake time: 22 to 25 minutes. Cooling: 15 minutes. Total: about 1 hour 5 minutes. Makes: 12 mini pies.
Spray the muffin tin well, especially around the rim of each cup. Sugar from the filling likes to stick.
Step-by-Step Instructions
- Heat the oven to 375°F (190°C).
- Cut 12 rounds from the crusts, re-rolling scraps as needed, and press one into each muffin cup.
- Cut small stars or leaves from the leftover dough for the tops.
- Toss the diced apples with brown sugar, flour, cinnamon, lemon juice, and melted butter.
- Spoon about 2 heaping tablespoons of filling into each cup.
- Place a dough shape on each pie, brush with egg wash, and sprinkle with cinnamon sugar.
- Bake 22 to 25 minutes, until the crust is golden and the filling bubbles.
- Cool in the tin for 10 minutes, then run a thin knife around each one and lift it out.
Common Mistakes to Avoid
- Dicing apples too large. Small cubes cook through in the short bake time.
- Overfilling. Juice spills over and glues the pies to the tin.
- Waiting too long to remove them. Fully cooled sugar hardens and sticks, so lift them out while still warm.
Variations, Storage, and Final Thoughts
Top each pie with a spoonful of crumb topping instead of a dough shape, or add a small cube of cheddar to the filling for a sweet and savory bite. They’re also cute with a tiny lattice.
Keep them in a container at room temperature for 2 days or in the fridge for 4. Warm them in a 350°F (180°C) oven for 5 minutes.
Key takeaway: small dice and a well-greased tin make these easy. They’re perfect for little hands and big parties.
7. Rustic Apple Galette
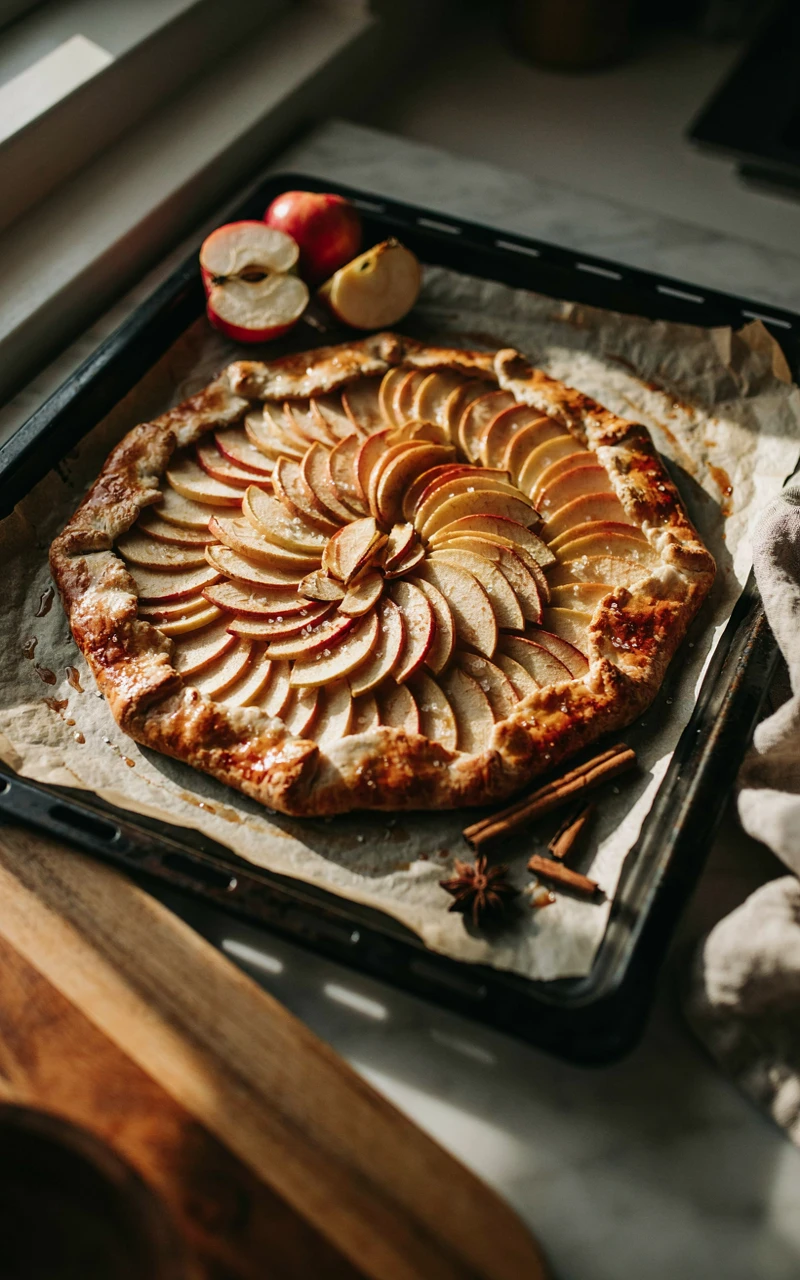
Why You’ll Love This Recipe
A galette is a free-form pie baked flat on a sheet pan. You pile the apples in the center, fold the edges up, and you’re done, with no pie plate and no crimping.
It’s supposed to look a little imperfect, which takes all the pressure off. I make this one when I want something sweet but don’t feel like a big project.
Ingredients
- 1 refrigerated pie crust (half of a 14.1 oz / 400 g package)
- 3 medium apples, about 1 1/4 lb (565 g), sliced 1/8 inch (3 mm) thick
- 3 tbsp (38 g) granulated sugar
- 1 tbsp (8 g) all-purpose flour
- 1 tsp (3 g) ground cinnamon
- 1 tbsp (15 ml) lemon juice
- 2 tbsp (28 g) unsalted butter, melted
- 2 tbsp (40 g) apricot jam, warmed
- 1 large egg beaten with 1 tbsp (15 ml) milk
- 1 tbsp (12 g) coarse sugar
Tools and Preparation
Use a rimmed baking sheet, parchment paper, a rolling pin, and a pastry brush. Prep time: 20 minutes. Bake time: 35 to 40 minutes. Cooling: 20 minutes. Total: about 1 hour 20 minutes. Serves: 6.
Roll the crust right on the parchment to about 12 inches (30 cm) across. Then you can slide the whole thing onto the pan without moving the dough.
Step-by-Step Instructions
- Heat the oven to 400°F (200°C).
- Roll the crust on the parchment and move it, paper and all, to the baking sheet.
- Toss the apple slices with sugar, flour, cinnamon, and lemon juice.
- Arrange the apples in overlapping circles, leaving a 2-inch (5 cm) border.
- Fold the border up over the edge of the apples, pleating it as you go.
- Brush the apples with melted butter and the crust with egg wash, then sprinkle the crust with coarse sugar.
- Bake 35 to 40 minutes, until the crust is deep golden and the apple edges start to brown.
- Brush the warm apples with the warmed jam for a shiny finish, then cool 20 minutes.
Common Mistakes to Avoid
- Thick apple slices. A galette bakes fast, so thin slices cook through in time.
- A skinny border. Less than 2 inches won’t hold the juice in.
- Skipping parchment. Juice leaks a little, and parchment saves your pan.
Variations, Storage, and Final Thoughts
Spread 2 tablespoons of almond paste or cream cheese on the crust before the apples go on. Sliced pears mixed with the apples are lovely, too.
A galette is best the day it’s baked, but it keeps covered at room temperature for 1 day or in the fridge for 3. Re-crisp it in the oven before serving.
Key takeaway: rustic is the goal here. It’s one of the easiest autumn desserts you can make with a single crust.
8. Baked Apple Hand Pies
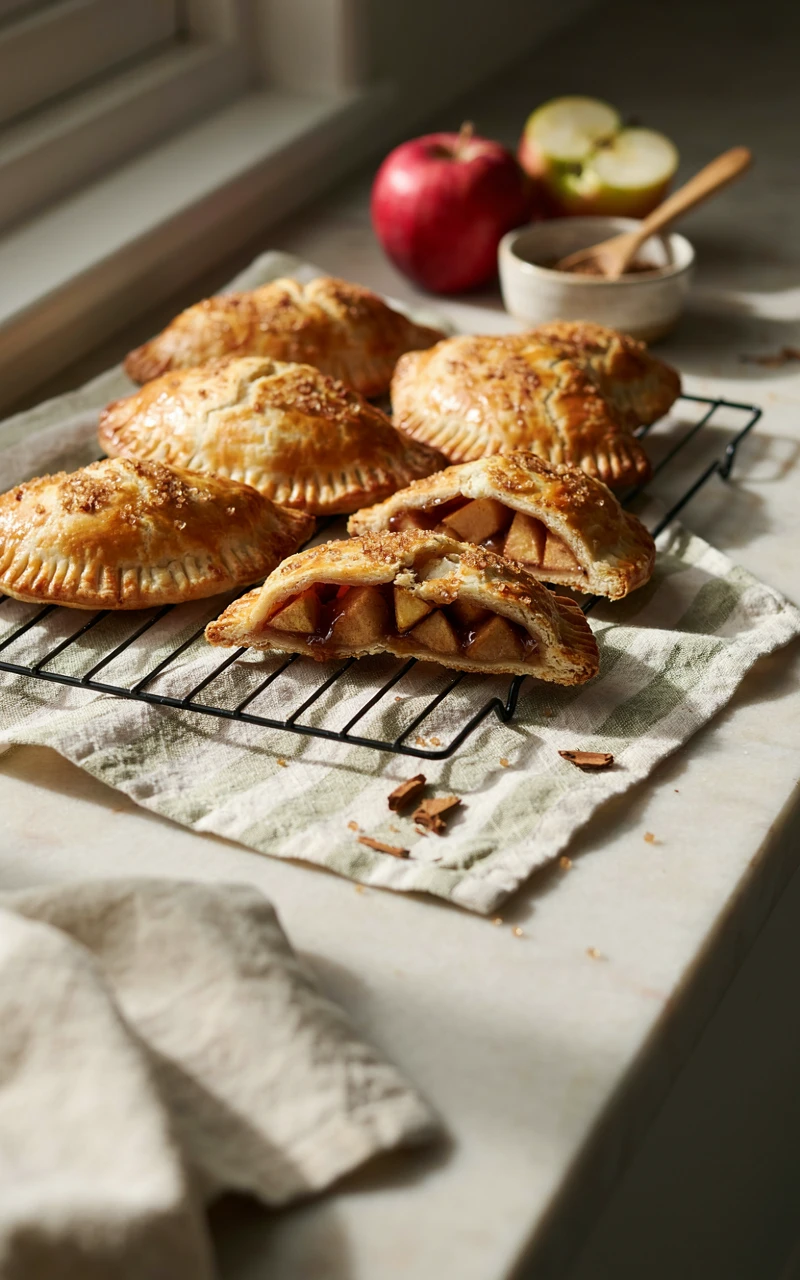
Why You’ll Love This Recipe
Hand pies are little folded pockets of flaky crust and warm apple filling. You can eat them standing up, take them on a fall walk, or tuck one into a lunchbox.
Cooking the filling first means it’s thick and jammy, so nothing leaks out. They’re baked, not fried, which keeps them simple.
Ingredients
- 1 package (14.1 oz / 400 g) refrigerated pie crusts, 2 crusts total
- 3 medium apples, about 1 lb (450 g), peeled and diced 1/4 inch (6 mm)
- 2 tbsp (28 g) unsalted butter
- 1/4 cup (50 g) packed light brown sugar
- 1 tsp (3 g) ground cinnamon
- Pinch of salt
- 1 tbsp (8 g) cornstarch mixed with 1 tbsp (15 ml) water
- 1 large egg beaten with 1 tbsp (15 ml) milk
- 1/2 cup (60 g) powdered sugar and 1 tbsp (15 ml) milk, for an optional glaze
Tools and Preparation
You’ll need a medium skillet, a 5-inch (13 cm) round cutter or small bowl, a fork, a baking sheet, and parchment paper. Prep time: 30 minutes, plus 20 minutes to cool the filling. Bake time: 18 to 22 minutes. Total: about 1 hour 15 minutes. Makes: 8 hand pies.
Make the filling first and spread it on a plate to cool. Warm filling melts the butter in the crust and makes the pies soft.
Step-by-Step Instructions
- Melt the butter in the skillet over medium heat. Add apples, brown sugar, cinnamon, and salt and cook 6 to 8 minutes, until just tender.
- Stir in the cornstarch mixture and cook 1 minute more, until thick and glossy. Cool completely.
- Heat the oven to 400°F (200°C) and line the baking sheet with parchment.
- Cut 8 rounds from the crusts, re-rolling scraps once.
- Spoon about 2 tablespoons of filling onto one half of each round, leaving a 1/2-inch (1 cm) edge.
- Brush the edge with egg wash, fold over into a half-moon, and press firmly with a fork to seal.
- Brush the tops with egg wash and cut two small slits in each.
- Bake 18 to 22 minutes, until puffed and golden. Cool 10 minutes, then drizzle with glaze if you like.
Common Mistakes to Avoid
- Overfilling. Too much filling bursts the seams.
- Weak seals. Press hard with the fork all the way around.
- Using warm filling. Let it cool all the way, or the crust turns gummy.
Variations, Storage, and Final Thoughts
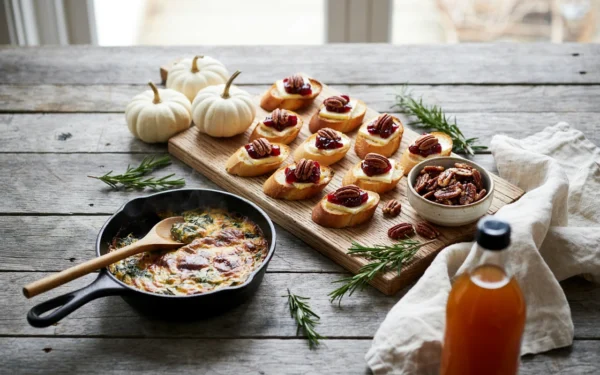
Fold a little cream cheese into the cooled filling, or use puff pastry for a flakier pie. They’re also a sweet little extra next to your Thanksgiving appetizers when guests want something to nibble.
Store them in a container at room temperature for 2 days, or freeze unbaked pies on a tray, then bag them. Bake from frozen, adding 5 minutes.
Key takeaway: cook and cool the filling first. That one step keeps every hand pie neat.
9. Cast Iron Skillet Apple Pie
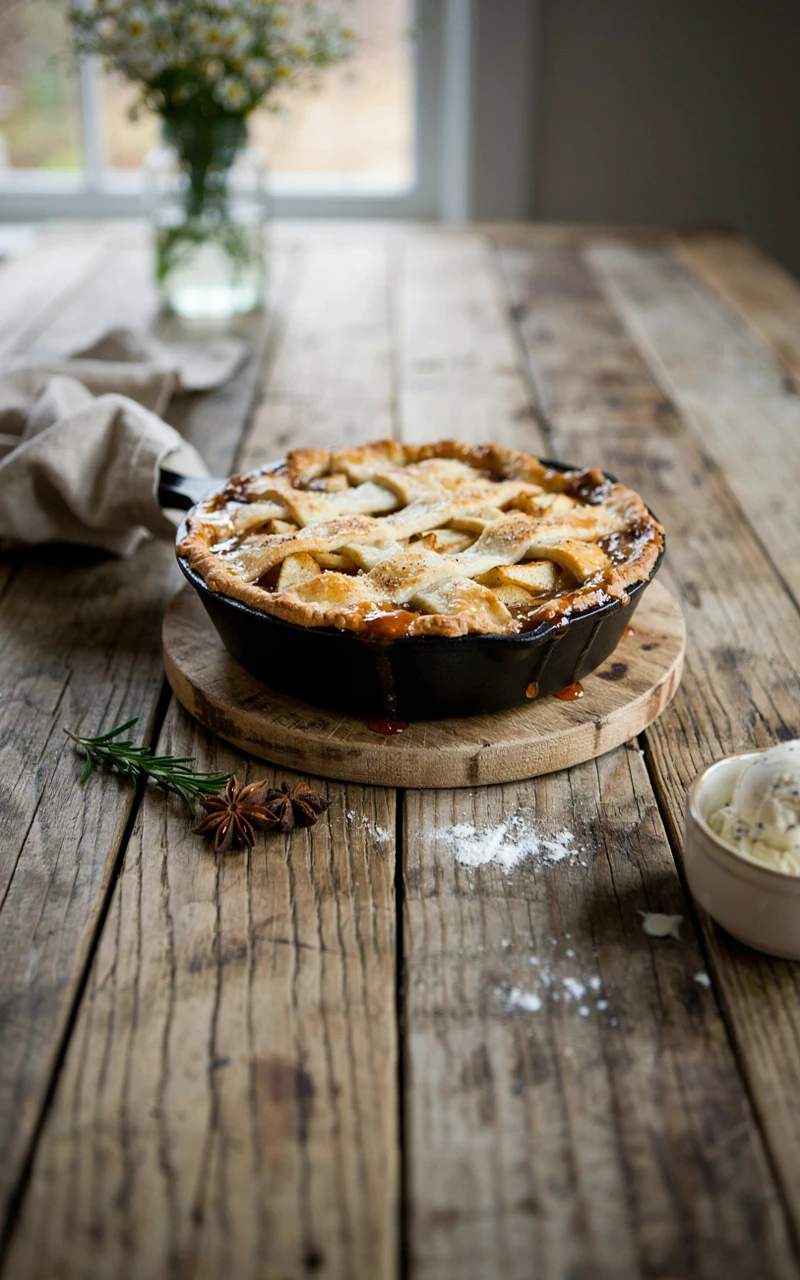
Why You’ll Love This Recipe
Baking a pie in a cast iron skillet gives you a crisp, caramelized bottom crust that a regular pie plate just can’t match. A layer of butter and brown sugar melts under the crust and turns into a sticky caramel.
It also looks wonderful brought straight to the table in the pan. If you own a skillet, give this one a try.
Ingredients
- 1 package (14.1 oz / 400 g) refrigerated pie crusts, 2 crusts total
- 4 tbsp (56 g) unsalted butter
- 1/2 cup (100 g) packed light brown sugar, for the skillet
- 6 medium apples, about 2 1/2 lb (1.1 kg), sliced 1/4 inch (6 mm) thick
- 1/4 cup (50 g) granulated sugar
- 2 tbsp (16 g) all-purpose flour
- 1 1/2 tsp (4 g) ground cinnamon
- 1 tbsp (15 ml) lemon juice
- 1 large egg beaten with 1 tbsp (15 ml) milk
- 1 tbsp (12 g) coarse sugar
Tools and Preparation
Use a 10-inch (25 cm) cast iron skillet, a large bowl, sturdy oven mitts, and a baking sheet to catch drips. Prep time: 25 minutes. Bake time: 55 to 60 minutes. Cooling: 1 hour. Total: about 2 hours 25 minutes. Serves: 8.
Remember that the handle gets very hot in the oven. I slip a handle cover or folded towel on it the moment it comes out so nobody grabs it by accident.
Step-by-Step Instructions
- Heat the oven to 375°F (190°C).
- Melt the butter in the skillet over low heat, stir in the brown sugar, and take the pan off the heat. Let it cool for 5 minutes.
- Lay one crust over the sugar mixture and press it gently into the skillet.
- Toss the apples with sugar, flour, cinnamon, and lemon juice, then pile them in.
- Top with the second crust, tuck and crimp the edges, cut slits, brush with egg wash, and sprinkle with coarse sugar.
- Set the skillet on the baking sheet and bake 55 to 60 minutes, until golden with thick juice bubbling at the slits.
- Cool at least 1 hour before slicing.
Common Mistakes to Avoid
- Adding the crust to sizzling butter. Let the pan cool a few minutes so the dough doesn’t melt.
- Skipping the baking sheet. Caramel bubbles over and burns on the oven floor.
- Grabbing the handle. It stays hot for a long time after baking.
Variations, Storage, and Final Thoughts
Use the Dutch crumb topping instead of a top crust, or add a handful of dried cherries. It’s wonderful warm with vanilla ice cream melting into the caramel.
Move leftovers to a covered container rather than storing them in the skillet, since the fruit acid can dull the pan’s seasoning. Keep for 2 days on the counter or 4 in the fridge.
Key takeaway: butter and brown sugar under the crust give you a caramelized bottom every time. It’s fall baking at its coziest.
10. Apple Cranberry Lattice Pie
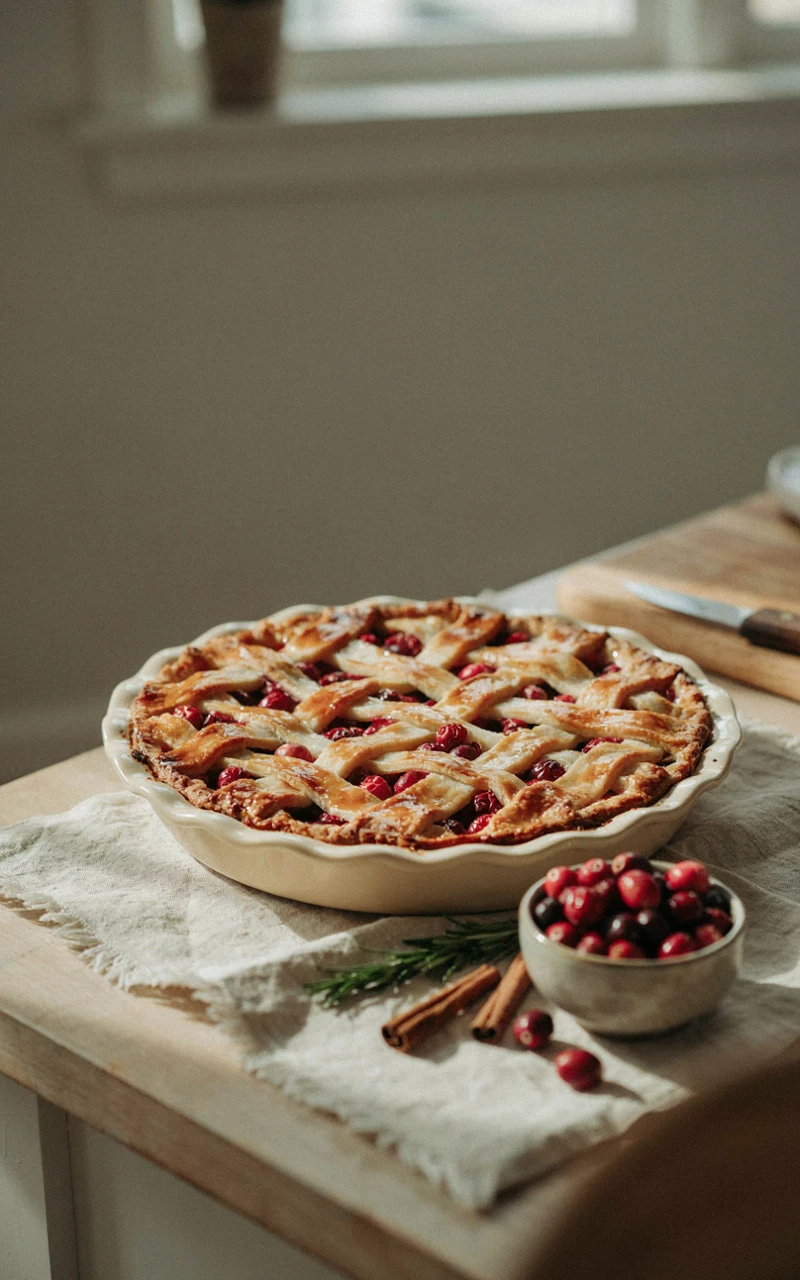
Why You’ll Love This Recipe
Tart red cranberries tucked between the apples make this pie look like a holiday. The lattice top shows off all that color.
The cranberries add a little tang that keeps the pie from tasting too sweet. It’s the one I bring to Thanksgiving every year.
Ingredients
- 1 package (14.1 oz / 400 g) refrigerated pie crusts, 2 crusts total
- 5 medium apples, about 2 1/4 lb (1 kg), sliced 1/4 inch (6 mm) thick
- 1 1/2 cups (150 g) fresh or frozen cranberries
- 3/4 cup (150 g) granulated sugar
- 3 tbsp (24 g) cornstarch
- 1 tsp (2 g) grated orange zest
- 1 tsp (3 g) ground cinnamon
- Pinch of salt
- 1 large egg beaten with 1 tbsp (15 ml) milk
- 1 tbsp (12 g) coarse sugar
Tools and Preparation
You’ll need a 9-inch (23 cm) deep-dish pie plate, a pizza cutter or knife, a ruler, a large bowl, and a baking sheet. Prep time: 40 minutes. Bake time: 60 to 65 minutes. Cooling: 3 hours. Total: about 4 hours 45 minutes. Serves: 8.
If you use frozen cranberries, don’t thaw them. Toss them in straight from the bag.
Step-by-Step Instructions
- Heat the oven to 425°F (220°C) with a baking sheet on the lower rack.
- Press one crust into the pie plate and chill it while you work.
- Toss the apples and cranberries with sugar, cornstarch, orange zest, cinnamon, and salt, then pour into the crust.
- Cut the second crust into 10 strips about 1 inch (2.5 cm) wide.
- Lay 5 strips across the pie in one direction. Fold back every other strip, lay one strip the other way, and unfold. Repeat until woven.
- Trim the strips, press them into the bottom crust edge, and crimp.
- Brush with egg wash and sprinkle with coarse sugar.
- Bake 20 minutes, lower to 375°F (190°C), and bake 40 to 45 minutes more, until the juice is thick and bubbling between the strips.
- Cool 3 hours before slicing.
Common Mistakes to Avoid
- Using flour instead of cornstarch. Cranberries release lots of juice, and cornstarch thickens it better.
- Warm dough strips. Chill them for 10 minutes if they get floppy.
- Worrying about a perfect weave. Laying strips one way and then the other without weaving still looks lovely.
Variations, Storage, and Final Thoughts
Swap the cranberries for fresh blackberries or chopped pears. A pinch of ground ginger goes well with the orange zest.
Keep it covered on the counter for 2 days or in the fridge for 4. It’s even easier to slice cleanly on the second day.
Key takeaway: cornstarch keeps the cranberry juice in check. This is a holiday-ready pie without any fancy skills.
11. Cinnamon Roll Crust Apple Pie
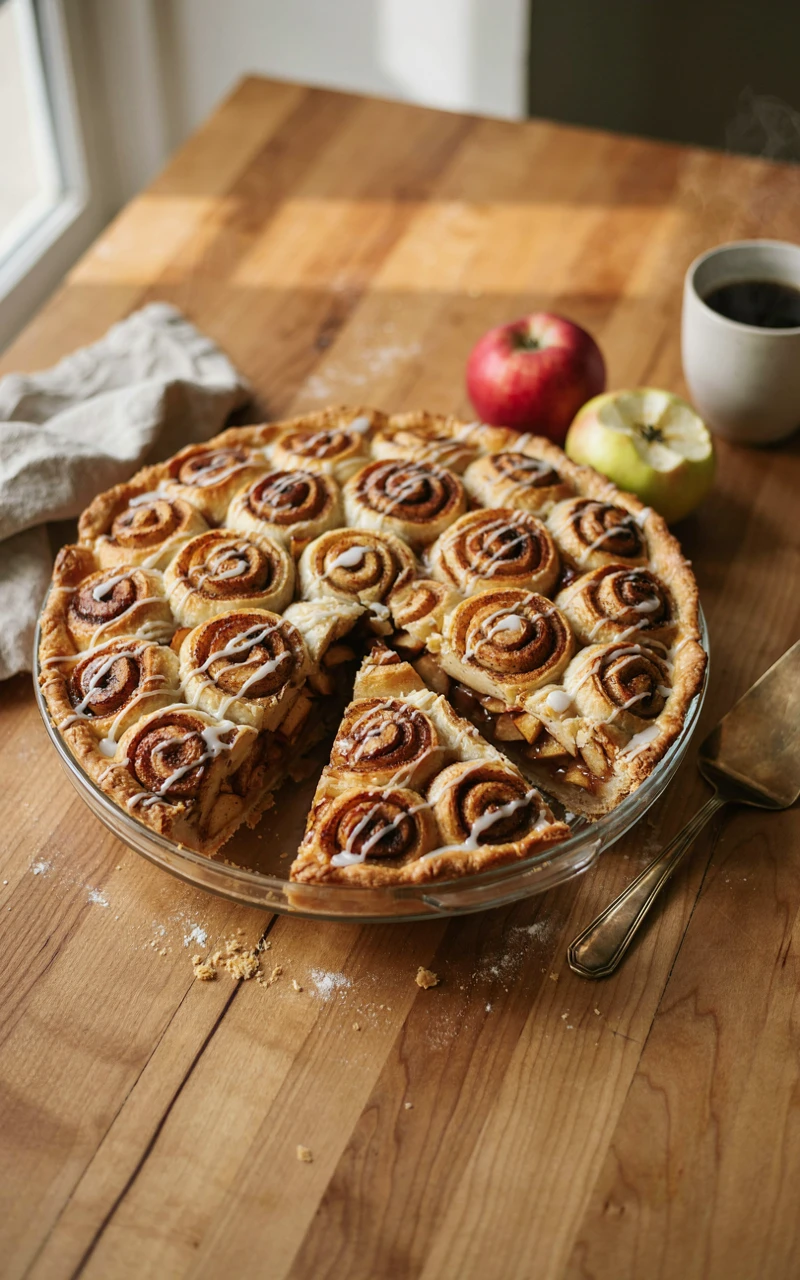
Why You’ll Love This Recipe
This pie uses canned cinnamon rolls as the crust, and it’s as fun as it sounds. The rolls bake into a soft, swirled crust that tastes like breakfast and dessert at once.
Kids go wild for it, and it takes less effort than a regular pie. The icing from the can becomes the drizzle on top.
Ingredients
- 2 cans (12.4 oz / 350 g each) refrigerated cinnamon rolls with icing, 16 rolls total
- 5 medium apples, about 2 lb (900 g), sliced 1/4 inch (6 mm) thick
- 2 tbsp (28 g) unsalted butter
- 1/3 cup (65 g) packed light brown sugar
- 1 tsp (3 g) ground cinnamon
- 1 tbsp (8 g) cornstarch
- 1 tbsp (15 ml) lemon juice
- Pinch of salt
Tools and Preparation
Use a 9-inch (23 cm) deep-dish pie plate, a large skillet, cooking spray, a rolling pin, and foil. Prep time: 25 minutes. Bake time: 35 to 40 minutes. Cooling: 30 minutes. Total: about 1 hour 35 minutes. Serves: 8.
The filling gets a quick head start on the stove. Cinnamon roll dough bakes faster than pie crust, so raw apples wouldn’t soften in time.
Step-by-Step Instructions
- Heat the oven to 350°F (180°C) and spray the pie plate.
- Melt the butter in the skillet, add the apples, brown sugar, cinnamon, and salt, and cook 6 to 8 minutes, until just tender.
- Stir the cornstarch into the lemon juice, add it to the pan, and cook 1 minute until thick. Let cool for 10 minutes.
- Press 8 rolls flat and fit them into the pie plate, pinching the seams together to make one crust.
- Spoon in the apple filling.
- Slice the remaining 8 rolls in half crosswise into thin rounds and lay them over the top, swirl side up.
- Bake for 20 minutes, cover loosely with foil, and bake 15 to 20 minutes more, until the top is deep golden and the dough under the center rolls looks cooked when you lift one with a knife.
- Cool for 30 minutes, then warm the icing for 10 seconds and drizzle it over the top.
Common Mistakes to Avoid
- Using raw apples. They stay crunchy because the bake is short.
- Leaving gaps in the bottom. Pinch every seam closed so filling doesn’t leak under the crust.
- Pulling it out pale. The middle needs the full time to cook through.
Variations, Storage, and Final Thoughts
Use orange cinnamon rolls for a citrus twist, or sprinkle chopped pecans between the top rolls. It makes a fun brunch dish on a fall weekend.
Store covered in the fridge for up to 3 days. Warm slices in the microwave for 20 seconds to soften the rolls again.
Key takeaway: pre-cook the apples and give the center time to bake. It’s a playful twist that feels special with very little work.
12. Maple Pecan Apple Pie
Why You’ll Love This Recipe
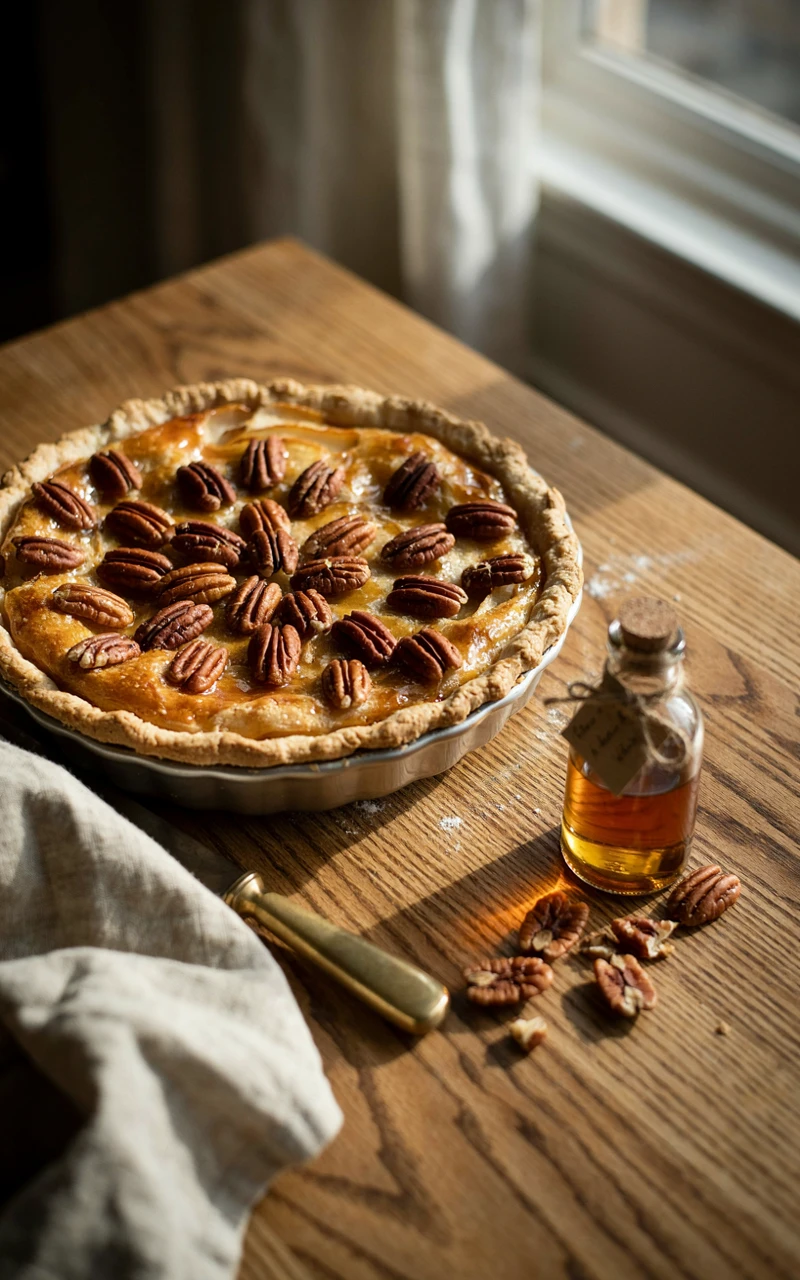
Real maple syrup sweetens the apples in this pie, and a crunchy maple pecan topping goes on top. It tastes like a crisp fall morning in the woods.
The maple flavor is warm and deep without being too sweet. It’s the pie I make when I want something a little different from the classic.
Ingredients
For the filling:
- 1 refrigerated pie crust (half of a 14.1 oz / 400 g package)
- 6 medium apples, about 2 1/2 lb (1.1 kg), sliced 1/4 inch (6 mm) thick
- 1/3 cup (80 ml) pure maple syrup
- 3 tbsp (24 g) all-purpose flour
- 1 tsp (3 g) ground cinnamon
- 1/4 tsp ground nutmeg
- 1 tbsp (15 ml) lemon juice
For the maple pecan topping:
- 1 cup (110 g) chopped pecans
- 1/2 cup (60 g) all-purpose flour
- 1/4 cup (50 g) packed light brown sugar
- 4 tbsp (56 g) unsalted butter, melted
- 2 tbsp (30 ml) pure maple syrup
- Pinch of salt
Tools and Preparation
Grab a 9-inch (23 cm) deep-dish pie plate, two bowls, a baking sheet, and foil. Prep time: 25 minutes. Bake time: 55 to 60 minutes. Cooling: 2 hours. Total: about 3 hours 25 minutes. Serves: 8.
Check the label on your syrup. You want pure maple syrup, not pancake syrup, which is mostly corn syrup and won’t give you that real maple taste.
Step-by-Step Instructions
- Heat the oven to 375°F (190°C) with a baking sheet on the lower rack.
- Press the crust into the pie plate and crimp the edge.
- Toss the apples with maple syrup, flour, cinnamon, nutmeg, and lemon juice, then pour into the crust.
- In the second bowl, stir together the pecans, flour, brown sugar, melted butter, maple syrup, and salt until clumpy.
- Scatter the topping evenly over the apples.
- Bake 30 minutes, then cover loosely with foil.
- Bake 25 to 30 minutes more, until the filling bubbles at the edges and a knife slides easily into the apples.
- Cool 2 hours before slicing.
Common Mistakes to Avoid
- Using pancake syrup. The flavor is flat, and the filling gets runny.
- Skipping the foil. Pecans and maple brown fast and can taste burnt.
- Cutting it too soon. Maple filling needs the full cooling time to set.
Variations, Storage, and Final Thoughts
Swap the pecans for walnuts, or add a splash of vanilla to the filling. A drizzle of extra maple syrup over each warm slice is a treat.
Keep it covered on the counter for 2 days or in the fridge for 4. Warm slices in a 350°F (180°C) oven for 10 minutes so the pecans get crunchy again.
Key takeaway: pure maple syrup and a foil tent are all this pie asks of you. It’s a cozy finish to a list full of comfort.
Twelve pies is a lot, I know. I didn’t bake all of these in one weekend, and you don’t need to either.
What I hope you take away is that a great apple pie comes from a few simple habits, not some special talent. Cold dough, a good mix of apples, and a little patience while it cools will carry you through every recipe here.
If your oven is already warm and you still have the baking bug, my easy pumpkin bread is a sweet next step. Pick the pie that made you smile while reading, grab a bag of apples, and give it a go this week. Then come back and tell me in the comments which one you baked and how it turned out, because I’d love to hear about it.