This post may contain affiliate links, which means I may receive a small commission should you decide to click that link and make a purchase. For more information please refer to the Terms & Conditions.
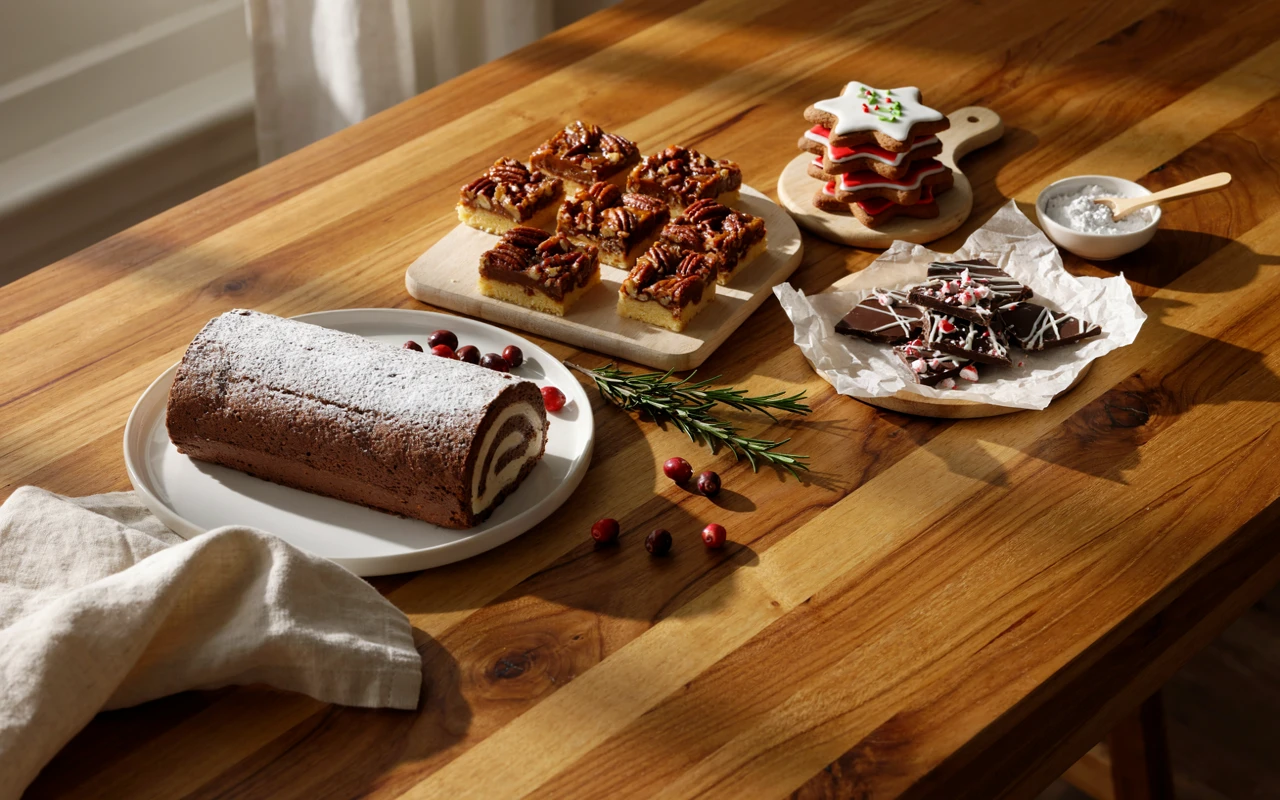
Every year I promise myself I’ll get ahead on Christmas baking, and every year I end up melting chocolate at midnight on December 23rd. This year I’m doing it differently. I made a short list of Christmas dessert ideas to start planning early, and I’m sharing it with you here.
Most of these desserts keep well, freeze well, or get better after a few days in the fridge. That means you can shop in November, bake in early December, and actually sit down with a cup of coffee on Christmas Eve.
Below you’ll find 10 Christmas desserts you can plan, shop for, and even make ahead, so the holidays feel a little less rushed.
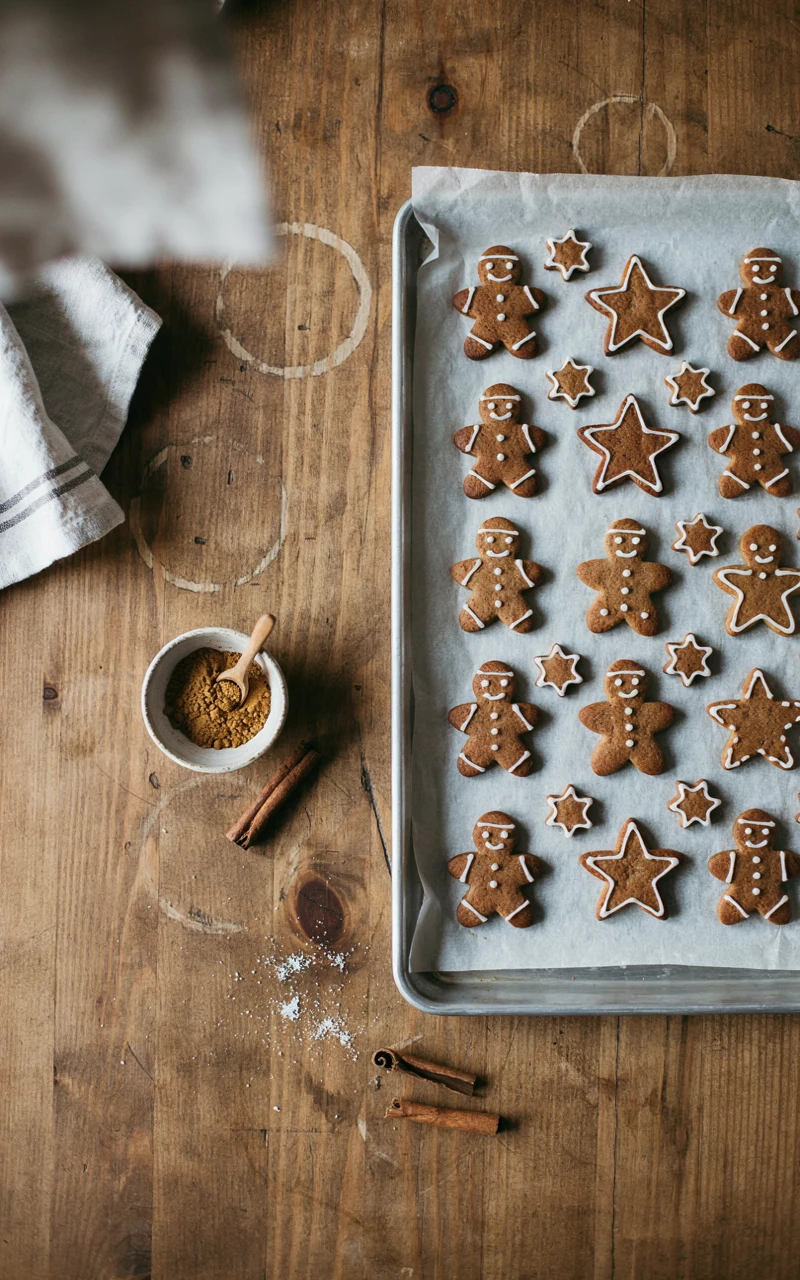
1. Soft Gingerbread Cookies
Why You’ll Love This Recipe
These are the soft, chewy kind of gingerbread cookie, not the hard ones you hang on the tree. They have crackly sugar tops, puffy centers, and plenty of ginger and molasses.
You don’t need cookie cutters or icing. Roll the dough into balls, coat them in sugar, and bake, so they’re a good first project when you’re easing into holiday baking.
Ingredients
- 2 1/4 cups (280 g) all-purpose flour
- 1 1/2 tsp ground ginger
- 1 tsp ground cinnamon
- 1/4 tsp ground cloves
- 1 tsp baking soda
- 1/2 tsp salt
- 3/4 cup (170 g) unsalted butter, softened
- 3/4 cup (150 g) packed brown sugar
- 1 large egg
- 1/4 cup (85 g) molasses
- 1 tsp vanilla extract
- 1/4 cup (50 g) granulated sugar, for rolling
Tools and Preparation
You’ll need a large bowl, a hand or stand mixer, two baking sheets, parchment paper, and a cookie scoop or tablespoon. Set the butter out an hour ahead so it’s soft enough to press with a finger.
- Prep time: 20 minutes
- Chill time: 1 hour
- Cook time: 10 minutes per batch
- Total time: about 1 hour 50 minutes
- Makes: about 24 cookies
Step-by-Step Instructions
- Whisk the flour, ginger, cinnamon, cloves, baking soda, and salt in a bowl and set it aside.
- Beat the butter and brown sugar for 2 to 3 minutes, until light and fluffy.
- Add the egg, molasses, and vanilla, and beat until smooth.
- Mix in the flour mixture on low speed just until no dry streaks remain.
- Cover the bowl and chill the dough for 1 hour.
- Heat the oven to 350°F (180°C) and line the baking sheets with parchment.
- Scoop 1 1/2 tablespoon balls, roll them in the granulated sugar, and space them 2 inches (5 cm) apart.
- Bake for 9 to 10 minutes, until the edges are set and the tops look cracked but the centers still look a little soft.
- Cool on the sheet for 5 minutes, then move the cookies to a rack.
Common Mistakes to Avoid
- Skipping the chill. Warm dough spreads into flat, thin cookies.
- Over-baking. If the centers look done in the oven, they’ll be hard once cool.
- Using black strap molasses. It’s bitter here, so pick regular or “original” molasses.
Variations, Storage, and Final Thoughts
Add 1/4 tsp black pepper for a little kick, or dip half of each cooled cookie in melted white chocolate. A sprinkle of flaky salt on top is lovely too.
Keep the cookies in an airtight tin for up to 5 days. You can also freeze the rolled dough balls for up to 3 months and bake them straight from frozen, adding a minute or two.
I like to freeze a full batch of dough in early December. When friends drop by, I bake six at a time and the whole house smells like Christmas.
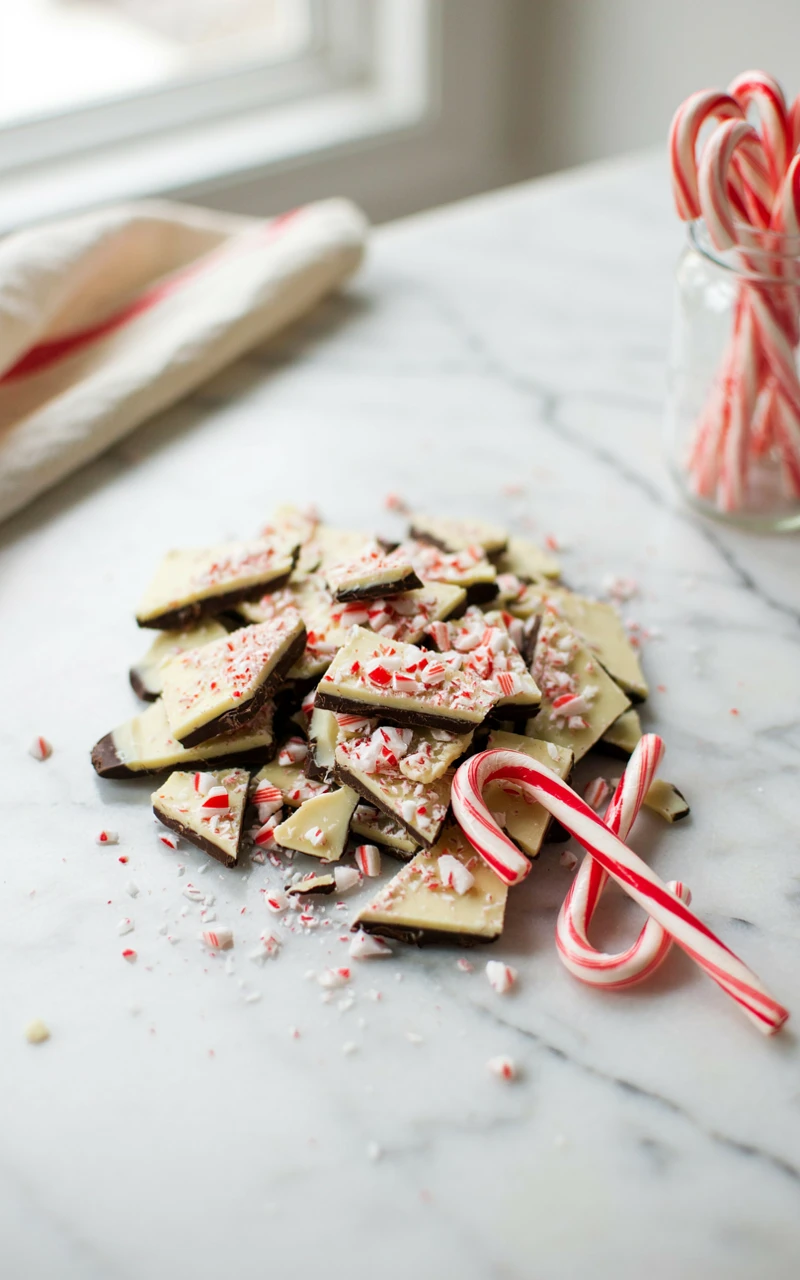
2. Easy Peppermint Bark
Why You’ll Love This Recipe
Peppermint bark is one of the easiest festive desserts you can make. It needs only four ingredients and no oven at all.
It also makes a great gift. Break it into pieces, pack it into a jar or a cellophane bag with a ribbon, and you’ve got neighbor gifts done in an afternoon.
Ingredients
- 12 oz (340 g) semisweet or dark chocolate, chopped
- 12 oz (340 g) good white chocolate, chopped
- 1/2 tsp peppermint extract
- 1/2 cup (85 g) crushed candy canes (about 6 regular candy canes)
Tools and Preparation
Grab a 9 x 13 inch (23 x 33 cm) baking pan, parchment paper, two microwave-safe bowls, a spatula, and a zip-top bag with a rolling pin for crushing the candy canes. Line the pan with parchment so it hangs over the sides, which makes lifting the bark out much easier.
- Prep time: 20 minutes
- Chill time: 45 minutes
- Total time: about 1 hour 5 minutes
- Makes: about 24 pieces
Step-by-Step Instructions
- Microwave the dark chocolate in 30-second bursts, stirring each time, until it’s almost melted. Stir until the last bits melt.
- Pour it into the lined pan and spread it into an even layer.
- Chill for about 15 minutes, until it’s set but not rock hard.
- Melt the white chocolate in 20-second bursts, stirring well each time, since it burns faster.
- Stir in the peppermint extract.
- Spread the white chocolate over the dark layer right away.
- Scatter the crushed candy canes on top and press them in gently.
- Chill for 30 minutes, until firm, then lift out and break or cut into pieces.
Common Mistakes to Avoid
- Letting water touch the chocolate. Even a drop can make it thick and grainy.
- Chilling the first layer too long. If it’s too hard, the two layers split apart when you break the bark.
- Swapping in peppermint oil at the same amount. Oil is much stronger, so use just a few drops.
Variations, Storage, and Final Thoughts
Try milk chocolate on the bottom, or swirl the two chocolates together with a knife for a marbled look. Crushed pretzels on top add a salty crunch.
Store the bark in an airtight container in a cool spot for up to 2 weeks, or in the fridge if your kitchen is warm. Keep it away from humidity, which makes the candy canes sticky.
This is the one I make first every year. Once it’s in a tin, I feel like the season has officially started.
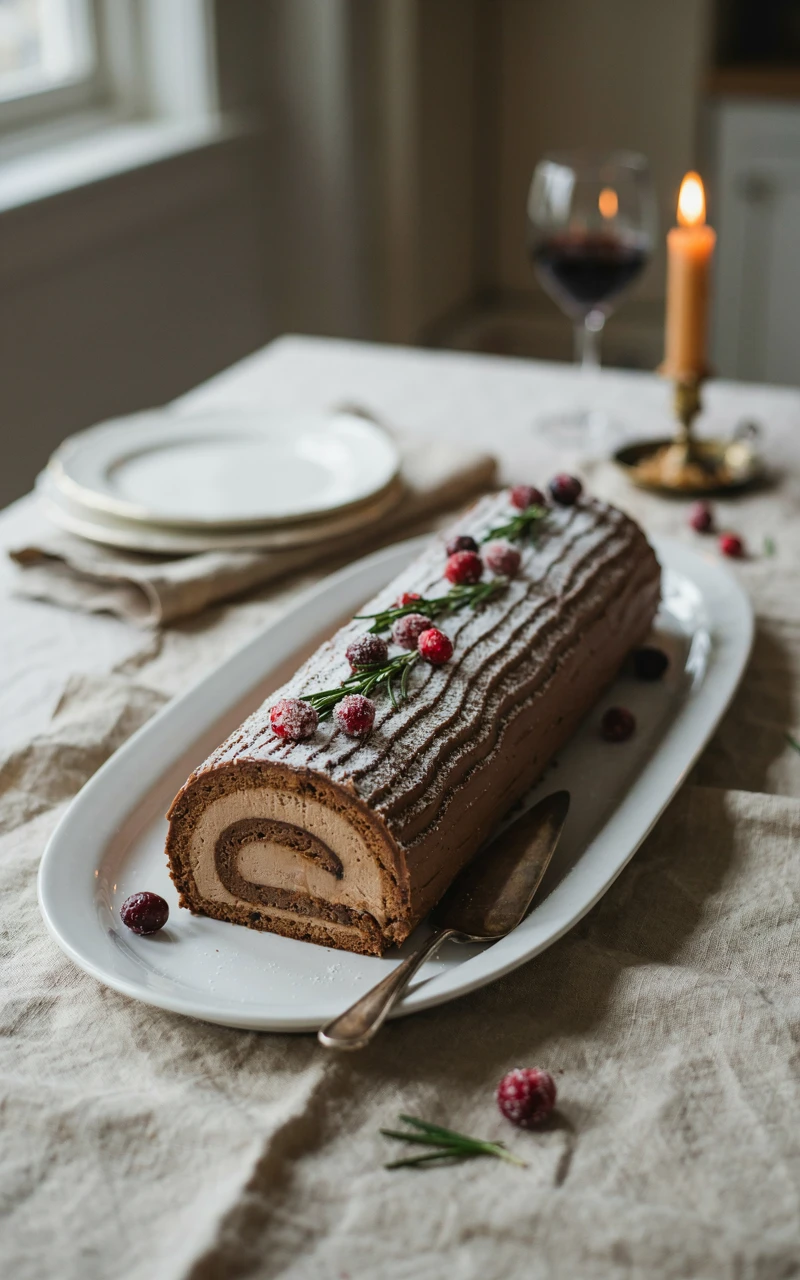
3. Chocolate Yule Log
Why You’ll Love This Recipe
A yule log looks like it came from a bakery window, but it’s just a thin sponge cake rolled around whipped cream. Frost it with chocolate ganache, drag a fork through it for bark lines, and everyone at the table will want a picture.
It’s one of those Christmas recipes that feels special without needing fancy skills. The rolling part sounds scary, but a kitchen towel does most of the work.
Ingredients
For the cake:
- 4 large eggs, at room temperature
- 2/3 cup (130 g) granulated sugar
- 1 tsp vanilla extract
- 1/2 cup (60 g) all-purpose flour
- 1/4 cup (25 g) unsweetened cocoa powder
- 1/4 tsp salt
- 2 tbsp (15 g) powdered sugar, for the towel
For the filling:
- 1 cup (240 ml) cold heavy cream
- 1/4 cup (30 g) powdered sugar
- 1 tsp vanilla extract
For the ganache:
- 6 oz (170 g) semisweet chocolate, finely chopped
- 3/4 cup (180 ml) heavy cream
Tools and Preparation
You’ll need a 10 x 15 inch (25 x 38 cm) jelly roll pan, parchment, a mixer, a sieve, a clean thin kitchen towel, and an offset spatula. Grease the pan, line it with parchment, and grease the parchment too.
- Prep time: 40 minutes
- Cook time: 12 minutes
- Cooling and chilling: about 1 hour 30 minutes
- Total time: about 2 hours 20 minutes
- Serves: 10
Step-by-Step Instructions
- Heat the oven to 375°F (190°C).
- Beat the eggs and sugar on high for 5 to 7 minutes, until thick and pale. When you lift the beaters, the mixture should fall in a ribbon that sits on top for a few seconds.
- Beat in the vanilla.
- Sift the flour, cocoa, and salt over the eggs and fold gently with a spatula until no streaks remain.
- Spread the batter evenly in the pan and bake for 10 to 12 minutes, until the top springs back when you touch it.
- Dust the towel with powdered sugar, flip the hot cake onto it, and peel off the parchment.
- Starting from a short end, roll the cake up with the towel inside and let it cool completely, about 1 hour.
- Whip the filling ingredients to stiff peaks.
- Unroll the cake, spread on the cream, and roll it back up without the towel. Chill seam side down.
- For the ganache, heat the cream until it just simmers, pour it over the chocolate, wait 5 minutes, then stir until smooth. Let it thicken for about 20 minutes.
- Spread the ganache over the log and run a fork along it to make bark lines.
Common Mistakes to Avoid
- Rolling a cold cake. Roll it while it’s hot, or it will crack.
- Stirring instead of folding. Rough mixing knocks out the air and gives you a flat, dense sponge.
- Frosting with runny ganache. Wait until it’s as thick as peanut butter.
Variations, Storage, and Final Thoughts
Add 1/4 tsp peppermint extract to the filling, or swap the whipped cream for a coffee buttercream. A few sugared rosemary sprigs and fresh cranberries on top look like a little forest.
The finished log keeps in the fridge for 3 days. You can also freeze the unfrosted filled roll, wrapped tightly, for up to 1 month, then thaw it in the fridge overnight and frost.
Don’t stress if yours cracks a little. The ganache covers everything, and real logs have cracks anyway.
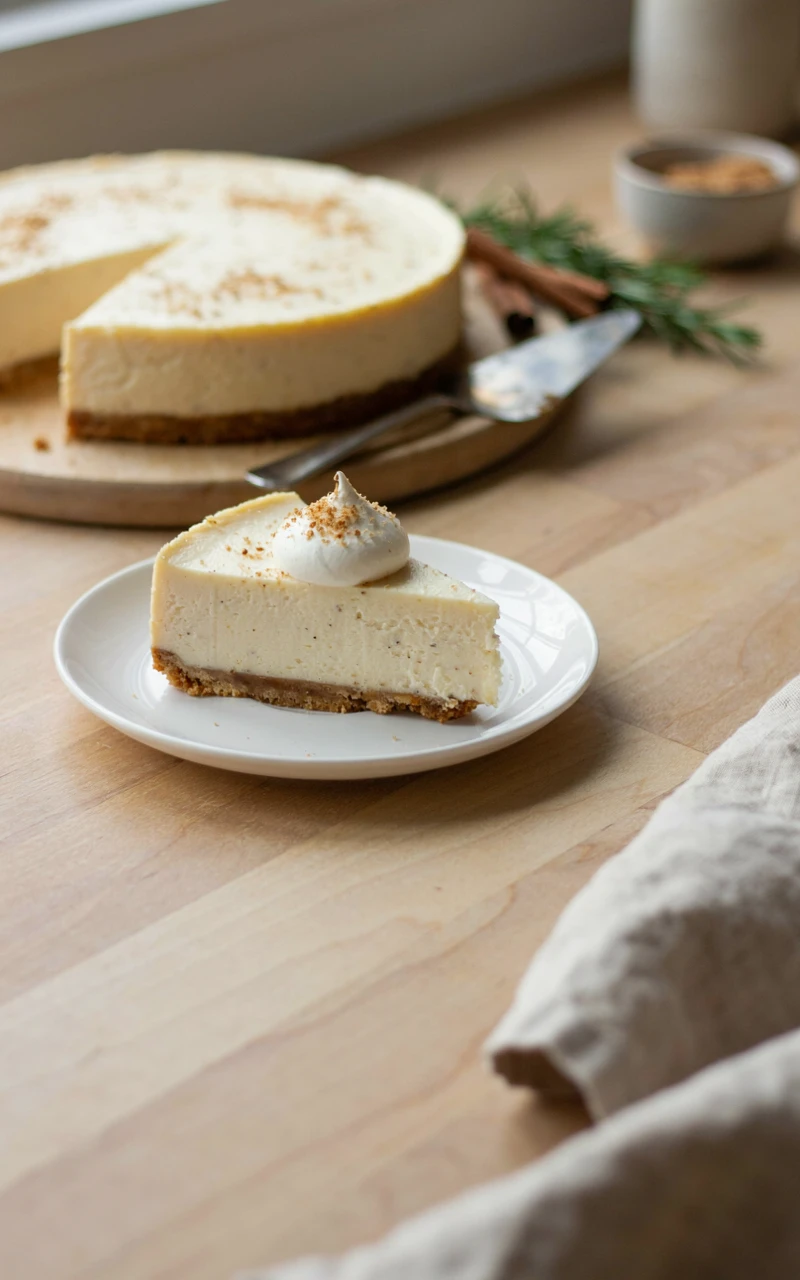
4. Eggnog Cheesecake
Why You’ll Love This Recipe
If you love eggnog, this is your dessert. It’s creamy, lightly spiced with nutmeg, and tastes like the holidays in every bite.
Cheesecake is also a great make-ahead dessert because it needs to chill overnight anyway. Bake it a day or two early and it’s one less thing to think about.
Ingredients
For the crust:
- 1 1/2 cups (150 g) graham cracker crumbs
- 2 tbsp (25 g) granulated sugar
- 6 tbsp (85 g) unsalted butter, melted
For the filling:
- 24 oz (680 g) full-fat cream cheese, softened (three 8 oz blocks)
- 3/4 cup (150 g) granulated sugar
- 2 tbsp (16 g) all-purpose flour
- 3/4 cup (180 ml) store-bought eggnog
- 3 large eggs, at room temperature
- 1 tsp vanilla extract
- 1/2 tsp ground nutmeg
- 1 tbsp (15 ml) dark rum, optional
Tools and Preparation
You’ll need a 9 inch (23 cm) spring form pan, a mixer, a rimmed baking sheet, and a second pan for hot water. Take the cream cheese and eggs out of the fridge about 2 hours ahead, because cold cream cheese leaves lumps.
Store-bought eggnog is pasteurized, so it’s ready to use. If you make your own with raw eggs, heat it to at least 160°F (71°C), which is the safe temperature for egg dishes listed on FoodSafety.gov’s chart of safe cooking temperatures.
- Prep time: 25 minutes
- Cook time: about 1 hour 10 minutes
- Cooling and chilling: at least 7 hours
- Total time: about 8 hours 35 minutes
- Serves: 12
Step-by-Step Instructions
- Heat the oven to 325°F (160°C) and set a pan of hot water on the lowest rack.
- Mix the crumbs, sugar, and melted butter, press firmly into the bottom of the pan, and bake for 10 minutes.
- Beat the cream cheese on low until smooth, then beat in the sugar and flour.
- Mix in the eggnog, vanilla, nutmeg, and rum.
- Add the eggs one at a time on low speed, mixing just until each one disappears.
- Pour the filling over the crust and set the pan on a baking sheet on the middle rack.
- Bake for 55 to 65 minutes, until the edges are set and the center 2 to 3 inches (5 to 8 cm) still wobble like gelatin.
- Turn off the oven, crack the door, and leave the cheesecake inside for 1 hour.
- Run a knife around the edge, cool to room temperature, then chill for at least 6 hours or overnight.
Common Mistakes to Avoid
- Beating on high speed. Too much air makes the top puff up and crack.
- Baking until the center is firm. It keeps setting as it cools.
- Slicing too soon. A warm cheesecake is soft and messy, so give it the full chill.
Variations, Storage, and Final Thoughts
Use gingersnaps instead of graham crackers for a spicier crust. Top each slice with whipped cream and a pinch of nutmeg, or a spoonful of caramel sauce.
Covered, it keeps in the fridge for 5 days. You can also freeze the whole cheesecake, wrapped well, for up to 2 months and thaw it overnight in the fridge.
Even people who say they don’t like eggnog usually go back for a second slice. It’s softer and gentler than the drink.
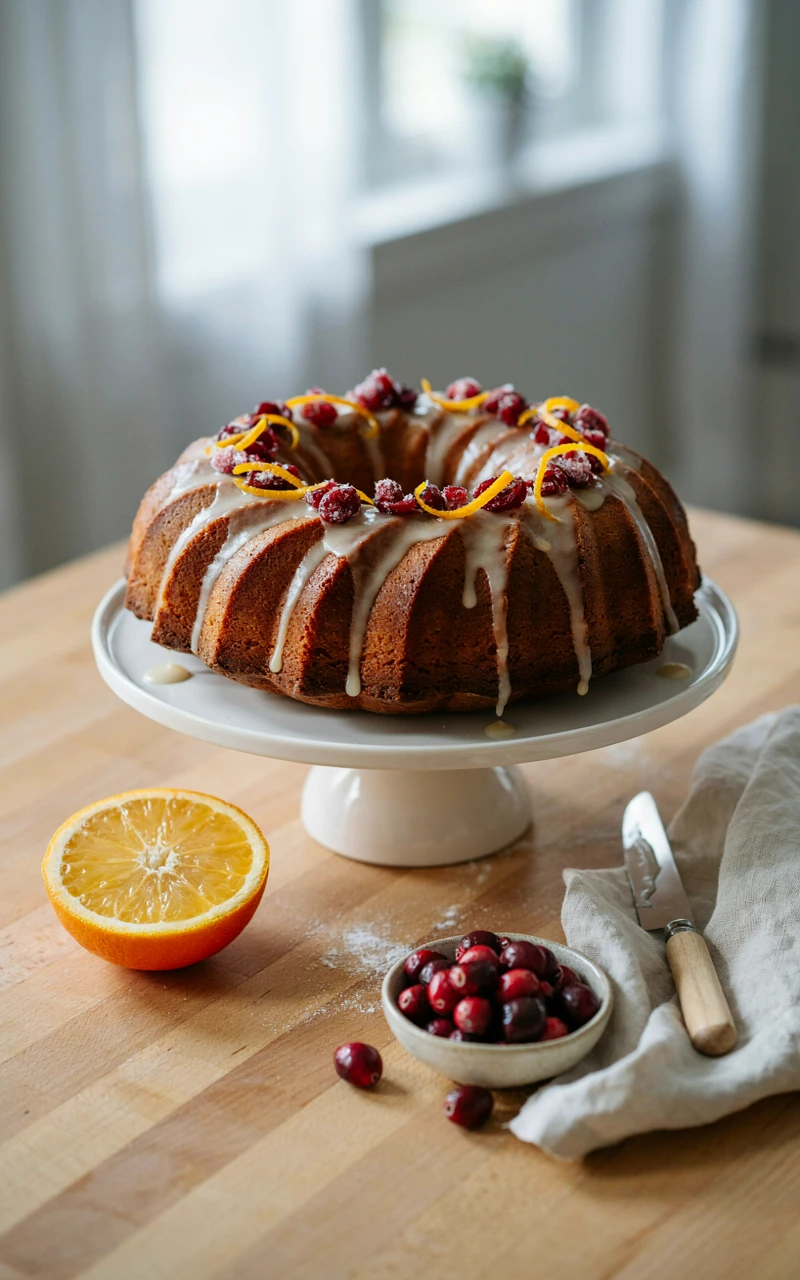
5. Cranberry Orange Bundt Cake
Why You’ll Love This Recipe
This cake is bright, buttery, and dotted with tart red cranberries that look so pretty when you slice it. The orange glaze drips down the sides and sets into a sweet, shiny coat.
It’s a nice break from all the chocolate and caramel. I also love it for Christmas morning, with coffee, while everyone opens presents.
Ingredients
For the cake:
- 3 cups (375 g) all-purpose flour, plus 1 tbsp for the berries
- 2 tsp baking powder
- 1/2 tsp baking soda
- 1/2 tsp salt
- 1 cup (225 g) unsalted butter, softened
- 2 cups (400 g) granulated sugar
- 4 large eggs, at room temperature
- Zest of 2 oranges
- 1/2 cup (120 ml) fresh orange juice
- 1/2 cup (120 g) sour cream
- 1 tsp vanilla extract
- 2 cups (200 g) fresh or frozen cranberries
For the glaze:
- 1 1/2 cups (180 g) powdered sugar
- 3 tbsp (45 ml) fresh orange juice
Tools and Preparation
You’ll need a 10 to 12 cup (2.4 to 2.8 L) bundt pan, a mixer, a zester, and a cooling rack. Grease every curve of the pan with soft butter and dust it with flour, or use baking spray that contains flour.
- Prep time: 25 minutes
- Cook time: 55 to 65 minutes
- Cooling time: about 1 hour 30 minutes
- Total time: about 3 hours
- Serves: 14
Step-by-Step Instructions
- Heat the oven to 350°F (180°C).
- Whisk the 3 cups of flour, baking powder, baking soda, and salt in a bowl.
- Rub the orange zest into the sugar with your fingers until it smells strongly of orange.
- Beat the butter and orange sugar for 3 minutes, until pale and fluffy.
- Beat in the eggs one at a time, then the vanilla.
- Mix the orange juice and sour cream together in a cup.
- Add the flour mixture in three parts, alternating with the sour cream mixture, mixing on low after each one.
- Toss the cranberries with 1 tbsp flour and fold them in.
- Spread the batter in the pan and bake for 55 to 65 minutes, until a skewer in the thickest part comes out clean.
- Cool in the pan for 15 minutes, then turn the cake out onto a rack and cool completely.
- Whisk the glaze until smooth and pour it over the cooled cake.
Common Mistakes to Avoid
- Skipping the flour on the berries. Without it, the cranberries sink to the bottom.
- Turning it out too soon or too late. Fifteen minutes is the sweet spot; much longer and it can stick.
- Glazing a warm cake. The glaze melts right off.
Variations, Storage, and Final Thoughts
Swap the orange for lemon, or add 1/2 cup (60 g) chopped pistachios with the berries. A teaspoon of cinnamon in the batter gives it a cozier feel.
Wrap the unglazed cake well and keep it at room temperature for 3 days, or freeze it for up to 3 months. Glaze it the day you serve it.
If fruit desserts are always the first to go at your house, my easy apple pie ideas are worth bookmarking for the rest of the season too.
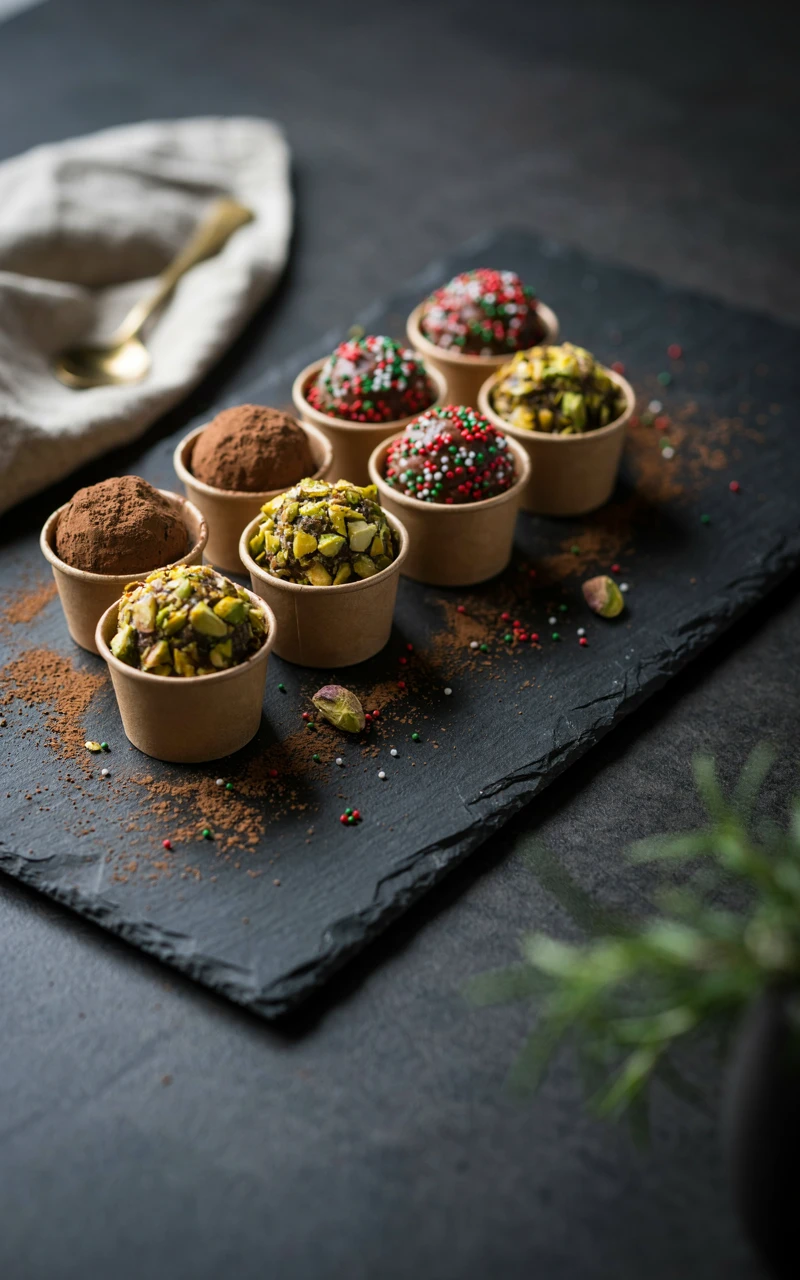
6. Chocolate Truffles
Why You’ll Love This Recipe
Homemade truffles taste fancy, but they’re just chocolate and cream rolled into balls. You can make a big batch in one evening and roll them in all kinds of coatings.
They look beautiful on a dessert plate and even better in a small box as a gift. Kids love helping with the rolling part, though it does get messy.
Ingredients
- 8 oz (225 g) semisweet chocolate, finely chopped
- 1/2 cup (120 ml) heavy cream
- 1 tbsp (14 g) unsalted butter, softened
- 1 tsp vanilla extract
- 1 pinch salt
- 1/4 cup (25 g) unsweetened cocoa powder, for coating
- 1/4 cup (30 g) finely chopped pistachios, for coating
- 2 tbsp (25 g) holiday sprinkles, for coating
Tools and Preparation
You’ll need a heatproof bowl, a small saucepan, a spatula, a small cookie scoop or teaspoon, a baking sheet lined with parchment, and a few shallow bowls for the coatings. Chop the chocolate finely so it melts evenly in the warm cream.
- Prep time: 25 minutes
- Chill time: about 2 hours 30 minutes
- Total time: about 3 hours
- Makes: about 24 truffles
Step-by-Step Instructions
- Put the chopped chocolate in the heatproof bowl.
- Heat the cream in the saucepan until small bubbles form around the edge.
- Pour the hot cream over the chocolate and leave it alone for 5 minutes.
- Stir slowly from the center out until smooth and glossy, then stir in the butter, vanilla, and salt.
- Cover and chill for about 2 hours, until firm enough to scoop.
- Scoop 2 teaspoon portions onto the lined sheet.
- Roll each one quickly between your palms into a ball.
- Roll the balls in cocoa, pistachios, or sprinkles.
- Chill for 30 minutes more before serving.
Common Mistakes to Avoid
- Boiling the cream. Too much heat can make the chocolate oily.
- Using chocolate chips. They have ingredients that keep them from melting smoothly, so use a chopped bar.
- Rolling with warm hands. Run your hands under cold water and dry them if the truffles start to melt.
Variations, Storage, and Final Thoughts
Stir in 1 tbsp (15 ml) orange liqueur or 1/2 tsp peppermint extract with the vanilla. Crushed freeze-dried raspberries make a pretty pink coating.
Keep truffles in an airtight container in the fridge for up to 2 weeks, or freeze them for up to 3 months. Let them sit out for 15 minutes before serving so they’re soft and creamy.
If you’re short on time, just pick one coating. A plate of plain cocoa truffles still looks lovely.
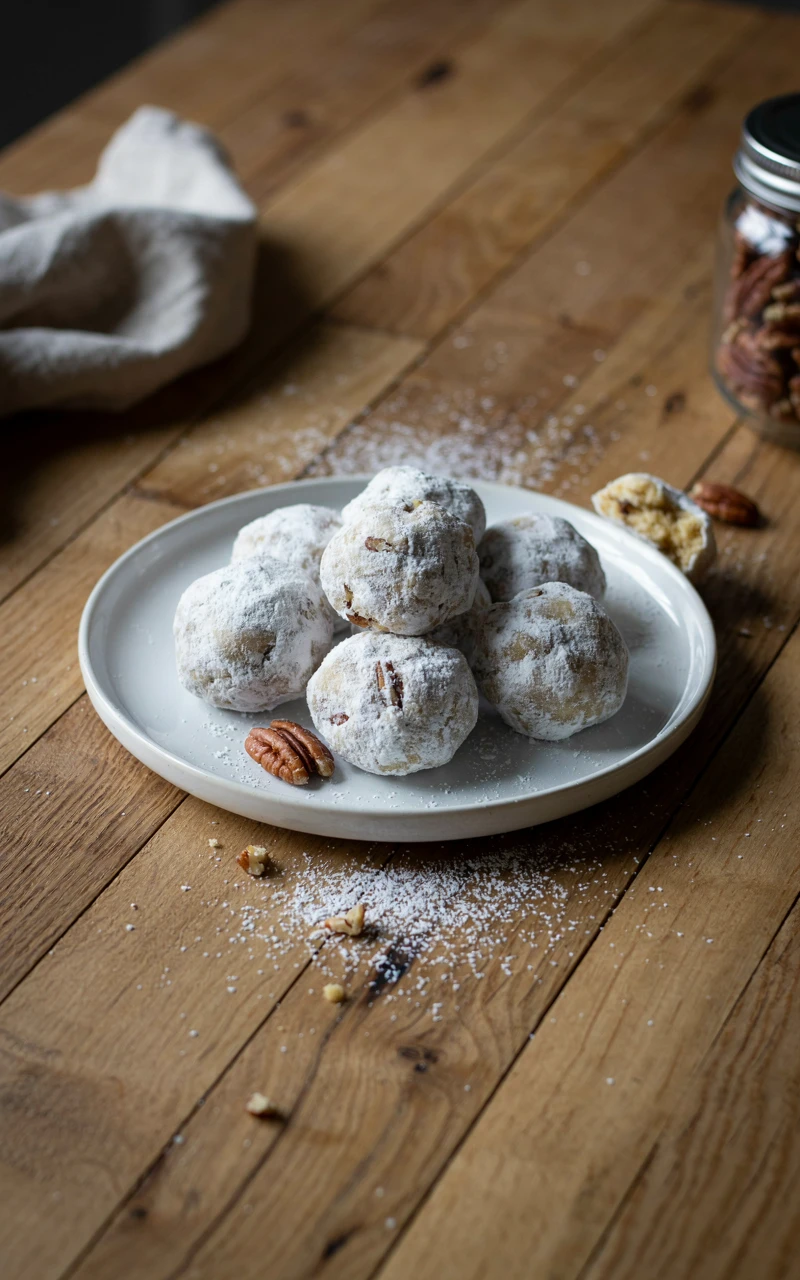
7. Snowball Cookies
Why You’ll Love This Recipe
Snowball cookies are buttery, nutty, and melt in your mouth. They’re rolled twice in powdered sugar, so they look like little snowballs on the plate.
The dough has no eggs and only a handful of pantry ingredients. If you need a lot of cookies for a cookie swap, this is the recipe to double.
Ingredients
- 1 cup (225 g) unsalted butter, softened
- 1/2 cup (60 g) powdered sugar, for the dough
- 1 tsp vanilla extract
- 2 1/4 cups (280 g) all-purpose flour
- 1/4 tsp salt
- 3/4 cup (85 g) finely chopped pecans or walnuts
- 1 1/2 cups (180 g) powdered sugar, for rolling
Tools and Preparation
You’ll need a mixer, two baking sheets lined with parchment, a cooling rack, and a shallow bowl for the powdered sugar. Toasting the nuts for 5 to 7 minutes in the oven first gives the cookies a deeper flavor.
- Prep time: 20 minutes
- Cook time: 12 to 14 minutes per batch
- Total time: about 50 minutes
- Makes: about 36 cookies
Step-by-Step Instructions
- Heat the oven to 350°F (180°C).
- Beat the butter and 1/2 cup powdered sugar until creamy, then beat in the vanilla.
- Mix in the flour and salt on low until a soft dough forms.
- Stir in the chopped nuts.
- Roll the dough into 1 inch (2.5 cm) balls and place them 1 inch apart on the sheets.
- Bake for 12 to 14 minutes, until the bottoms are light golden and the tops are still pale.
- Cool for 5 minutes, then roll the warm cookies gently in powdered sugar.
- Once they’re completely cool, roll them in powdered sugar a second time.
Common Mistakes to Avoid
- Waiting until the tops brown. By then the cookies are dry.
- Chopping the nuts too coarsely. Big pieces make the balls crumble.
- Skipping the second roll. The first coat melts into the warm cookie; the second gives the snowy look.
Variations, Storage, and Final Thoughts
Use almonds with 1/2 tsp almond extract, or add mini chocolate chips. Some people press a little dent in each ball and fill it with jam after baking.
Store them in a tin for up to 1 week. The baked, uncoated cookies freeze well for 3 months; thaw them and give them a fresh roll in powdered sugar before serving.
These always remind me of my grandmother’s cookie tins. Wear a dark sweater at your own risk.
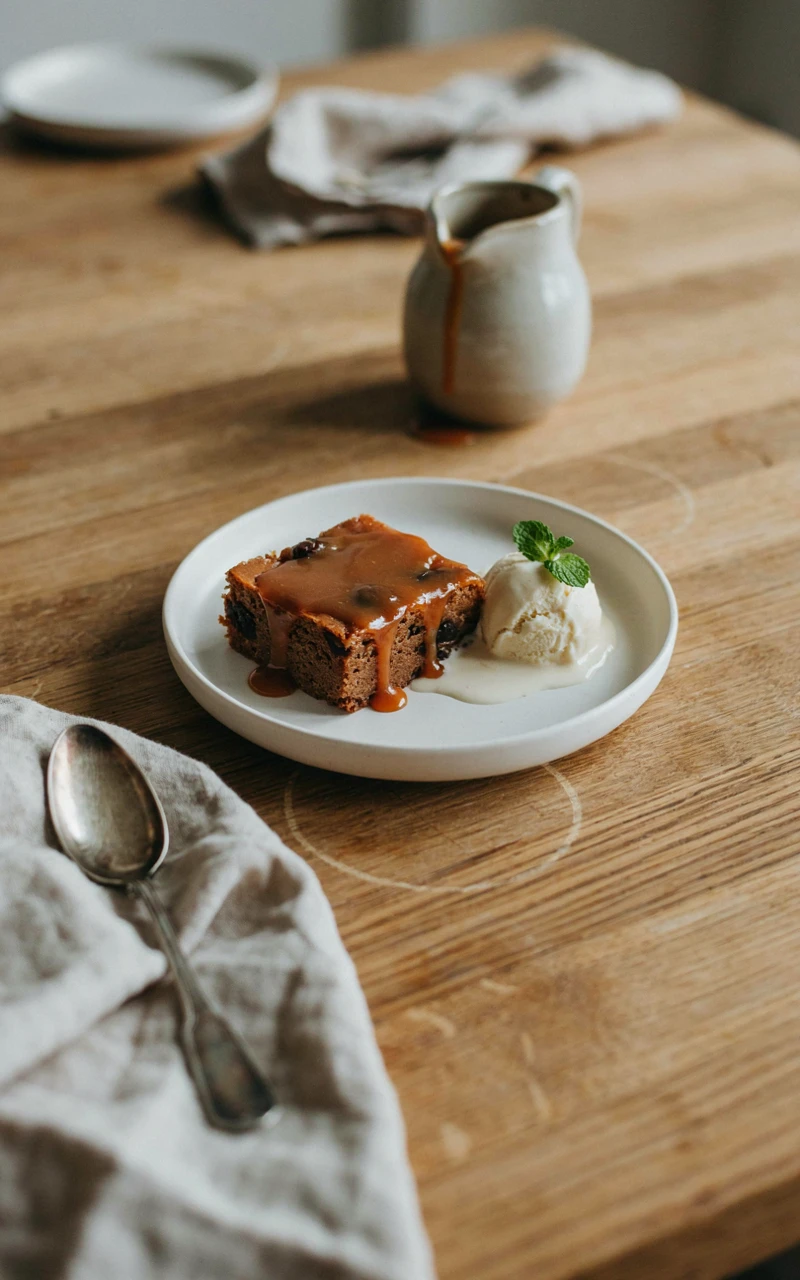
8. Sticky Toffee Pudding
Why You’ll Love This Recipe
Sticky toffee pudding is a soft, moist date cake soaked in warm toffee sauce. It’s a classic British holiday food, and once you try it, you’ll understand why people get so excited about it.
Don’t let the dates scare you off. They melt into the cake, so you just taste a rich, caramel-like sweetness.
Ingredients
For the cake:
- 1 cup (175 g) pitted dates, chopped
- 1 cup (240 ml) boiling water
- 1 tsp baking soda
- 1/4 cup (57 g) unsalted butter, softened
- 3/4 cup (150 g) packed dark brown sugar
- 2 large eggs
- 1 tsp vanilla extract
- 1 1/4 cups (155 g) all-purpose flour
- 1 tsp baking powder
- 1/4 tsp salt
For the toffee sauce:
- 1/2 cup (113 g) unsalted butter
- 1 cup (200 g) packed dark brown sugar
- 3/4 cup (180 ml) heavy cream
- 1 pinch salt
Tools and Preparation
You’ll need an 8 x 8 inch (20 x 20 cm) baking pan, a mixer, a medium saucepan, a whisk, and a skewer. Grease the pan well with butter.
- Prep time: 25 minutes
- Cook time: 30 to 35 minutes
- Total time: about 1 hour
- Serves: 9
Step-by-Step Instructions
- Heat the oven to 350°F (180°C).
- Put the dates in a bowl, pour the boiling water over them, and stir in the baking soda. Let them soak for 10 minutes.
- Mash the dates with a fork until mostly smooth.
- Beat the butter and brown sugar, then beat in the eggs and vanilla.
- Mix in the flour, baking powder, and salt, then stir in the dates and their liquid. The batter will be thin.
- Pour it into the pan and bake for 30 to 35 minutes, until the top springs back and a skewer comes out clean.
- For the sauce, melt the butter and brown sugar over medium heat, then whisk in the cream and salt. Simmer for 3 to 4 minutes, until slightly thickened.
- Poke holes all over the warm cake and pour about a third of the sauce over it.
- Serve squares warm with extra sauce on top.
Common Mistakes to Avoid
- Leaving the dates chunky. Big pieces make heavy, wet spots in the cake.
- Boiling the sauce hard. A gentle simmer keeps it smooth instead of grainy.
- Serving it cold. This dessert is meant to be warm and gooey.
Variations, Storage, and Final Thoughts
Add 1/2 tsp ground ginger to the batter, or a splash of bourbon to the sauce. Serve it with vanilla ice cream or softly whipped cream.
Keep the cake and sauce separately in the fridge for up to 4 days, and warm them before serving. The cake freezes for 3 months, and the sauce freezes for 1 month.
I make this one for Christmas night, when everyone is tired and wants something warm. It never lasts long.
9. Pecan Pie Bars
Why You’ll Love This Recipe
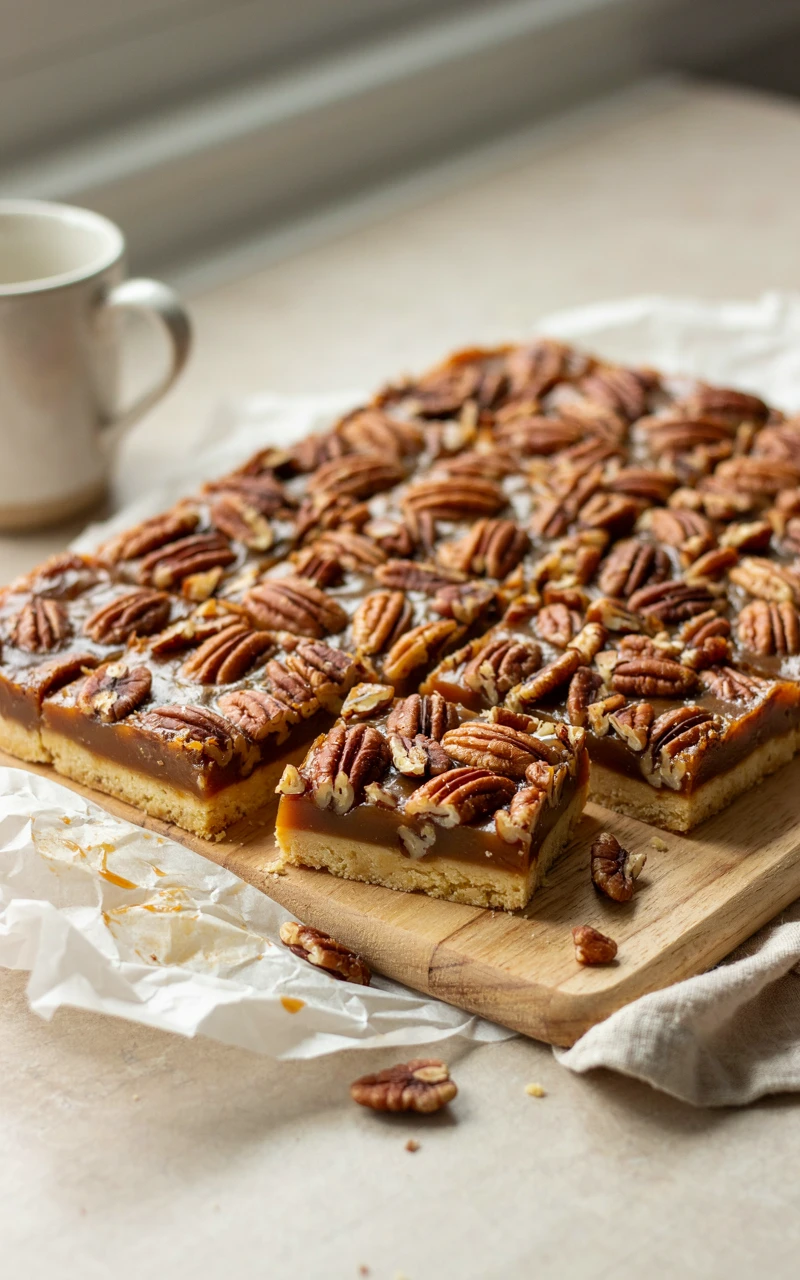
Pecan pie bars give you everything you love about pecan pie, without rolling out a crust. The shortbread base presses right into the pan, and the gooey pecan filling goes on top.
They’re easy to cut into neat squares and eat with your hands. That makes them perfect for parties, potlucks, and long dessert tables full of Christmas desserts.
Ingredients
For the crust:
- 2 cups (250 g) all-purpose flour
- 1/3 cup (65 g) granulated sugar
- 1/4 tsp salt
- 3/4 cup (170 g) cold unsalted butter, cubed
For the filling:
- 3 large eggs
- 3/4 cup (240 g) light corn syrup
- 3/4 cup (150 g) packed brown sugar
- 1/4 cup (57 g) unsalted butter, melted
- 2 tsp vanilla extract
- 1/4 tsp salt
- 2 1/2 cups (250 g) chopped pecans
Tools and Preparation
You’ll need a 9 x 13 inch (23 x 33 cm) pan, parchment, a food processor or pastry cutter, a whisk, and a large bowl. Line the pan with parchment, leaving some hanging over the sides so you can lift the bars out.
- Prep time: 20 minutes
- Cook time: about 45 minutes
- Cooling and chilling: about 2 hours
- Total time: about 3 hours 5 minutes
- Makes: 24 bars
Step-by-Step Instructions
- Heat the oven to 350°F (180°C).
- Pulse the flour, sugar, and salt, then add the cold butter and pulse until it looks like coarse crumbs.
- Press the crumbs firmly and evenly into the pan.
- Bake for 18 to 20 minutes, until the edges are light golden.
- While the crust bakes, whisk the eggs, corn syrup, brown sugar, melted butter, vanilla, and salt until smooth.
- Stir in the pecans.
- Pour the filling over the hot crust and spread the nuts out evenly.
- Bake for 22 to 25 minutes, until the edges are set and the center only jiggles slightly.
- Cool completely, then chill for 1 hour before cutting into bars.
Common Mistakes to Avoid
- Under-baking the crust. A pale crust turns soggy under the filling.
- Cutting warm bars. The filling oozes everywhere, so wait until they’re cold.
- Using untoasted, stale pecans. Taste one first; old nuts taste bitter.
Variations, Storage, and Final Thoughts
Use maple syrup instead of corn syrup for a deeper flavor, or scatter 1/2 cup (85 g) chocolate chips over the crust before adding the filling. Drizzle melted chocolate on top for a dressier look.
Keep the bars covered in the fridge for up to 5 days, or freeze them in a single layer for up to 3 months. They taste great straight from the fridge.
If you made pecan pie for Thanksgiving and want a change, this is it. You’ll find more make-ahead ideas in my list of Thanksgiving recipes to start planning before November.
10. Spiced Christmas Fruitcake
Why You’ll Love This Recipe
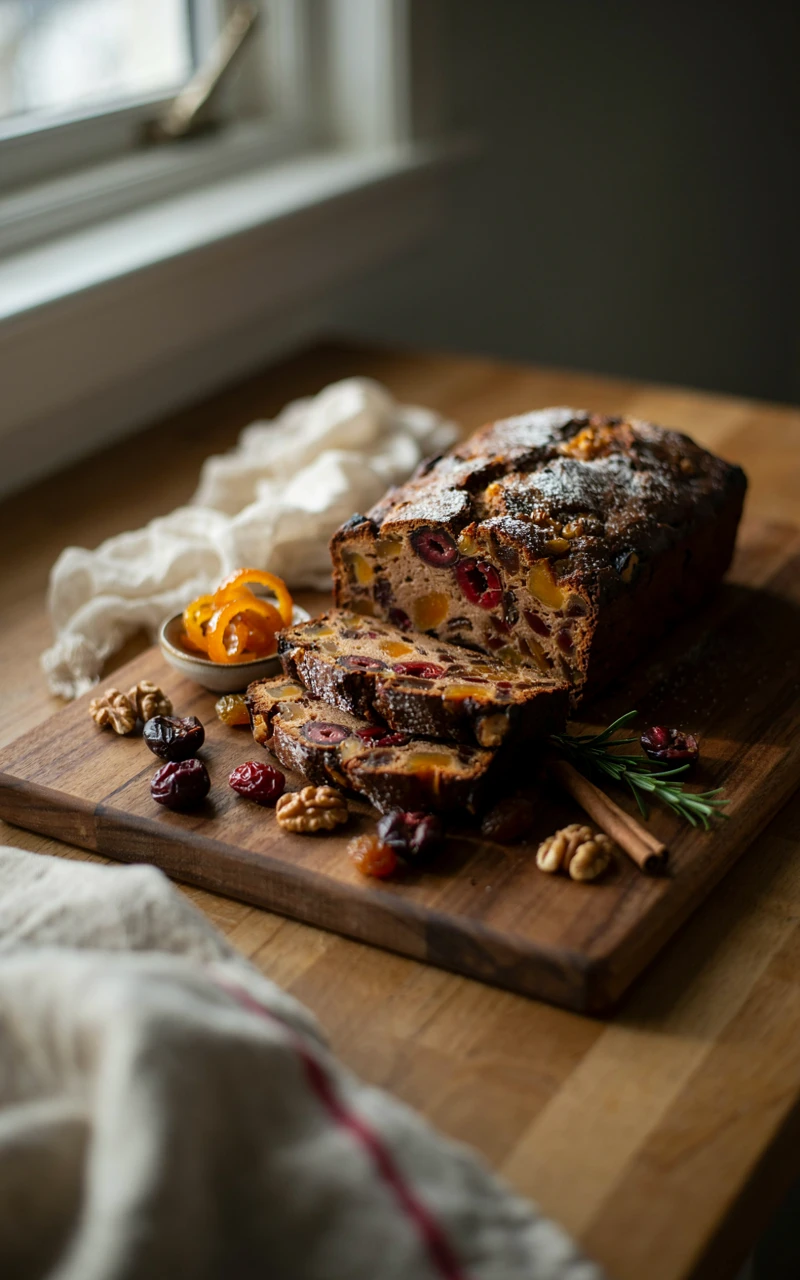
I know fruitcake has a bad reputation, but a good homemade one is nothing like the dry bricks people joke about. This one is moist, warmly spiced, and packed with dried fruit you actually like, with no neon-colored candied cherries in sight.
It’s also the best dessert on this list for planning early. You can bake it weeks before Christmas, and it gets better as it rests.
Ingredients
- 2 cups (300 g) mixed dried fruit, such as raisins, currants, chopped apricots, and dried cherries
- 1/2 cup (60 g) dried cranberries
- 1/2 cup (120 ml) orange juice or brandy, for soaking
- 1/2 cup (113 g) unsalted butter, softened
- 3/4 cup (150 g) packed dark brown sugar
- 2 large eggs
- 1 tbsp (20 g) molasses
- Zest of 1 orange
- 1 1/2 cups (190 g) all-purpose flour
- 1 tsp baking powder
- 1 tsp ground cinnamon
- 1/2 tsp ground ginger
- 1/4 tsp ground nutmeg
- 1/4 tsp ground cloves
- 1/4 tsp salt
- 1/2 cup (60 g) chopped walnuts
- 2 to 4 tbsp (30 to 60 ml) extra brandy or orange juice, for brushing
Tools and Preparation
You’ll need a 9 x 5 inch (23 x 13 cm) loaf pan, parchment, a mixer, a skewer, a pastry brush, and plastic wrap and foil for storing. Soak the dried fruit in the orange juice or brandy overnight, covered, so it gets plump and juicy.
- Soaking time: overnight, at least 8 hours
- Prep time: 25 minutes
- Cook time: 75 to 90 minutes
- Total time: about 10 hours, mostly hands-off
- Makes: 12 slices
Step-by-Step Instructions
- Heat the oven to 300°F (150°C) and line the loaf pan with parchment on the bottom and sides.
- Beat the butter and brown sugar until fluffy.
- Beat in the eggs one at a time, then the molasses and orange zest.
- Whisk the flour, baking powder, spices, and salt in another bowl, then mix them in on low.
- Fold in the soaked fruit with any leftover liquid, plus the walnuts.
- Spread the batter in the pan and smooth the top.
- Bake for 75 to 90 minutes, until the top is deep brown and a skewer in the center comes out clean. Cover loosely with foil after 45 minutes if the top is darkening fast.
- Poke holes in the warm cake and brush on 1 to 2 tbsp of brandy or orange juice.
- Cool completely in the pan, then lift it out.
Common Mistakes to Avoid
- Skipping the soak. Dry fruit pulls moisture out of the cake.
- Baking at a higher temperature. The low heat keeps the outside from burning before the middle cooks.
- Wrapping it while warm. Trapped steam can make it soggy or moldy.
Variations, Storage, and Final Thoughts
Swap the walnuts for pecans or almonds, and use any dried fruit you love, like figs or dates. For an alcohol-free version, stick with orange juice the whole way through.
Wrap the cooled cake in parchment, then plastic wrap and foil, and store it in a cool, dark spot. If you used brandy, brush on another tablespoon once a week, and it’ll keep for up to 6 weeks; the orange juice version keeps for 1 week at room temperature or 3 months in the freezer.
Bake this in mid-November and give it a little brandy each weekend. By Christmas, it’s soft, rich, and ready to slice.
Here’s a quick look at how far ahead you can make each dessert, so you can plan your baking weekends:
| Dessert | Make Ahead | Best Way to Store |
|---|---|---|
| Soft Gingerbread Cookies | Dough up to 3 months | Freezer (dough balls) |
| Easy Peppermint Bark | Up to 2 weeks | Airtight tin, cool spot |
| Chocolate Yule Log | Up to 1 month, unfrosted | Freezer, then fridge |
| Eggnog Cheesecake | Up to 2 months | Freezer or fridge |
| Cranberry Orange Bundt Cake | Up to 3 months, unglazed | Freezer |
| Chocolate Truffles | Up to 3 months | Freezer or fridge |
| Snowball Cookies | Up to 3 months, uncoated | Freezer |
| Sticky Toffee Pudding | Up to 3 months | Freezer (cake and sauce apart) |
| Pecan Pie Bars | Up to 3 months | Freezer |
| Spiced Christmas Fruitcake | Up to 6 weeks | Wrapped, cool dark spot |
Writing this list made me realize how much of my December stress came from trying to bake everything in the same few days. Spreading these out over a few weekends has made the season feel so much calmer.
Key takeaway: start with the fruitcake and the freezer-friendly cookies, then save the yule log and sticky toffee pudding for the last week.
You don’t have to make all ten. Pick two or three that fit your family, start early, and enjoy the baking as much as the eating.
I’d love to hear which one you’re making first, so leave a comment below or send me a message. You’ve got this, and your Christmas table is going to look wonderful.