This post may contain affiliate links, which means I may receive a small commission should you decide to click that link and make a purchase. For more information please refer to the Terms & Conditions.
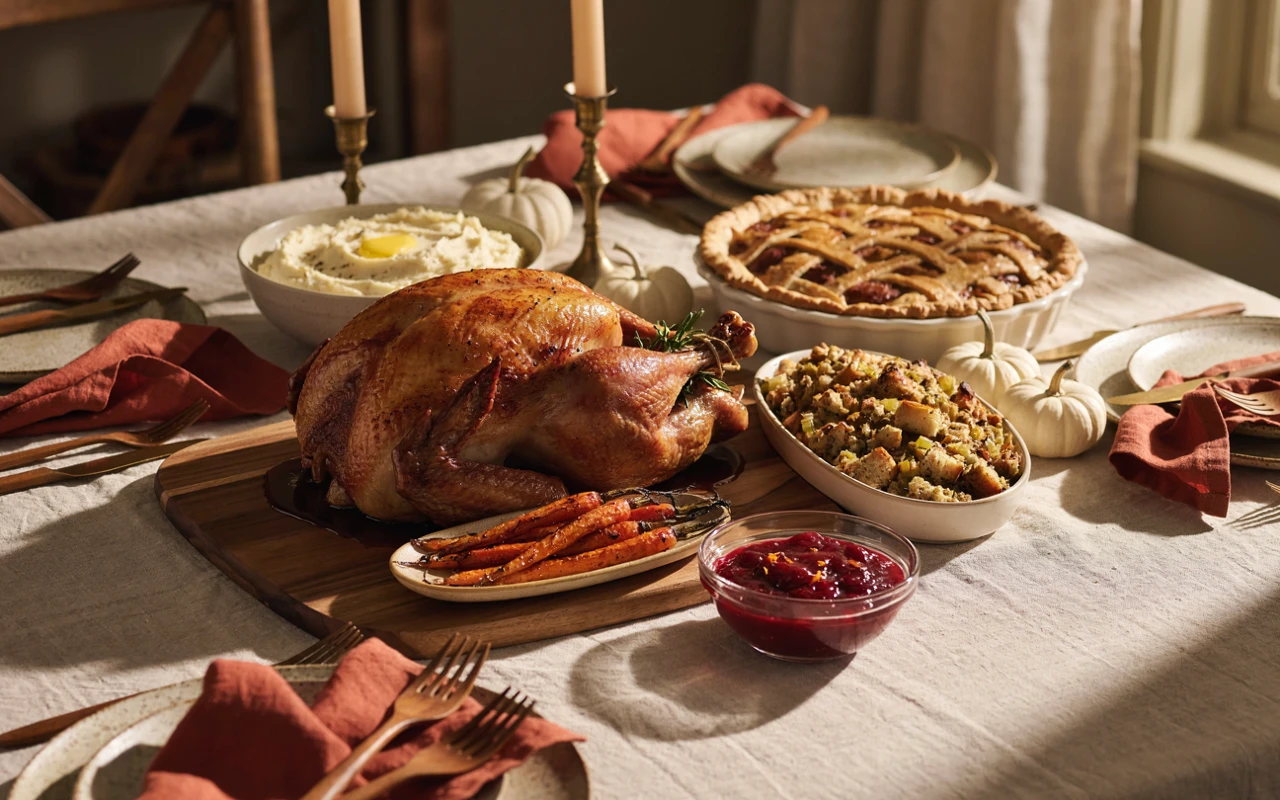
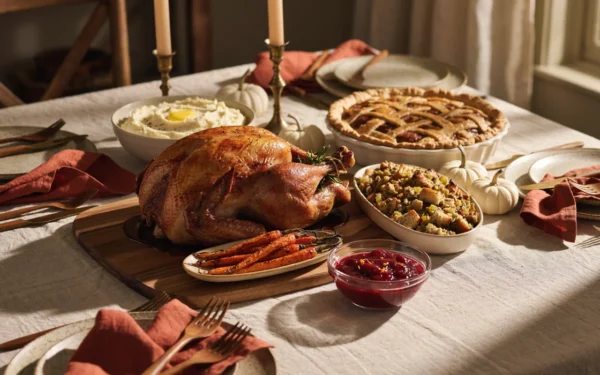
The first year I hosted, I tried to cook every one of my Thanksgiving recipes on Thursday morning, and dinner landed on the table at 7:30 at night. These days I pick my Thanksgiving recipes and start planning before November, and the whole day feels so much calmer.
Early planning isn’t fancy. It just means you’ve tried the pie crust once, you know your roasting pan fits the oven, and the gravy is already sitting in the freezer.
If you want something for guests to nibble while the turkey rests, I’ve already shared my favorite Thanksgiving appetizers to make early. This post covers everything else on the table.
Here are 15 Thanksgiving recipes you can plan, shop for, and partly make ahead, so the big day feels easy instead of rushed.
1. Herb Butter Roast Turkey for Your Thanksgiving Dinner
Why You’ll Love This Recipe
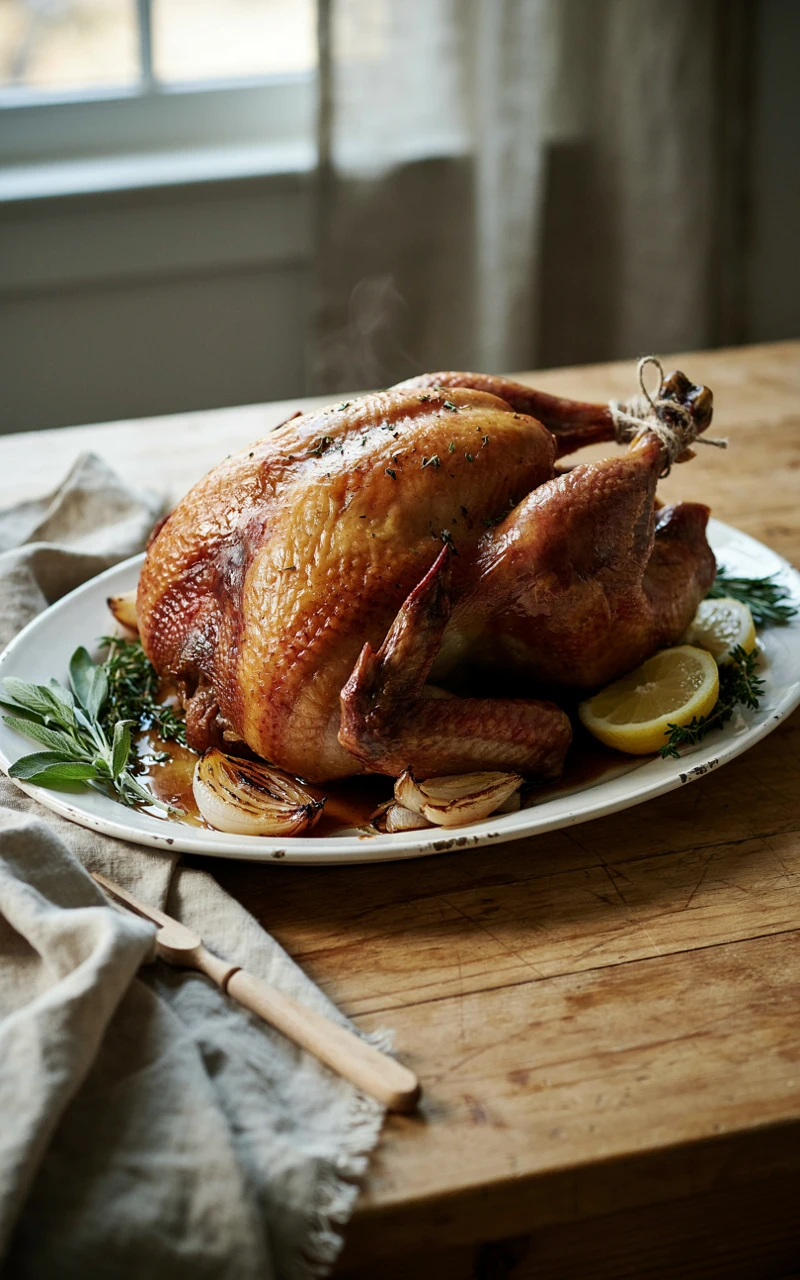
This turkey is juicy, golden, and full of garlic and herbs without any brining buckets or fancy gear. You rub herb butter under the skin, roast it low and steady, and let a thermometer tell you when it’s done.
It’s the dish everyone remembers, so it’s the one worth planning first. Once you know your bird’s size, the rest of your Thanksgiving dinner falls into place around it.
Ingredients
- 1 whole turkey, 12 to 14 lb (5.4 to 6.4 kg), fully thawed
- 1/2 cup (115 g) unsalted butter, softened
- 2 tbsp (6 g) fresh sage, chopped
- 1 tbsp (3 g) fresh thyme leaves
- 1 tbsp (3 g) fresh rosemary, chopped
- 4 garlic cloves, minced
- 1 tbsp (15 g) kosher salt
- 1 tsp (2 g) black pepper
- 1 onion, cut into quarters
- 1 lemon, cut in half
- 2 cups (480 ml) chicken broth
Tools and Preparation
You’ll need a roasting pan with a rack, an instant-read thermometer, paper towels, and a large cutting board for carving. Prep time: 20 minutes. Cook time: about 3 to 3 1/2 hours. Rest time: 30 to 45 minutes. Serves 10 to 12.
Thawing is the step people forget. A frozen turkey thaws in the fridge at about 24 hours for every 4 to 5 lb (1.8 to 2.3 kg), so buy early and plan your fridge space now.
| Turkey size | Fridge thaw time | Roast time at 325°F (165°C) | Serves |
|---|---|---|---|
| 10 to 12 lb (4.5 to 5.4 kg) | 2 to 3 days | 2 1/2 to 3 hours | 8 to 10 |
| 12 to 14 lb (5.4 to 6.4 kg) | 3 days | 3 to 3 1/2 hours | 10 to 12 |
| 14 to 18 lb (6.4 to 8.2 kg) | 3 to 4 days | 3 1/2 to 4 hours | 12 to 16 |
| 18 to 20 lb (8.2 to 9 kg) | 4 to 5 days | 4 to 4 1/2 hours | 16 to 20 |
Step-by-Step Instructions
- Take the turkey out of the fridge 1 hour before roasting. Heat the oven to 325°F (165°C).
- Remove the neck and giblets, then pat the turkey very dry inside and out with paper towels.
- Mix the butter, sage, thyme, rosemary, garlic, salt, and pepper in a bowl.
- Gently loosen the skin over the breast with your fingers and spread half the herb butter underneath. Rub the rest all over the outside.
- Tuck the onion and lemon inside the cavity. Set the turkey on the rack and pour the broth into the pan.
- Roast for 3 to 3 1/2 hours, basting with pan juices every 45 minutes. If the breast browns too fast, tent it loosely with foil.
- Check the thickest part of the thigh with your thermometer. It’s done at 165°F (74°C), which is the safe minimum temperature for poultry.
- Move the turkey to a cutting board, cover loosely with foil, and rest for 30 to 45 minutes before carving. Save the pan drippings for gravy.
Common Mistakes to Avoid
- Trusting the pop-up timer. They often pop late, after the breast has dried out. Use a real thermometer.
- Skipping the pat-dry. Wet skin steams instead of browning.
- Carving right away. The juices run all over the board instead of staying in the meat.
- Starting the thaw too late. Count the days back from Thanksgiving before you shop.
Variations, Storage, and Final Thoughts
Swap the herbs for orange zest and smoked paprika, or use a bone-in turkey breast if you’re feeding six or fewer. A 6 to 7 lb (2.7 to 3.2 kg) breast roasts in about 2 hours at the same temperature.
Store leftover turkey in the fridge within 2 hours of serving and eat it within 3 to 4 days. Sliced turkey freezes well for up to 3 months.
Key takeaway: buy and thaw early, dry the skin well, and trust your thermometer. Do those three things and your turkey will be the easy part.
2. Make-Ahead Turkey Gravy
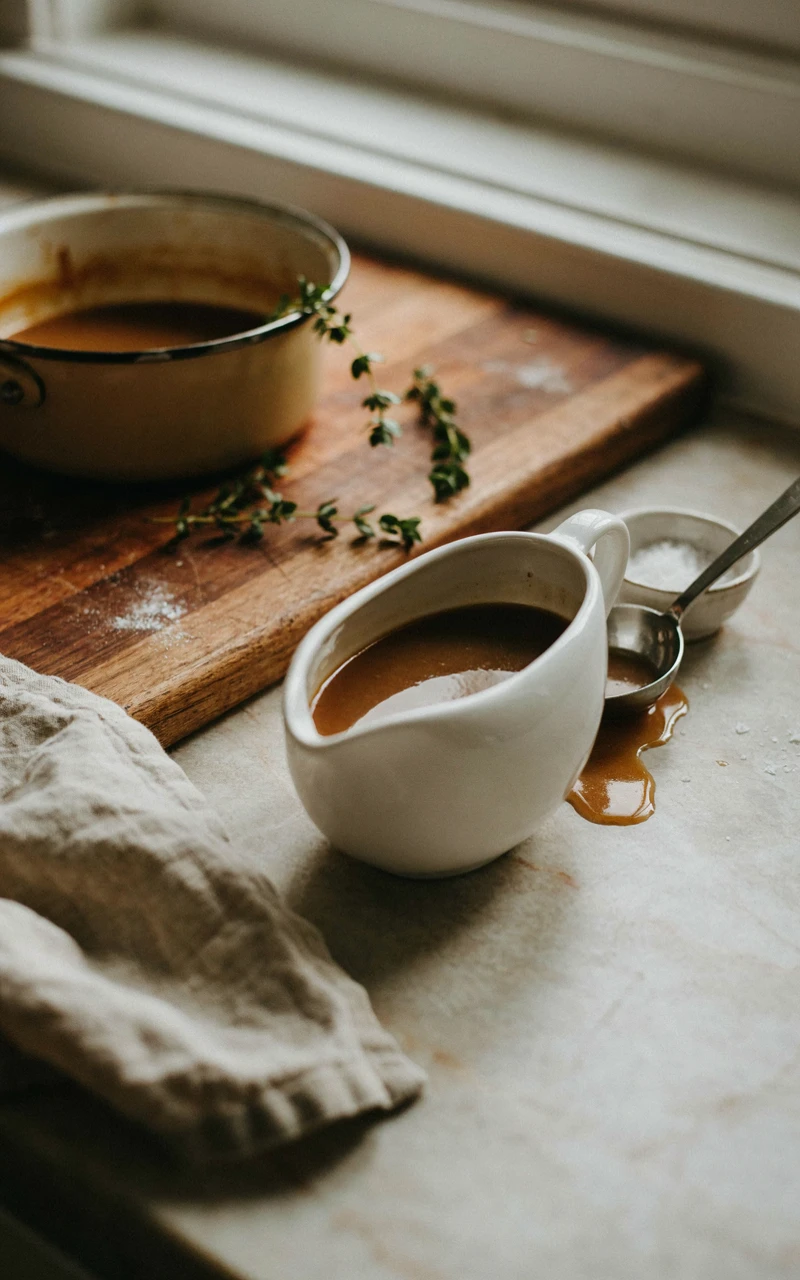
Why You’ll Love This Recipe
Gravy is usually the last-minute panic of the day, with everyone waiting while you whisk lumps out of a pan. This version is made weeks ahead from roasted turkey wings, frozen, and simply warmed up on Thanksgiving.
It tastes rich and deep, and you can still stir in some fresh pan drippings from your turkey right before serving.
Ingredients
- 3 lb (1.4 kg) turkey wings
- 1 onion, quartered
- 2 carrots, cut into chunks
- 2 celery ribs, cut into chunks
- 1 tbsp (15 ml) olive oil
- 8 cups (1.9 L) low-sodium chicken broth
- 4 sprigs fresh thyme
- 1/2 cup (115 g) unsalted butter
- 1/2 cup (65 g) all-purpose flour
- 1 tsp (5 g) salt, plus more to taste
- 1/2 tsp (1 g) black pepper
Tools and Preparation
You’ll need a sheet pan, a large pot, a fine-mesh strainer, a whisk, and freezer containers. Prep time: 15 minutes. Cook time: about 3 hours. Makes about 6 cups (1.4 L), enough for 12 people.
Pick a weekend in early November for this one. Most of the time is hands-off simmering.
Step-by-Step Instructions
- Heat the oven to 400°F (200°C). Toss the wings, onion, carrots, and celery with oil on a sheet pan.
- Roast for 1 hour 15 minutes, until the wings are deep brown.
- Move everything to a large pot. Pour a splash of broth on the hot pan, scrape up the brown bits, and add them to the pot.
- Add the rest of the broth and the thyme. Simmer gently, uncovered, for 1 1/2 hours.
- Strain the stock and skim off the fat. You should have about 6 cups (1.4 L).
- Melt the butter in a clean pot over medium heat. Whisk in the flour and cook for 3 to 4 minutes, until it smells nutty and turns light brown.
- Slowly whisk in the warm stock, a cup at a time. Simmer for 10 minutes, until the gravy coats the back of a spoon.
- Season with salt and pepper, cool, and freeze.
Common Mistakes to Avoid
- Adding cold stock to hot roux all at once. That’s how lumps happen. Go slowly and keep whisking.
- Salting too early. The stock reduces, so season at the end.
- Pale wings. The dark color on the wings is where the flavor comes from.
Variations, Storage, and Final Thoughts
Add a splash of dry white wine with the stock, or stir in a spoonful of soy sauce for deeper flavor. For a gluten-free gravy, skip the roux and thicken with 3 tbsp (25 g) cornstarch mixed into cold water.
The gravy keeps in the fridge for 4 days or the freezer for 3 months. Thaw overnight in the fridge and warm it on the stove, whisking in turkey drippings at the end.
Key takeaway: making gravy early removes the most stressful 15 minutes of the whole day.
3. Classic Sage and Onion Stuffing
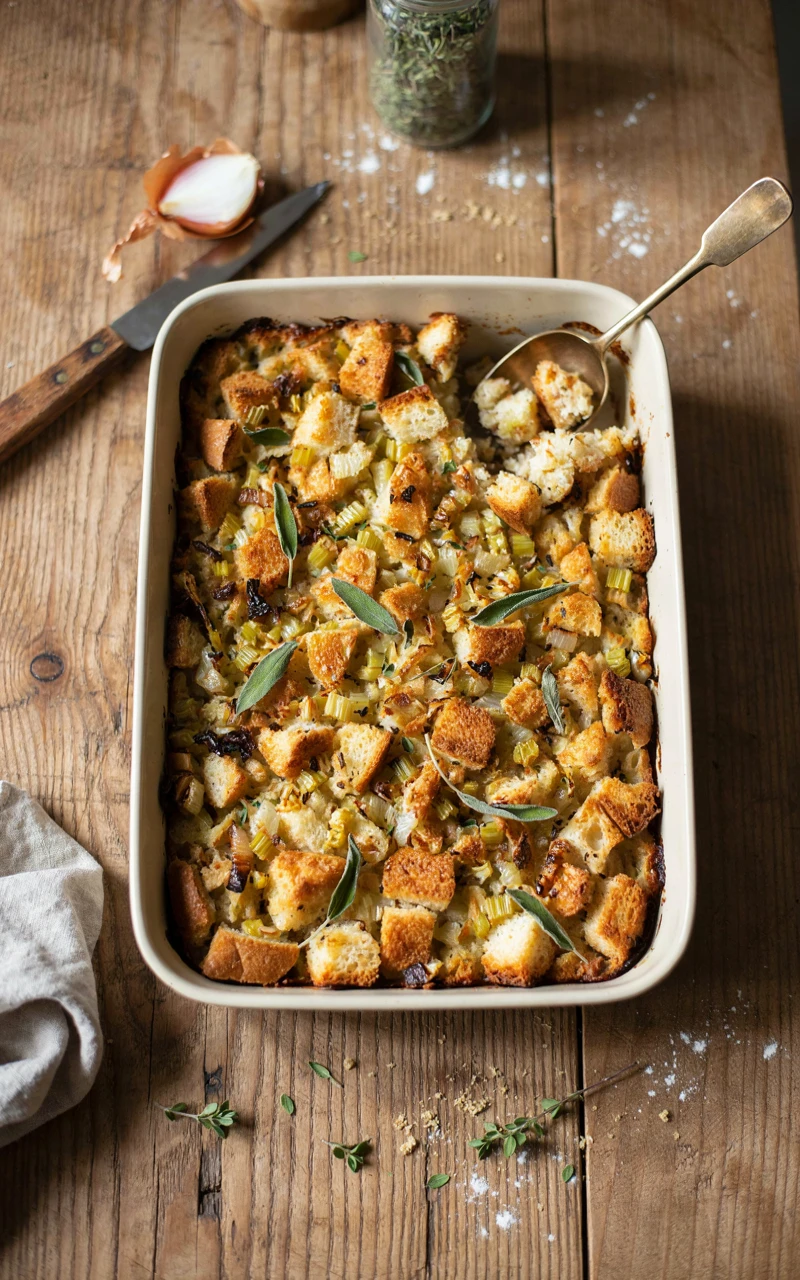
Why You’ll Love This Recipe
This is the stuffing I grew up with: buttery bread, soft onions, celery, and lots of sage. The top gets crispy and golden while the middle stays soft and savory.
It bakes in a dish instead of inside the bird, which means the turkey cooks faster and you don’t have to worry about undercooked stuffing.
Ingredients
- 1 lb (450 g) loaf of sturdy white bread, cut into 1-inch (2.5 cm) cubes
- 1/2 cup (115 g) unsalted butter, plus extra for the dish
- 2 medium onions, diced
- 3 celery ribs, diced
- 2 tbsp (5 g) fresh sage, chopped
- 1 tbsp (3 g) fresh thyme leaves
- 1/4 cup (15 g) fresh parsley, chopped
- 2 large eggs
- 2 1/2 cups (600 ml) chicken broth
- 1 tsp (5 g) salt
- 1/2 tsp (1 g) black pepper
Tools and Preparation
You’ll need a 9 x 13 inch (23 x 33 cm) baking dish, a large skillet, a big mixing bowl, and foil. Prep time: 25 minutes, plus drying the bread. Cook time: 45 minutes. Serves 10.
Cube the bread 2 days ahead and leave it spread out on sheet pans to dry. Stale bread soaks up broth without turning to mush.
Step-by-Step Instructions
- Heat the oven to 350°F (175°C) and butter the baking dish.
- Melt the butter in a skillet over medium heat. Cook the onions and celery for 10 minutes, until soft and see-through.
- Stir in the sage and thyme and cook for 1 minute more.
- Tip the bread into a large bowl and add the vegetables, parsley, salt, and pepper.
- Whisk the eggs with the broth and pour it over the bread. Toss until everything is evenly damp.
- Spread into the dish, cover with foil, and bake for 25 minutes.
- Uncover and bake another 20 minutes, until the top is golden and crisp.
Common Mistakes to Avoid
- Using soft, fresh bread. It turns soggy. Dry it first.
- Pouring in all the broth without checking. Bread varies, so stop when it’s damp but not swimming.
- Leaving the foil on the whole time. You’ll miss out on the crispy top.
Variations, Storage, and Final Thoughts
Brown 1 lb (450 g) of pork sausage and stir it in, or add 1 cup (120 g) dried cranberries and a chopped apple. You can also use cubed cornbread from recipe 11 for half the bread.
Assemble the stuffing the night before, cover, and refrigerate, then add 10 minutes to the covered baking time. Leftovers keep for 4 days in the fridge.
Key takeaway: dry bread and baking in a dish give you crisp edges and soft centers every time.
4. Creamy Garlic Mashed Potatoes
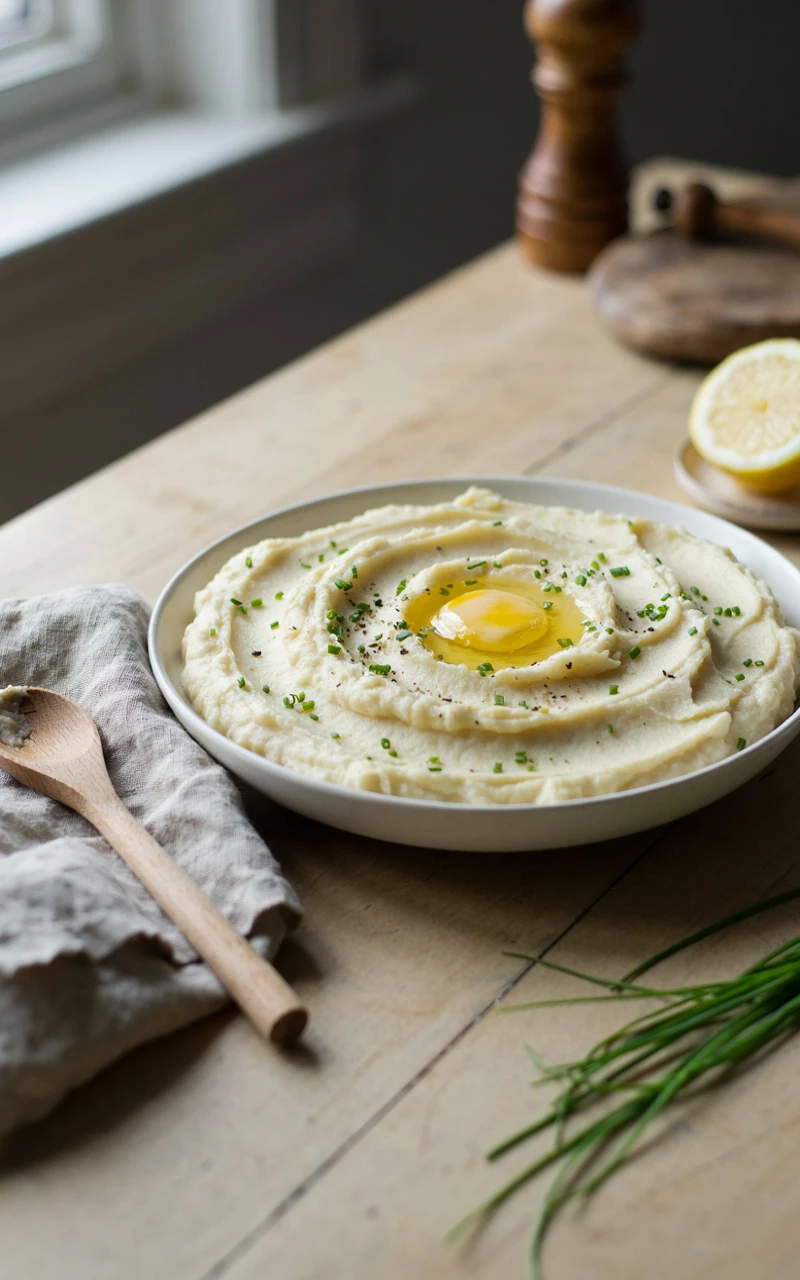
Why You’ll Love This Recipe
These mashed potatoes are thick, creamy, and soft garlicky without being sharp. A little cream cheese keeps them smooth even after they sit for a while, which matters a lot on a busy day.
They’re the side dish kids and grown-ups both go back for, and they hold beautifully in a slow cooker.
Ingredients
- 5 lb (2.3 kg) Yukon Gold potatoes, peeled and cut into 2-inch (5 cm) chunks
- 6 garlic cloves, peeled
- 1 tbsp (15 g) salt for the cooking water
- 1 cup (240 ml) whole milk
- 1/2 cup (120 ml) heavy cream
- 1/2 cup (115 g) unsalted butter
- 4 oz (115 g) cream cheese, softened
- 1 tsp (5 g) salt, plus more to taste
- 2 tbsp (6 g) chives, chopped
Tools and Preparation
You’ll need a large pot, a colander, a small saucepan, and a hand masher or potato ricer. Prep time: 20 minutes. Cook time: 25 minutes. Serves 10 to 12.
Yukon Golds are naturally buttery and creamy. Russets work too, but they turn fluffier and a little drier.
Step-by-Step Instructions
- Put the potatoes and garlic in a large pot and cover with cold water by 1 inch (2.5 cm). Add the salt.
- Bring to a boil, then simmer for 15 to 20 minutes, until a fork slides in with no push back.
- While they cook, warm the milk, cream, and butter in a small saucepan until the butter melts.
- Drain the potatoes well and put them back in the warm pot for 1 minute to steam off extra water.
- Mash the potatoes and garlic together, then stir in the cream cheese.
- Pour in the warm milk mixture a little at a time, stirring until smooth. Season and top with chives.
Common Mistakes to Avoid
- Using a blender or food processor. The potatoes turn gluey. Mash by hand.
- Adding cold milk. It cools the potatoes and won’t soak in evenly.
- Starting in boiling water. The outsides fall apart before the centers cook.
Variations, Storage, and Final Thoughts
Try sour cream instead of cream cheese, or fold in shredded Parmesan. Roasted garlic gives a sweeter, mellower flavor than boiled cloves.
Make them up to 2 days ahead and reheat with a splash of milk, or keep them in a slow cooker on warm for up to 4 hours. That frees up a burner when you need it most.
Key takeaway: warm dairy, dry potatoes, and a hand masher are the secret to creamy, never gluey, mash.
5. Brown Sugar Pecan Sweet Potato Casserole
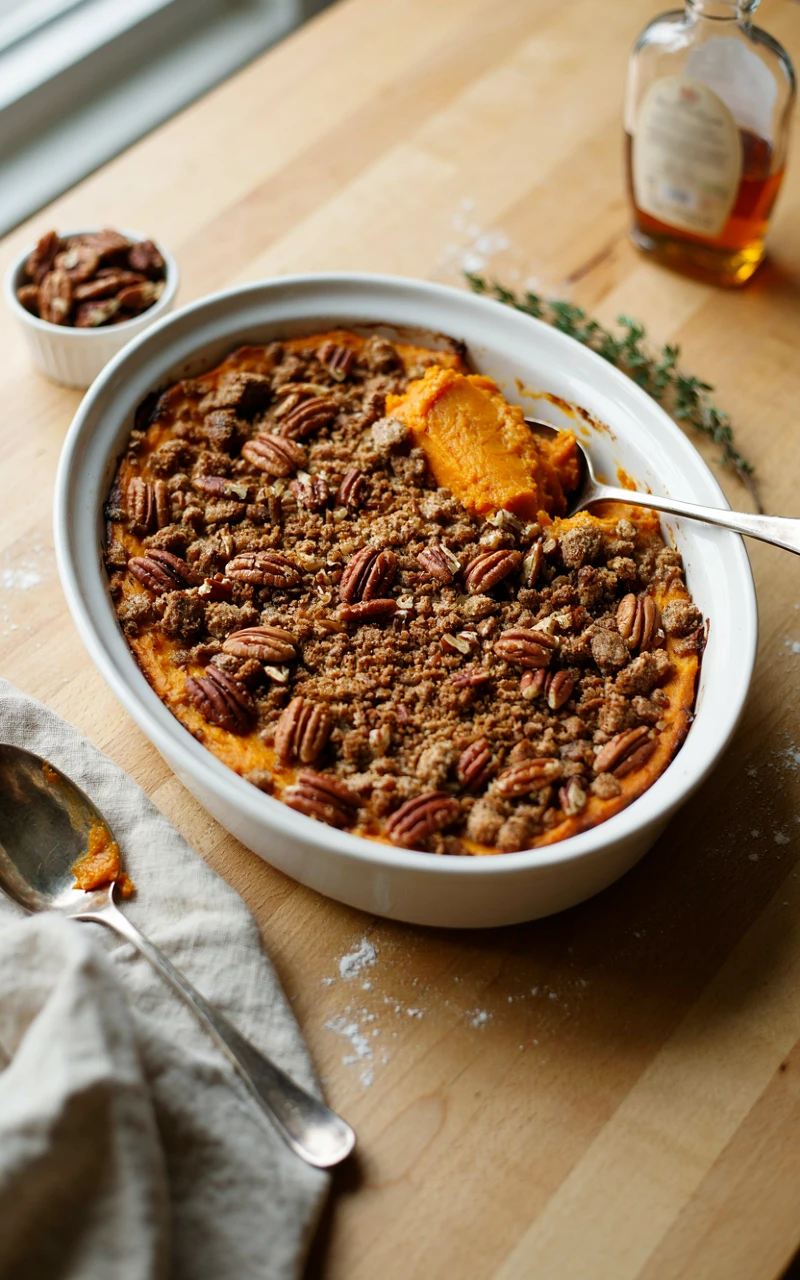
Why You’ll Love This Recipe
This casserole is soft, sweet, and spiced on the bottom with a crunchy brown sugar pecan topping. It sits right between a side dish and a dessert, which is exactly why people love it.
It’s also one of the easiest holiday recipes to make the day before.
Ingredients
For the filling:
- 4 lb (1.8 kg) sweet potatoes
- 1/3 cup (65 g) packed brown sugar
- 1/4 cup (55 g) unsalted butter, melted
- 1/2 cup (120 ml) whole milk
- 2 large eggs
- 1 tsp (5 ml) vanilla extract
- 1/2 tsp (1 g) ground cinnamon
- 1/2 tsp (3 g) salt
For the topping:
- 3/4 cup (150 g) packed brown sugar
- 1/3 cup (40 g) all-purpose flour
- 1/4 cup (55 g) unsalted butter, melted
- 1 cup (115 g) pecans, chopped
- 1/4 tsp (1.5 g) salt
Tools and Preparation
You’ll need a sheet pan, a 9 x 13 inch (23 x 33 cm) baking dish, a mixing bowl, and a masher or hand mixer. Prep time: 20 minutes. Cook time: about 1 1/2 hours including roasting the potatoes. Serves 10.
Roasting the sweet potatoes instead of boiling them keeps the filling thick and adds a caramel flavor.
Step-by-Step Instructions
- Heat the oven to 400°F (200°C). Prick the sweet potatoes and roast on a lined sheet pan for 50 to 60 minutes, until very soft.
- Let them cool slightly, then scoop the flesh into a bowl. Lower the oven to 350°F (175°C).
- Mash the potatoes with the brown sugar, butter, milk, eggs, vanilla, cinnamon, and salt until smooth.
- Spread the filling into a buttered baking dish.
- Stir the topping ingredients together until crumbly and scatter them evenly over the top.
- Bake for 30 minutes, until the topping is golden and the edges bubble.
Common Mistakes to Avoid
- Boiling the potatoes. They soak up water and make the filling runny.
- Adding the topping the night before. It goes soft. Add it just before baking.
- Overbaking. Pecans burn fast once the sugar starts bubbling.
Variations, Storage, and Final Thoughts
If your family loves marshmallows, skip the pecan topping and cover the top with mini marshmallows for the last 10 minutes. You can also add a pinch of nutmeg or orange zest to the filling.
Make the filling up to 2 days ahead and store it covered in the fridge. Add 10 minutes to the baking time if it goes in cold, and eat leftovers within 4 days.
Key takeaway: roast the potatoes and add the topping at the last minute for the best texture.
6. Homemade Green Bean Casserole
Why You’ll Love This Recipe
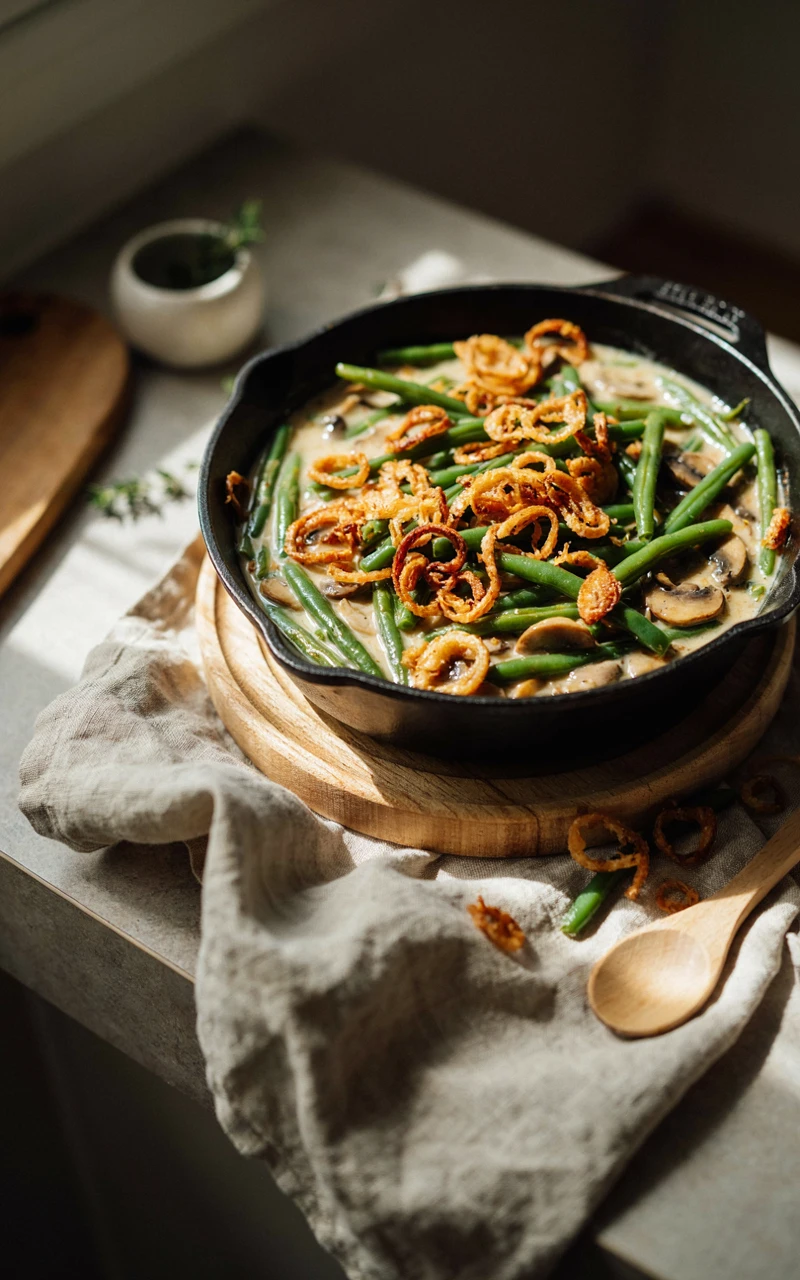
This is the green bean casserole you know, just made with fresh beans and a real mushroom cream sauce instead of a can of soup. It tastes brighter, the beans stay green, and it still has those crunchy fried onions on top.
It’s a small upgrade that makes a big difference, and it only takes about 30 minutes of hands-on time.
Ingredients
- 2 lb (900 g) fresh green beans, trimmed and cut in half
- 3 tbsp (45 g) unsalted butter
- 8 oz (225 g) cremini mushrooms, sliced
- 2 garlic cloves, minced
- 3 tbsp (25 g) all-purpose flour
- 1 cup (240 ml) chicken broth
- 1 cup (240 ml) whole milk
- 1/2 cup (50 g) Parmesan, grated
- 3/4 tsp (4 g) salt
- 1/4 tsp (0.5 g) black pepper
- 1 1/2 cups (85 g) store-bought crispy fried onions
Tools and Preparation
You’ll need a large pot, a bowl of ice water, a large skillet, and a 9 x 13 inch (23 x 33 cm) baking dish. Prep time: 20 minutes. Cook time: 35 minutes. Serves 8 to 10.
Blanching the beans first keeps them bright green and tender-crisp.
Step-by-Step Instructions
- Heat the oven to 375°F (190°C).
- Boil the green beans in salted water for 4 minutes, then plunge them into ice water. Drain well.
- Melt the butter in a skillet over medium-high heat. Cook the mushrooms for 6 to 8 minutes, until browned and their liquid is gone.
- Add the garlic and cook for 30 seconds. Sprinkle in the flour and stir for 1 minute.
- Slowly pour in the broth and milk, stirring until thick and smooth, about 4 minutes. Stir in the Parmesan, salt, and pepper.
- Toss the sauce with the beans and spread into the baking dish.
- Bake for 15 minutes, top with fried onions, and bake 5 to 10 minutes more, until bubbly and the onions are golden.
Common Mistakes to Avoid
- Not drying the beans. Extra water thins the sauce.
- Adding the onions too soon. They burn before the casserole heats through.
- Crowding the mushrooms. They steam instead of browning, so use a big skillet.
Variations, Storage, and Final Thoughts
Use frozen green beans in a pinch, thawed and patted dry. For extra crunch, add 1/2 cup (55 g) toasted sliced almonds with the onions.
Assemble everything except the onions up to a day ahead and refrigerate. Leftovers keep for 3 days, though the topping softens.
Key takeaway: fresh beans and a quick homemade sauce make this classic taste brand new.
7. Fresh Cranberry Orange Sauce
Why You’ll Love This Recipe
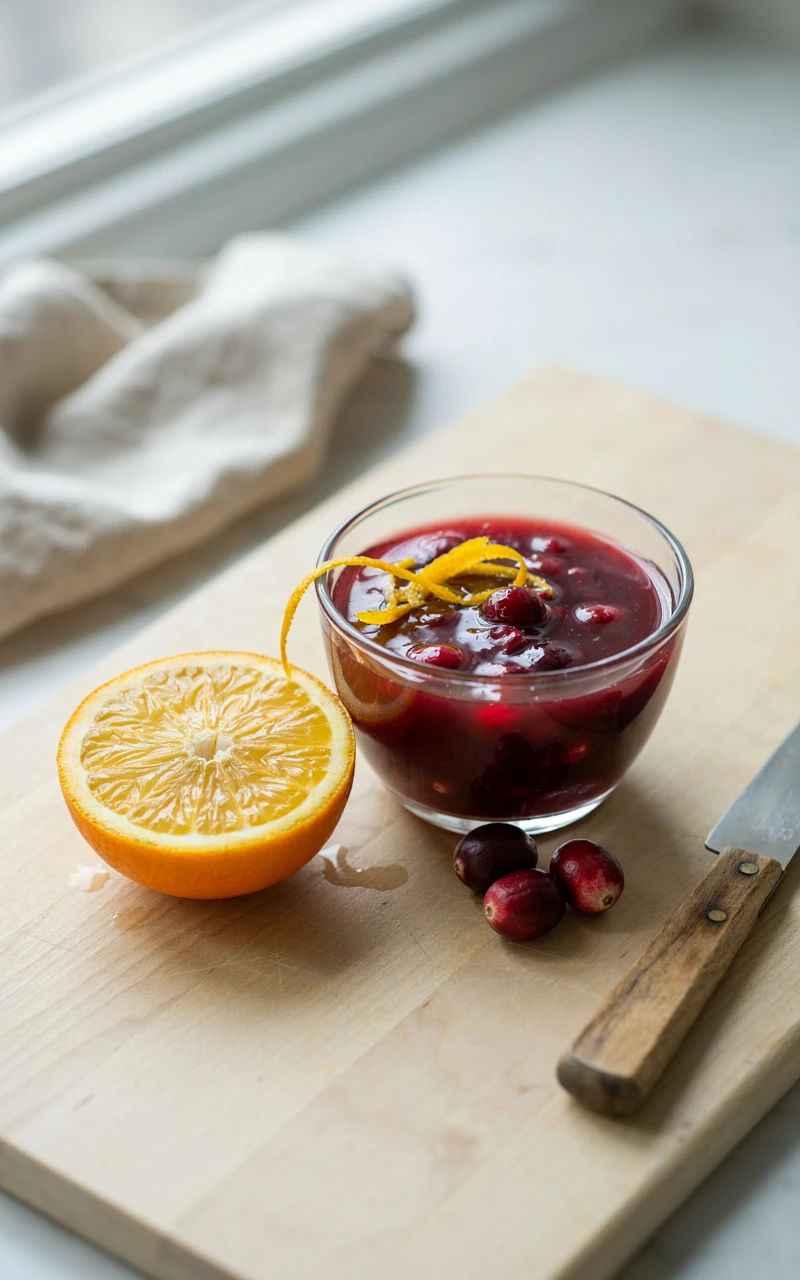
Once you make cranberry sauce from scratch, the canned kind is hard to go back to. It takes 15 minutes, uses one pot, and tastes tart, sweet, and bright with fresh orange.
It also cuts through all the rich Thanksgiving food on the plate, which is exactly what you want next to turkey and gravy.
Ingredients
- 12 oz (340 g) fresh or frozen cranberries
- 3/4 cup (150 g) granulated sugar
- 1/2 cup (120 ml) fresh orange juice
- 1/4 cup (60 ml) water
- Zest of 1 orange
- 1 pinch of salt
- 1 cinnamon stick (optional)
Tools and Preparation
You’ll need a medium saucepan, a wooden spoon, and a jar or bowl for storing. Prep time: 5 minutes. Cook time: 12 minutes. Makes about 2 cups (480 ml), enough for 10.
Rinse the cranberries and pick out any soft or shriveled ones before you start.
Step-by-Step Instructions
- Stir the sugar, orange juice, and water together in a saucepan over medium heat until the sugar dissolves.
- Add the cranberries, salt, and cinnamon stick if using.
- Bring to a boil, then lower to a simmer for 10 to 12 minutes. You’ll hear the berries pop.
- Take it off the heat once most of the berries have burst and the sauce looks glossy.
- Stir in the orange zest, remove the cinnamon stick, and cool completely.
Common Mistakes to Avoid
- Cooking until it looks thick. The sauce sets a lot as it cools, so stop while it’s still a bit loose.
- Adding the zest too early. Long cooking dulls the orange flavor.
- Using bottled juice only. Fresh juice tastes noticeably brighter.
Variations, Storage, and Final Thoughts
Swap a quarter of the sugar for maple syrup, or stir in a handful of chopped pecans after cooling. A splash of orange liqueur works nicely for an adults-only version.
This is the perfect early job. The sauce keeps for a week in the fridge and up to 2 months in the freezer.
Key takeaway: homemade cranberry sauce is cheap, fast, and one more thing you can cross off before the week of Thanksgiving.
8. Maple Roasted Brussels Sprouts With Bacon
Why You’ll Love This Recipe
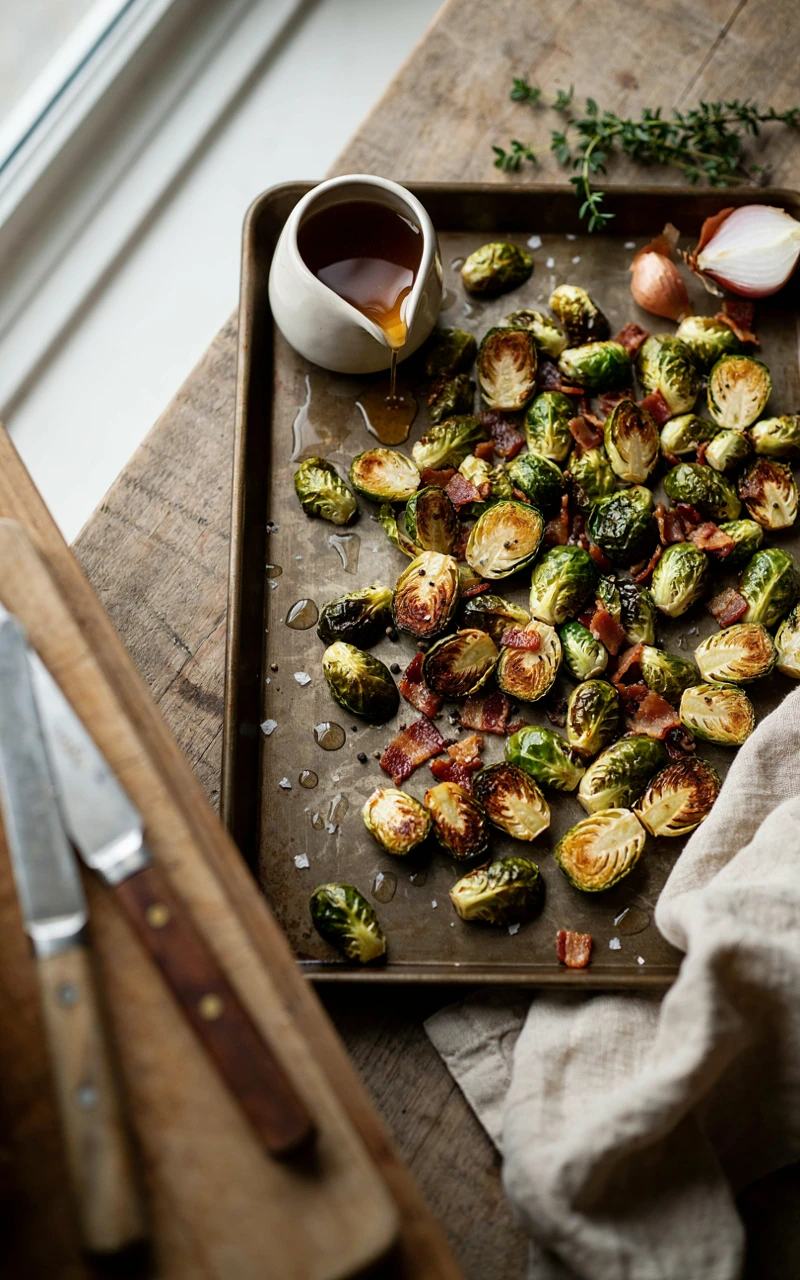
Even people who say they don’t like Brussels sprouts change their minds with this one. High heat makes the edges crispy and caramelized, and the maple syrup and bacon add salty-sweet flavor.
It’s one of my favorite fall recipes all season long, not just on Thanksgiving.
Ingredients
- 2 lb (900 g) Brussels sprouts, trimmed and halved
- 6 slices thick-cut bacon (about 6 oz / 170 g), chopped
- 2 tbsp (30 ml) olive oil
- 3 tbsp (45 ml) pure maple syrup
- 1 tbsp (15 ml) balsamic vinegar
- 1/2 tsp (3 g) salt
- 1/4 tsp (0.5 g) black pepper
Tools and Preparation
You’ll need a large rimmed sheet pan, a skillet, and a mixing bowl. Prep time: 15 minutes. Cook time: 30 minutes. Serves 8.
Trim and halve the sprouts a day ahead and keep them in a zip-top bag in the fridge.
Step-by-Step Instructions
- Heat the oven to 425°F (220°C).
- Cook the bacon in a skillet over medium heat for 6 to 8 minutes, until crisp. Move it to a paper towel and keep 1 tbsp (15 ml) of the fat.
- Toss the sprouts with the olive oil, bacon fat, salt, and pepper.
- Spread them on the sheet pan, cut side down, with space between them.
- Roast for 20 to 25 minutes, until the cut sides are deep golden brown.
- Whisk the maple syrup and balsamic together, drizzle over the hot sprouts, add the bacon, and toss.
Common Mistakes to Avoid
- Piling them up. Crowded sprouts steam and turn soggy. Use two pans if you need to.
- Adding maple syrup before roasting. It burns at high heat.
- Roasting too low. Anything under 400°F (200°C) won’t give you crispy edges.
Variations, Storage, and Final Thoughts
Leave out the bacon and add toasted pecans for a vegetarian version. Dried cranberries or pomegranate seeds add a pretty pop of red.
These are best fresh, but leftovers keep for 3 days. Reheat on a sheet pan at 400°F (200°C) for 8 minutes to bring back some crisp.
Key takeaway: high heat, cut side down, and a glaze at the very end.
9. Baked Mac and Cheese
Why You’ll Love This Recipe
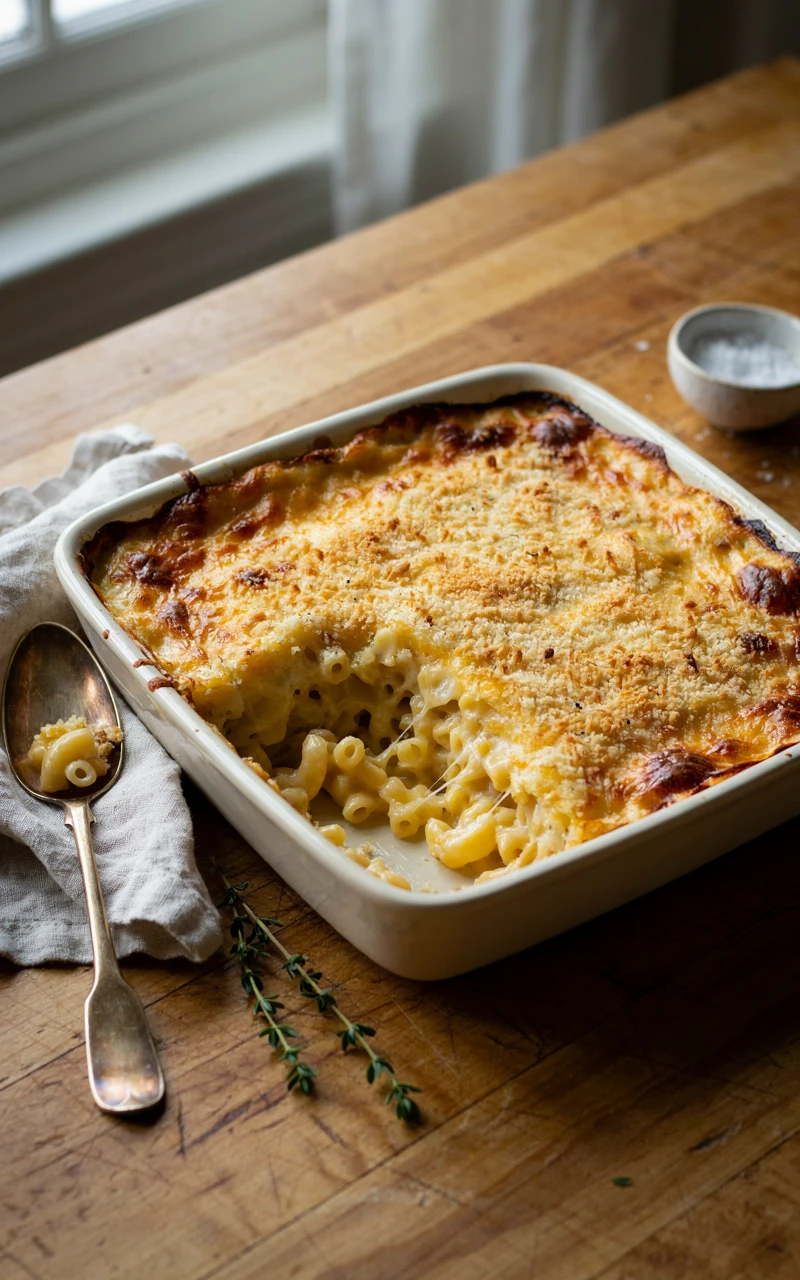
In a lot of homes, mac and cheese is just as important on the table as the turkey. This baked version is extra creamy inside with a golden, buttery crumb on top.
Sharp cheddar and a little Gruyère give it real cheese flavor, and it’s an easy win for any family dinner, holiday or not.
Ingredients
- 1 lb (450 g) elbow macaroni
- 4 tbsp (55 g) unsalted butter
- 1/4 cup (30 g) all-purpose flour
- 3 1/2 cups (840 ml) whole milk, warmed
- 4 cups (450 g) sharp cheddar, freshly shredded
- 1 cup (100 g) Gruyère, freshly shredded
- 1 tsp (2 g) dry mustard powder
- 1/2 tsp (1 g) smoked paprika
- 1 tsp (5 g) salt
- 1/2 cup (30 g) panko breadcrumbs
- 2 tbsp (30 g) unsalted butter, melted, for the topping
Tools and Preparation
You’ll need a large pot, a medium saucepan, a whisk, a box grater, and a 9 x 13 inch (23 x 33 cm) baking dish. Prep time: 20 minutes. Cook time: 40 minutes. Serves 10.
Shred your own cheese. Pre-shredded bags have an anti-caking coating that makes the sauce grainy.
Step-by-Step Instructions
- Heat the oven to 350°F (175°C) and butter the baking dish.
- Cook the macaroni 2 minutes less than the package says. Drain and set aside.
- Melt the butter in a saucepan over medium heat, whisk in the flour, and cook for 1 minute.
- Slowly whisk in the warm milk. Simmer for 5 minutes, until it coats a spoon.
- Take the pan off the heat and stir in 3 cups (340 g) cheddar, the Gruyère, mustard, paprika, and salt until smooth.
- Stir in the pasta and pour it into the dish. Scatter the rest of the cheddar on top.
- Toss the panko with melted butter and sprinkle over the cheese.
- Bake for 25 to 30 minutes, until bubbling at the edges and golden on top. Rest 10 minutes before serving.
Common Mistakes to Avoid
- Fully cooking the pasta first. It keeps cooking in the oven and turns mushy.
- Adding cheese over high heat. It can split and turn oily. Take the pan off the burner first.
- Skimping on sauce. It should look a little too saucy going in, since the pasta soaks it up.
Variations, Storage, and Final Thoughts
Swap the Gruyère for smoked Gouda or pepper jack. Crushed buttery crackers make a great topping instead of panko.
Assemble without the crumb topping a day ahead, then add the topping and bake for 35 to 40 minutes. Leftovers keep for 4 days and reheat well with a splash of milk.
Key takeaway: under cook the pasta, shred your own cheese, and don’t be shy with the sauce.
10. Honey Glazed Carrots
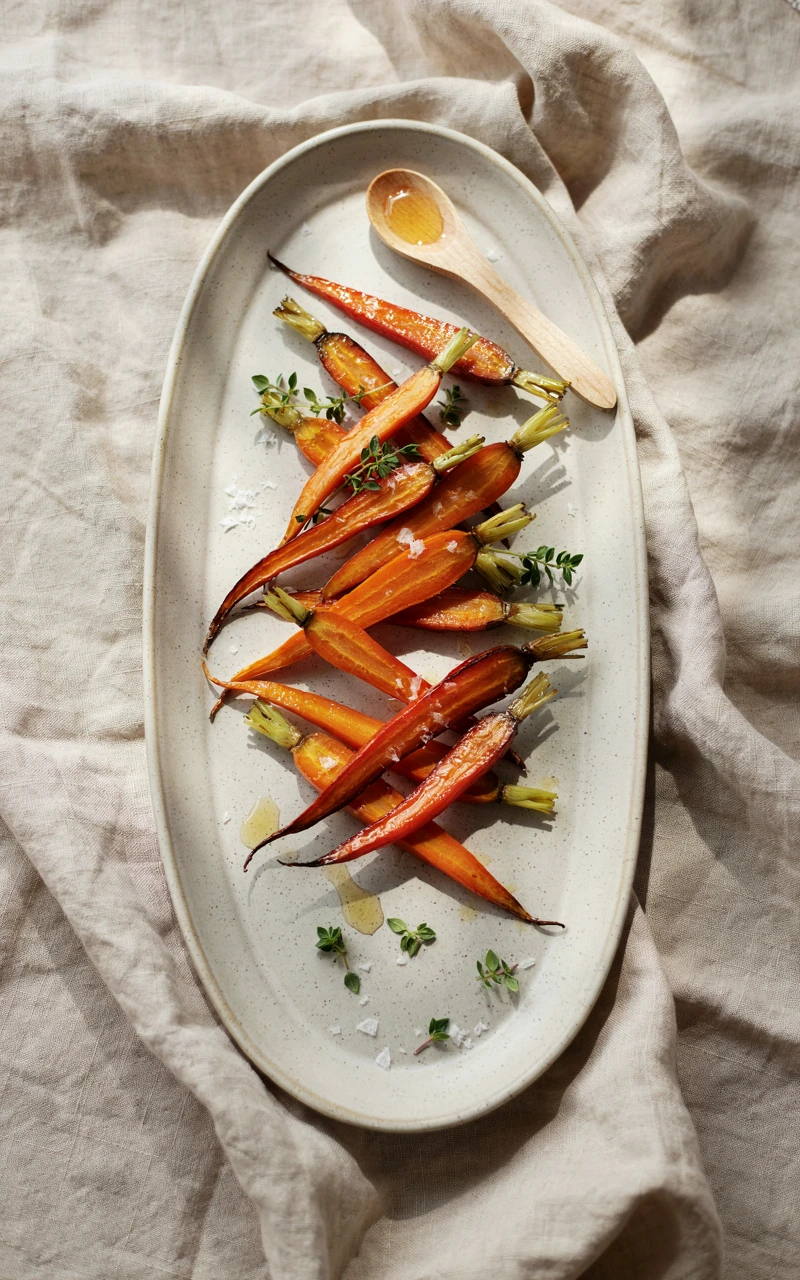
Why You’ll Love This Recipe
Oven space disappears fast on Thanksgiving, so I always plan at least one side that cooks on the stove. These carrots simmer and glaze in one skillet in under 20 minutes.
They come out tender, glossy, and lightly sweet, and they add bright color to a plate that’s usually all brown and beige.
Ingredients
- 2 lb (900 g) carrots, peeled and sliced on an angle about 1/2 inch (1.3 cm) thick
- 1/2 cup (120 ml) water
- 3 tbsp (45 g) unsalted butter
- 3 tbsp (60 g) honey
- 1 tsp (5 ml) fresh lemon juice
- 1 tsp (1 g) fresh thyme leaves
- 1/2 tsp (3 g) salt
- 1 tbsp (4 g) fresh parsley, chopped
Tools and Preparation
You’ll need a large skillet with a lid and a vegetable peeler. Prep time: 10 minutes. Cook time: 15 minutes. Serves 8.
Peel and slice the carrots up to 2 days ahead and store them in a container in the fridge.
Step-by-Step Instructions
- Put the carrots, water, and salt in a large skillet. Cover and bring to a simmer over medium heat.
- Cook for 8 to 10 minutes, until a fork goes in with just a little resistance.
- Uncover and let any remaining water cook off.
- Add the butter, honey, and thyme. Stir for 4 to 5 minutes, until the carrots are shiny and coated.
- Stir in the lemon juice, sprinkle with parsley, and serve.
Common Mistakes to Avoid
- Uneven slices. Thin pieces go mushy while thick ones stay hard.
- Glazing too long. Honey can burn quickly once the water is gone.
- Skipping the lemon. A squeeze keeps the sweetness from tasting flat.
Variations, Storage, and Final Thoughts
Swap the honey for maple syrup or brown sugar, or add a pinch of cinnamon. Rainbow carrots look beautiful on a holiday table.
Leftovers keep for 4 days in the fridge. Reheat gently in a skillet with a teaspoon of water.
Key takeaway: a stovetop side keeps your oven free for the dishes that need it.
11. Skillet Cornbread
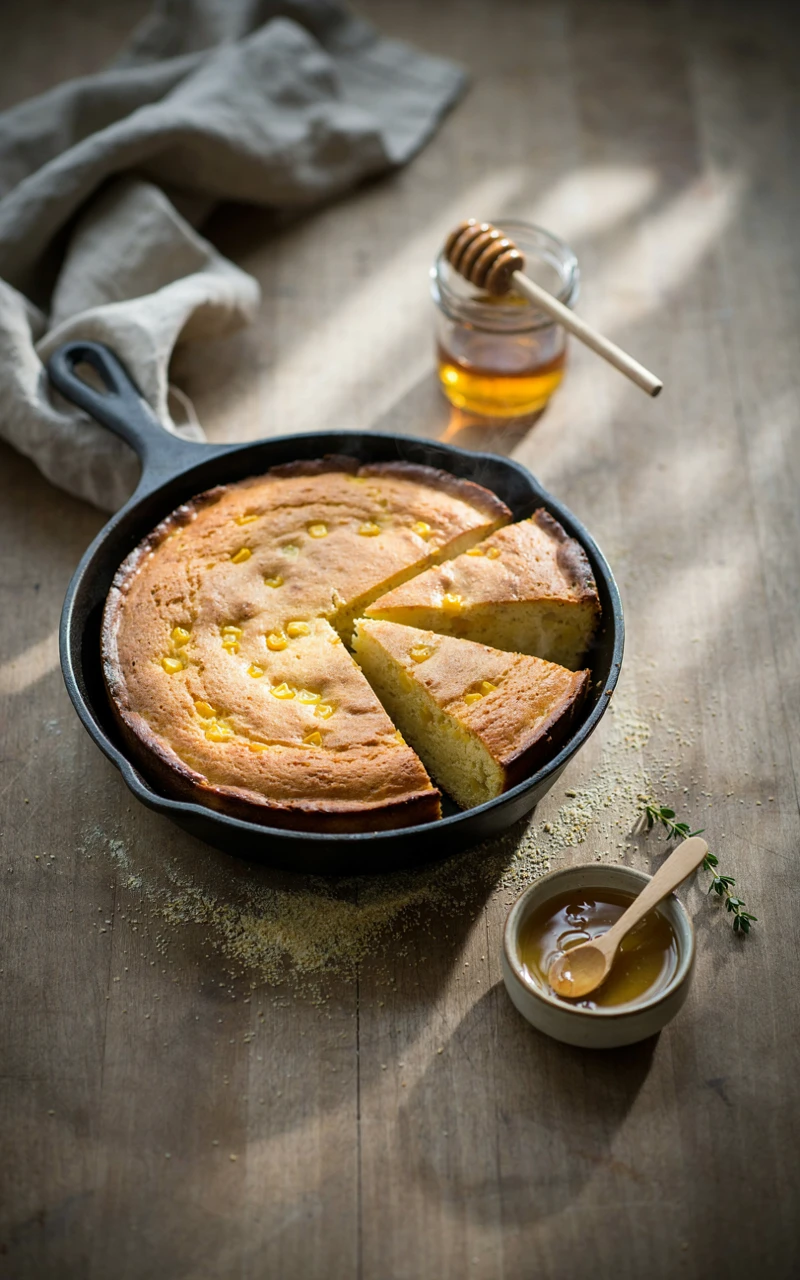
Why You’ll Love This Recipe
Pouring the batter into a hot cast iron skillet gives this cornbread crispy, golden edges and a soft, tender middle. It’s lightly sweet, so it goes with everything from gravy to cranberry sauce.
It’s also two dishes in one. Bake an extra pan a few days ahead and you have the base for cornbread stuffing.
Ingredients
- 1 cup (150 g) yellow cornmeal
- 1 cup (125 g) all-purpose flour
- 1/4 cup (50 g) granulated sugar
- 1 tbsp (12 g) baking powder
- 1/2 tsp (3 g) baking soda
- 1 tsp (5 g) salt
- 1 1/4 cups (300 ml) buttermilk
- 2 large eggs
- 1/2 cup (115 g) unsalted butter, melted, plus 1 tbsp (15 g) for the skillet
Tools and Preparation
You’ll need a 10-inch (25 cm) cast iron skillet, two mixing bowls, and a whisk. Prep time: 10 minutes. Cook time: 22 minutes. Serves 8.
No cast iron? A 9-inch (23 cm) square metal pan works, though you’ll lose some of the crispy edge.
Step-by-Step Instructions
- Put the skillet in the oven and heat it to 425°F (220°C) for at least 15 minutes.
- Whisk the cornmeal, flour, sugar, baking powder, baking soda, and salt in a large bowl.
- In another bowl, whisk the buttermilk, eggs, and melted butter.
- Pour the wet into the dry and stir just until no dry streaks remain.
- Carefully take out the hot skillet, add 1 tbsp butter, and swirl to coat. It should sizzle.
- Pour in the batter and bake for 20 to 22 minutes, until golden and a toothpick comes out clean.
- Cool for 10 minutes, then slice into wedges.
Common Mistakes to Avoid
- Using a cold skillet. You won’t get that crunchy crust.
- Over mixing. A few lumps are fine. Too much stirring makes it tough.
- Grabbing the handle bare-handed. Cast iron stays hot long after it leaves the oven.
Variations, Storage, and Final Thoughts
Stir in 1 cup (115 g) shredded cheddar and a chopped jalapeño, or 1 cup (150 g) corn kernels. Drizzle warm slices with honey butter for an extra treat.
Cornbread keeps wrapped at room temperature for 2 days or in the freezer for 3 months. Reheat at 350°F (175°C) for 8 to 10 minutes.
Key takeaway: a preheated skillet is the one step that makes this cornbread great.
12. Soft Buttermilk Dinner Rolls
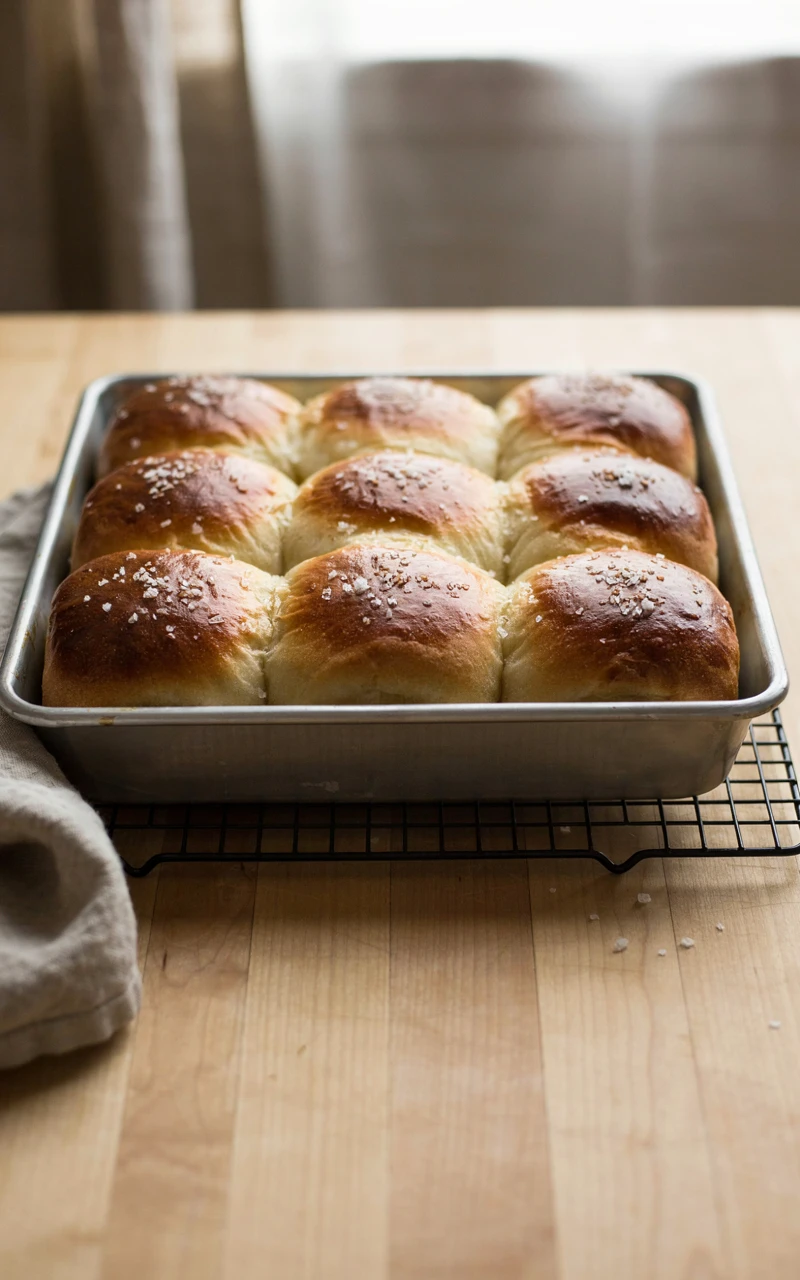
Why You’ll Love This Recipe
These rolls are pillowy, buttery, and pull apart in soft little clouds. Buttermilk makes them tender with a gentle tang, and they’re a lot easier than they look.
Best of all, they freeze perfectly. Bake them in early November and nobody will know they weren’t made that morning.
Ingredients
- 1 cup (240 ml) buttermilk, warmed to 105 to 110°F (40 to 43°C)
- 1/4 cup (60 ml) warm water
- 2 1/4 tsp (7 g) instant yeast, one packet
- 3 tbsp (40 g) granulated sugar
- 1 large egg, at room temperature
- 4 tbsp (55 g) unsalted butter, melted
- 3 1/2 cups (440 g) all-purpose flour, plus extra for dusting
- 1 1/2 tsp (9 g) salt
- 2 tbsp (30 g) butter, melted, for brushing
Tools and Preparation
You’ll need a stand mixer with a dough hook or a large bowl, a 9 x 13 inch (23 x 33 cm) baking pan, a kitchen towel, and a pastry brush. Prep time: 25 minutes. Rise time: about 2 hours. Cook time: 20 minutes. Makes 16 rolls.
Warmed buttermilk may look a little curdled. That’s normal and won’t hurt the dough.
Step-by-Step Instructions
- Stir the buttermilk, water, yeast, and sugar together. Let it sit 5 minutes, until a little foamy.
- Add the egg, melted butter, flour, and salt. Mix until a shaggy dough forms.
- Knead for 8 minutes in the mixer, or 10 minutes by hand, until smooth and slightly tacky.
- Cover and let rise in a warm spot for 1 to 1 1/2 hours, until doubled.
- Divide into 16 equal pieces, about 2.5 oz (70 g) each. Roll into tight balls and arrange in a buttered pan.
- Cover and let rise 45 minutes, until puffy and touching. Heat the oven to 375°F (190°C).
- Bake for 18 to 20 minutes, until golden brown. The centers should read 190°F (88°C).
- Brush with melted butter while hot.
Common Mistakes to Avoid
- Liquid that’s too hot. Above 120°F (49°C) can kill the yeast.
- Adding too much flour. A slightly sticky dough bakes into softer rolls.
- Rushing the rise. Under-risen rolls come out dense.
Variations, Storage, and Final Thoughts
Brush with garlic herb butter, or sprinkle flaky salt on top after baking. For sweeter rolls, swap the sugar for honey.
Cool completely, wrap tightly, and freeze for up to a month. Thaw at room temperature, then warm covered in foil at 300°F (150°C) for 10 minutes.
Key takeaway: bake the rolls early and freeze them. It’s one of the best time-savers on this list.
13. Butternut Squash Soup
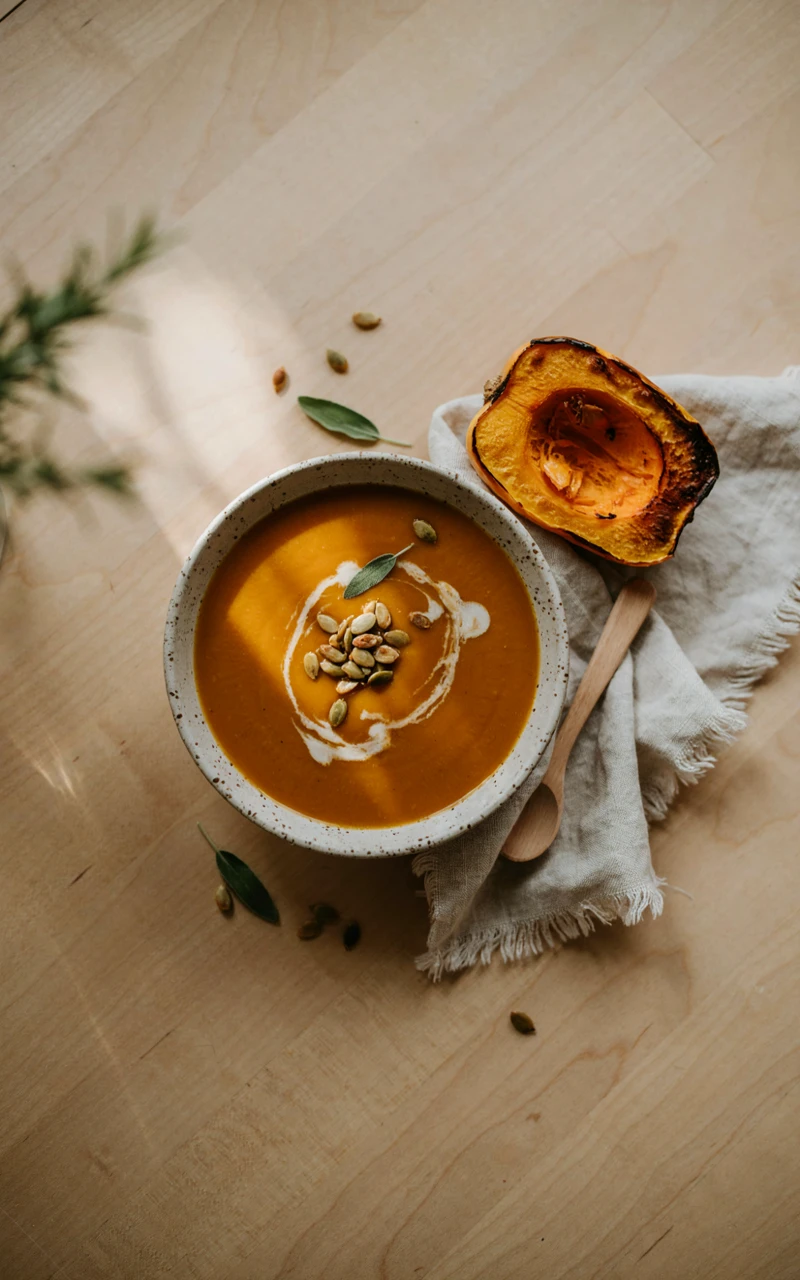
Why You’ll Love This Recipe
A small cup of this soup is a lovely way to start the meal while the turkey rests. It’s silky, a little sweet from apple, and warm with a touch of sage.
It’s also a wonderful option for any vegetarian guests if you use vegetable broth, and it reheats perfectly.
Ingredients
- 1 large butternut squash (about 3 lb / 1.4 kg), peeled, seeded, and cubed
- 2 tbsp (30 ml) olive oil
- 1 medium onion, chopped
- 2 carrots, chopped
- 1 apple, peeled and chopped
- 2 garlic cloves, minced
- 1 tsp (1 g) dried sage
- 1/4 tsp (0.5 g) ground nutmeg
- 4 cups (960 ml) chicken or vegetable broth
- 1/2 cup (120 ml) heavy cream
- 1 tsp (5 g) salt
- 1/4 tsp (0.5 g) black pepper
Tools and Preparation
You’ll need a sheet pan, a large pot, and an immersion blender or regular blender. Prep time: 20 minutes. Cook time: 1 hour. Serves 8 as a starter.
Many grocery stores sell pre-cubed squash. It costs a bit more but saves you 15 minutes of peeling.
Step-by-Step Instructions
- Heat the oven to 400°F (200°C). Toss the squash with 1 tbsp oil and roast for 35 to 40 minutes, until soft and browned on the edges.
- Heat the remaining oil in a large pot over medium heat. Cook the onion, carrots, and apple for 8 minutes, until soft.
- Add the garlic, sage, and nutmeg and cook for 1 minute.
- Add the roasted squash and broth. Simmer for 20 minutes.
- Blend until completely smooth. If using a regular blender, fill it only halfway and leave the lid vent open, covered with a towel.
- Stir in the cream, salt, and pepper. Warm through without boiling.
Common Mistakes to Avoid
- Skipping the roast. Boiled squash makes a flat, watery soup.
- Overfilling the blender with hot soup. Steam can blow the lid off.
- Boiling after adding cream. It can split and look grainy.
Variations, Storage, and Final Thoughts
Use coconut milk instead of cream for a dairy-free soup. Top bowls with toasted pumpkin seeds, a swirl of cream, or crispy sage leaves.
Freeze the soup before adding the cream for up to 3 months. Thaw overnight, reheat, then stir in the cream.
Key takeaway: roast the squash for flavor and make the soup weeks ahead.
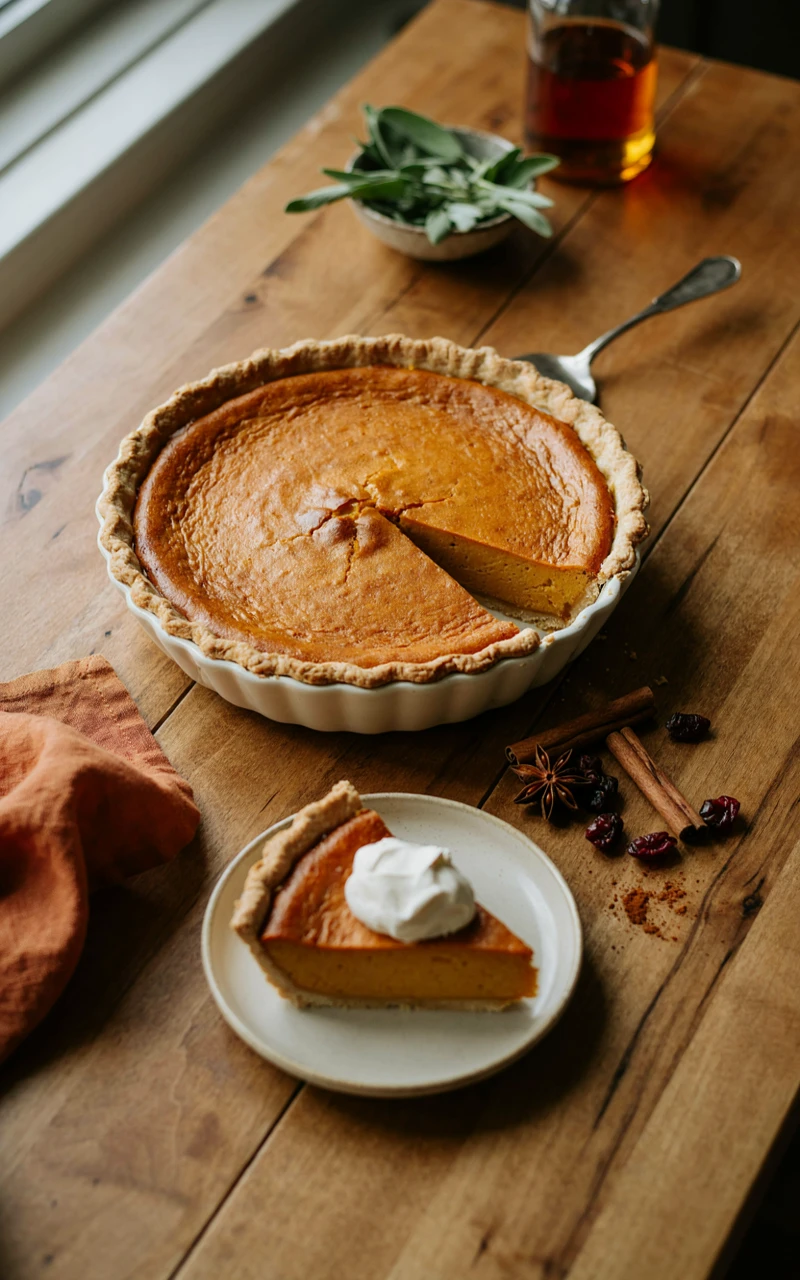
14. Classic Pumpkin Pie
Why You’ll Love This Recipe
It isn’t Thanksgiving in my house without pumpkin pie. This one has a smooth, spiced custard filling and a crust that stays crisp because it’s partly baked first.
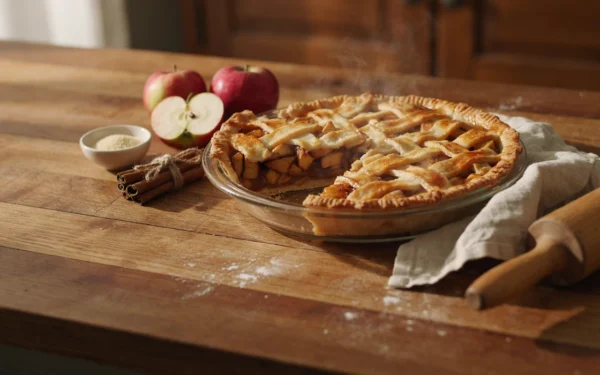
If you’d like a second pie option, my easy apple pie ideas pair nicely with it on the dessert table.
Ingredients
- 1 unbaked 9-inch (23 cm) pie crust, homemade or store-bought
- 1 can (15 oz / 425 g) pure pumpkin puree
- 3/4 cup (150 g) packed brown sugar
- 2 large eggs plus 1 egg yolk
- 1 cup (240 ml) evaporated milk
- 1 tsp (2 g) ground cinnamon
- 1/2 tsp (1 g) ground ginger
- 1/4 tsp (0.5 g) ground nutmeg
- 1/8 tsp (0.25 g) ground cloves
- 1/2 tsp (3 g) salt
Tools and Preparation
You’ll need a 9-inch (23 cm) pie dish, parchment paper, pie weights or dried beans, a whisk, and a mixing bowl. Prep time: 20 minutes. Cook time: about 1 hour 15 minutes. Cooling time: 3 hours. Serves 8.
Make sure your can says pure pumpkin, not pumpkin pie filling. The filling version already has sugar and spice added.
Step-by-Step Instructions
- Heat the oven to 400°F (200°C). Fit the crust into the dish and chill for 15 minutes.
- Line the crust with parchment, fill with weights, and bake for 15 minutes. Remove the weights and bake 5 minutes more, until lightly golden.
- Lower the oven to 350°F (175°C).
- Whisk the pumpkin, brown sugar, eggs, yolk, evaporated milk, spices, and salt until smooth.
- Pour into the warm crust.
- Bake for 50 to 55 minutes, until the edges are set and the center still jiggles slightly, like set gelatin.
- Cool on a rack for at least 3 hours before slicing.
Common Mistakes to Avoid
- Skipping the pre-bake. The bottom crust turns soggy.
- Baking until the center is firm. That leads to cracks across the top.
- Slicing too soon. The filling keeps setting as it cools.
Variations, Storage, and Final Thoughts
Use 2 tsp (4 g) pumpkin pie spice instead of the separate spices, or swap the crust for a gingersnap crumb crust. Serve with lightly sweetened whipped cream.
Bake it 1 to 2 days ahead and keep it covered in the fridge for up to 4 days. Custard pies need to stay chilled once cooled.
Key takeaway: pre-bake the crust and pull the pie while the center still has a gentle wobble.
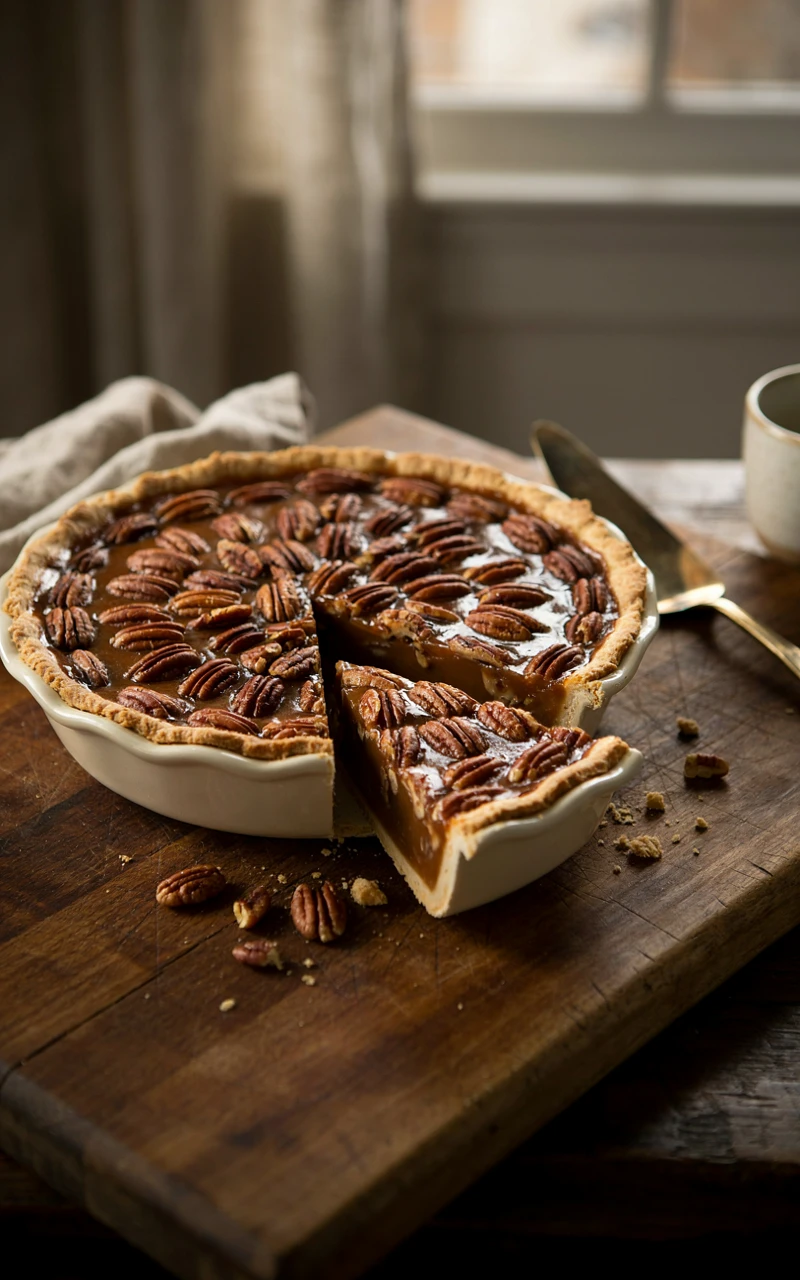
15. Easy Pecan Pie
Why You’ll Love This Recipe
This pecan pie has a gooey, caramel-like filling and a thick layer of toasty pecans on top. A little maple syrup in the filling gives it a warmer flavor than corn syrup alone.
It’s one of the easiest holiday recipes on this list. You stir the filling in one bowl, pour, and bake.
Ingredients
- 1 unbaked 9-inch (23 cm) pie crust
- 3 large eggs
- 3/4 cup (180 ml) light corn syrup
- 1/4 cup (60 ml) pure maple syrup
- 3/4 cup (150 g) packed brown sugar
- 4 tbsp (55 g) unsalted butter, melted
- 1 tsp (5 ml) vanilla extract
- 1/2 tsp (3 g) salt
- 2 cups (200 g) pecan halves
Tools and Preparation
You’ll need a 9-inch (23 cm) pie dish, a mixing bowl, a whisk, a sheet pan, and foil. Prep time: 15 minutes. Cook time: 55 to 60 minutes. Cooling time: 4 hours. Serves 8 to 10.
Toast the pecans at 350°F (175°C) for 6 minutes before using them. It makes a big difference in flavor.
Step-by-Step Instructions
- Heat the oven to 350°F (175°C). Fit the crust into the dish and chill while you make the filling.
- Whisk the eggs, corn syrup, maple syrup, brown sugar, butter, vanilla, and salt until smooth.
- Scatter the toasted pecans over the crust and pour the filling over them.
- Set the pie on a sheet pan to catch drips and bake for 25 minutes.
- Cover the crust edges with foil and bake another 30 to 35 minutes, until the edges are set and the center jiggles just a little. The center should read 200°F (93°C).
- Cool completely, at least 4 hours, before slicing.
Common Mistakes to Avoid
- Under-baking. The filling stays runny. Check the temperature if you’re unsure.
- Forgetting the foil. The crust edges burn before the filling sets.
- Cutting it warm. Pecan pie needs those 4 hours to firm up.
Variations, Storage, and Final Thoughts
Add 1/2 cup (85 g) chocolate chips for a chocolate pecan pie, or a splash of bourbon for a grown-up version. A pinch of flaky salt on top balances the sweetness.
Pecan pie keeps covered at room temperature for 1 day, then in the fridge for up to 4 days. It also freezes well for up to 2 months.
Key takeaway: toast the pecans, shield the crust, and give it time to cool.
Looking back at all 15 dishes, the thing that helped me most wasn’t any one recipe. It was deciding early which ones I’d make, and getting the gravy, cranberry sauce, rolls, and soup done before the week of Thanksgiving even started.
You don’t have to make all fifteen. Pick the ones your family loves, make a simple plan, and cook a few things each weekend in November.
You can absolutely pull off a calm, delicious Thanksgiving dinner this year. Tell me in the comments which dish you’re making first, and I’d love to hear about the one your family can’t do without.