This post may contain affiliate links, which means I may receive a small commission should you decide to click that link and make a purchase. For more information please refer to the Terms & Conditions.
The Ultimate Guide to Trending Christmas Nail Designs
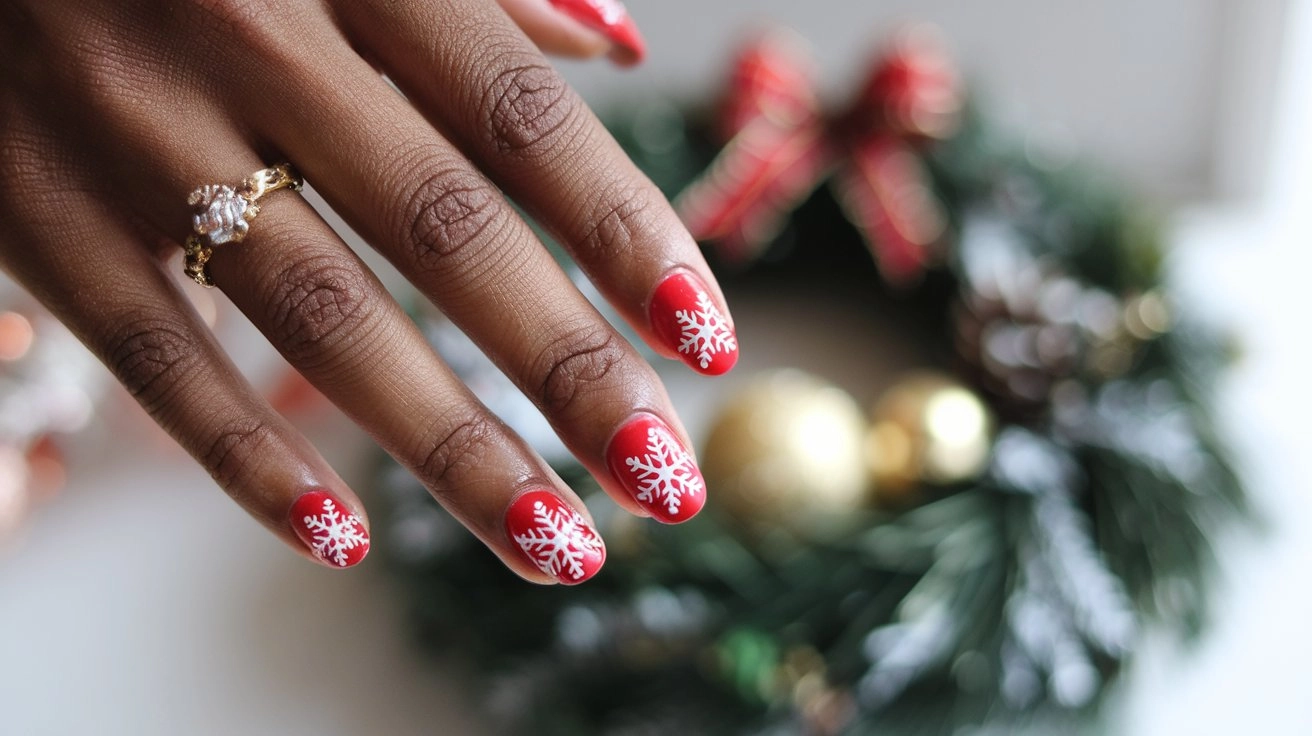
I’m thrilled to share this year’s most stunning Christmas nail designs with you! As someone who lives and breathes nail art, I’ve carefully curated these trends dominating the holiday season. But I won’t just show you what’s trending – I’ll walk you through exactly how to create each look yourself!
How to Recreate These Trending Christmas Nail Designs
Before starting any design, always:
- Remove old polish completely
- Shape your nails
- Push back cuticles
- Apply base coat
- Let dry completely
Trending Designs That Will Make Your Holiday Season Sparkle
The New Traditional Red
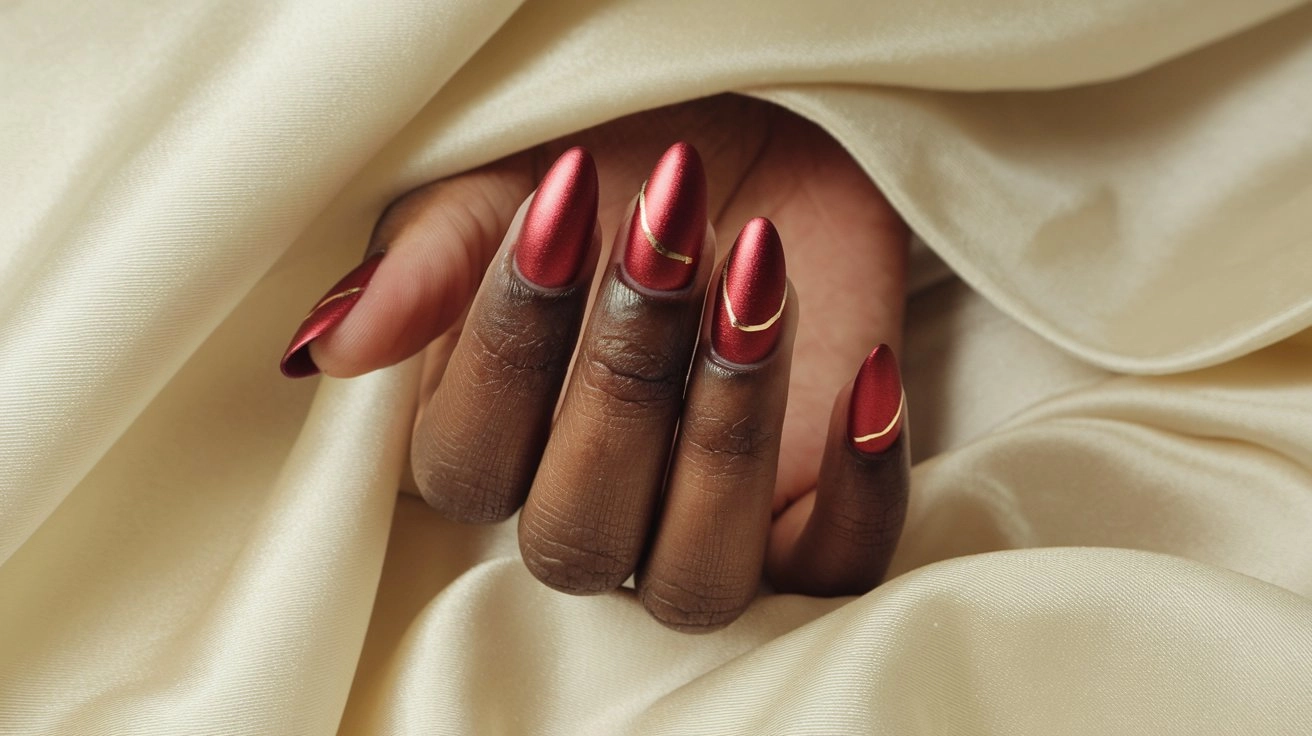
This isn’t your basic holiday red! We’re taking the classic Christmas color to new heights with a dimensional metallic finish. Picture this: a deep crimson base with subtle gold flecks that catch the light as you move your hands. The secret? Layer a matte top coat over most of the nail, leaving just a glossy stripe down the center for that modern edge.
You’ll need Metallic red polish, gold polish, matte top coat, regular top coat
Steps:
- Apply metallic red polish (2 thin coats)
- Let dry for 5 minutes
- Using a thin brush, add fine gold lines diagonally across each nail
- Let dry for 2 minutes
- Apply a matte top coat on most of the nail, leaving a thin vertical stripe down the center
- Once dry, apply a regular top coat only on the center stripe
- Seal the entire nail with the final top coat
Elevated French Tips
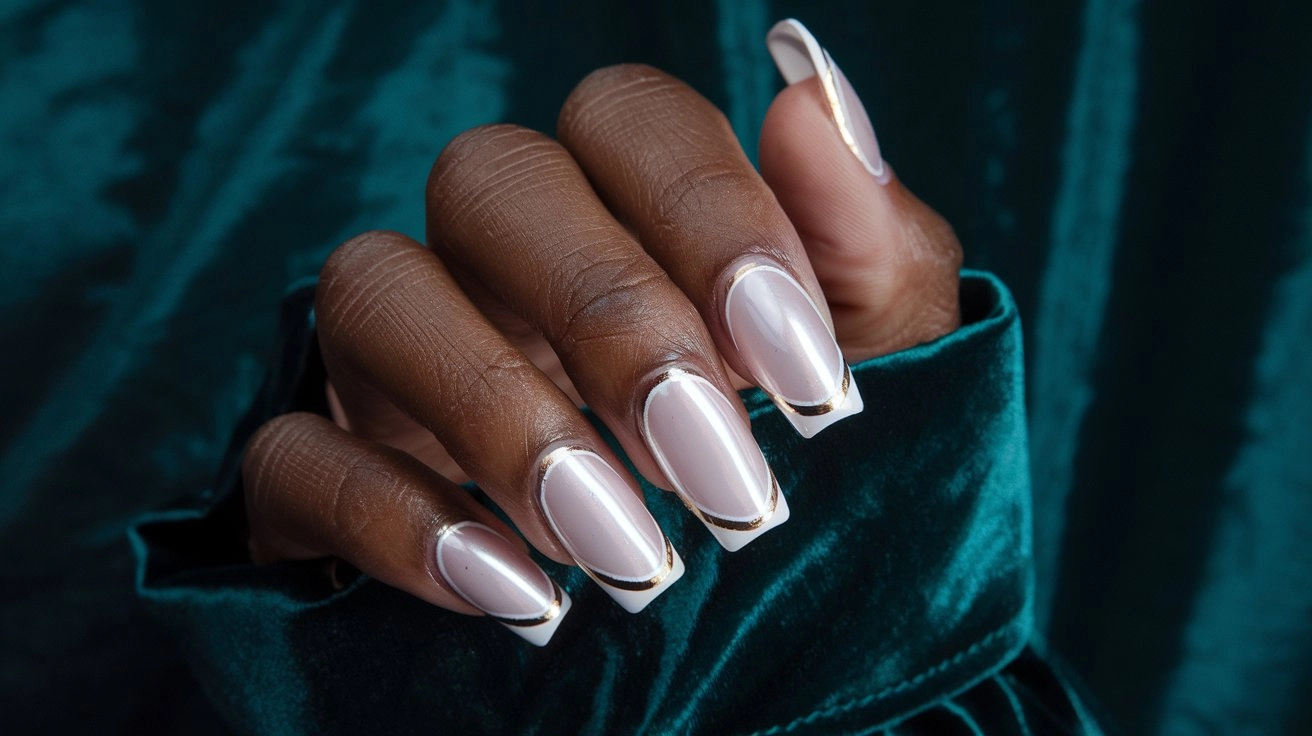
Forget everything you know about French manicures. This holiday version features metallic white tips with delicate gold striping at the smile line. Add a sprinkle of tiny rhinestones at the base of each tip, and you’ve got a party-ready look that’s still office-appropriate.
You’ll need Sheer pink polish, metallic white polish, gold striping tape, tiny rhinestones
Steps:
- Apply sheer pink base (2 coats)
- Let dry completely
- Using French tip guides or a steady hand, create white tips
- Apply gold striping tape just below the white tips
- Place one tiny rhinestone at the base of each tip
- Seal with a top coat, being careful not to disturb the stones
Contemporary Candy Canes
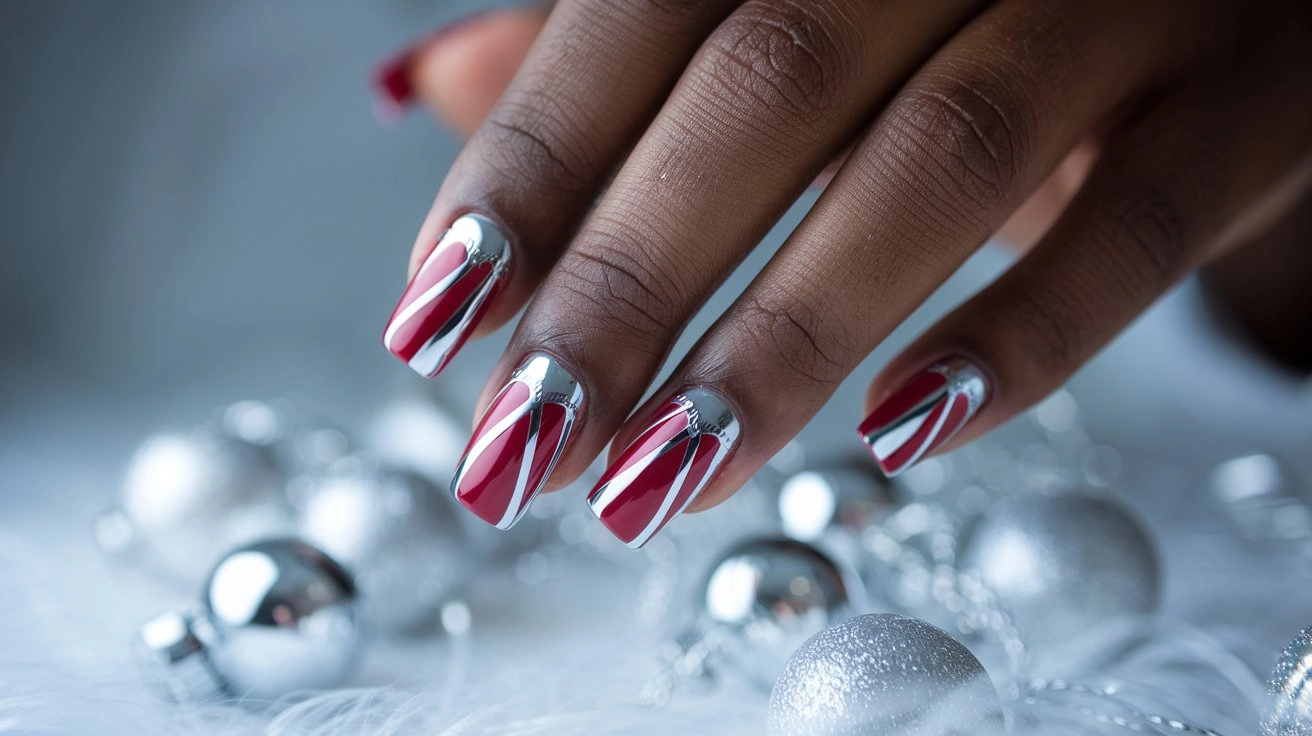
We’re reimagining the classic candy cane pattern with a modern twist. Think diagonal stripes in varying widths, using metallic white and shimmering red. The game-changer? Adding a thin line of gold between the stripes for extra sophistication.
You’ll need: White polish, red polish, gold polish, striping tape
Steps:
- Apply white base coat (2 layers)
- Let dry completely
- Place striping tape diagonally across the nails
- Paint alternating red stripes
- Remove the tape while the polish is still slightly wet
- Add thin gold lines between stripes using a detail brush
- Seal with top coat
Single Line Christmas Trees
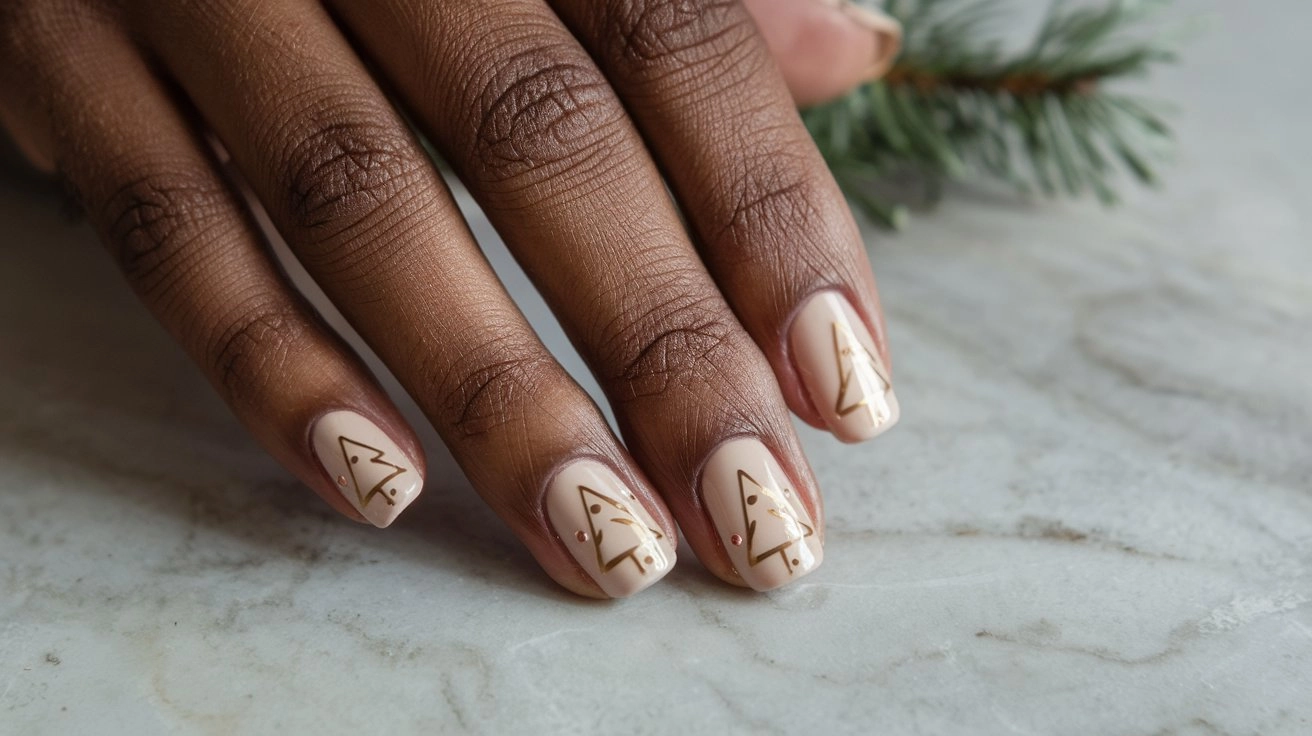
With this ingenious design, minimalism meets holiday cheer. Create abstract Christmas tree shapes on a neutral base using ultra-thin gold striping. One tree per nail is all you need—it’s simple yet incredibly striking.
You’ll need: Neutral polish, gold polish, and a thin detail brush
Steps:
- Apply neutral base color (2 coats)
- Let dry fully
- Using a thin brush and gold polish, draw a vertical line
- Add diagonal lines on each side, shorter as you go up
- Add a tiny dot at the top for the star
- Seal with top coat
Abstract Snowflakes
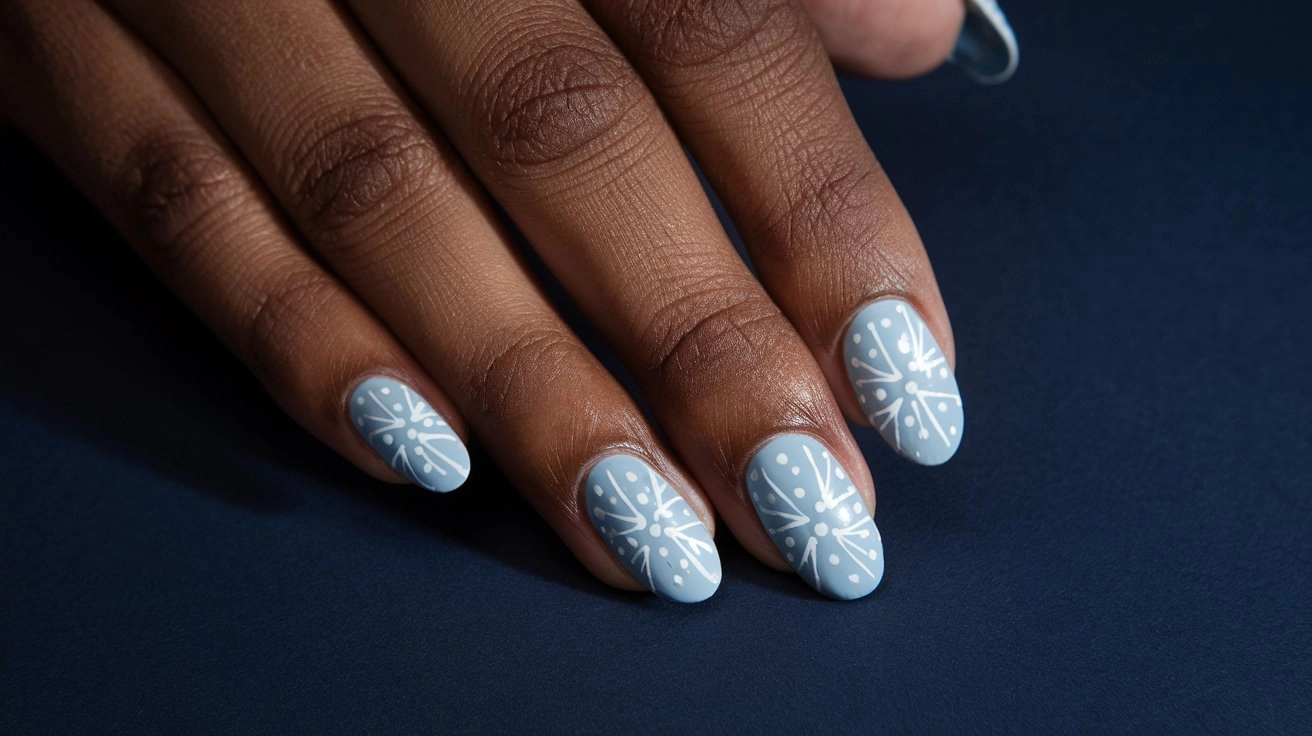
These aren’t your typical snowflake designs. We’re talking geometric interpretations using dots and lines in metallic silver and white, creating patterns that look like modern art while still capturing that winter wonderland vibe.
You’ll need: Pale blue polish, white polish, silver polish, dotting tool
Steps:
- Apply pale blue base (2 coats)
- Let dry completely
- Using the dotting tool, create a center dot in white
- Add six small dots around the center
- Connect dots with thin silver lines
- Add smaller dots at the line ends
- Seal with top coat
3D Sweater Effect

Cozy meets chic with this textured design that mimics your favorite winter knits. Using a special technique with your polish, create raised patterns on your nails that look and feel like tiny cable knits. Add metallic threads for extra sparkle.
You’ll need: White polish, thick white polish, detail brush
Steps:
- Apply white base (2 coats)
- Let dry completely
- Using thick white polish, create raised vertical lines
- Add diagonal connecting lines to create a cable pattern
- Let dry completely (15 minutes minimum)
- Very carefully seal with a thick top coat
Metallic Ornaments
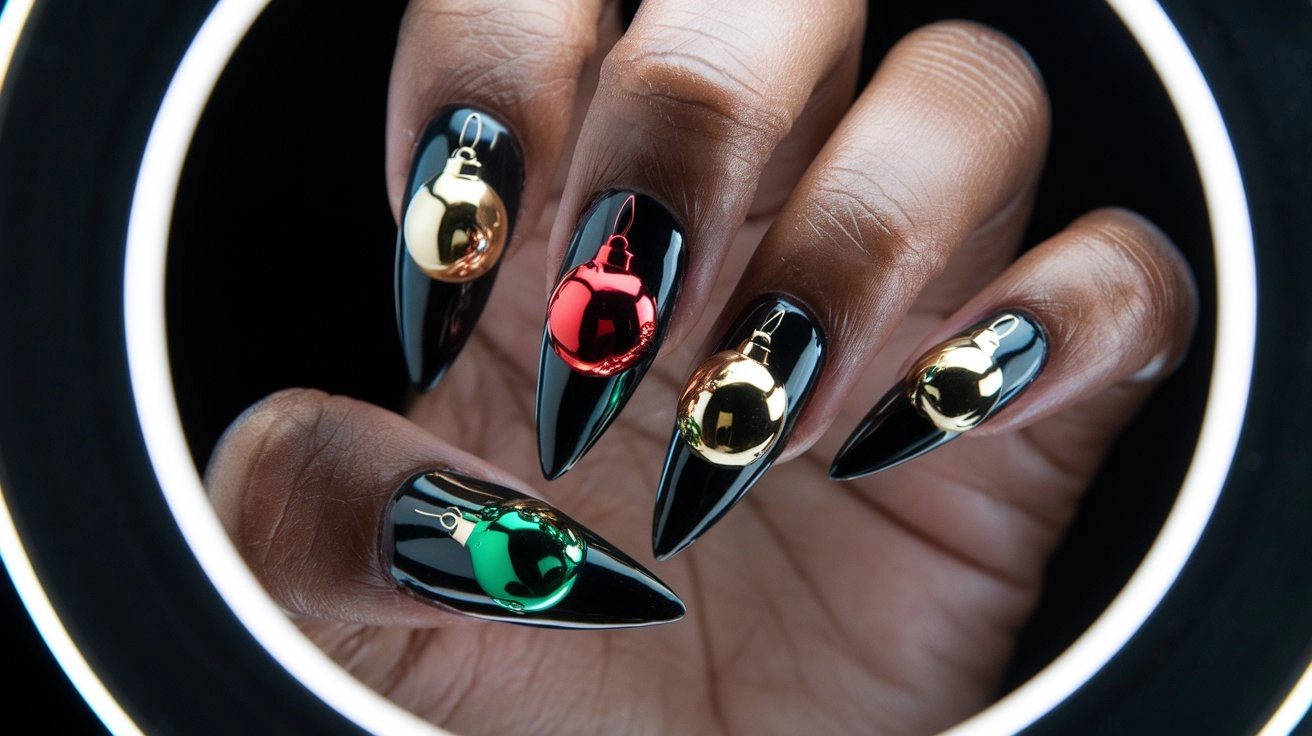
Transform each nail into a miniature Christmas bauble. The key is using chrome powder over dark polish to create that realistic ornament shine, then adding delicate hanging details in gold or silver.
You’ll need: Dark polish, chrome powder, detail brush, gold polish
Steps:
- Apply dark base color (2 coats)
- Let dry completely
- Apply chrome powder with an applicator
- Draw ornament top with gold polish
- Add hanging string detail
- Seal with a special top coat for chrome powder
Winter Branches
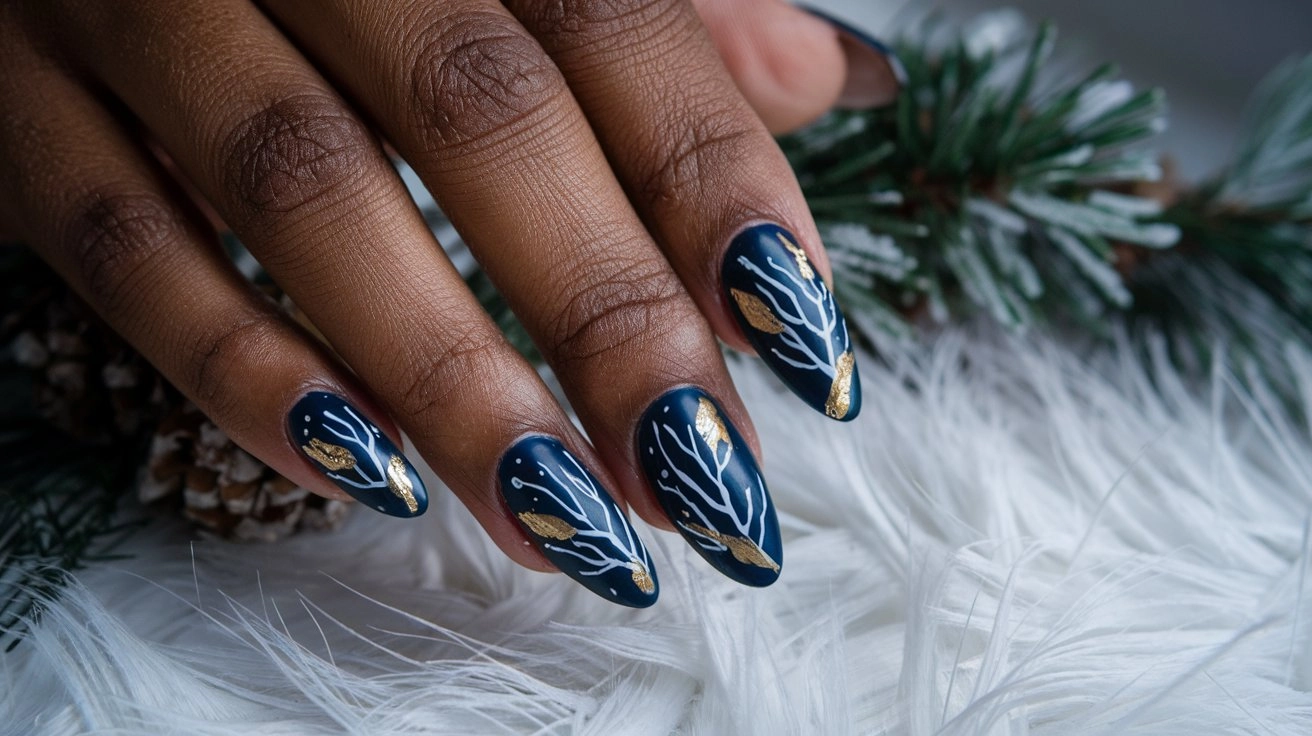
Bring nature’s beauty to your fingertips with delicate white branches painted over a midnight blue base. Add tiny gold leaves and berries for a touch of warmth and sparkle.
You’ll need: Dark blue polish, white polish, gold polish, thin brush
Steps:
- Apply blue base (2 coats)
- Let dry completely
- Using a thin brush, paint white branches
- Add smaller branch details
- Dot tiny gold berries along branches
- Add white dots for snow
- Seal with top coat
Crystal Snowflakes
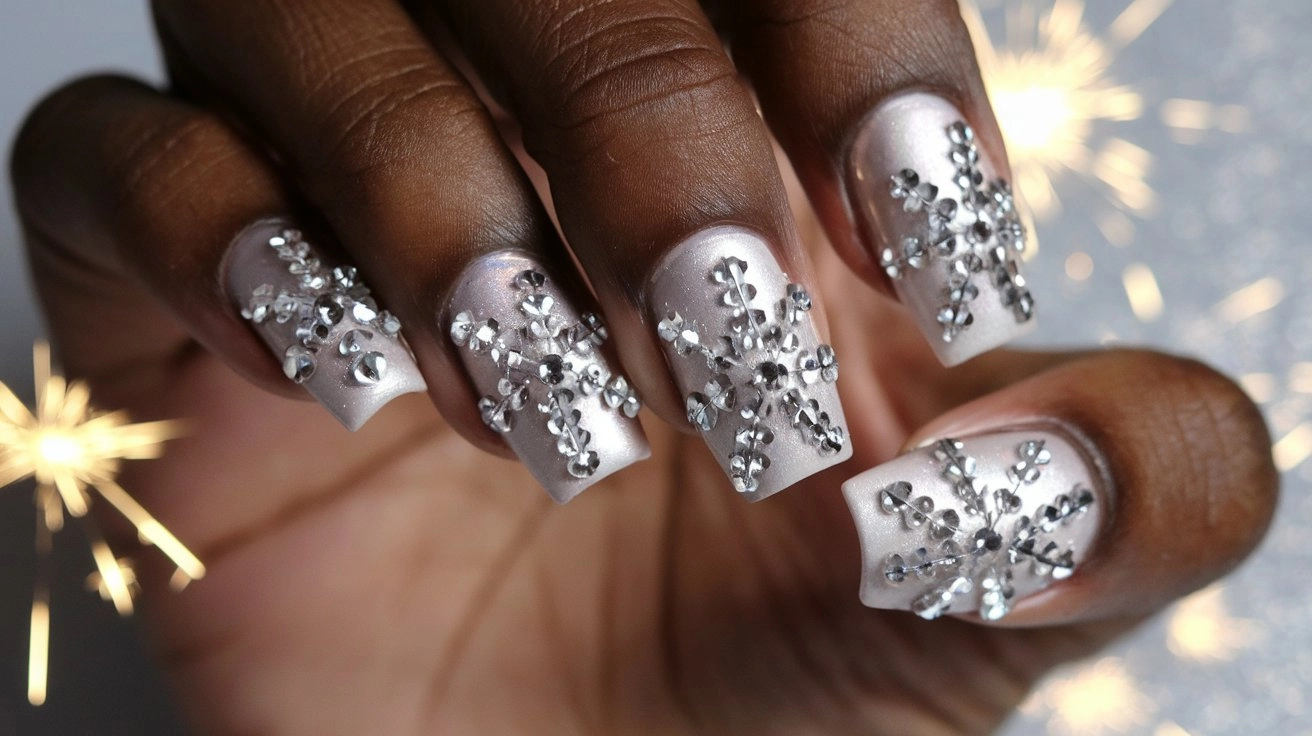
This show-stopping design features carefully placed crystals forming delicate snowflake patterns. The secret is using crystals of varying sizes and connecting them with fine silver lines.
You’ll need: White polish, crystals in various sizes, a crystal placement tool, nail glue
Steps:
- Apply white base (2 coats)
- Let dry completely
- Place the largest crystal in the center
- Add six smaller crystals around it
- Connect with even smaller crystals
- Secure with nail glue
- Carefully seal with a thick top coat
Abstract Christmas Trees
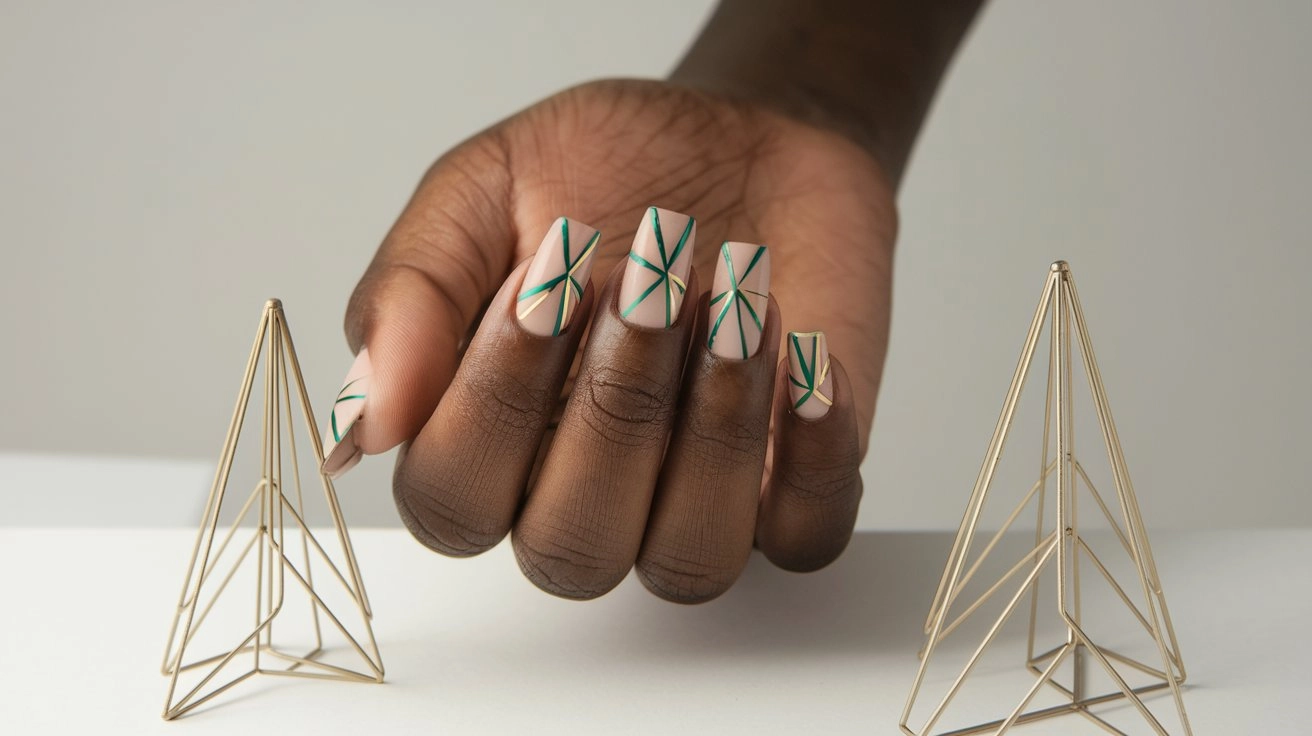
A geometric take on holiday trees using clean lines and metallic accents. Each nail’s abstract interpretation of a Christmas tree is created with straight lines and angular shapes.
You’ll need: Neutral polish, gold polish, thin brush
Steps:
- Apply neutral base (2 coats)
- Let dry completely
- Draw triangular tree shapes with gold
- Add geometric details inside trees
- Put a tiny star on top
- Seal with top coat
Geometric Gift Boxes
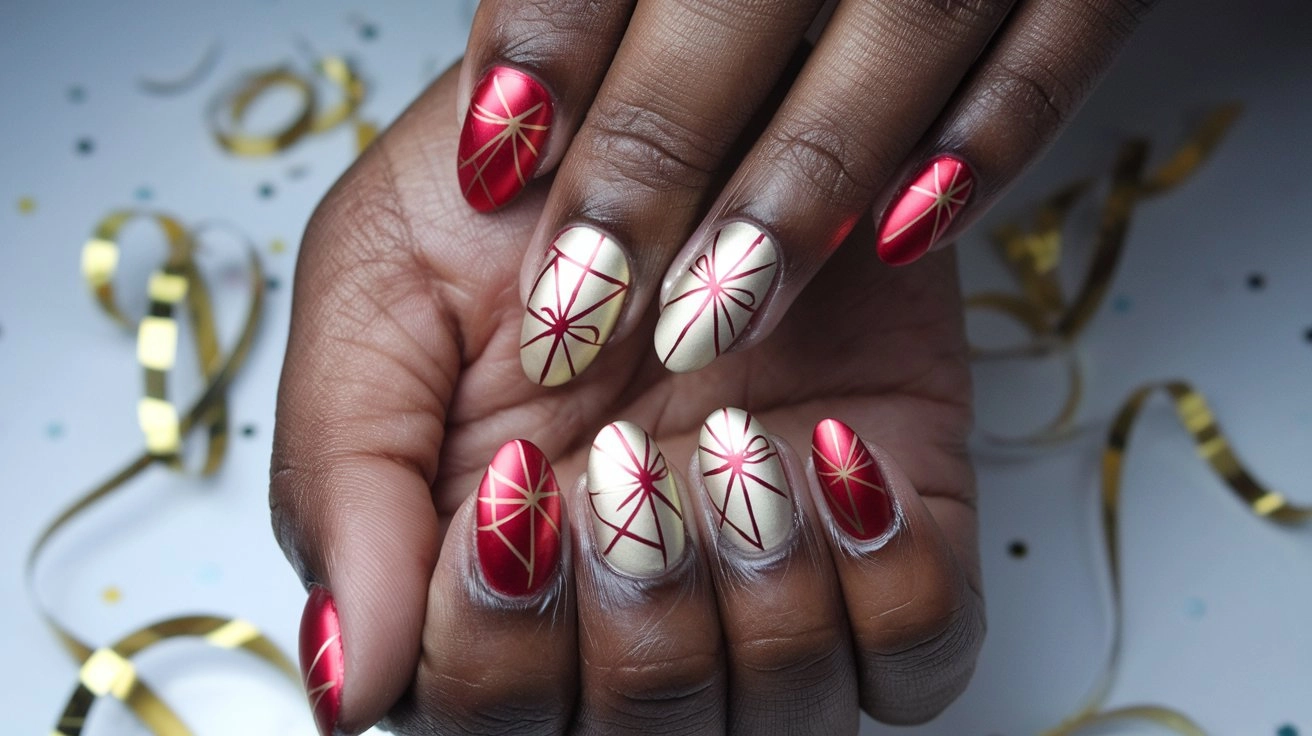
Transform your nails into tiny presents using precise lines and metallic ribbons. The key is creating different-sized box shapes on each nail, with bows and sparkly wrapping details.
You’ll need: Light polish, metallic polish, thin brush
Steps:
- Apply light base (2 coats)
- Let dry completely
- Draw square/rectangle shapes
- Add crossing lines for ribbons
- Create small bow details
- Seal with top coat
Foil Transfer Holly
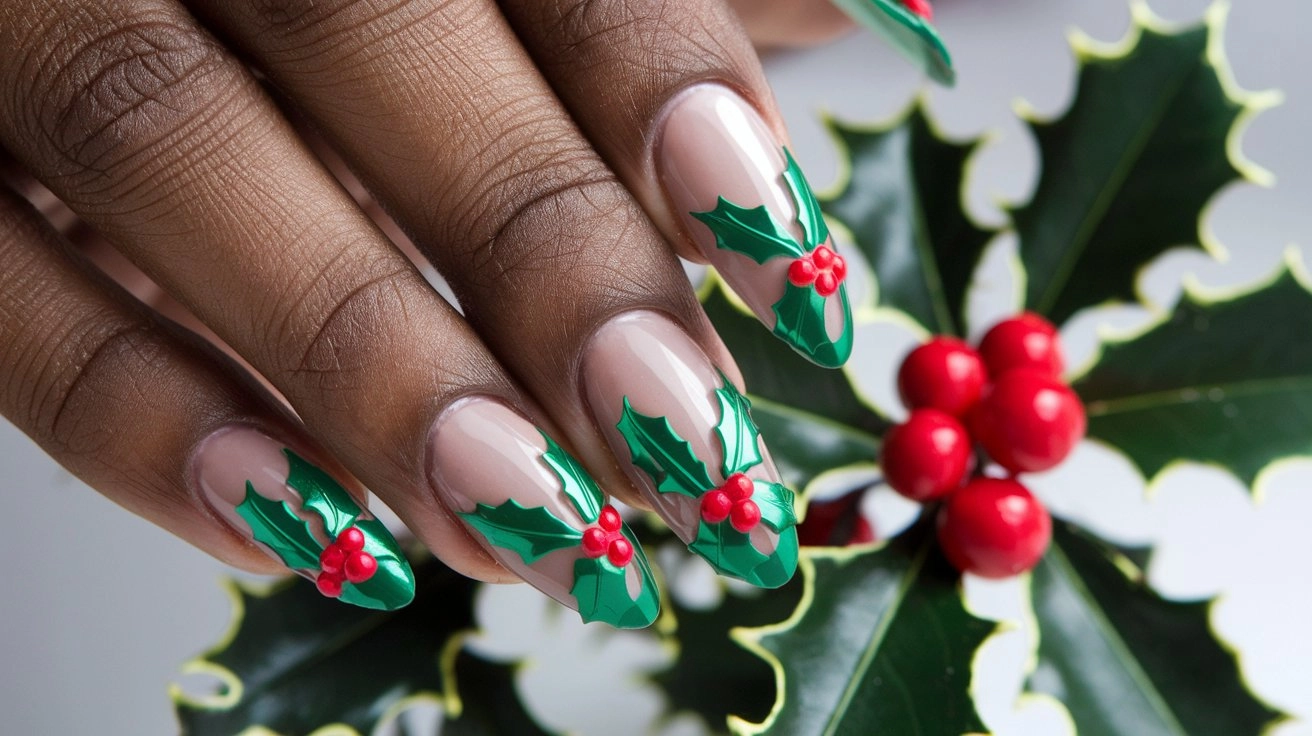
This modern take on traditional holly uses a foil transfer technique for ultra-shiny leaves. The berries are created with dimensional red dots that catch the light beautifully.
You’ll need: Dark polish, green foil, red polish, dotting tool
Steps:
- Apply dark base (2 coats)
- Let dry completely
- Apply foil adhesive in leaf shapes
- Press green foil onto the adhesive
- Add red dots for berries
- Seal with top coat
Glitter Gradient Stars
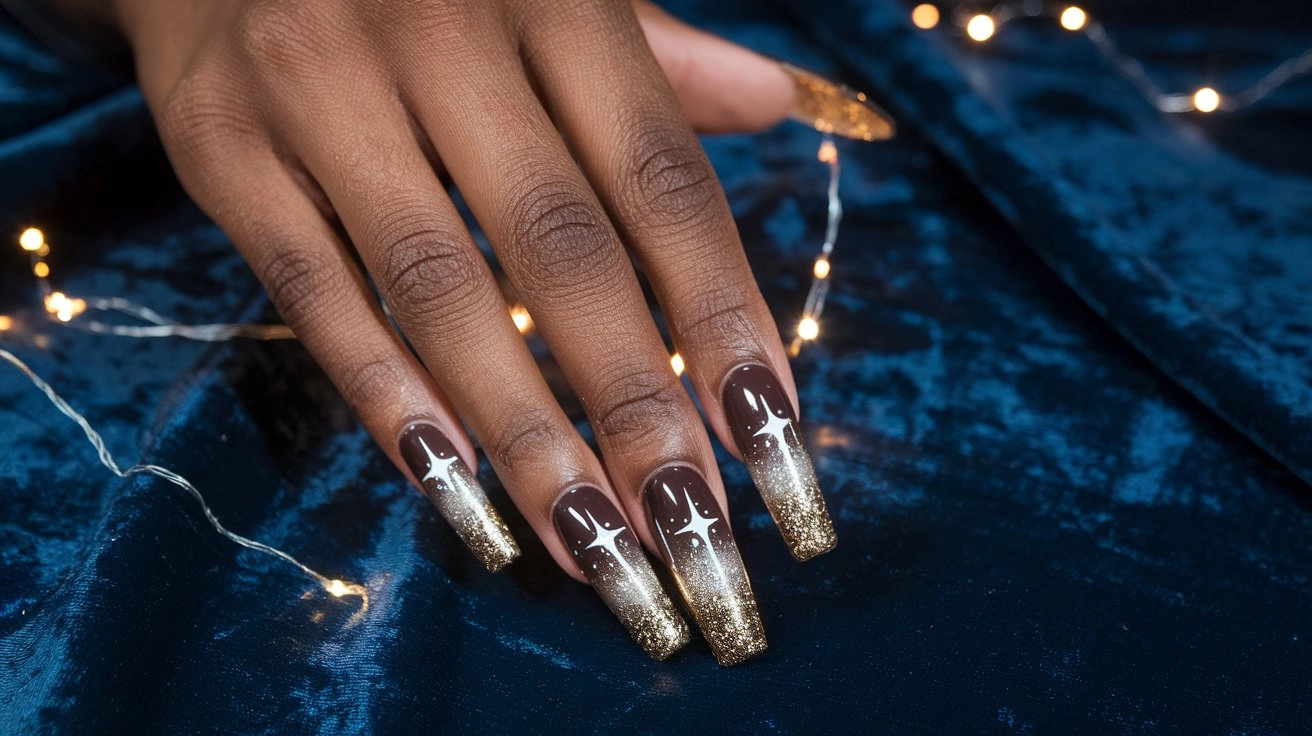
Create a starry night effect with carefully placed glitter that gradually becomes more concentrated toward the nail tips. For extra magic, add hand-painted stars in metallic gold.
You’ll need: Dark polish, fine glitter, gold polish, makeup sponge
Steps:
- Apply dark base (2 coats)
- Let dry completely
- Dab glitter with sponge, heavier at the tips
- Paint small gold stars
- Add extra glitter if needed
- Seal with a thick top coat
Simple Holly Dots
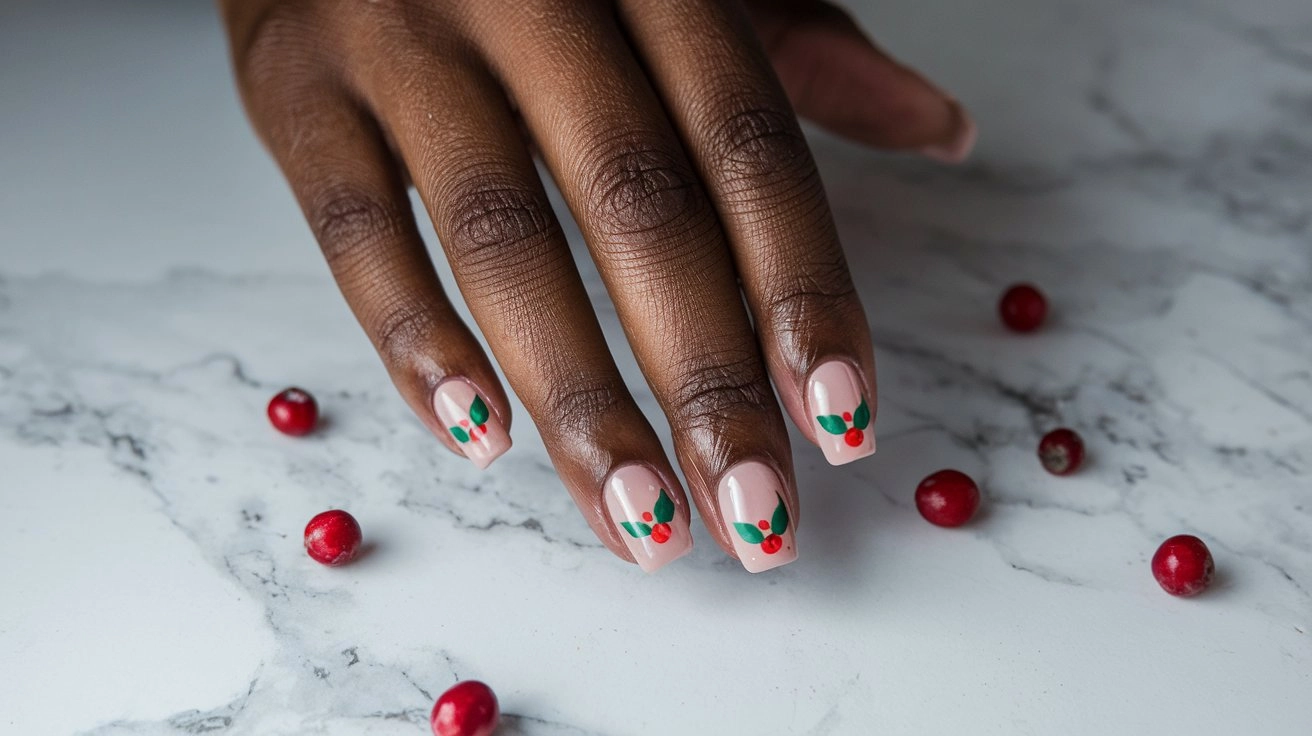
Perfect for those who want festive nails without the fuss. Quick red dots form berries, while simple green brush strokes create leaves. It’s minimal yet unmistakably holiday-themed.
You’ll need: Light polish, red polish, green polish, dotting tool
Steps:
- Apply light base (2 coats)
- Let dry completely
- Make three red dots for berries
- Add green leaf shapes around the dots
- Seal with top coat
Minimalist Ornaments
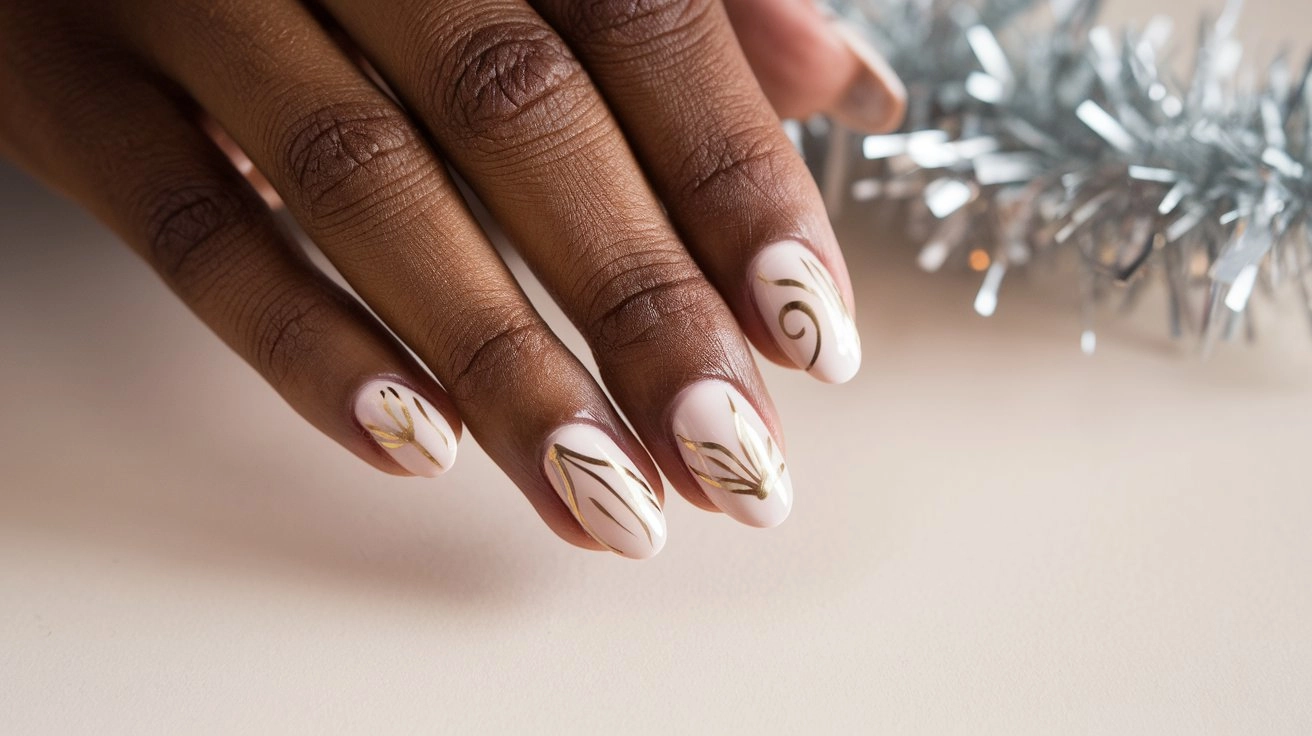
Clean, simple ornament outlines on a neutral base make for an elegant and understated holiday look. Use metallic polish for the outlines to keep it festive without going overboard.
You’ll need: Neutral polish, metallic polish, thin brush
Steps:
- Apply neutral base (2 coats)
- Let dry completely
- Draw simple ornament outlines
- Add tiny top details
- Keep designs minimal
- Seal with top coat
BONUS: Step-by-Step Guide to Recreate This Festive Snowflake Nail Art:

- Prep Your Nails: Start trimming and filing your nails to your desired natural shape. Push back cuticles and buff the surface for a smooth base.
- Apply a Base Coat: Use a clear base coat to protect your nails and ensure the design lasts longer.
- Paint with Red Nail Polish: Apply two coats of bright red polish on each nail, allowing each coat to dry thoroughly before applying the next. This creates a vibrant backdrop for the snowflake design.
- Draw Snowflake Designs: Use a fine nail art brush or a white nail art pen to draw a small, intricate snowflake on each nail. Start with a central dot, draw outward lines, and add small details to mimic snowflake arms.
- Add a Top Coat: Seal the design with a clear top coat to add shine and protect your snowflake art from chipping.
- Optional – Add Festive Details: If desired, add a tiny dot of glitter polish at the center of each snowflake for a bit of sparkle.
- Let it Dry: Allow your nails to fully dry and set to avoid smudging the design.
This design pairs perfectly with holiday decor and adds a festive touch to your look!
Pro Tips for Perfect Holiday Nails
Before you dive into these designs, keep these game-changing tips in mind:
- Always start with properly prepped nails
- Use thin layers for better control and faster drying
- Invest in quality brushes for detailed work
- Seal your design with an excellent top coat
- Take your time with the placement of any embellishments
Pro Tips for Success
- Practice designs on paper first
- Work in good lighting
- Have cleanup tools ready (small brush dipped in remover)
- Let each layer dry completely
- Don’t forget to cap the free edges with a top coat
- Keep strokes light and steady
- Less is more with embellishments
- Take your time with detailed work
Troubleshooting Common Issues
- If the polish is streaky, Apply thinner coats
- If design smudges: Wait longer between layers
- If top coat smears design: Use a light touch, let the design dry longer
- If crystals fall off: Use proper nail glue, no top coat
- If lines aren’t straight, Try using striping tape as a guide
Care Tips to Make Your Holiday Designs Last
Keep your festive nails looking fresh throughout the season:
- Apply cuticle oil daily
- Wear gloves while cleaning or doing dishes
- Touch up your top coat every few days
- Fix any chips immediately
- Keep your hands moisturized
Design Selection Guide
| Design | Perfect For | Difficulty Level | Durability |
|---|---|---|---|
| New Traditional Red | Office parties | Easy | High |
| Elevated French Tips | Formal events | Medium | High |
| Crystal Snowflakes | Special occasions | Advanced | Medium |
| Simple Holly Dots | Quick fixes | Easy | High |
| 3D Sweater Effect | Statement looks | Advanced | Medium |
Conclusion
Your nails can be the perfect conversation starter this holiday season at any party. Whether you’re drawn to the classic elegance of The New Traditional Red or the modern edge of Abstract Christmas Trees, there’s a design here for every style and skill level.
Remember: Nail art takes practice! Don’t get discouraged if your first attempt isn’t perfect. Each time you try, you’ll improve your technique and confidence with these Christmas Nail Designs. Nail art is all about expressing your style while having fun.
Feel free to mix and match these trends or add your creative twist. After all, the best holiday nails are the ones that make you smile every time you look at them!
I hope this season brings you plenty of festive cheer, gorgeous nails, and fun moments of creativity. Happy Creating!
