This post may contain affiliate links, which means I may receive a small commission should you decide to click that link and make a purchase. For more information please refer to the Terms & Conditions.
Of course! Here is a humanized version of the introduction using simpler language and a first-person perspective:
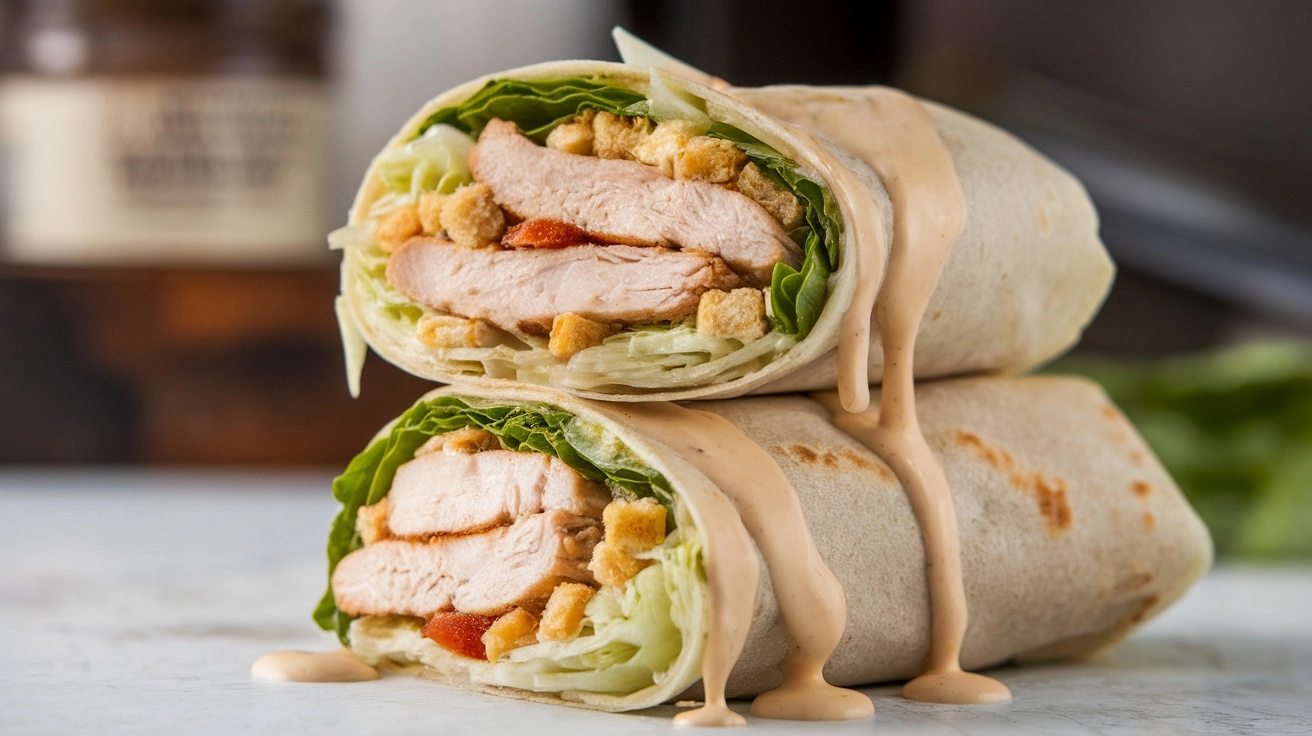
I’m excited to share my recipe for this Irresistible Easy Chicken Caesar Wrap for Beginners.
We can all agree that a good Chicken Caesar Wrap is among the best lunch ideas. You see it on almost every menu! But, I have a question: have you ever been let down by one? I know I have.
Too often, I’ve had wraps with sad, wilted lettuce, super dry chicken, and a dressing that tasted like it came straight from a boring bottle. It was just… okay.
I got so tired of the disappointment that I made it my mission to create the perfect homemade version. And this is it! This isn’t just about tossing a salad in a tortilla. I’m showing you how to build a wrap with amazing flavor in every bite.
We’ll make a creamy, dreamy Caesar dressing from scratch that you’ll want to eat with a spoon. We’ll also make our own crunchy, garlicky croutons (they’re a game-changer!) and cook up some perfectly juicy chicken.
I know “from scratch” can sound like a lot of work, but every step is super simple and worth it. So, say goodbye to boring lunches and prepare a delicious wrap; you’ll be counting down the minutes until you can eat it.
Ingredients You’ll Need
The magic of a truly great Chicken Caesar Wrap comes from using fresh, high-quality ingredients, especially for the dressing. Here is everything you will need, broken down by component.
For the Creamy Homemade Caesar Dressing
- 1 large egg yolk
- 2 cloves of garlic, minced into a paste
- 2 anchovy fillets packed in oil, minced into a paste
- 1 tablespoon Dijon mustard
- 2 tablespoons fresh lemon juice
- 1 teaspoon Worcestershire sauce
- 120 ml (1/2 cup) light olive oil or other neutral oil
- 50 grams (1/2 cup) finely grated Parmesan cheese
- Salt and freshly cracked black pepper, to taste
- For the Garlic Herb Croutons
- 3 cups day-old crusty bread, cut into 3/4-inch cubes
- 3 tablespoons olive oil
- 1/2 teaspoon garlic powder
- 1/4 teaspoon dried oregano
- A pinch of salt and black pepper
For the Chicken and Assembly
- 2 boneless, skinless chicken breasts (about 450 grams or 1 pound total)
- 1 tablespoon olive oil
- 1 teaspoon paprika
- 1/2 teaspoon garlic powder
- Salt and black pepper to taste
- 1 large head of romaine lettuce, washed, dried, and chopped
- 4 large (10-12 inch) flour tortillas or wraps
- 50 grams (1/2 cup) shaved Parmesan cheese, for assembly
Step-by-Step Instructions: Building the Perfect Wrap
Step 1: Make the Creamy Caesar Dressing
The soul of any Caesar wrap is the dressing; this homemade version is liquid gold. It’s creamy, tangy, and packed with umami flavor.
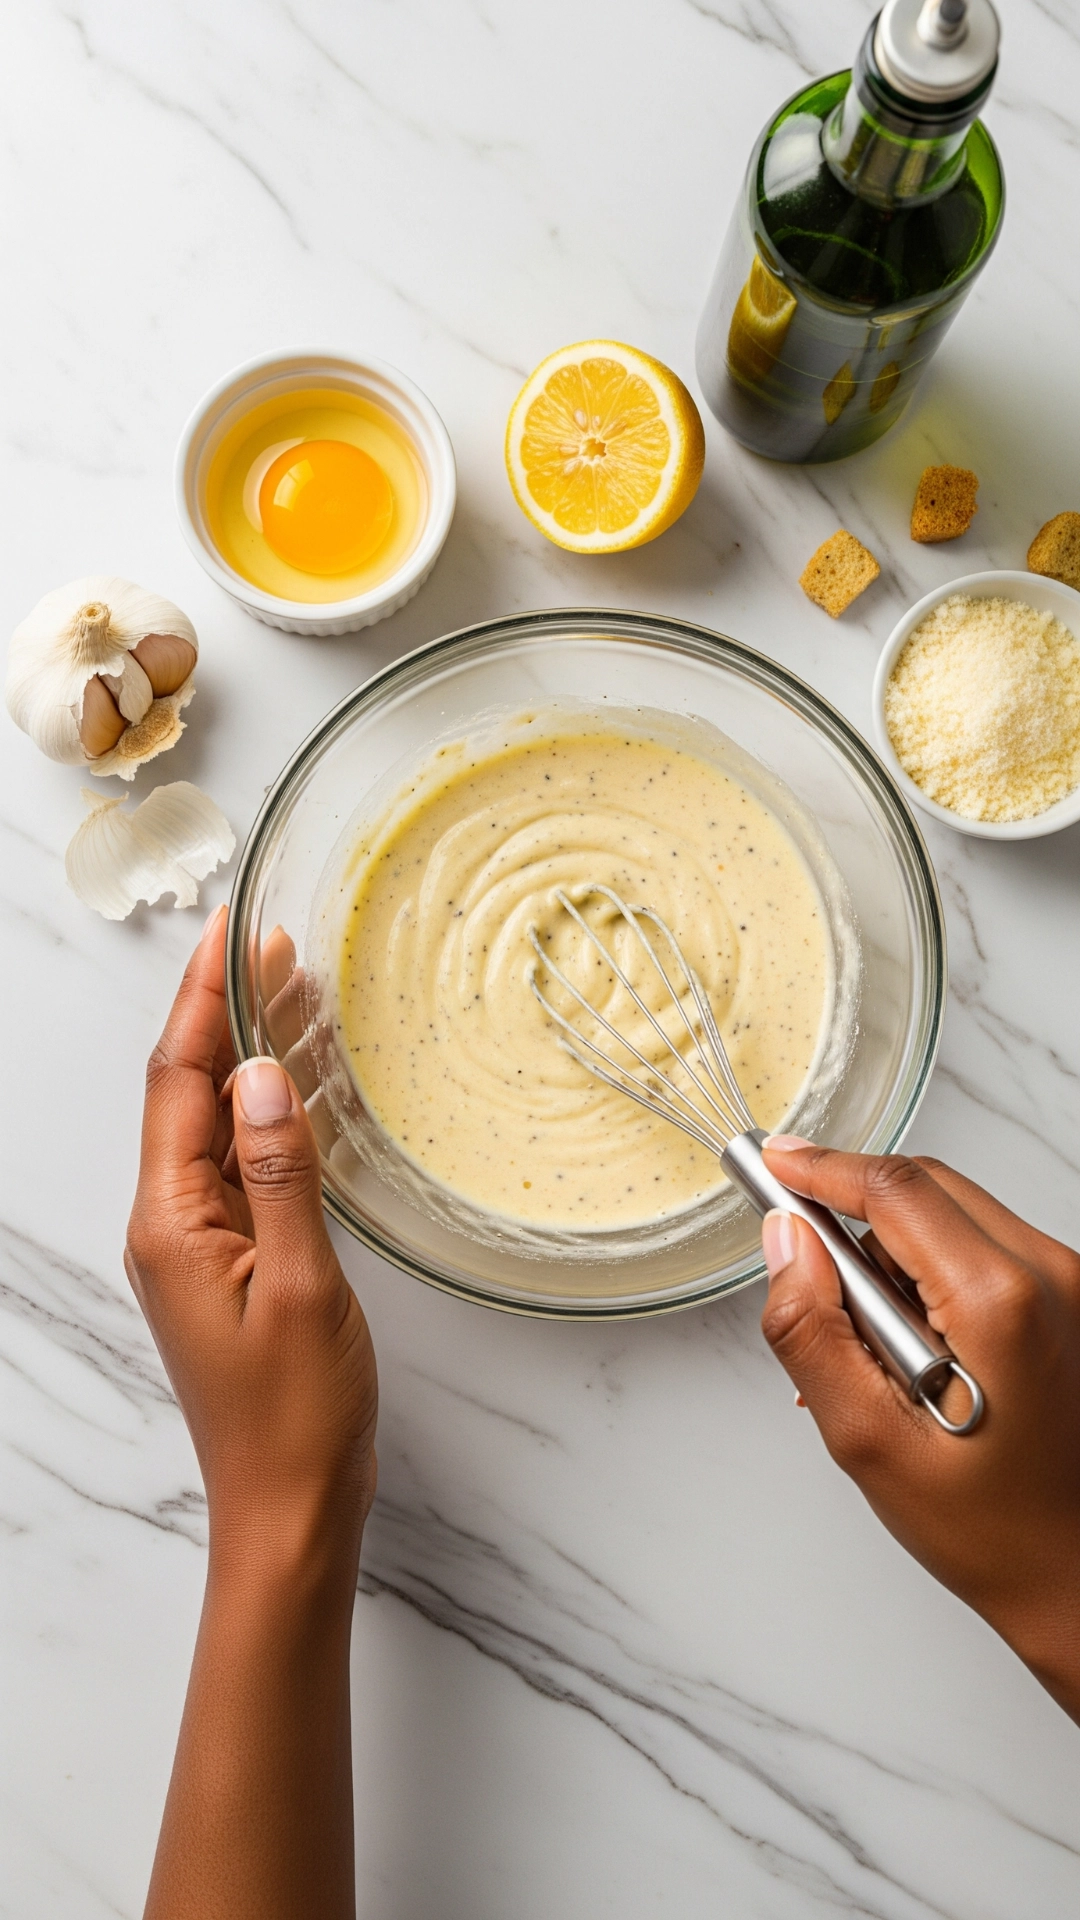
Add the egg yolk, minced garlic, and anchovy paste to a medium-sized bowl. Whisk these together vigorously for about 30 seconds until they are slightly pale and combined. The anchovies and garlic should essentially dissolve. Next, whisk in the Dijon mustard, fresh lemon juice, and Worcestershire sauce until smooth.
Now comes the most crucial part: emulsifying the oil. While whisking continuously, add the olive oil in a very slow, thin stream. Adding it slowly at the beginning is crucial to allow the dressing to emulsify and become thick and creamy.
Once about half of the oil has been added and the dressing starts to look thick, you can add the remaining oil in a slightly faster (but still steady) stream.
Once all the oil is incorporated, fold in the 50 grams of finely grated Parmesan cheese. Give it a final taste and season generously with salt and freshly cracked black pepper. The dressing should be potent and flavorful! Cover and set it aside in the refrigerator while you prepare the other components.
Step 2: Prepare the Romaine Lettuce
For the perfect wrap, your lettuce must be impeccably fresh, clean, and, most importantly, dry. Any excess water will make the final wrap soggy.
Start by separating the leaves from the head of romaine. Please place them in a large bowl or a clean sink and rinse them thoroughly under cold running water, washing away any grit or dirt.
The best way to dry the leaves is in a salad spinner. Place the rinsed leaves in the basket and spin them until no more water is extracted. If you don’t have a salad spinner, lay the leaves in a single layer on a clean kitchen towel or paper towels and gently pat them dry.
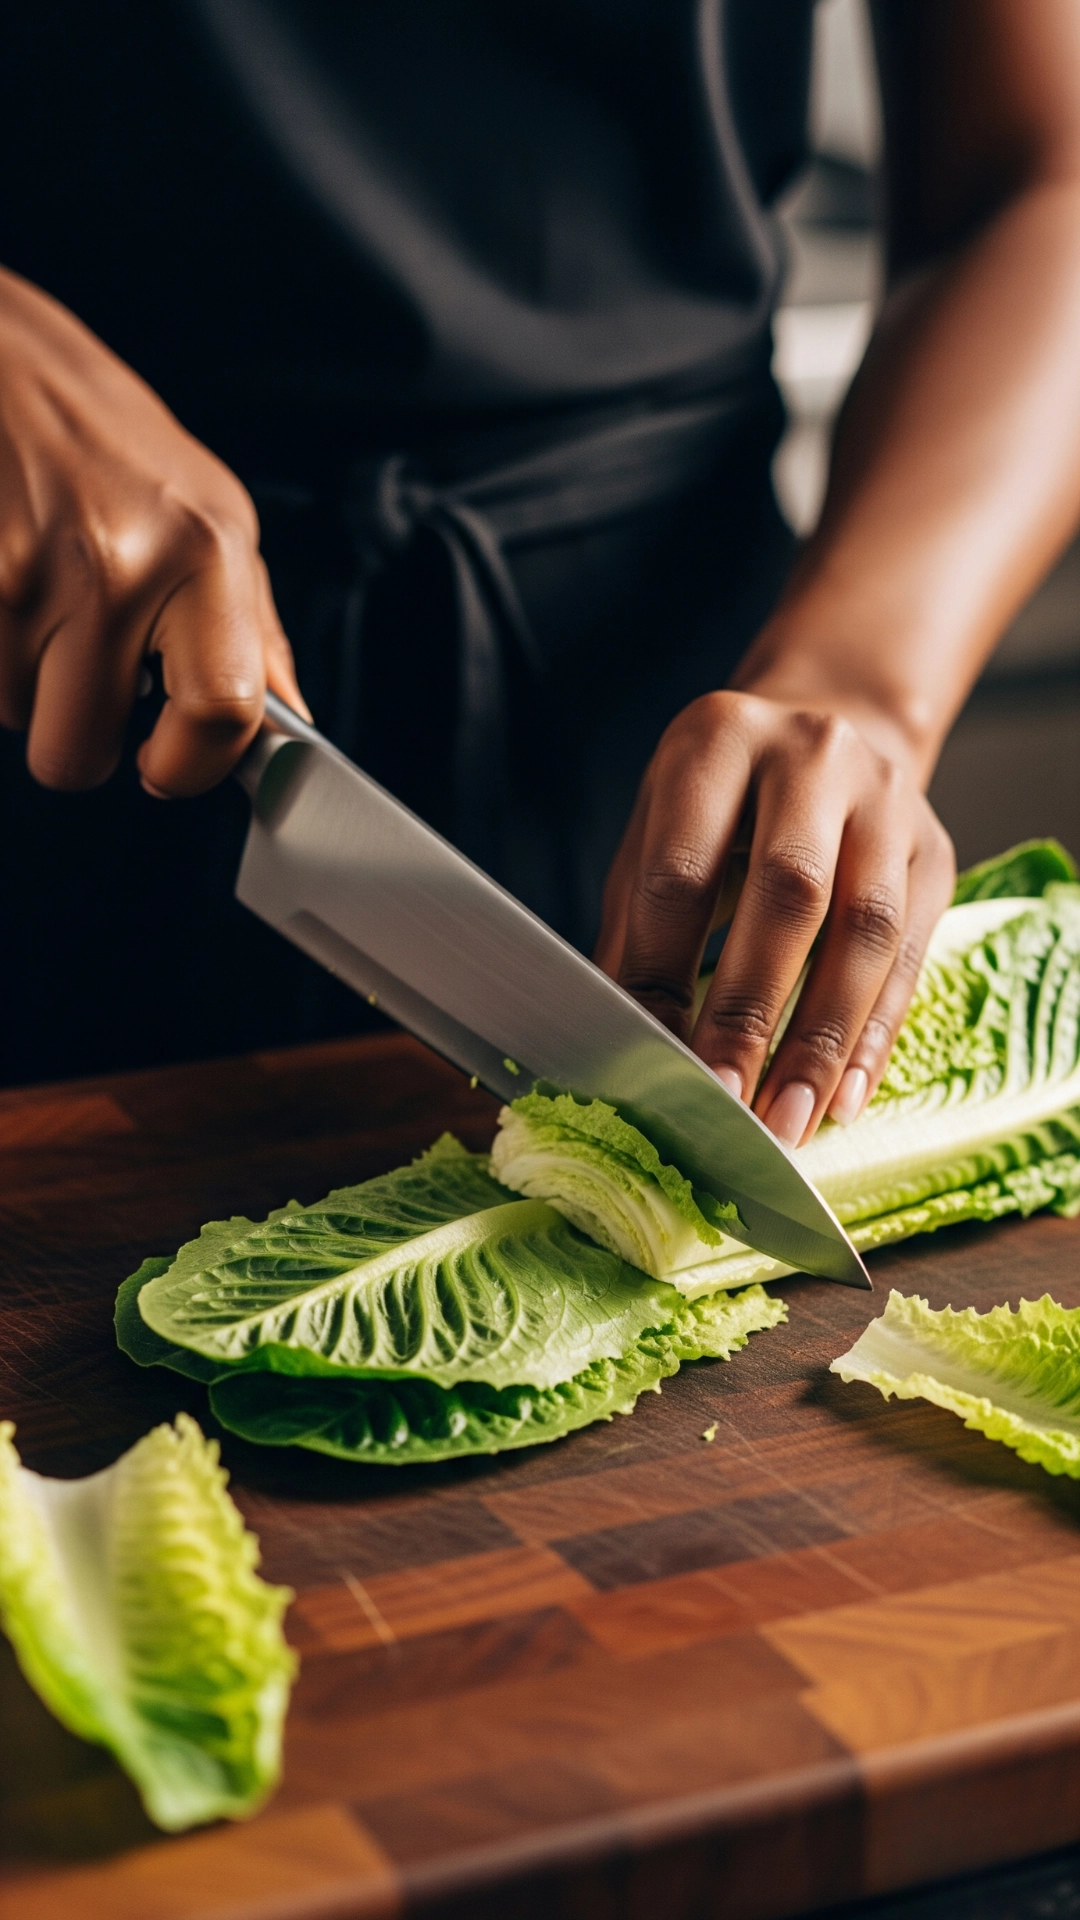
Once the leaves are dehydrated, stack a few on top of each other on a cutting board. Using a large, sharp chef’s knife, chop the lettuce into bite-sized, ribbon-like pieces about 1 inch thick. Set the chopped lettuce aside.
Step 3: Make the Garlic Herb Croutons
Store-bought croutons are fine, but nothing compares to the crisp texture and flavor of fresh, homemade ones. They are surprisingly easy to make and elevate this wrap to a new level.
First, preheat your oven to 190°C (375°F).
Place your cubed, day-old bread into a large mixing bowl. Day-old bread is key, as it’s slightly drier and will toast up much crispier than fresh bread. Drizzle the three tablespoons of olive oil over the bread cubes. Sprinkle the 1/2 teaspoon of garlic powder, 1/4 teaspoon of dried oregano, and a pinch of salt and pepper evenly over the top.
Using your hands or a large spoon, toss everything together until each cube of bread is lightly and evenly coated in the oil and seasonings. Don’t be afraid to be thorough here; you want every crouton to be flavorful.
Spread the seasoned bread cubes in a single layer on a baking sheet. Do not overcrowd the pan, which will cause the croutons to steam rather than toast. If necessary, use two baking sheets.
Bake for 10-15 minutes, tossing halfway through, until golden brown, crisp, and fragrant. Keep a close eye on them during the last few minutes; they can quickly go from perfectly toasted to burnt.
Once done, remove them from the oven and let them cool completely on the baking sheet. They will become even crunchier as they cool.

Now that the dressing is chilling and the croutons are cooling, it’s time to cook the wrap’s star protein.
Step 4: Cook the Chicken
The key to a great wrap is juicy, flavorful chicken. We’ll achieve this by patting the chicken dry, seasoning it well, and giving it a perfect sear in a hot skillet.
First, pat the chicken breasts completely dry with a paper towel. This is a crucial step for a beautiful golden-brown crust. Mix 1 teaspoon of paprika, 1/2 teaspoon of garlic powder, and a generous pinch of salt and pepper in a small bowl.
Rub this seasoning mixture over both sides of the chicken breasts, ensuring they are evenly coated.
Heat one tablespoon of olive oil in a large skillet or cast-iron pan over medium-high heat. The pan is ready when the oil shimmers. Carefully place the seasoned chicken breasts in the hot skillet, ensuring not to overcrowd the pan.
Cook for 5-7 minutes on the first side, without moving them, until a deep golden-brown crust has formed. Flip the chicken breasts and cook for another 5-7 minutes on the second side, or until the chicken is cooked and the internal temperature reaches 74°C (165°F) on a meat thermometer.
Once cooked, transfer the chicken to a clean cutting board and let it rest for at least 5-10 minutes. This allows the juices to redistribute throughout the meat, ensuring it stays moist and tender. After resting, slice the chicken against the grain into bite-sized strips.

Step 5: Assemble the Wrap
This is where the magic happens. The key to a great wrap is to toss the main ingredients with the dressing before they go into the tortilla. This ensures every single bite is perfectly coated and flavorful.
In a large bowl, combine the chopped romaine lettuce, the sliced chicken, the cooled homemade croutons, and the shaved Parmesan cheese. Drizzle a generous amount of your homemade Caesar dressing over the top.
Start with about half of the dressing and use tongs to gently toss everything together until all the ingredients are lightly and evenly coated. Add more dressing, but be careful not to oversaturate the lettuce, which can make the wrap soggy.
Lay one large flour tortilla flat on a clean work surface. Spoon about a quarter of the Caesar salad mixture into the center of the tortilla, arranging it in a neat line down the middle, leaving a border of about 2-3 inches on all sides. This space is crucial for rolling the wrap tightly without the filling spilling out.
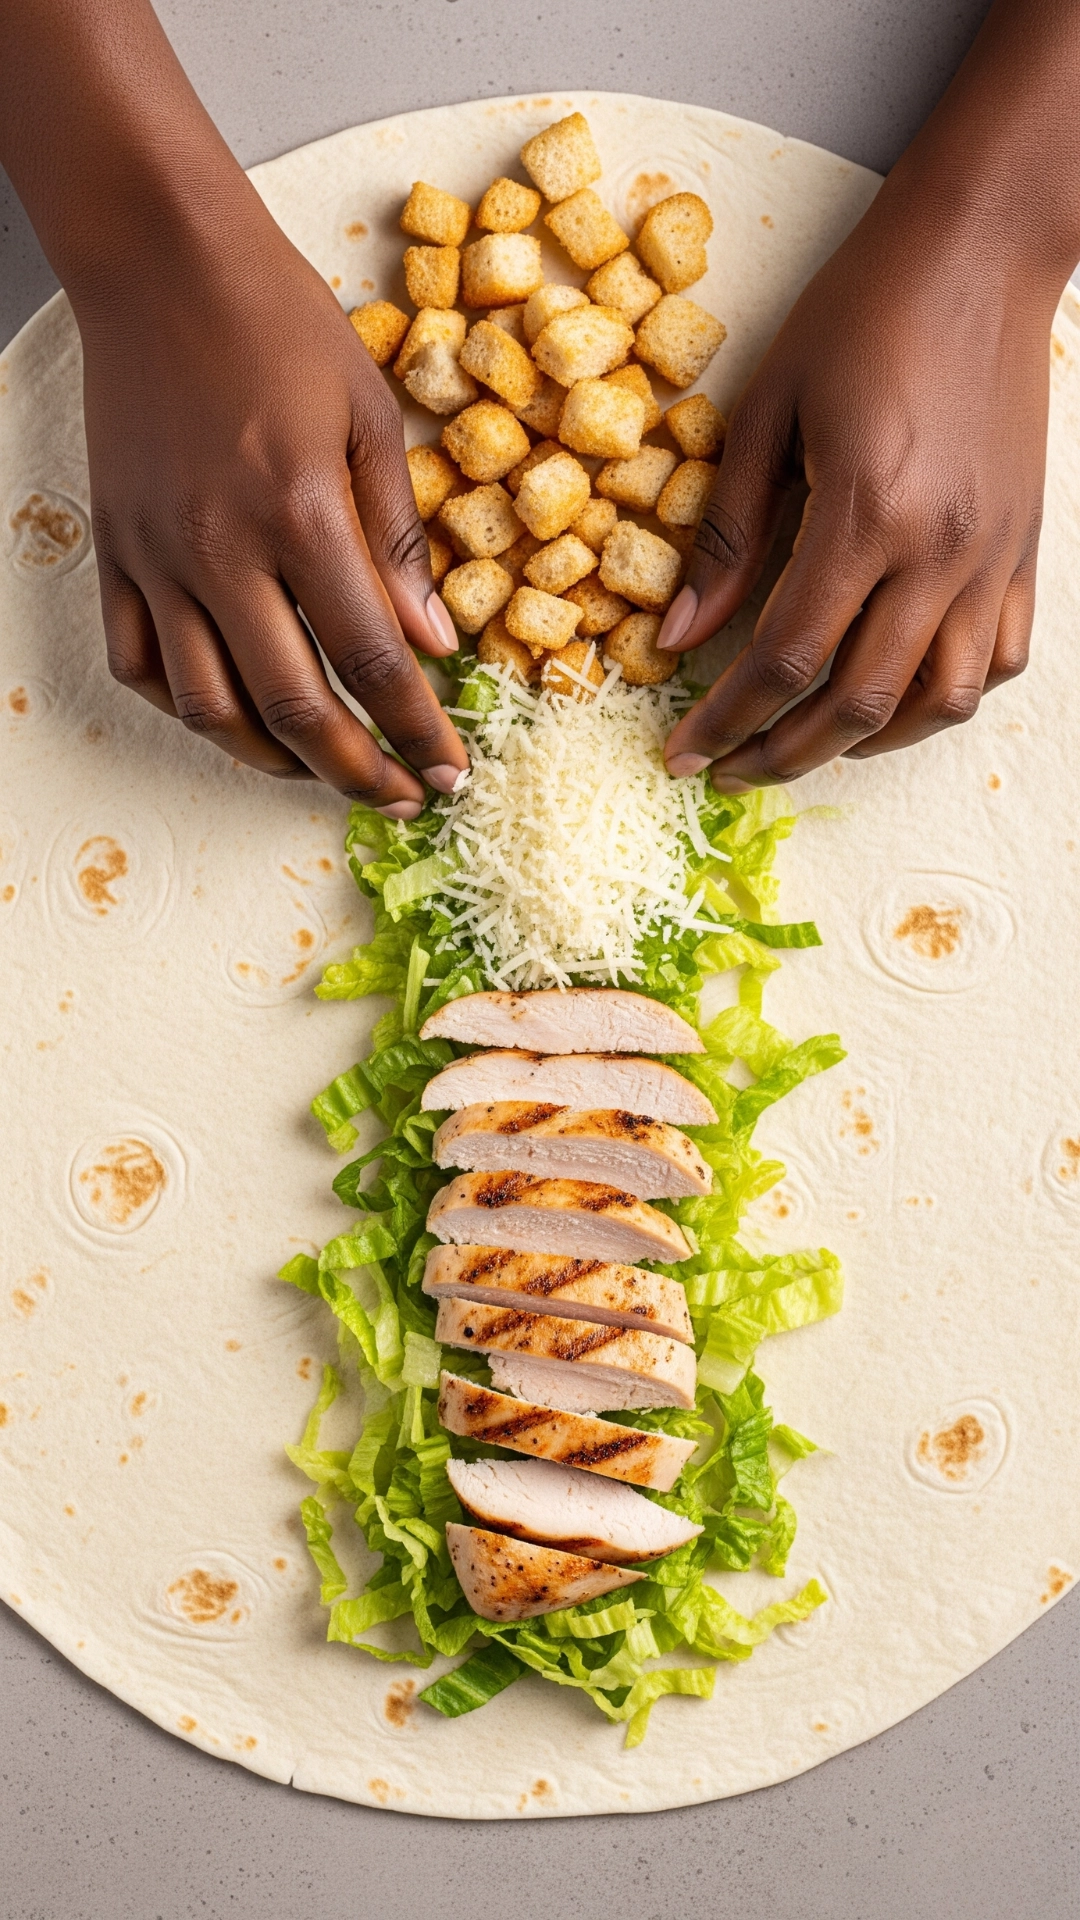
Now that the filling is perfectly placed, here is how to roll the perfect wrap that won’t fall apart.
Step 6: Roll the Wrap Tightly
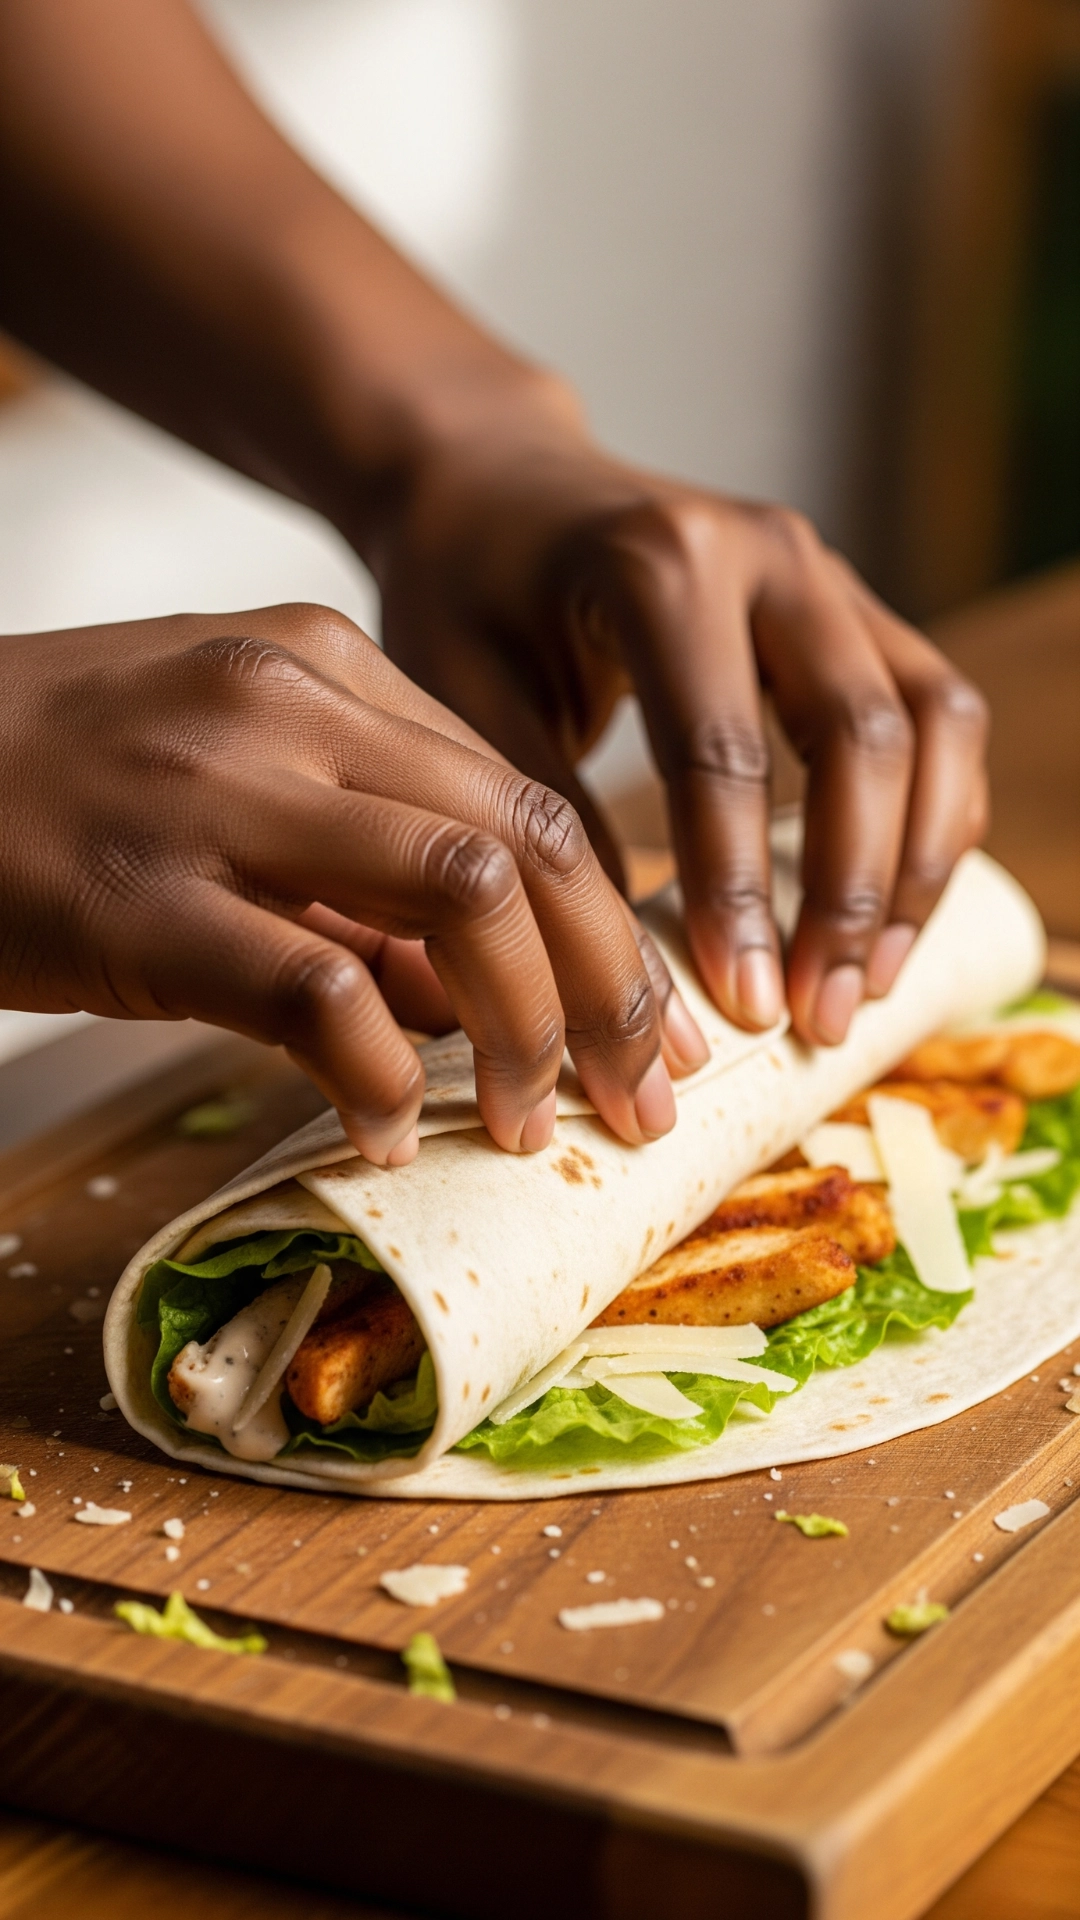
The technique for rolling a wrap is similar to rolling a burrito. A tight, secure roll is the key to a wrap that holds together beautifully, whether you eat it immediately or pack it for lunch.
Start with the tortilla laid flat, with the filling line in the center. Take the bottom edge of the tortilla (the side closest to you) and fold it over the filling, tucking it snugly against it.
Next, fold the tortilla’s left and right sides towards the center while holding the bottom flap in place. This creates an envelope-like shape and is the most critical step for preventing the filling from spilling out of the ends.
Now, roll the wrap away from you, keeping the roll as tight as possible. Use your fingers to keep the filling tucked in as you go. When you reach the end, the final edge of the tortilla should seal the wrap closed. Place the wrap seam-side down to help it stay sealed.
Repeat this process for the remaining three wraps.
Excellent. Here is the final, optional step for a restaurant-quality finish, followed by the remaining sections of the blog post and the complete Pinterest details.
Step 7: Sear for a Golden Finish (Optional but Recommended)
You can enjoy the wrap as is, but if you want that crispy, golden-brown exterior you see at the best delis, a quick sear is the way to go. This not only adds a wonderful texture but also helps to seal the wrap shut.
Heat a large, dry non-stick skillet or pan over medium heat. No oil is needed. Carefully place one or two wraps in the pan, seam-side down. Let the wrap toast for about 1-2 minutes, until it’s golden brown and lightly crisped.
Gently flip the wrap and toast the other side for another 1-2 minutes.
Transfer the toasted wrap to a cutting board. Use a sharp serrated knife to slice the wrap in half diagonally for a beautiful presentation. Serve immediately with any extra Caesar dressing on the side for dipping.
Tips for the Perfect Easy Chicken Caesar Wrap
- Don’t Skip the Anchovies: Even if you don’t like them, anchovies are the secret ingredient to a proper Caesar dressing. They melt into the dressing and provide a deep, savory, umami flavor that is not fishy.
- Dry Your Lettuce Completely: This is the most important tip to avoid a soggy wrap. A salad spinner is your best friend here.
- Use Day-Old Bread: Slightly stale, crusty bread makes the best croutons because it has less moisture and will toast up much crispier.
- Don’t Overdress the Salad: Toss the salad with just enough dressing to coat everything lightly. You can always serve extra on the side for dipping.
- Warm Your Tortillas: Before assembling, warm your tortillas for a few seconds in a dry pan or the microwave. This makes them softer, more pliable, and less likely to tear when you’re rolling them.
Variations and Substitutions
This recipe is a fantastic template. Feel free to customize it to your liking!
- Different Protein: For a vegetarian version, swap the chicken for grilled shrimp, steak, or even crispy chickpeas.
- Add Bacon: For an extra layer of salty, smoky flavor, add some crispy, crumbled bacon to the filling.
- Spice it up: Add a pinch of red pepper flakes to the chicken seasoning or a dash of your favorite hot sauce to the dressing for a kick.
- Add Veggies: Feel free to add other ingredients like sliced avocado for creaminess, cherry tomatoes for a burst of sweetness, or red onion for a sharp bite.
- Use Kale: For a heartier green, swap out some of the romaine for kale. Just massage the kale with a bit of dressing first to soften it.
Make-Ahead and Storage Instructions
This wrap is perfect for meal prep with a few key strategies.
- Dressing: The Caesar dressing can be made up to 4 days in advance and stored in an airtight container or jar in the refrigerator.
- Croutons: Homemade croutons can be stored in an airtight container at room temperature for up to 3 days.
- Chicken: The cooked and sliced chicken can be stored in an airtight container in the refrigerator for up to 3 days.
- Assembled Wraps: An assembled wrap is best eaten within a few hours. For meal prep, it’s best to store all the components separately and assemble the wrap just before serving to prevent it from getting soggy. If you must pre-assemble it, try to create a barrier of whole lettuce leaves between the filling and the tortilla to minimize sogginess.
Frequently Asked Questions (FAQ)
Q: Is using a raw egg yolk in the dressing safe? A: There is a small risk associated with consuming raw eggs. If you are concerned, primarily if serving to children, the elderly, or immunocompromised individuals, use pasteurized eggs, which can be found in most grocery stores.
Q: Can I make this gluten-free? A: Absolutely! For the croutons, use your favorite gluten-free tortillas and bread. The rest of the ingredients are naturally gluten-free.
Q: My dressing is too thin. How can I fix it? A: This usually happens if the oil was added too quickly. To fix it, start with a fresh egg yolk in a new bowl and slowly whisk the thin dressing into it. The new yolk should help it emulsify and thicken up.
Q: What’s the best way to get a garlic and anchovy paste? A: The best way is to use a mortar and pestle. If you don’t have one, you can place the minced garlic, anchovies, and coarse salt pinch on a cutting board. Use the flat side of your chef’s knife to press and smear the mixture across the board until it forms a uniform paste. The salt acts as an abrasive and helps break everything down.
And there you have it—a Chicken Caesar Wrap that’s a world away from the bland, disappointing versions you might have had before. It’s a perfect harmony of textures and flavors: creamy, crunchy, savory, and fresh.
It’s a testament that sometimes, making the classics from scratch is not just a little better, it’s a complete game-changer. Enjoy!
