This post may contain affiliate links, which means I may receive a small commission should you decide to click that link and make a purchase. For more information please refer to the Terms & Conditions.
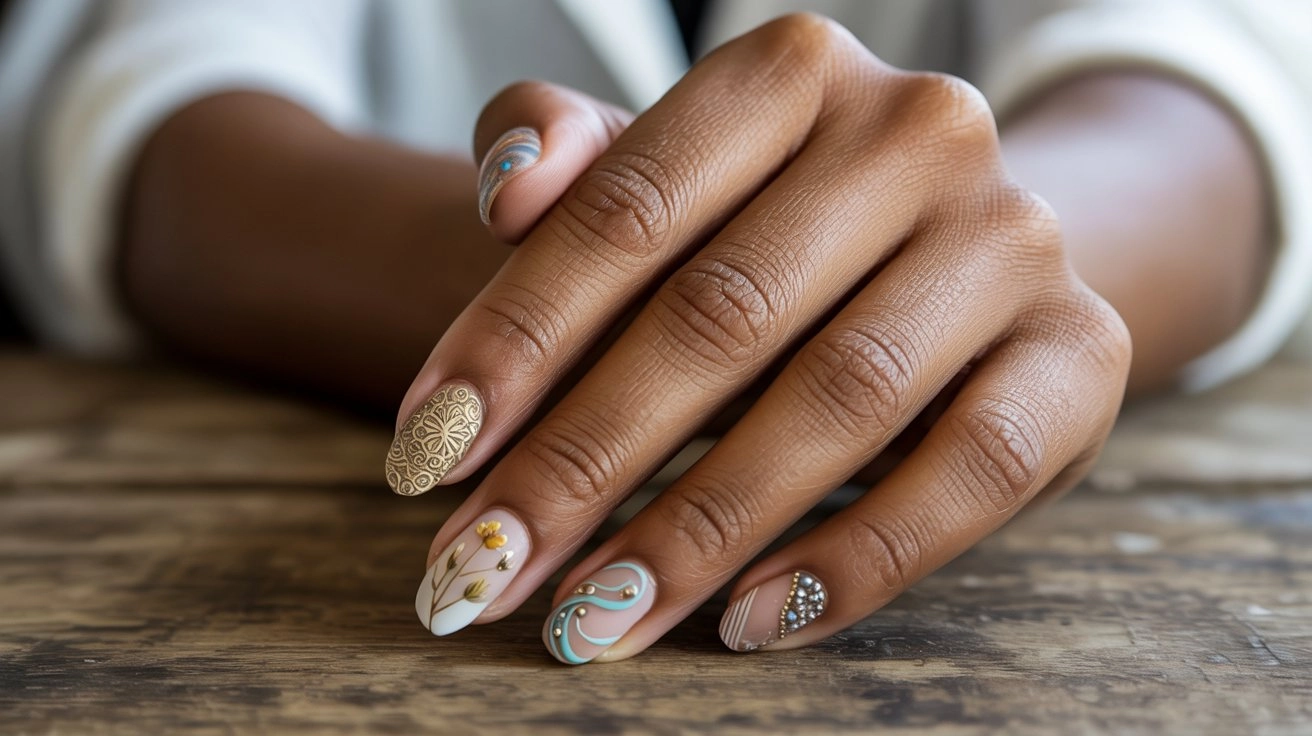
Searching for Cute Boho Nail Ideas that genuinely speak to your free-spirited soul? If you’re tired of basic manicures and dreaming of a style that feels more like ‘running barefoot through a field of wildflowers’ than ‘stuck in an office,’ you have definitely come to the right place.
I’ve gathered all my absolute favorite designs—from dreamy, earthy patterns to delicate, whimsical florals—that I know you’ll love.
But in this guide, I’m not just showing you pretty pictures. I’m walking you step-by-step through how to create these gorgeous looks at home and sharing all my best secrets for making them last.
Your perfect boho manicure is waiting for you just below. Let’s get started!
Pastel Dreamcatcher Designs
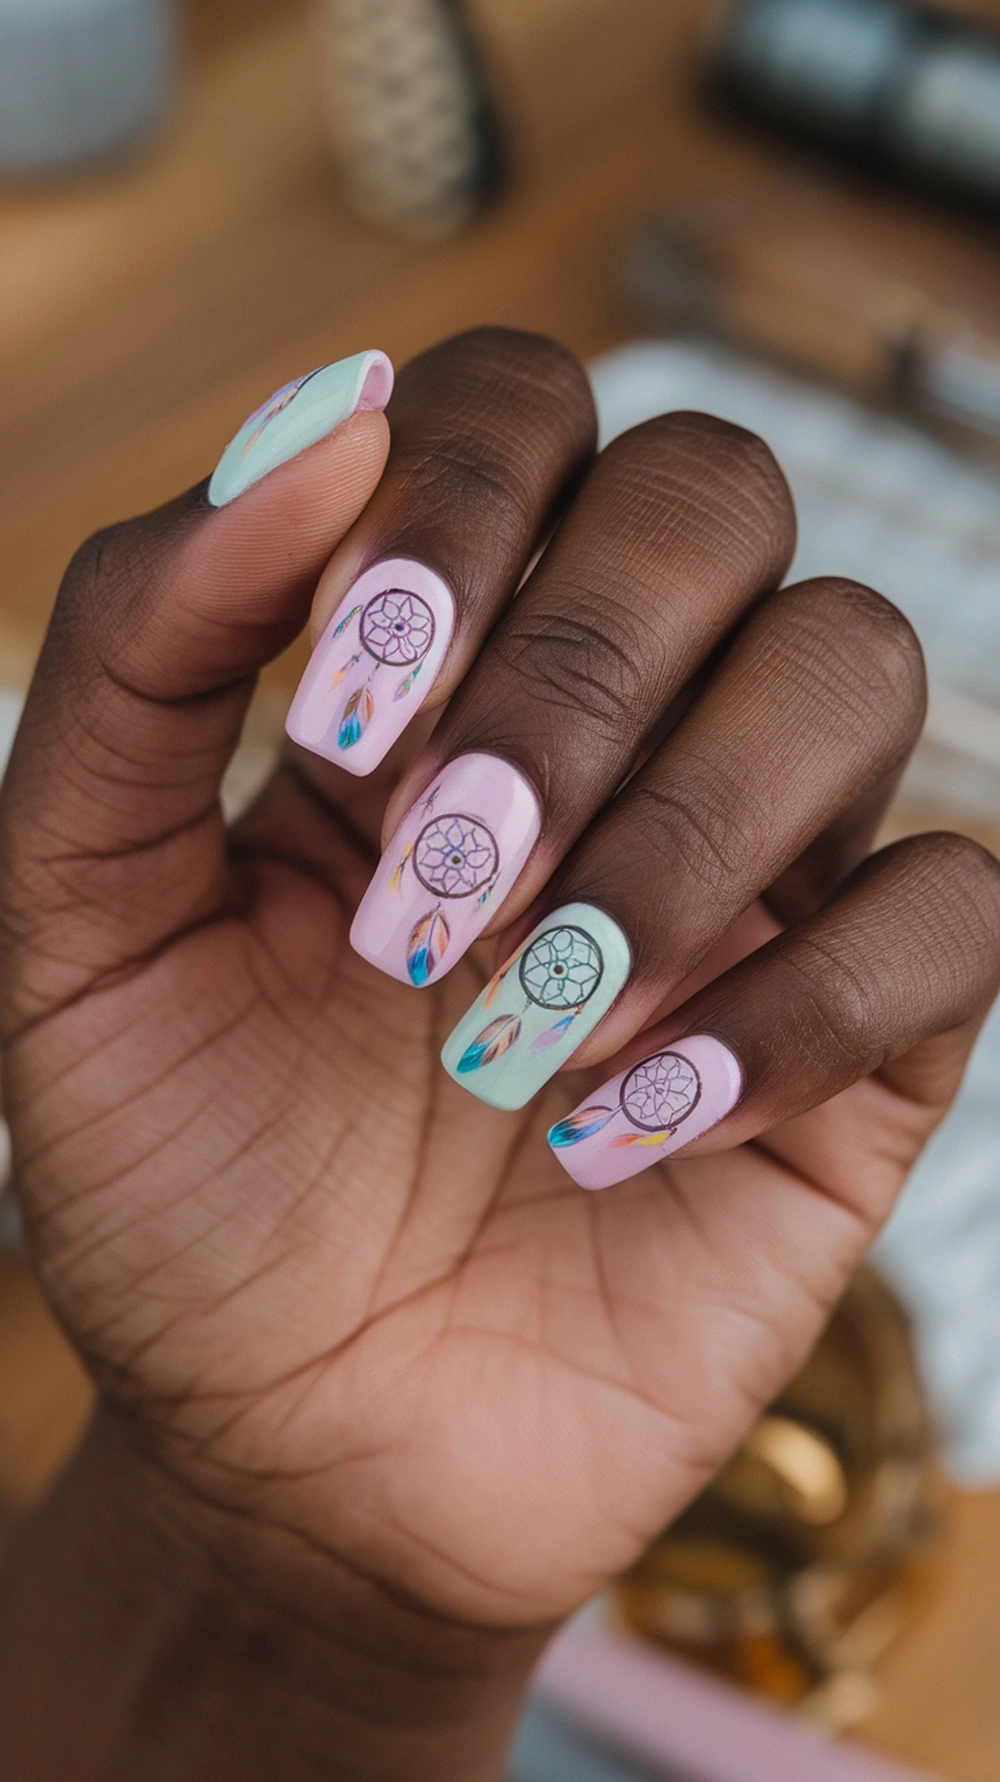
There’s something genuinely magical about pastel dreamcatcher nails. Soft, dreamy colors like blush pink and gentle mint create a calming canvas for the delicate, whimsical patterns. This look feels both intricate and effortlessly chic, perfect for any occasion.
Ready to create your own little work of art? It’s easier than you might think! Start by giving your nails a clean slate and a protective base coat. Once dry, sweep on your favorite pastel shade and let it set completely. Now for the fun part: the dreamcatcher.
Gently draw the delicate web and tiny feathers using a super-fine brush or a nail art pen. Don’t worry about perfection; the free-spirited vibe matters most! A glossy top coat is the final step to seal your design and make it shine.
And to keep your dreamy manicure looking flawless? My little secret is to treat them with care. They aren’t huge fans of long soaks in the bath, and they love a daily dose of cuticle oil to stay hydrated.
If a small chip happens, a tiny touch-up with your polish is an easy fix to keep your cute nails looking vibrant.
Mandala Patterns on Neutral Base
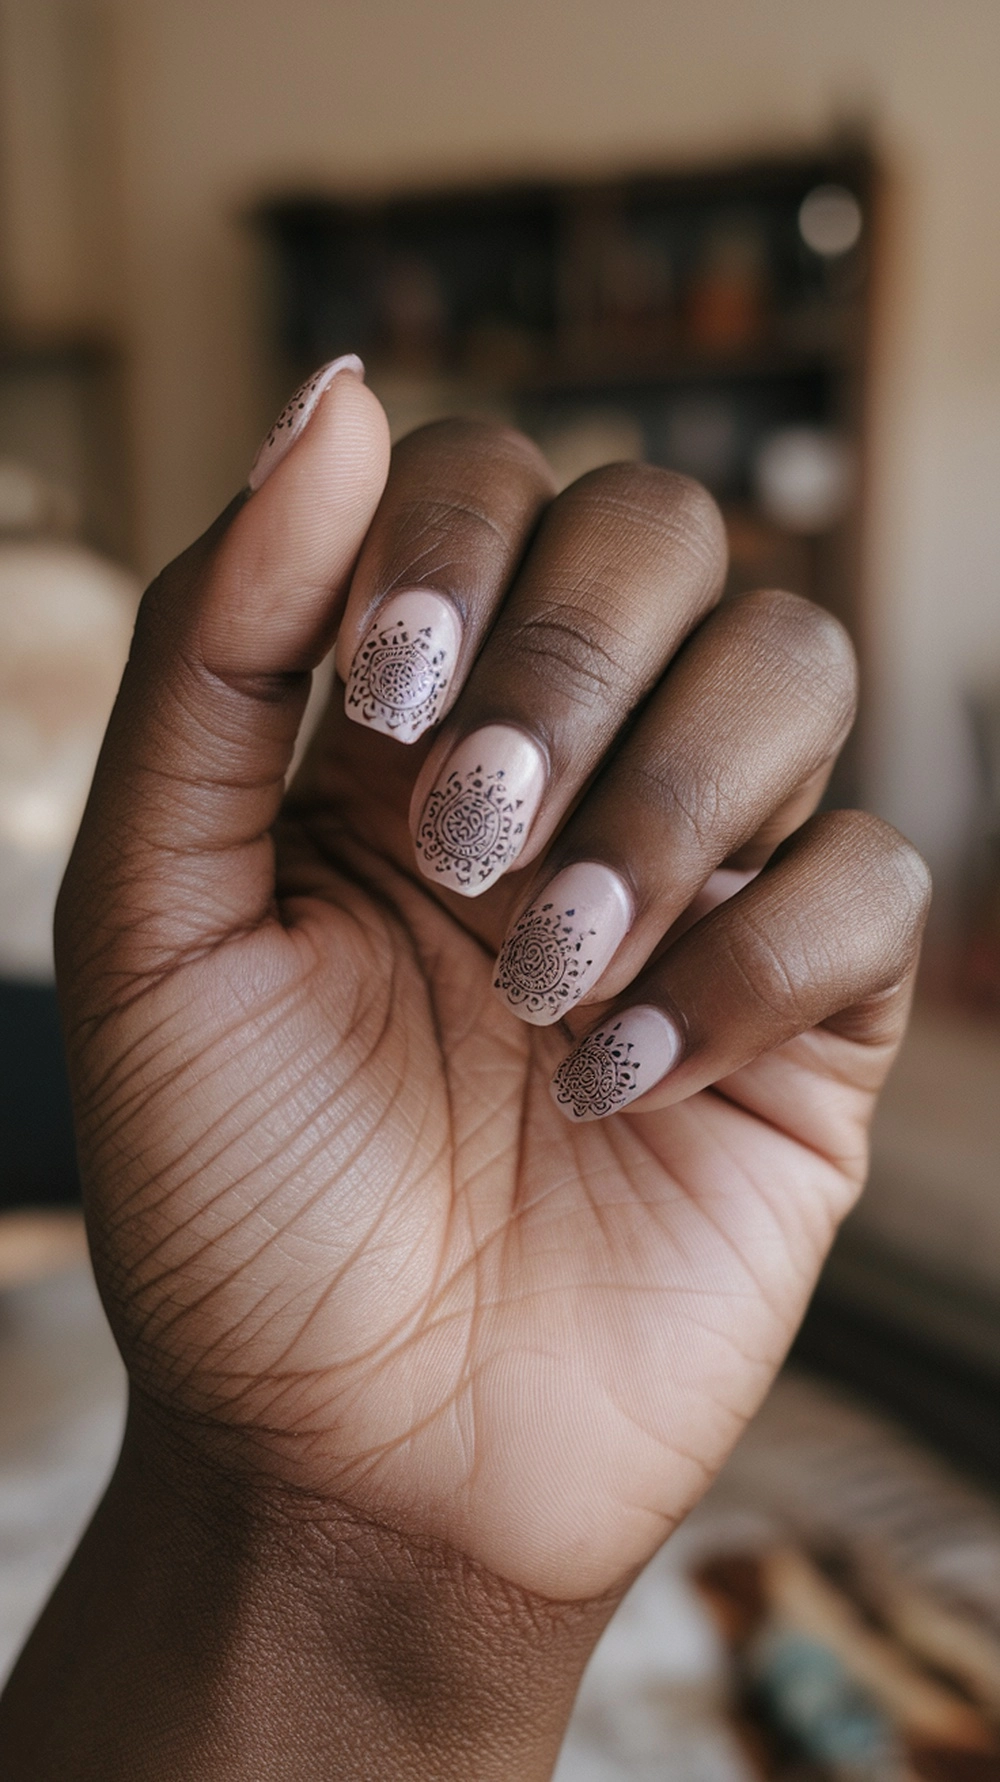
There’s something so calming and beautiful about mandala art, and it brings a truly special boho vibe to your nails.
You create an earthy yet exquisite look by pairing intricate patterns with a soft, neutral base.
A sandy beige or warm taupe polish makes the perfect canvas, allowing the delicate details of your mandala to be the star truly.
Ready to find your zen and create this look? Start by sweeping on your favorite neutral base color. Once it’s dry, grab a fine-tipped brush or a nail art pen and let your creativity flow.
You can create simple, delicate patterns or go for a more detailed design; there’s no wrong way. This versatile style looks especially stunning on short nails, adding a touch of simple, intricate beauty.
A good top coat is essential to protect your little masterpiece. It will seal in your design and give it a gorgeous shine. A little daily cuticle oil goes a long way in keeping everything hydrated and preventing chips. Your beautiful mandala nails will look fresh and fabulous with just a little care.
Bohemian Geometric Shapes
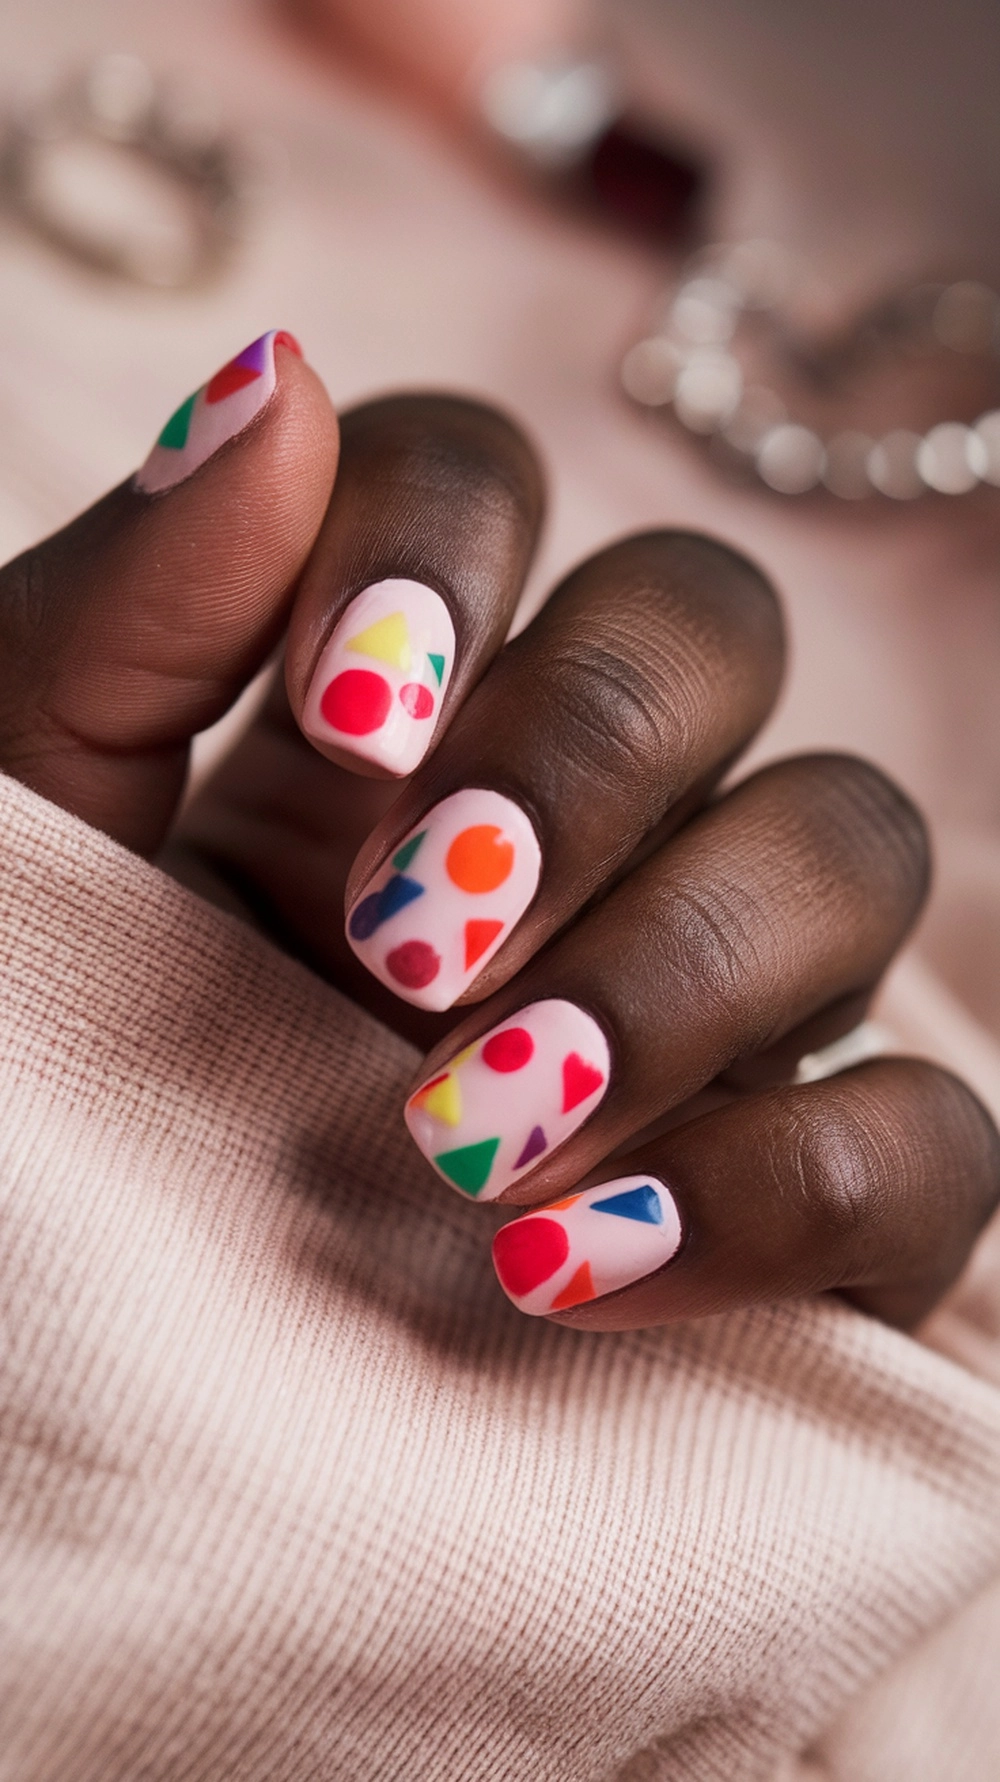
Ready to play with shapes and create a unique boho look for your nails? This geometric style is fun and trendy to show off your creative side.
It’s all about that playful mix of colorful shapes over a soft pink base; a vibrant, modern, and chic look using crisp triangles, perfect little dots, and other fun patterns.
Here’s how you can create your own mini-masterpiece. Start with a clean nail and a good base coat. Then, sweep on a pretty light pink polish to make your canvas. Once that’s dry, it’s time to play! Start adding your geometric shapes using a thin brush or a dotting tool.
Go for earthy tones, bright pops of color, or a mix of both. There are no rules here, so have fun and create a pattern that’s all you.
Want to keep your new manicure looking sharp? A glossy top coat is non-negotiable; it seals your design and adds that pro-level shine.
This look is exceptionally durable and stunning on bohemian acrylic nails. Remember to love your cuticles with a moisturizer and avoid harsh chemicals. A little care is all it takes!
Earthy Tones with Floral Accents
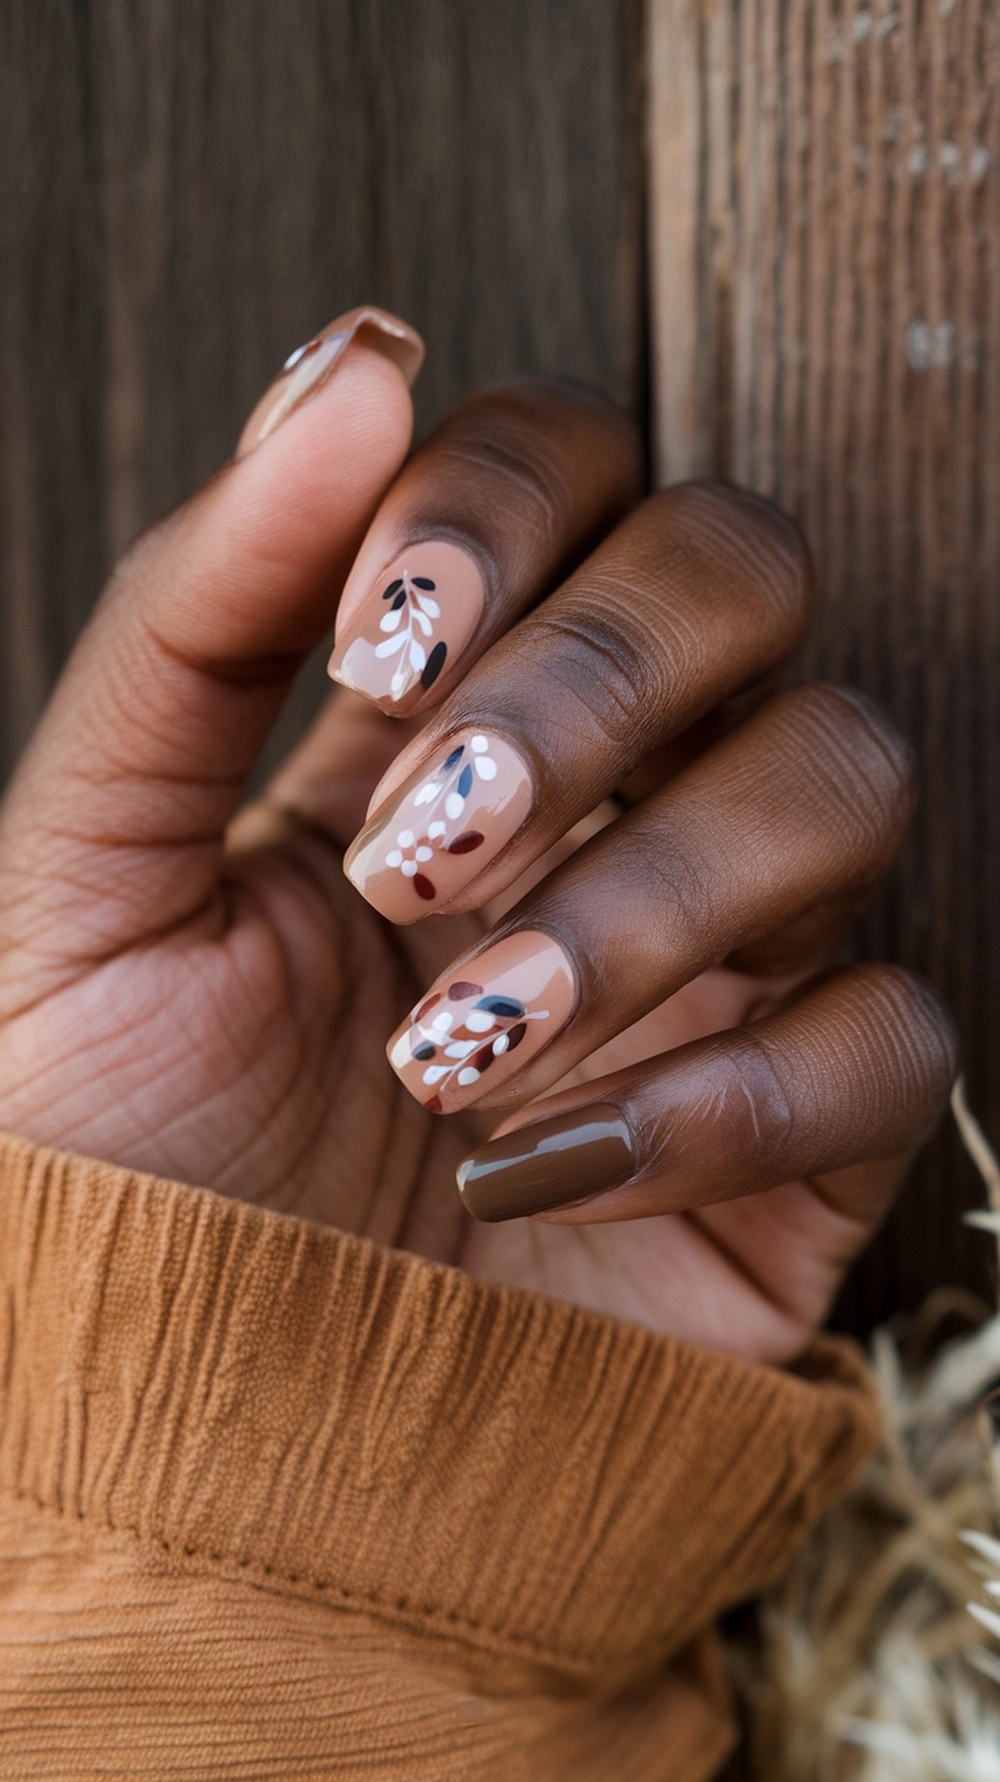
There’s something so comforting and effortlessly chic about earthy-toned nails. This look is all about capturing that cozy, grounded boho vibe.
Think of it like a favorite warm sweater for your fingertips, using a beautiful blend of soft browns and warm neutrals. The delicate little floral accents in white, deep red, and dark green add a sweet, playful touch that works beautifully in any season.
Ready to create this warm and natural look? It’s a lovely, calming design to paint. Start with a protective base coat, then sweep on your favorite nude or soft brown polish. Once that’s dry, it’s time for the tiny wildflowers.
Using a fine-tipped brush, gently add the delicate petals and leaves. This design is special because of the pop of color against the earthy background.
A little TLC goes a long way to keep your cozy mani looking its best. A quick swipe of top coat every few days will maintain that beautiful shine and help prevent chips.
Your nails will also thank you for wearing gloves when you clean. Hydrated cuticles are the secret to a fresh, long-lasting manicure!”
Vintage Lace Nail Accents – Cute Boho Nail Ideas
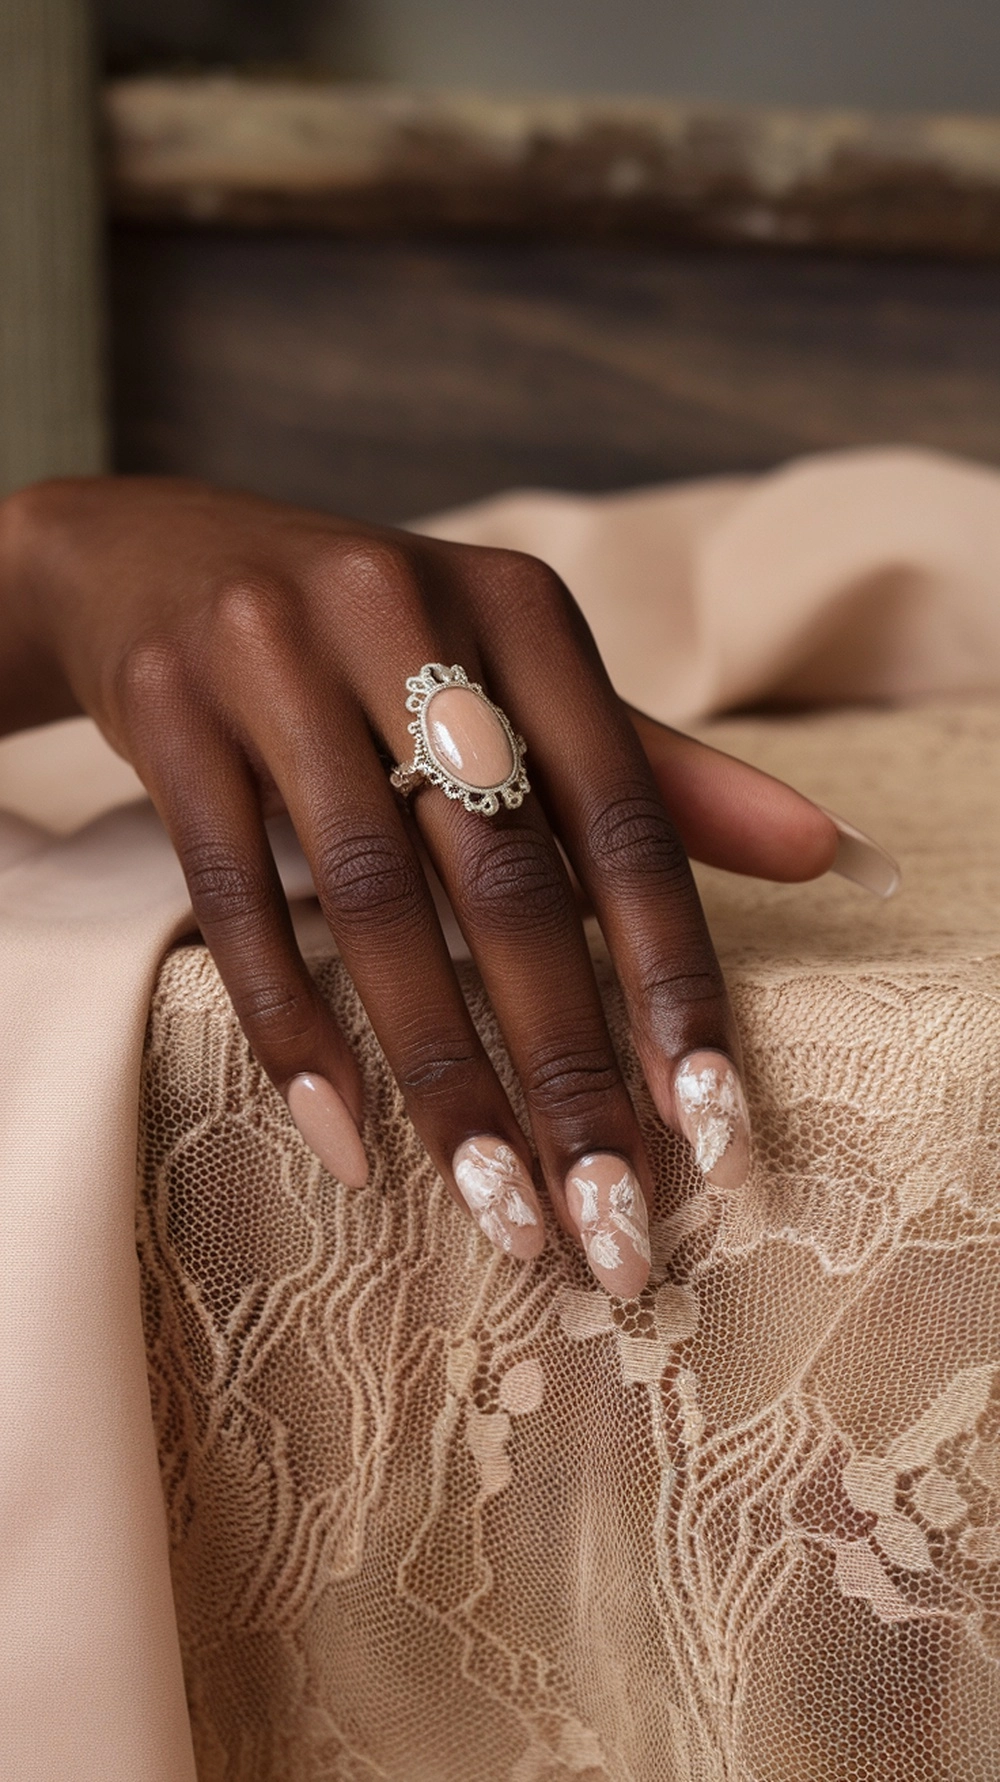
Vintage lace has a special kind of romance, and you can capture that delicate, timeless beauty right on your fingertips. This elegant boho look pairs a soft, earthy nude base with the most intricate, web-like patterns of white lace.
It creates a stunning contrast that’s both rustic and incredibly chic, perfect for adding a touch of charm to your style.
Ready to create this beautiful look? Begin with clean, shaped nails and a protective base coat. Next, sweep on a barely-there nude polish for your background. Once that’s dry, it’s time for the lace.
You can use a fine nail art brush to hand-paint the delicate patterns if you feel artistic. Or, for a super quick and perfect design every time, nail stamps are a brilliant shortcut! A glossy top coat is the final touch to seal your artwork.
A little gentle care is all you need to preserve the delicate details of your vintage lace nails. Gel polish is a fantastic secret weapon for a look that truly lasts, especially for a special occasion. It’s a perfect style for the fresh feeling of spring or any time you’re embracing a boho-chic vibe.
Feather and Arrow Nail Art
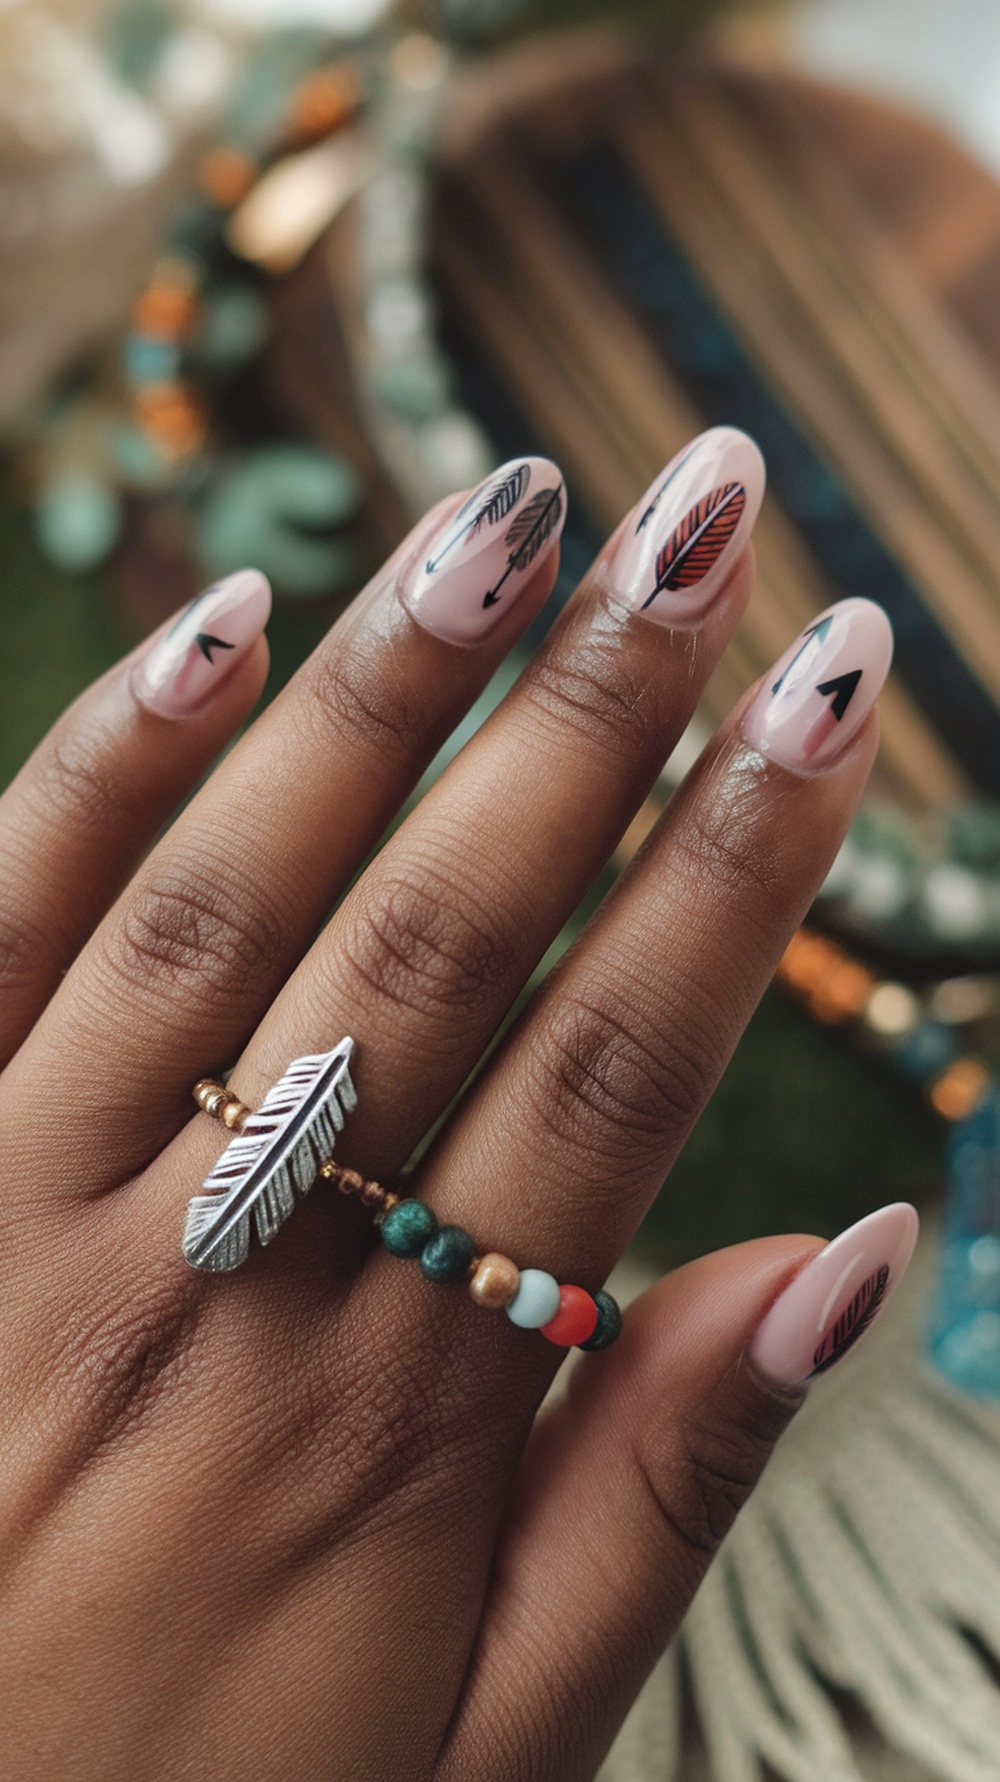
I love the playful, earthy vibe of feather and arrow nail art. It’s a perfect way to express your boho style, blending natural elements with fun. The soft pink background makes the intricate black and red feather patterns stand out, creating a beautiful, eye-catching contrast.
Here’s how you can create this look. After your base coat, paint your nails a soft pink and let them dry well. Now, for the creative part. Use an excellent brush to draw your feathers and arrows.
Black is great for the details, and adding a few pops of red gives it an entertaining twist. Once you’re happy with your design, seal it with a top coat for that glossy finish.
Just give them a little love to keep your feather and arrow nails looking great. A top coat refresh every few days can work wonders. When ready for a new look, this design is a great stepping stone to trying other fun boho nail ideas!
Sunset Ombre with Glitter Tips
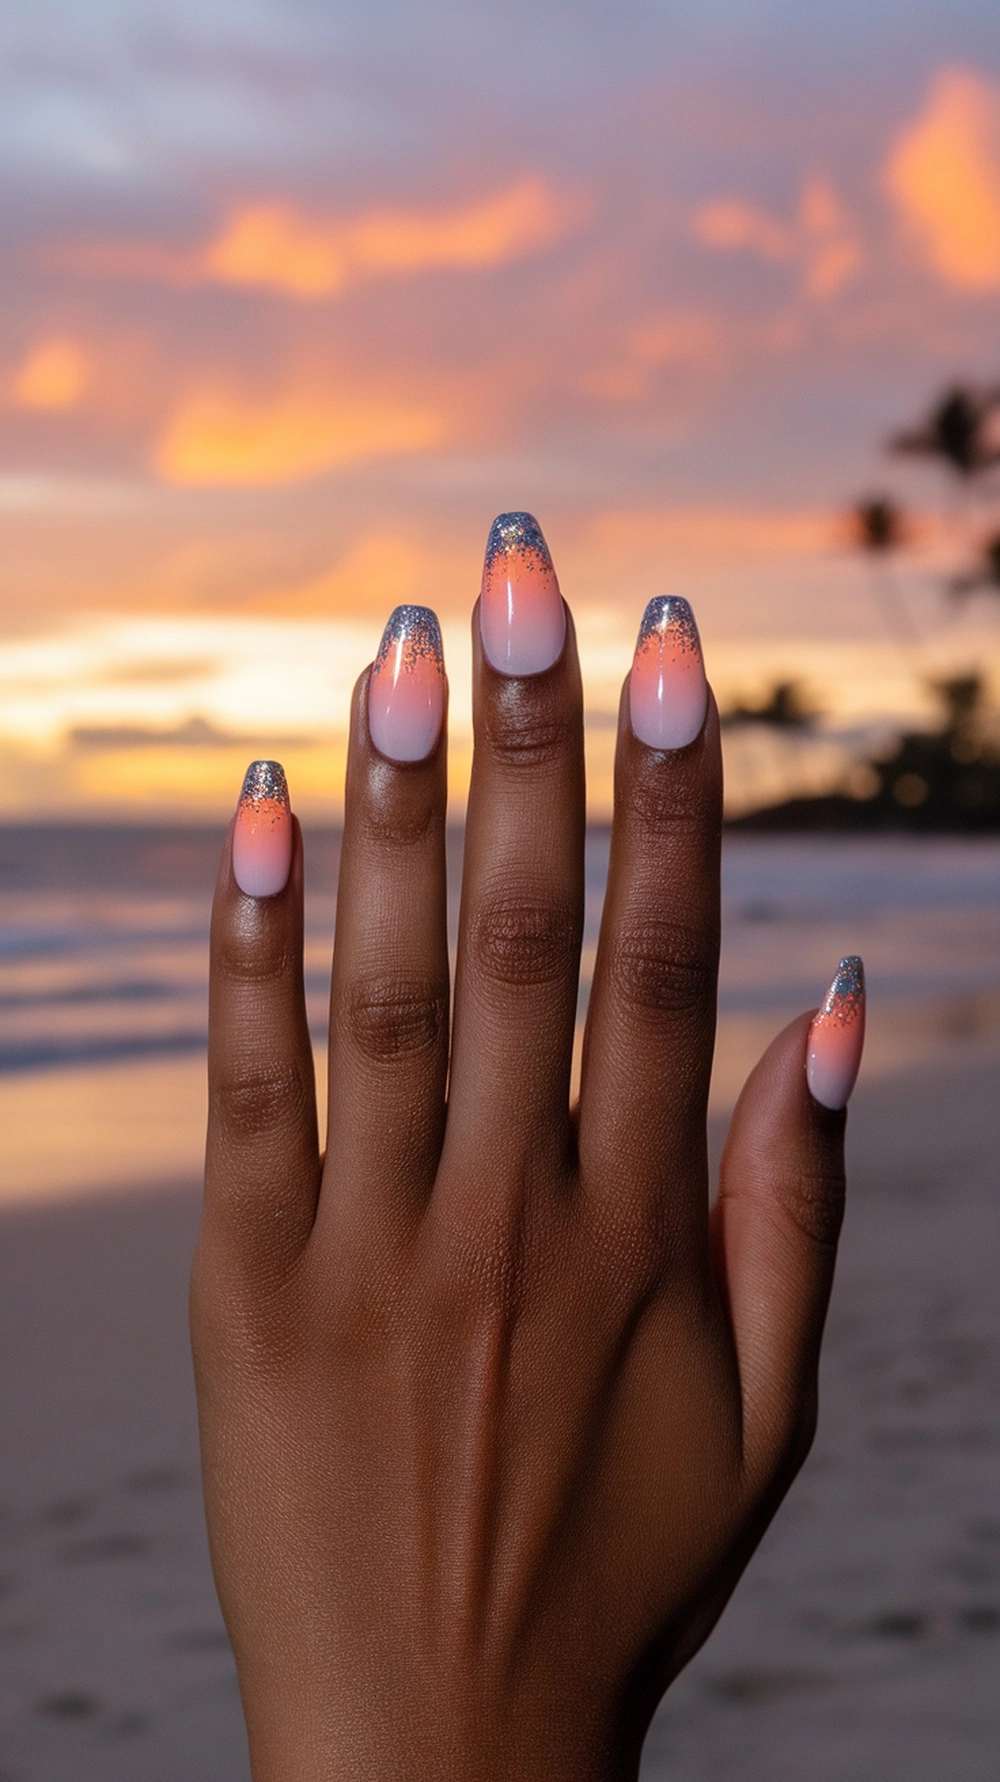
Want to carry the magic of a warm summer sunset right on your fingertips? This stunning ombre look is pure boho chic, capturing that beautiful, fleeting moment when the sky is painted in the most gorgeous colors.
It’s a dreamy gradient that melts from a soft, hazy peach into a warm, rosy pink. And for that extra magic touch, a little sparkle at the tips is like catching the last rays of sunshine.
Here’s how you can create this radiant look. After your base coat, sweep on a light pink or nude polish to create a soft background. Now for the magic trick: the ombre.
Paint a little of your peach and pink polish on a simple makeup sponge, then gently dab it onto your nail to create that beautiful, seamless blend. Once you’re happy with the gradient, add a delicate layer of glitter to the tips for that boho sparkle.
A fresh layer of top coat every few days will lock in the shine to keep your sunset glowing. And if you’re ever looking for more nail art inspiration, this ombre makes a perfect canvas. Imagine adding a delicate white mandala to enhance that beautiful, relaxed, nature-inspired vibe.
Turquoise and Coral Color Block
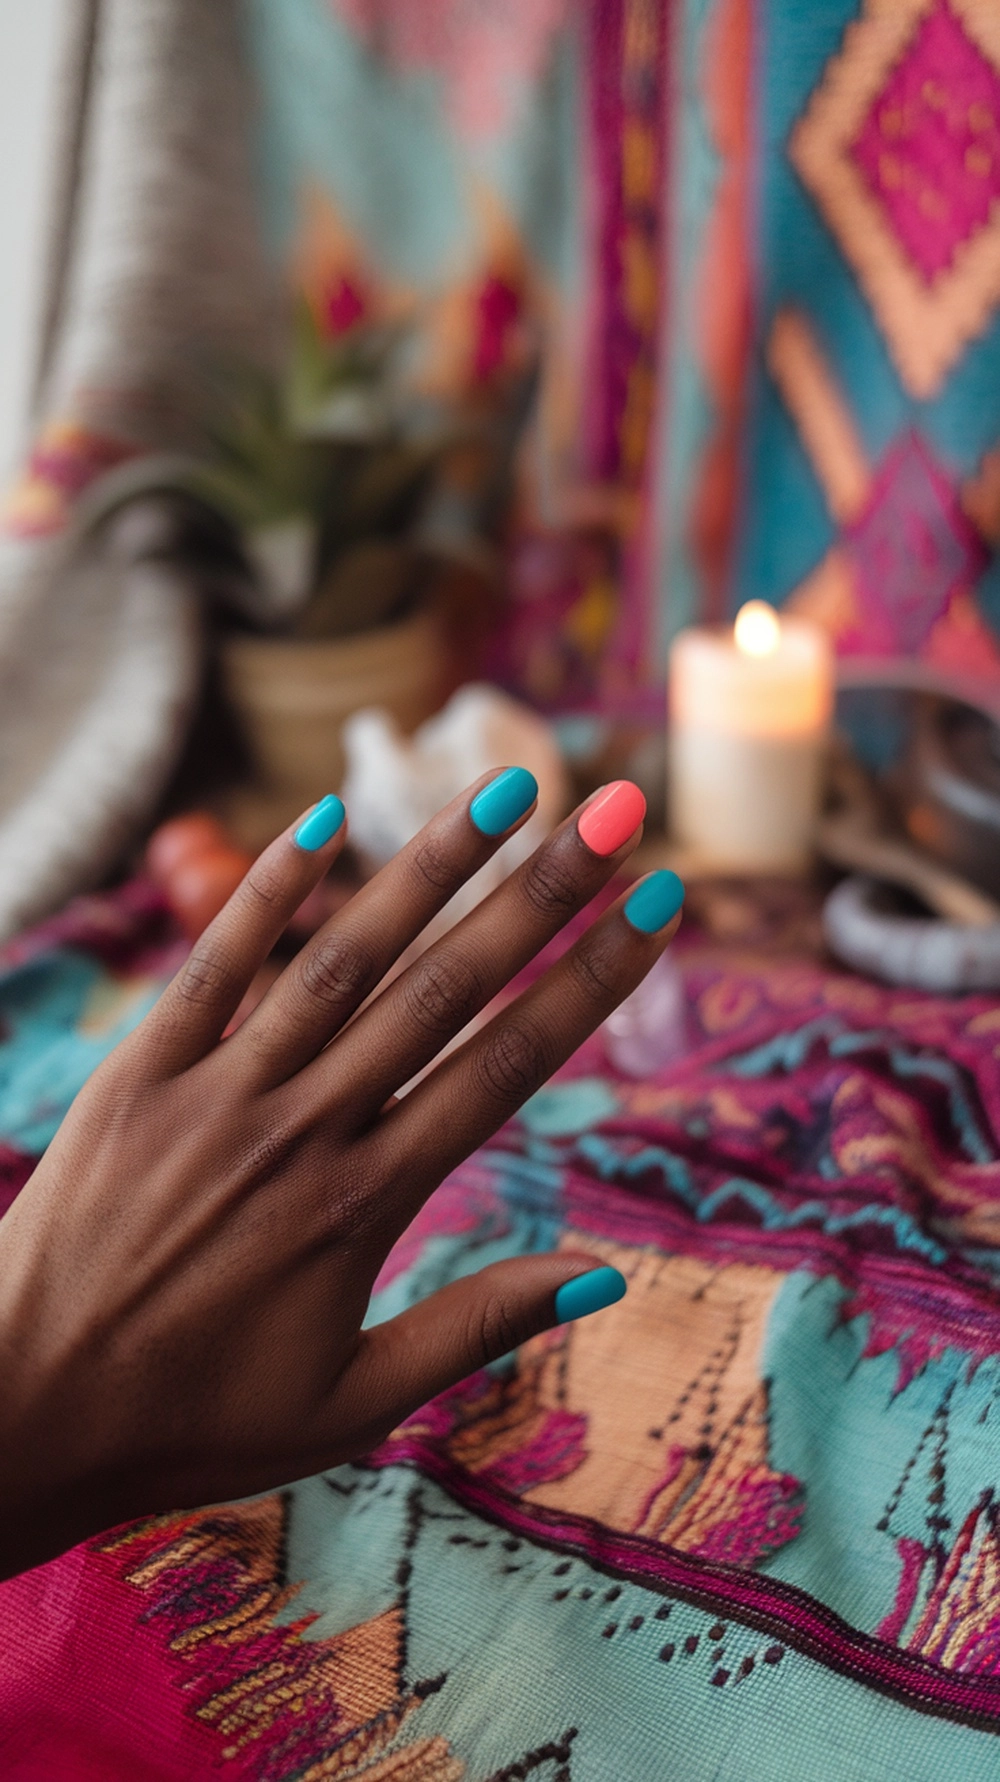
If you ask me, no color combination screams ‘sunshine and good vibes’ more than turquoise and coral. I think they’re a match made in boho heaven!
My favorite way to wear them is with a fun, fresh color block design. The bold contrast between the poppy coral and the calm turquoise will make your nails pop. It’s the simplest way to get that chic boho style with a major splash of color.
Let me show you how I create this high-impact look; it’s simple. After my trusty base coat, I play with color. I’ll paint a couple of nails turquoise and the others coral.
My secret for getting a perfect, crisp edge is that I do lines on a single nail. Just a little bit of tape! Once everything is dry, I lock it all in with a glossy top coat for that beautiful, shiny finish.
Keeping this fun look fresh is a breeze for me. I use a little cuticle oil daily to keep my nails happy and hydrated. If I notice a chip after a few days, a quick touch-up is all I need to keep the colors looking bright. It’s my go-to stylish, low-maintenance look for my busy life!
Nature-Inspired Leaf Patterns
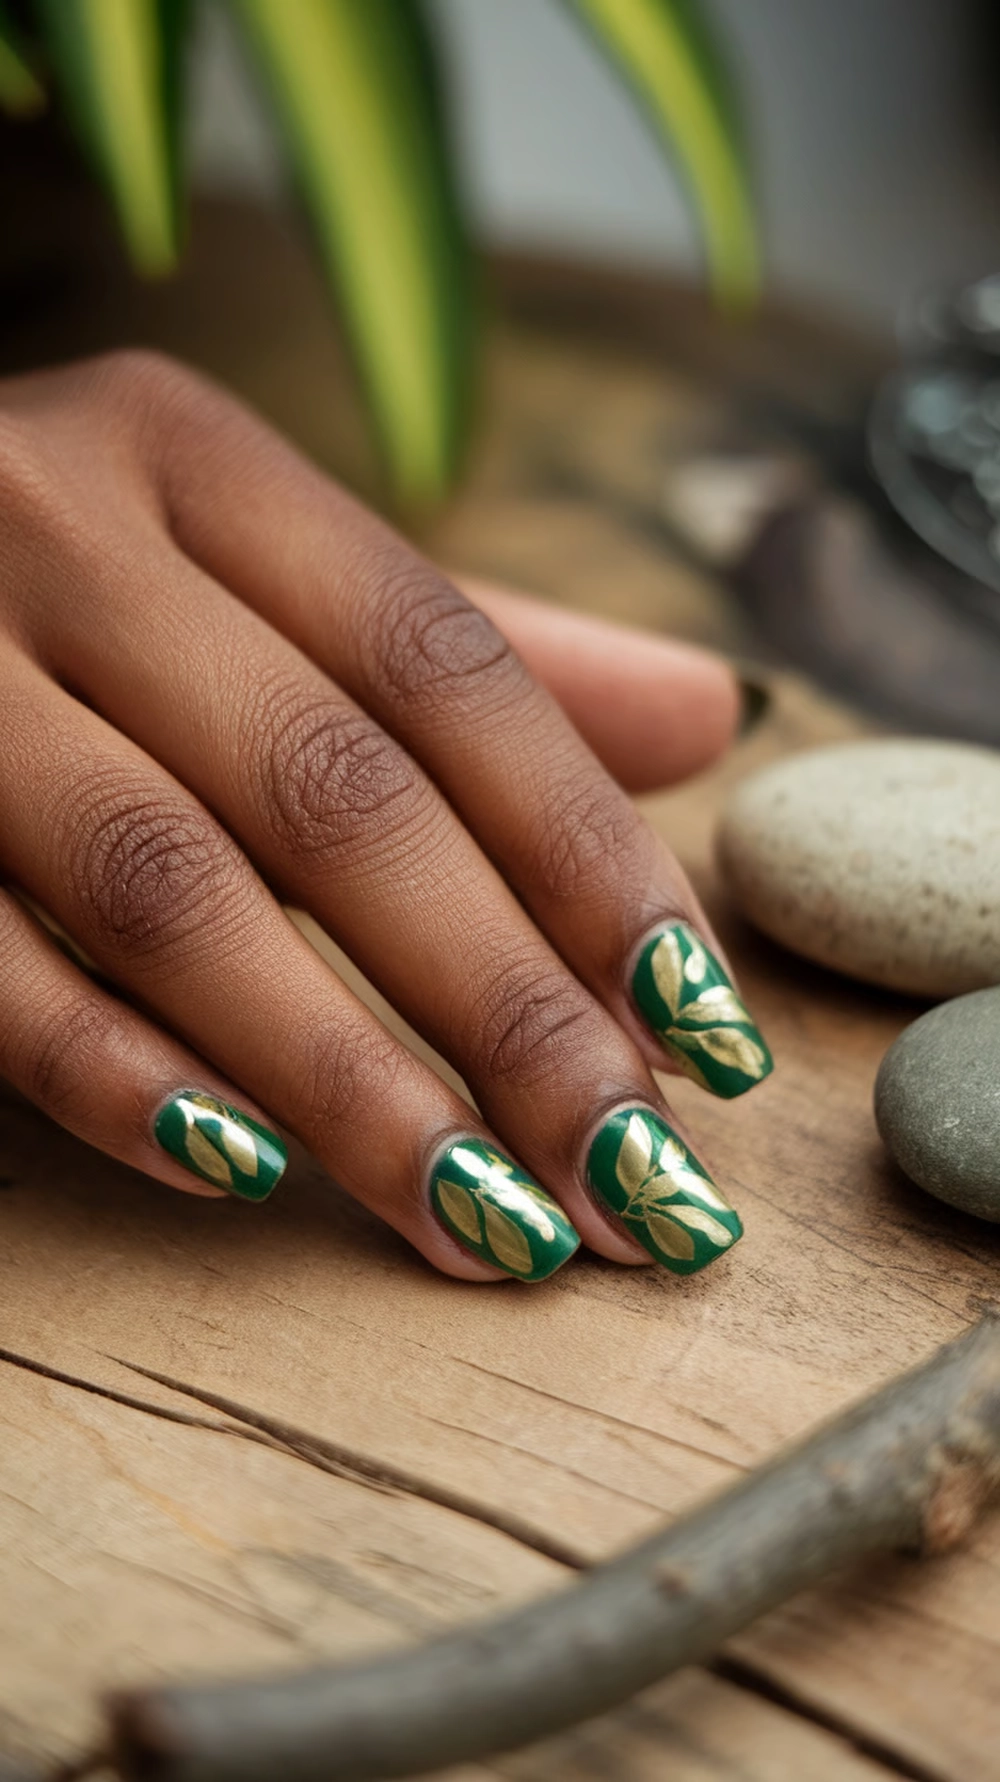
The outdoors has always inspired me, so bringing beautiful, nature-inspired leaf patterns to my fingertips is one of my favorite ways to get that boho chic look.
I love how this design’s rich, forest-green polish contrasts with the delicate, shimmering gold leaves. It feels so fresh and vibrant! Adding a few tiny gems is the secret to elevating the whole look and making it feel extra special.
Let me walk you through how I create this style. I always start with a good base coat to keep my nails healthy. Then, I apply a gorgeous deep green polish for that earthy canvas.
Once that’s dry, the real fun begins. Using an excellent brush, I carefully paint the delicate leaf patterns with a metallic gold polish. My favorite part is placing a tiny gem or two; I love how it catches the light!
I’m pretty diligent with a few things to keep my little works of art looking fabulous. My number one rule is sealing everything with a good top coat, and I’ll even add another layer every few days to keep it glossy.
I also try to remember that my nails are jewels, not tools! And for me, daily cuticle oil is a non-negotiable for keeping everything healthy and beautiful.
Bright Floral Watercolor Nails
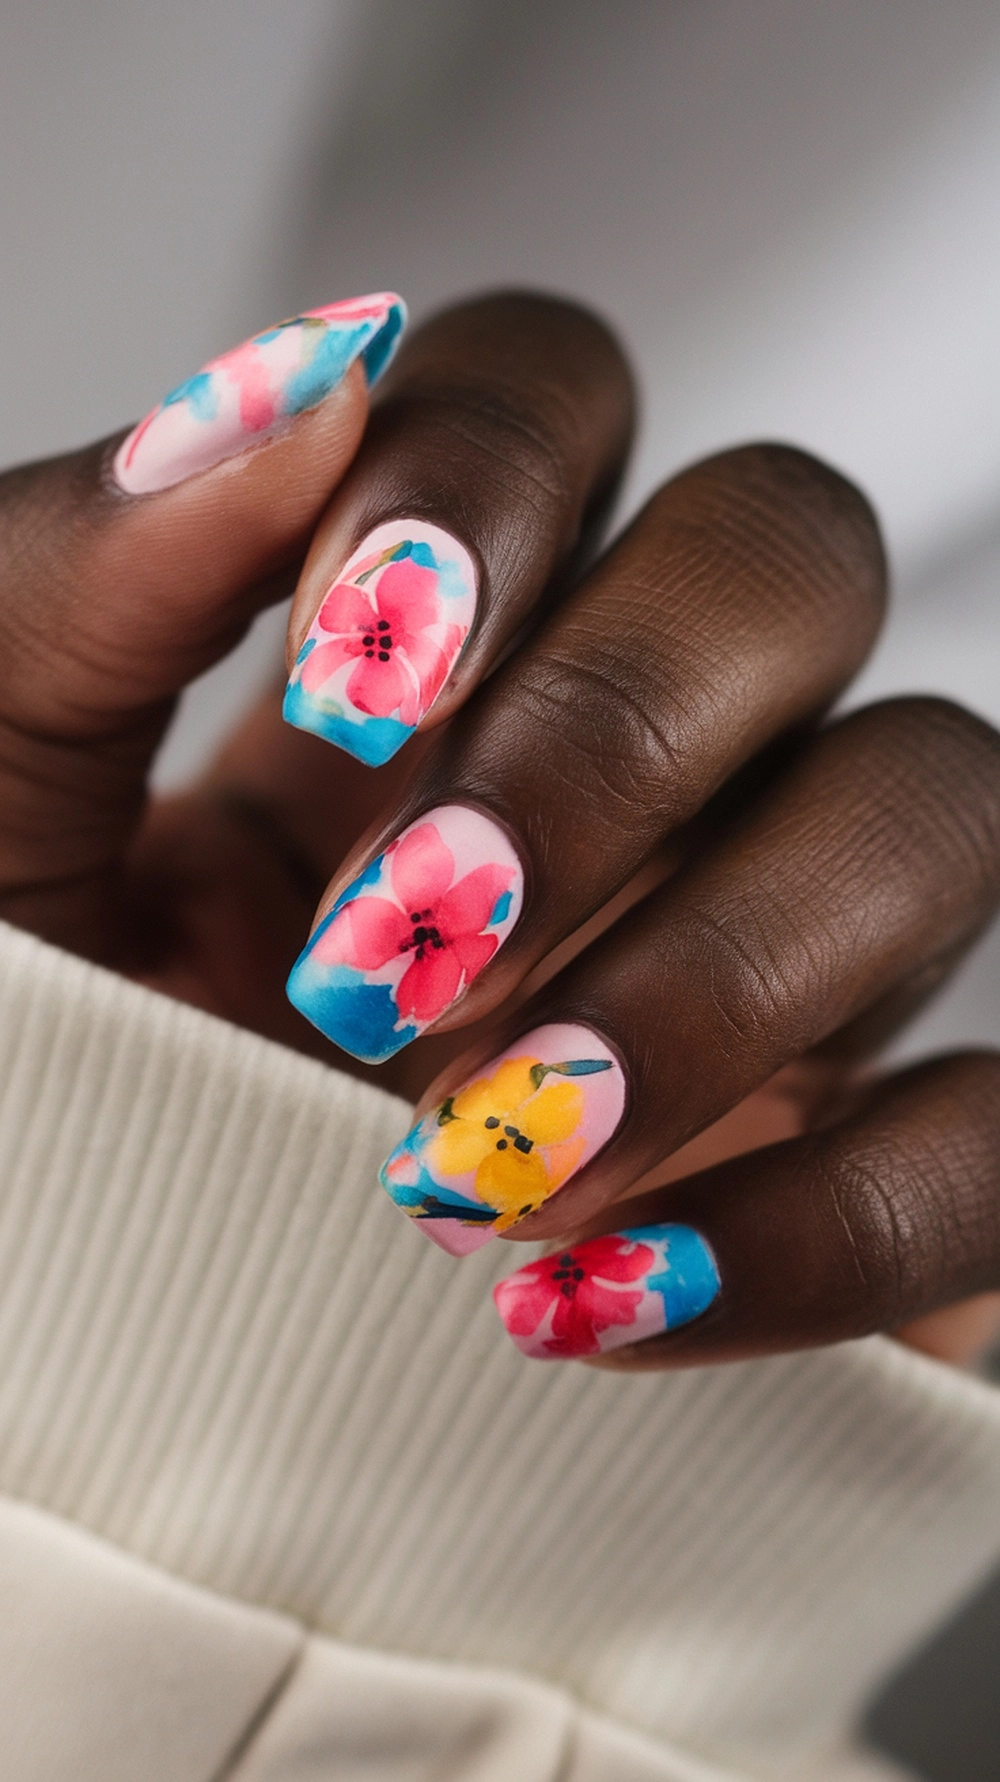
I am absolutely in love with the dreamy, artistic vibe of watercolor nails, and I think bright florals are the perfect way to showcase this style for a boho chic look.
It’s like having a tiny, blooming garden right on my fingertips! I adore mixing vibrant pinks, sunny yellows, and soft blues to create that soft, blended effect. It’s a unique and sophisticated look that’s perfect for any season.
Let me share how I create my own little watercolor masterpieces. After my essential base coat, I start with a light pink or nude polish as my canvas. Once that’s dry, the real artistry begins. I’ll place tiny dabs of different floral colors close together using a fine brush.
The secret I use is to have a second brush slightly damp with polish remover to gently tap the edges of the colors, allowing them to bleed into each other beautifully. I love layering the colors for depth. Then, I seal my art with a glossy top coat.
I have a couple of simple tricks for keeping my little garden blooming. My go-to is good cuticle oil to nourish my nails.
I’ve also learned the hard way that wearing gloves when I’m doing chores makes a massive difference in preventing chips. I can keep my boho nails looking impressive for so much longer with just a little care!
Dreamy Cloud and Sun Designs
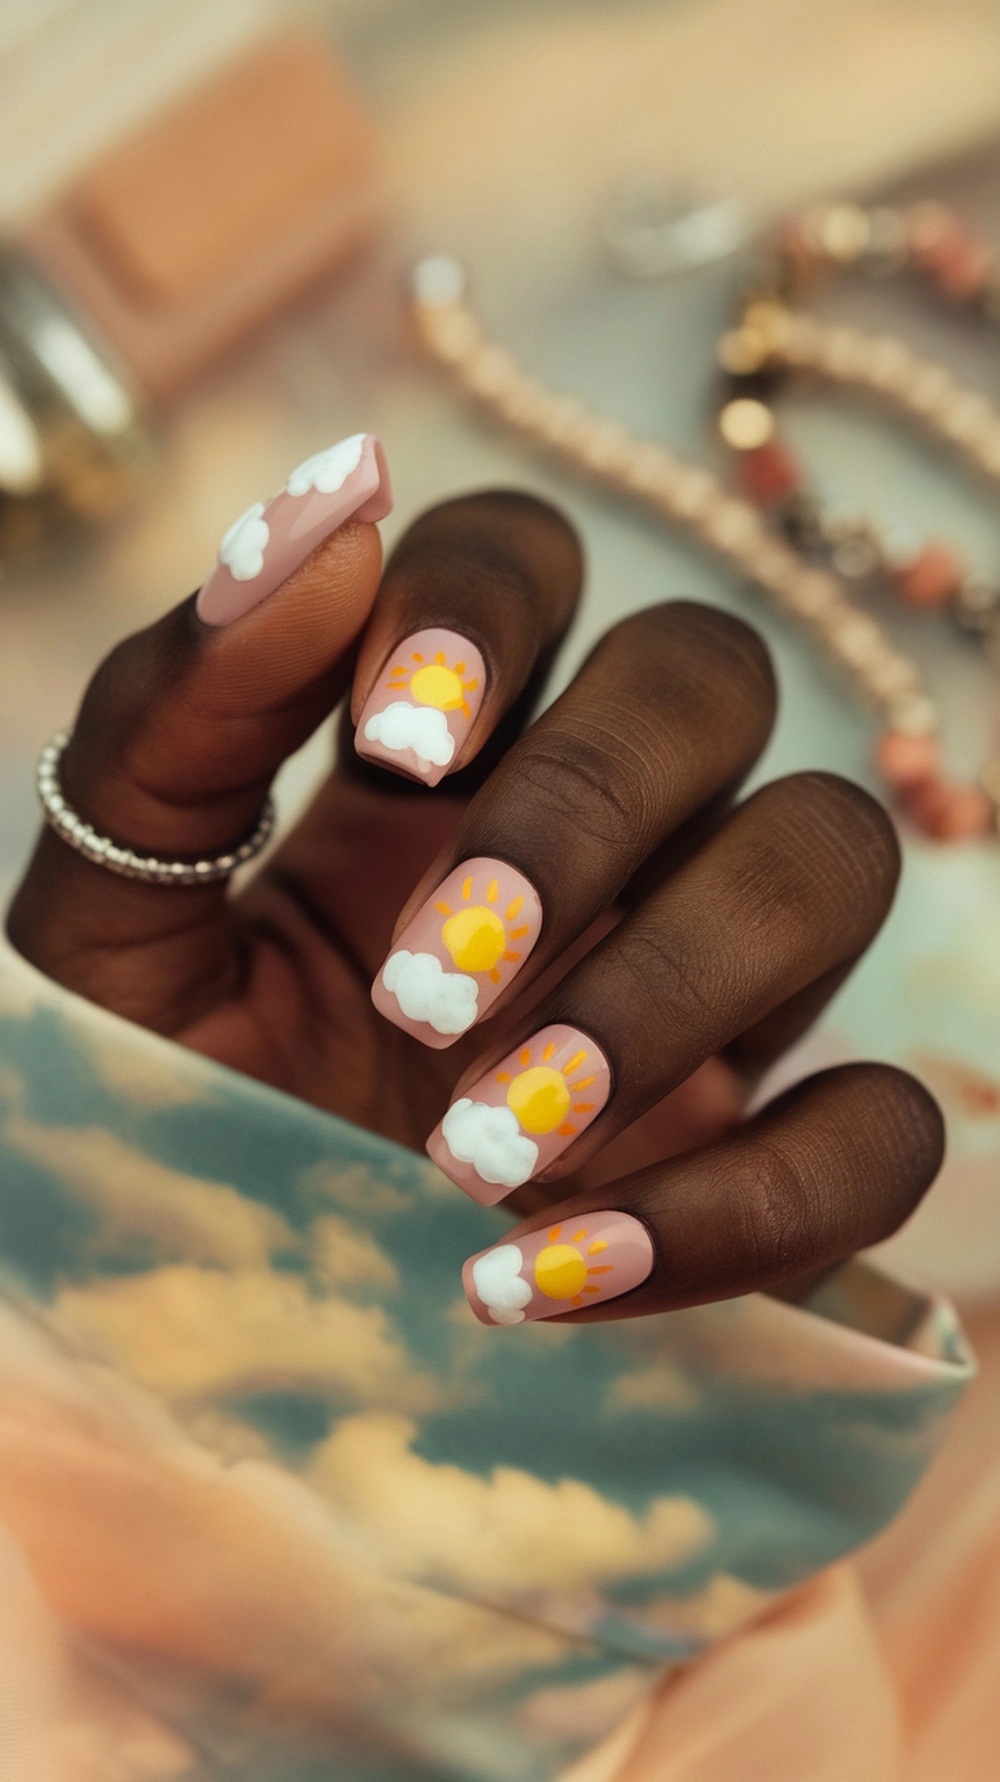
I’m such a sucker for a sunny day, so I love capturing that cheerful vibe right on my nails with this dreamy cloud and sun design. For me, it’s pure happiness!
I start with a soft pink base, like a perfect morning sky, and then add bright, happy suns and little fluffy white clouds. This look instantly puts me in a good mood and perfectly fits my laid-back, boho style.
Let me share how I create this little piece of sunshine. After my base coat, I paint my foundation with rosy pink polish. Once that’s dry, I use a fine brush to paint a cheerful yellow sun, and sometimes I’ll add tiny orange rays for an extra pop.
For the clouds, my little trick is to use a dotting tool with white polish to create overlapping dots—this is how I get that fluffy look! It’s one of my favorite cute nail designs, and I think it looks especially adorable on short nails.
To keep my sunny day manicure bright, my go-to is always a glossy top coat to seal in the design. And because my cuticles can get dry, daily moisturizing is a must for me. It’s so easy to keep this happy look lasting longer!
Boho Chic Tie-Dye Effect
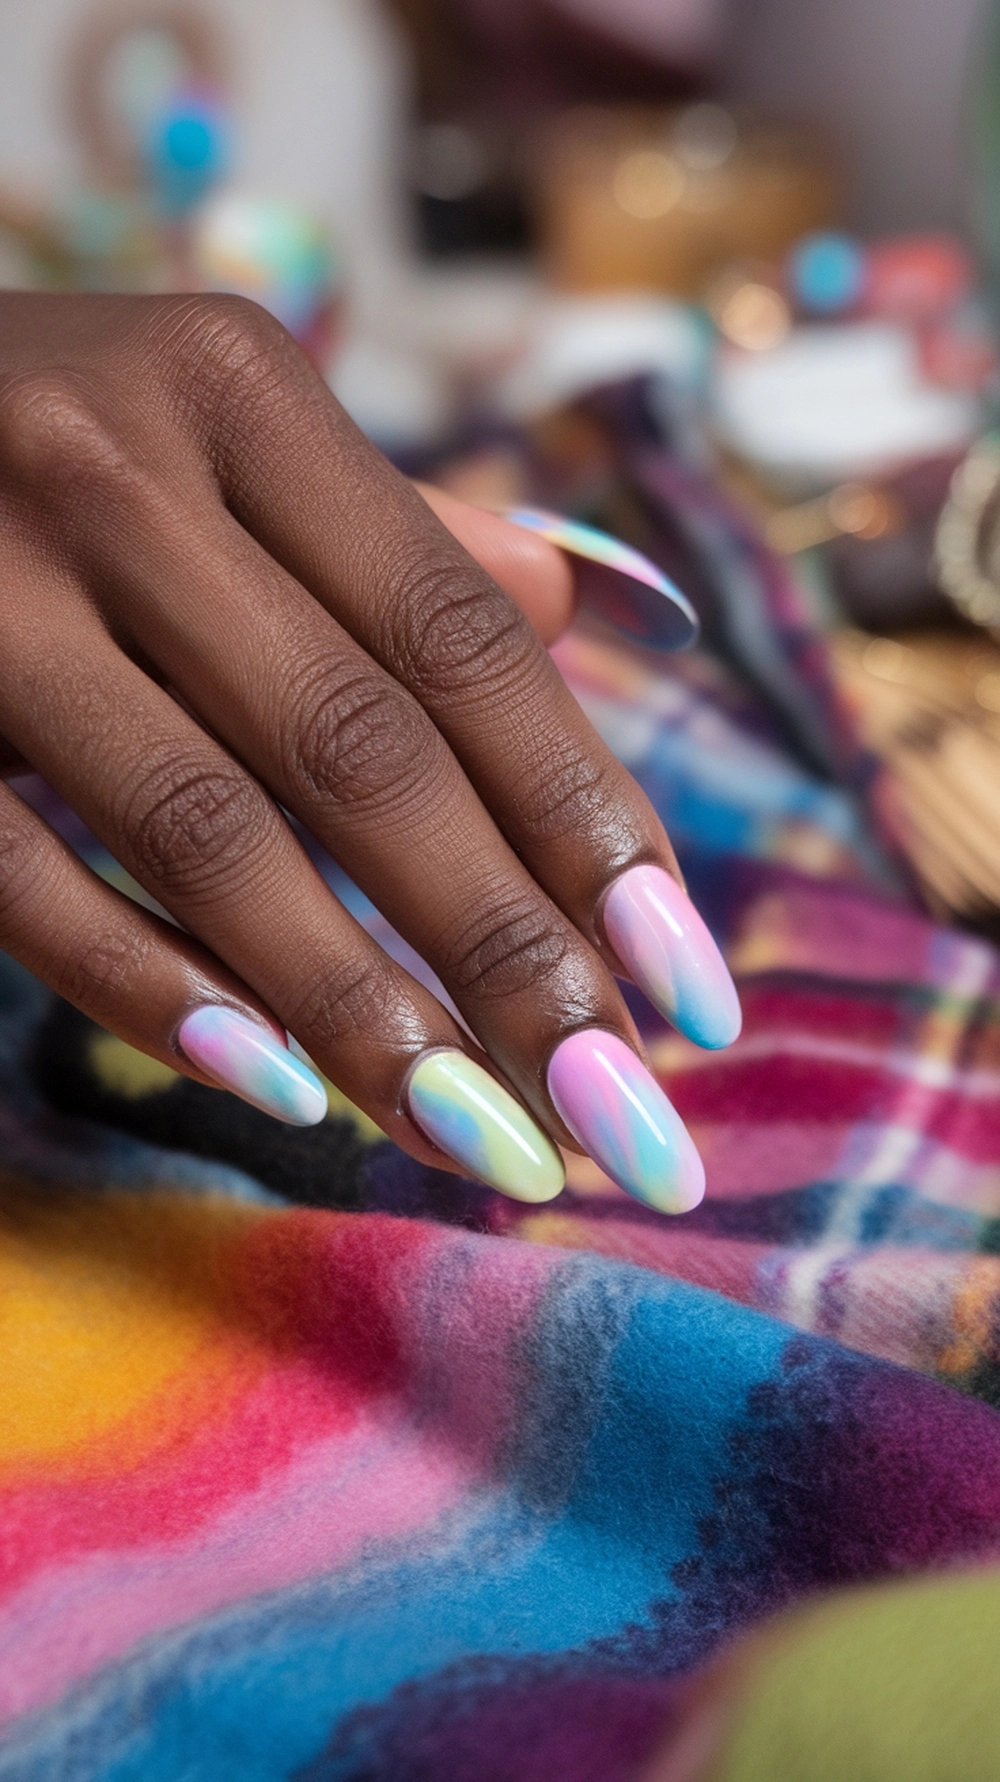
I am such a fan of a good throwback, and nothing says ‘free-spirited’ quite like a gorgeous tie-dye effect on my nails. It’s the ultimate in laid-back, boho chic style!
I love how this design’s soft pastel colors blend and swirl together. It’s such a playful and vibrant look that I think it is perfect for summer festivals or whenever I want a fun, casual vibe.
Let me show you how I get this look—it’s so much fun, and you really can’t mess it up! After my usual base coat, I pick a few of my favorite pastel shades, like a soft pink, a minty green, and a dreamy blue. I’ll apply little dabs of each color in random spots on my nails.
Then, my secret weapon: I use a small piece of a makeup sponge to gently dab and blend the colors until I get that signature, soft tie-dye cloud. I finish it all off with a super glossy top coat.
My main trick for keeping my good vibes manicure lasting as long as possible is a good top coat to seal in the design.
I also use cuticle oil to keep my nails hydrated, which helps prevent chips. With just a little care, I can keep my boho nails looking impressive and fresh!
Woven Textures and Patterns
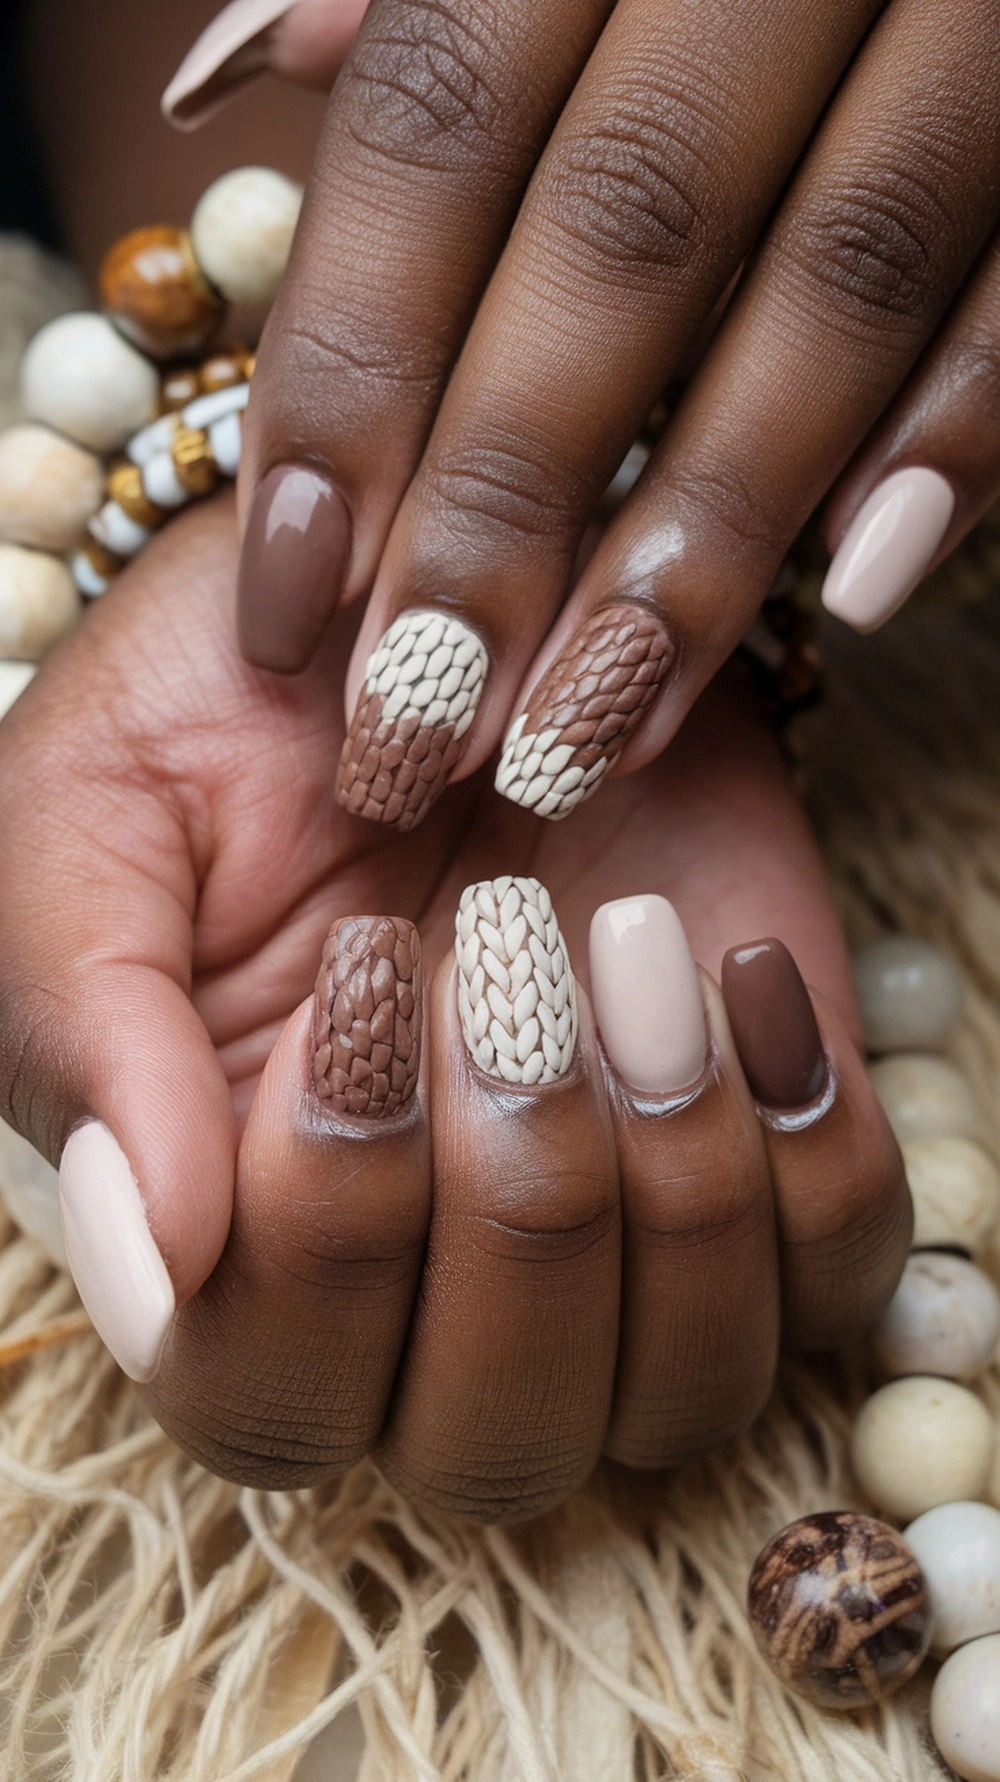
I’m excited to share one of my favorite boho nail art ideas with you: these stunning woven-inspired designs. If you’re like me and love the cozy texture of a soft woven blanket, you will fall for this look.
I love how the intricate, thread-like patterns and earthy tones come together to create a cozy and chic style.
Ready to create this textural masterpiece together? First, I’ll have you prep your nails with a good base coat to protect them. Then comes the fun part: let’s pick out a cozy palette of earthy shades like taupe, beige, and deep brown.
I suggest applying two coats to create a solid base. For the woven effect, use a fine nail art brush to create the intricate, overlapping lines. My favorite thing about this design is that you can mix and match different patterns on each nail for a look that’s uniquely yours.
Once you’re happy with your design, we need to protect it. My best advice is to seal all that beautiful work with a glossy top coat for shine and durability.
Trust me, your nails will also thank you for a little daily cuticle oil to keep everything hydrated. I wear this look all year round; it’s perfect for a sunny farmers market in the spring, but you can easily transition it to fall with some deeper colors. I know you’re going to love it!
Crystal and Gemstone Embellishments
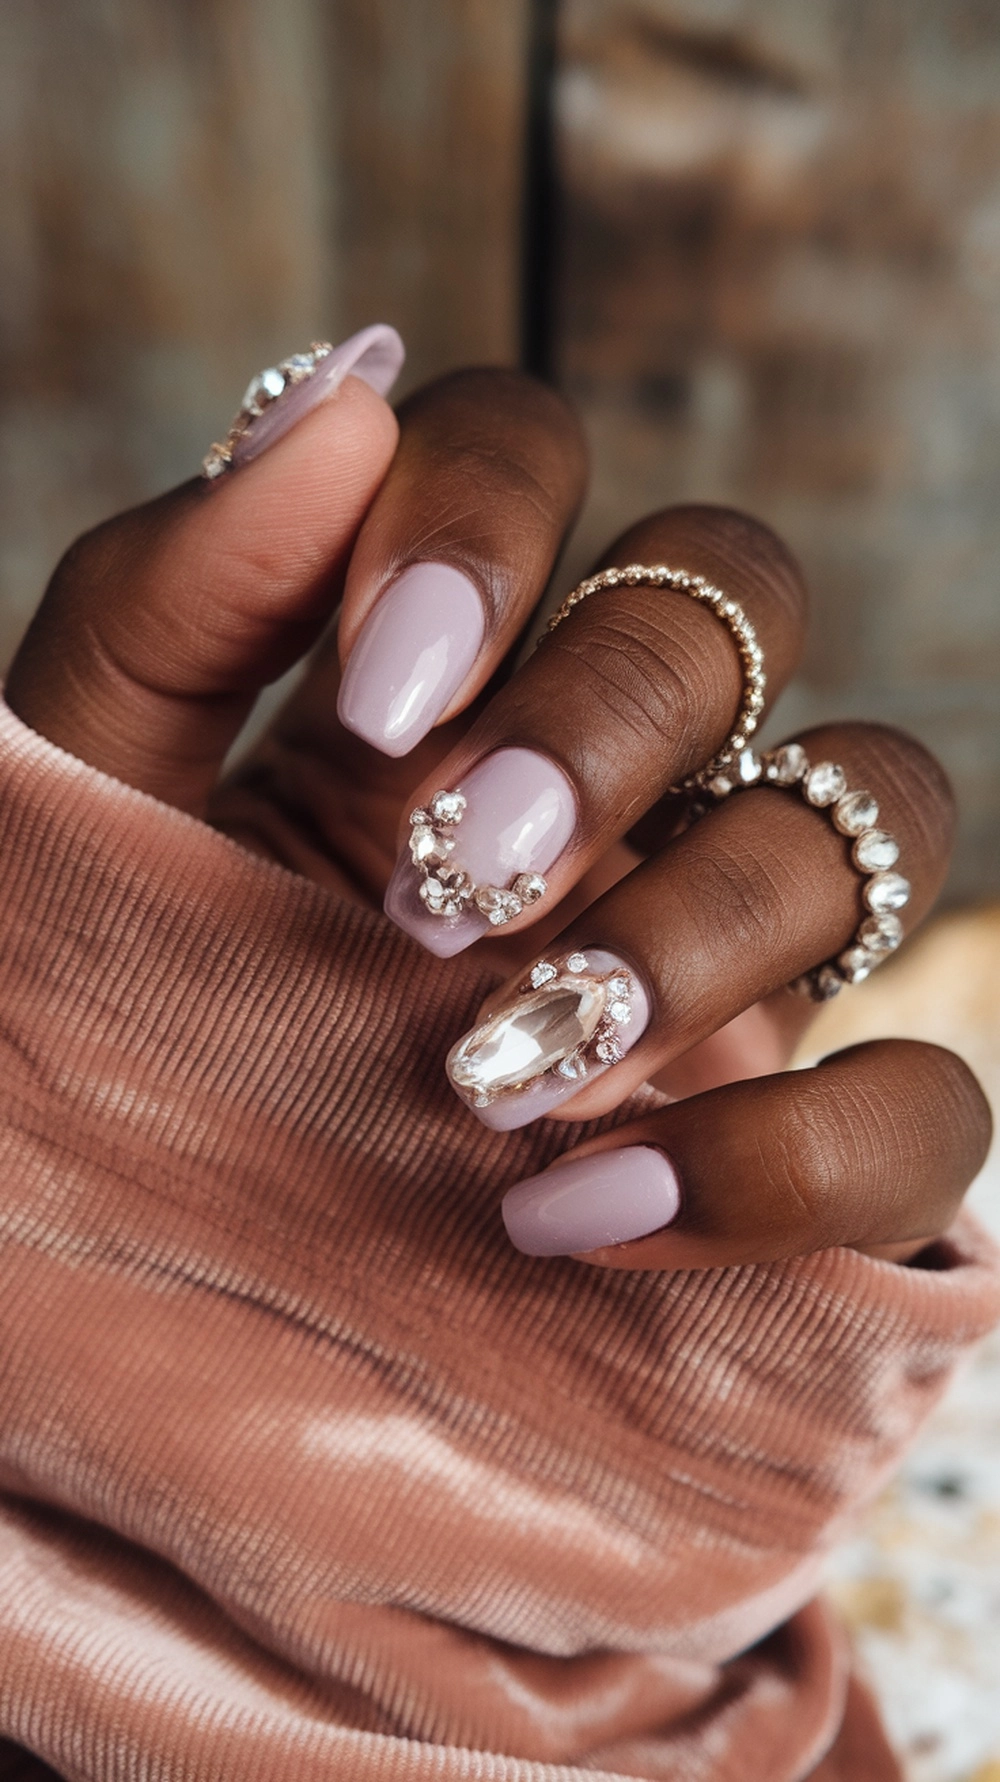
For me, the best part of boho style is expressing your unique spirit, and I think adding sparkling crystals and gemstones to your nails is the most magical way to do it! I’m so in love with this look.
The dreamy, soft lavender polish creates the perfect backdrop for the twinkling gems, adding a touch of glam that I find so chic and special.
Let me show you how to create this stunning look. Of course, I always start with a clean nail base and a protective base coat. Then, you’ll want to sweep on a gorgeous lavender polish. Once that’s dry, it’s my favorite part: the sparkle!
You can carefully place your crystals and gemstones using a bit of nail glue. This is where your personality really gets to shine. I suggest you create a design that speaks to you, whether a simple, elegant cluster or your own little constellation.
Now, we have to protect your beautiful treasures! My go-to trick is to seal everything with a top coat. If you want a really durable finish, especially for your summer nails, let me tell you, a gel top coat is my secret weapon. It gives your nails that extra strength.
I also suggest you be gentle with your hands to prevent the gems from snagging. With just a little care, your boho manicure will stay looking absolutely fabulous!
Rainbow Stripes with Bohemian Charm
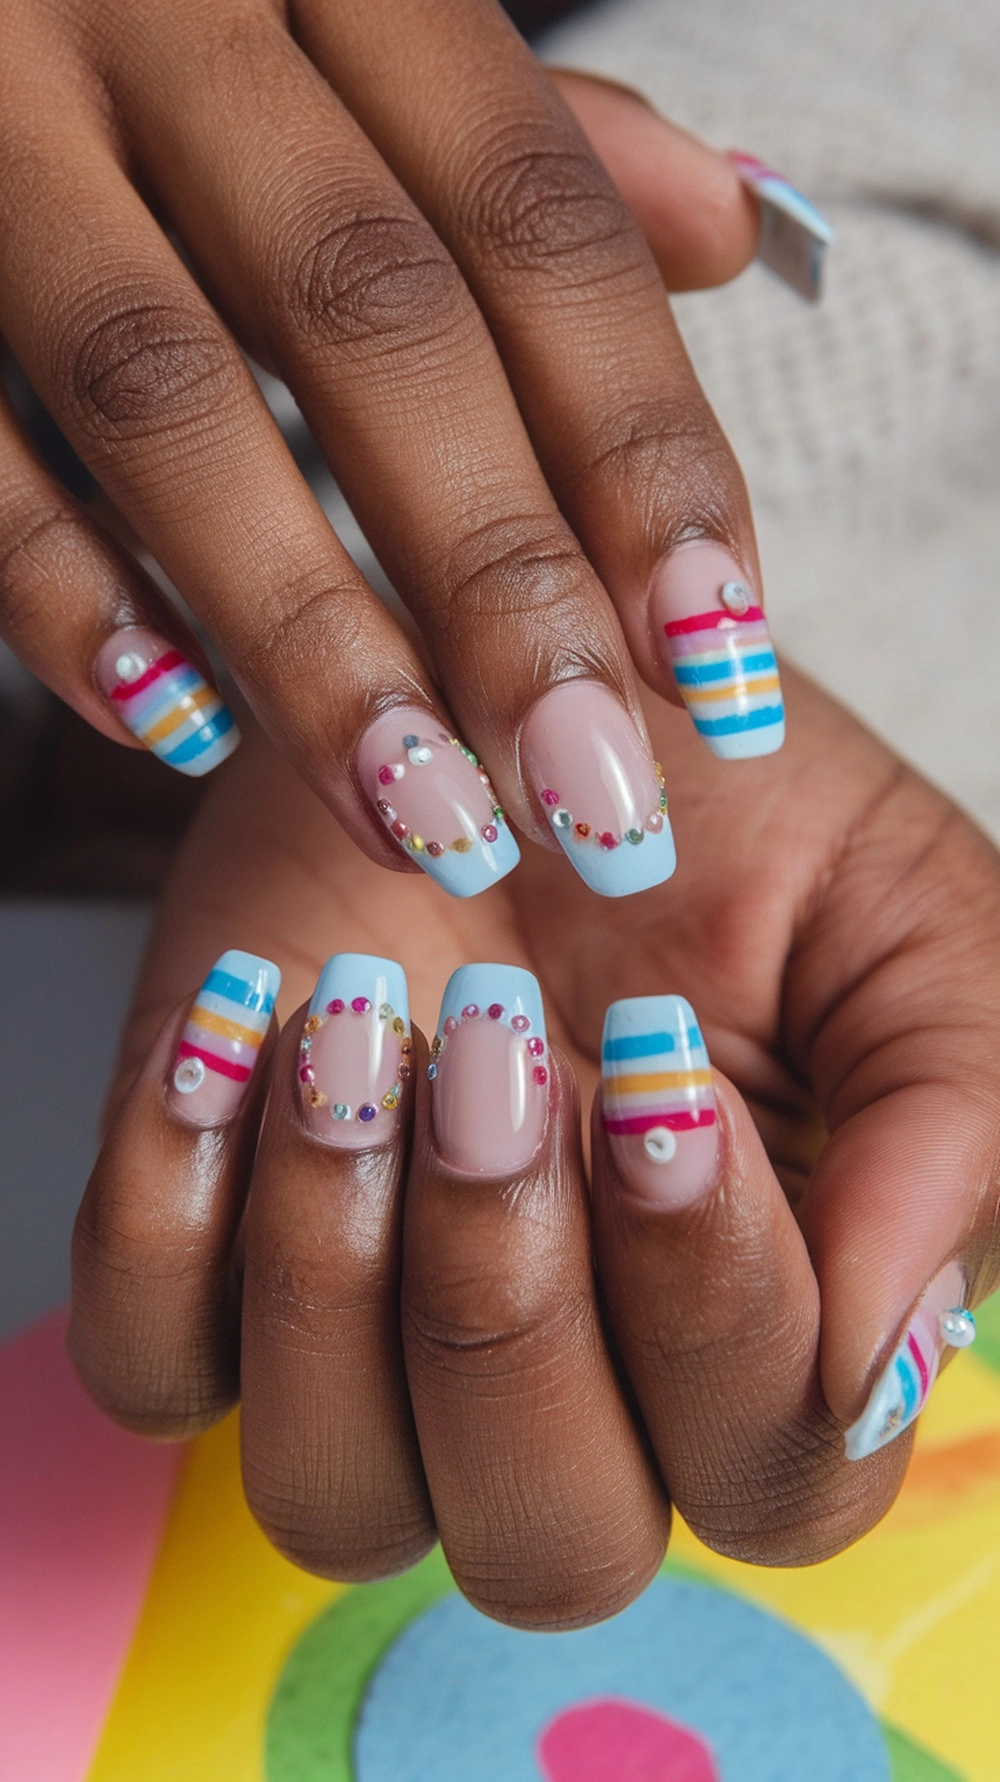
When I’m in the mood for something super cheerful that screams ‘good vibes,’ I always turn to rainbow stripes for my boho nails! This look is pure, playful fun, and it’s absolutely perfect for summer.
I love starting with a clear-sky blue base and then layering on all those bright, happy colors. It’s a design that makes you smile.
Let me show you how I create this little burst of happiness—it’s so easy! After I’ve applied my base coat, I’ll have you paint on a beautiful light blue polish as your background.
Let that dry completely. Now, let’s play with color! Using a thin brush, you can paint on your rainbow stripes. I like to mix up the widths for a really unique look.
My favorite part is that your stripes don’t have to be perfect; that’s part of the free-spirited charm! Adding a few tiny dots or gems can elevate the design, like I do, if you want a little extra sparkle.
To keep your rainbow shining bright, I have a few simple tips. My trick is to add a fresh layer of top coat every couple of days, keeping these colors super vibrant.
And trust me, your manicure will thank you if you wear gloves when you’re doing chores. You and I can keep our nails looking cheerful and fabulous with just a little care!
Minimalist Moon and Star Designs
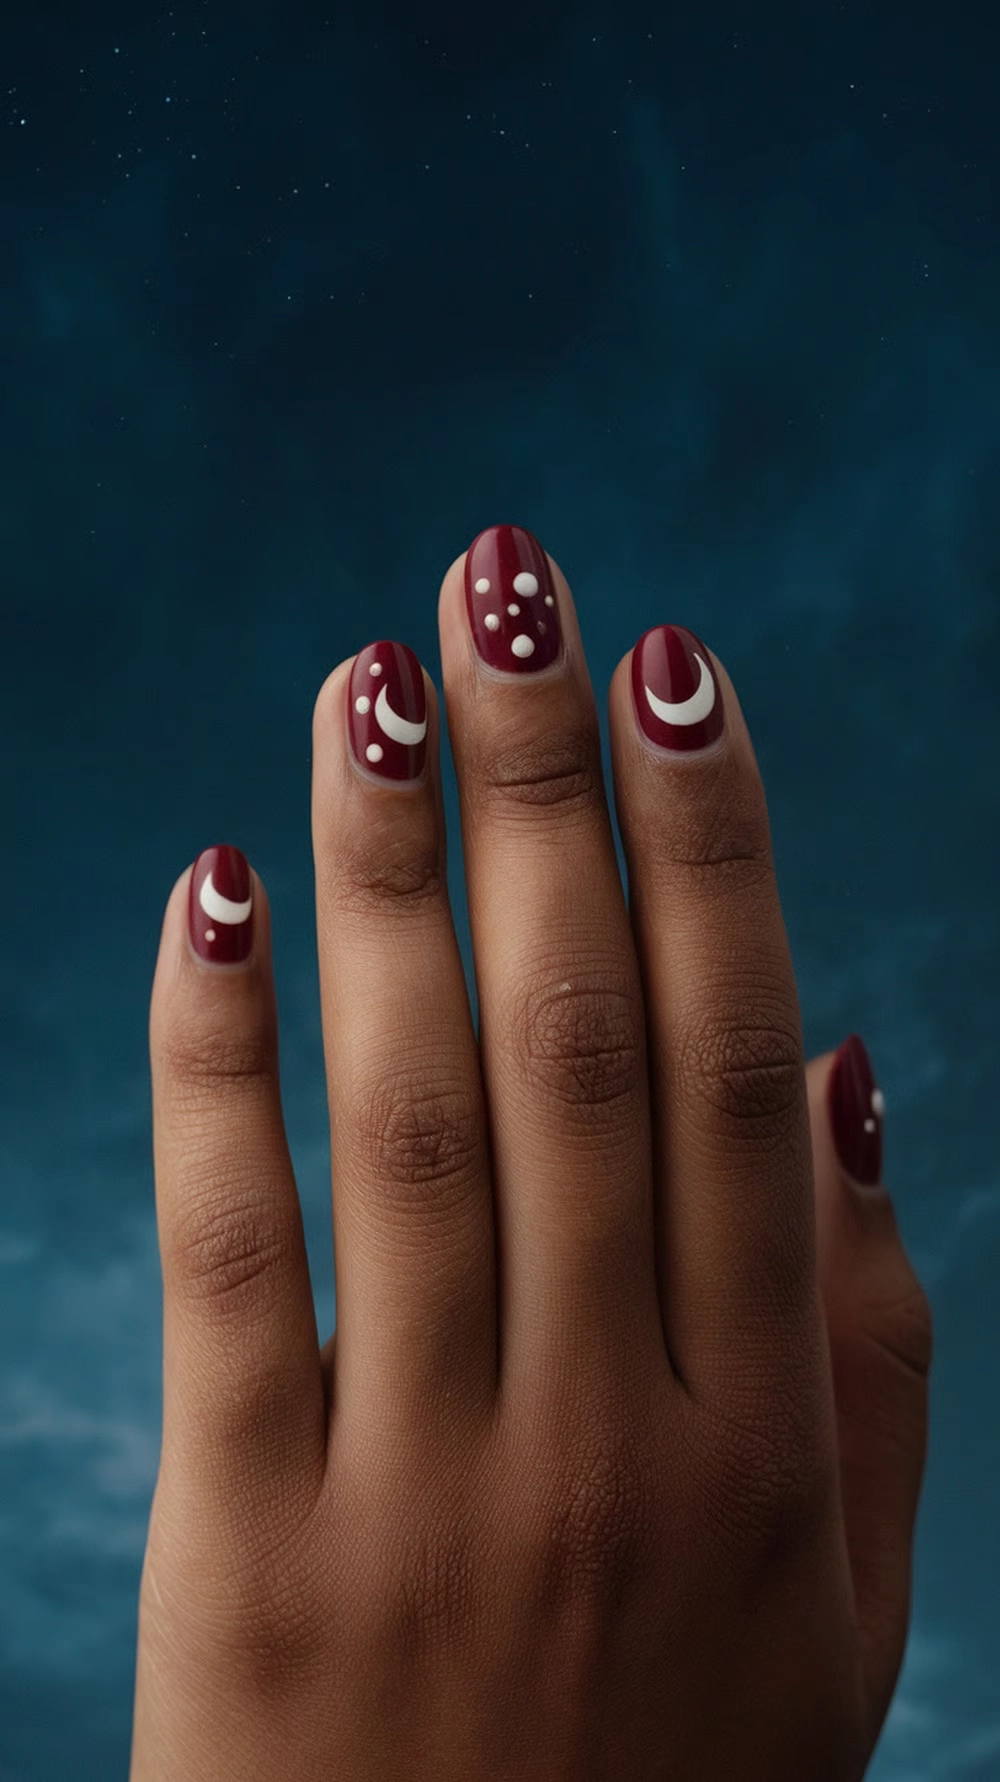
I’ve always been a stargazer, so I love bringing a little piece of the magical night sky to my nails with these minimalist moon and star designs. There’s something so calming about them.
The deep, rich brown base I used here reminds me of a cozy late-night sky, and it makes the delicate white moons and stars pop so beautifully. I turn to this look when I want a touch of boho chic magic.
Let me show you how you can create your own little celestial scene. I always start with a base coat to protect my nails. Then, you’ll want to paint on a gorgeous, rich brown polish.
Once that’s dry, we can add the magic. Using a fine brush or a nail art pen, you can carefully paint delicate crescent moons and tiny, twinkling stars.
My favorite part is that you can place them however you like; I love creating a different little galaxy on each nail. This look is versatile; I’ve worn it on both square and stiletto shapes, and it’s always stunning.
I have a few tips for keeping your night sky sparkling. My secret to making this design last is a really good, glossy top coat. Trust me, it makes the little stars pop even more!
And if you ever want to switch it up, I sometimes add a tiny dot of pastel blue to my stars for a little extra twinkle. It’s a fun way to make the look entirely your own!
Bohemian Tribal Prints
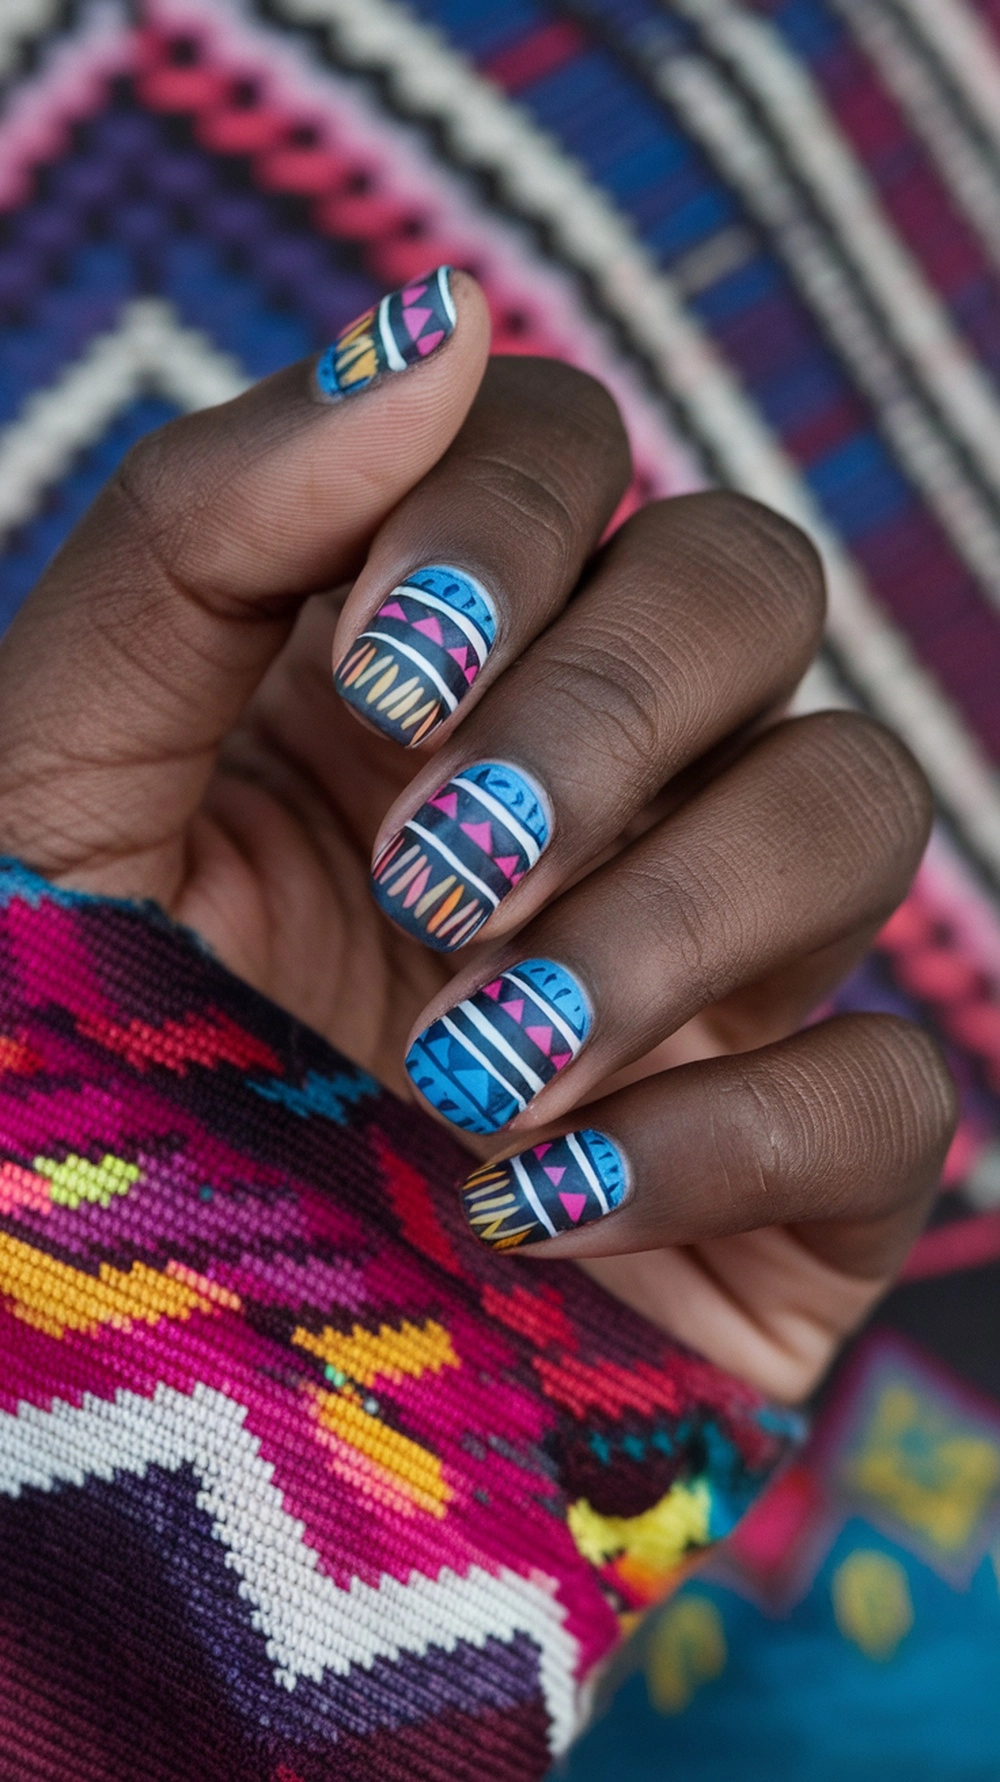
If you’re like me and love a bold, artistic, and full-of-personality nail design, you will adore these bohemian tribal prints.
I’m obsessed with how vibrant colors and intricate patterns combine to create an eye-catching and playful look. It’s all about mixing earthy tones with unexpected pops of color to capture that free-spirited, boho chic essence.
Let me show you how I bring this look to life, and how you can. I always start with a solid base coat. Then, you’ll want to choose a color palette that speaks to you—I’m drawn to nature-inspired blues, greens, and browns.
This is where your inner artist gets to play! Using a thin brush, you can create tribal patterns like bold zigzags and tiny dots. My biggest advice? Don’t be afraid to mix and match colors and patterns. You can make a unique, colorful nail effect that’s all your own.
Now, we need to protect your masterpiece! Let me tell you, a glossy top coat is the most critical step for me to ensure the longevity of my design.
These intricate designs look especially sharp and last long on bohemian acrylic nails. Daily cuticle oil will keep your whole look fresh and polished. I know you’ll have so much fun wearing this style!
And that’s it! We’ve looked at so many fun boho nail ideas, and I hope you found a style you love.
The most important thing I want you to remember is that boho nails are all about being yourself. Whether you like soft, earthy colors or bright, happy rainbows doesn’t matter.
You can paint tiny patterns, add sparkly gems, or play with color. Just pick whatever makes you happy!
Don’t worry about making your nails look perfect. The best part is having fun and creating something that shows off your unique style.
So go ahead and give one a try. I know you’ll create something beautiful. Happy painting!

