This post may contain affiliate links, which means I may receive a small commission should you decide to click that link and make a purchase. For more information please refer to the Terms & Conditions.
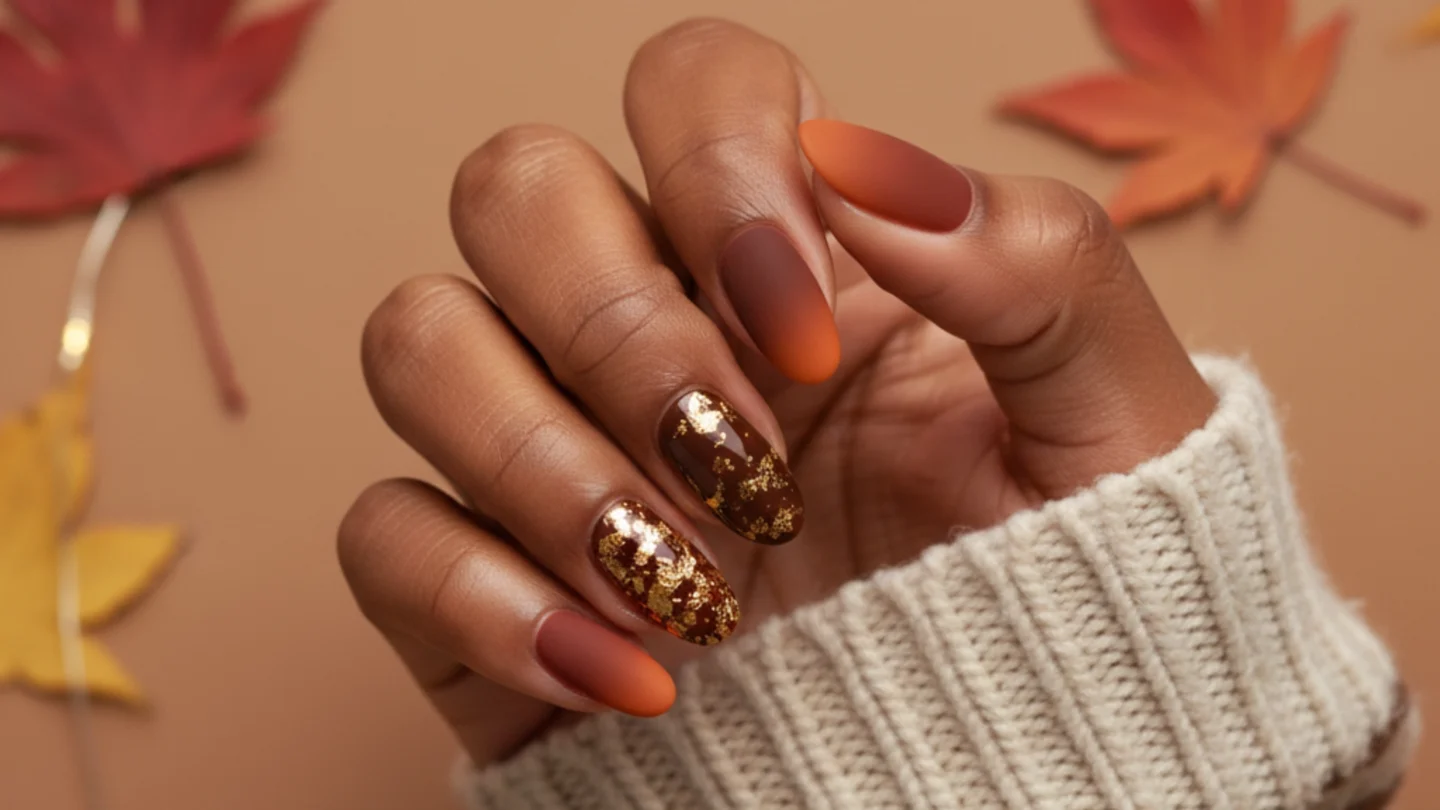
Isn’t it amazing how a new manicure can completely change your mood? Getting my nails done for fall is the ultimate way to welcome the season. It makes me feel ready for pumpkin patches and curling up with a good book.
I’ve been obsessing over all the warm, rich colors and creative designs this year. I used to stick to a simple dark polish, but I’m ready for a change. I want to try something that really captures the cozy autumn vibe.
I’ve found so many inspiring looks that I just had to share them. If you’re looking for stunning fall nail ideas, you’re in the right place. Let’s find the perfect design to get us ready for this cozy season!
Amazing Fall Nail Ideas for This Season
Ready to turn your nails into tiny works of art this fall? I’m here to show you that you don’t need to be a professional to get a stunning look. You can do it right at home with a little bit of patience.
I’ve gathered my absolute favorite fall nail ideas to share with you. Each one comes with a simple step-by-step guide to help you. Let’s have some fun and get creative!
Classic Pumpkin Spice Ombre
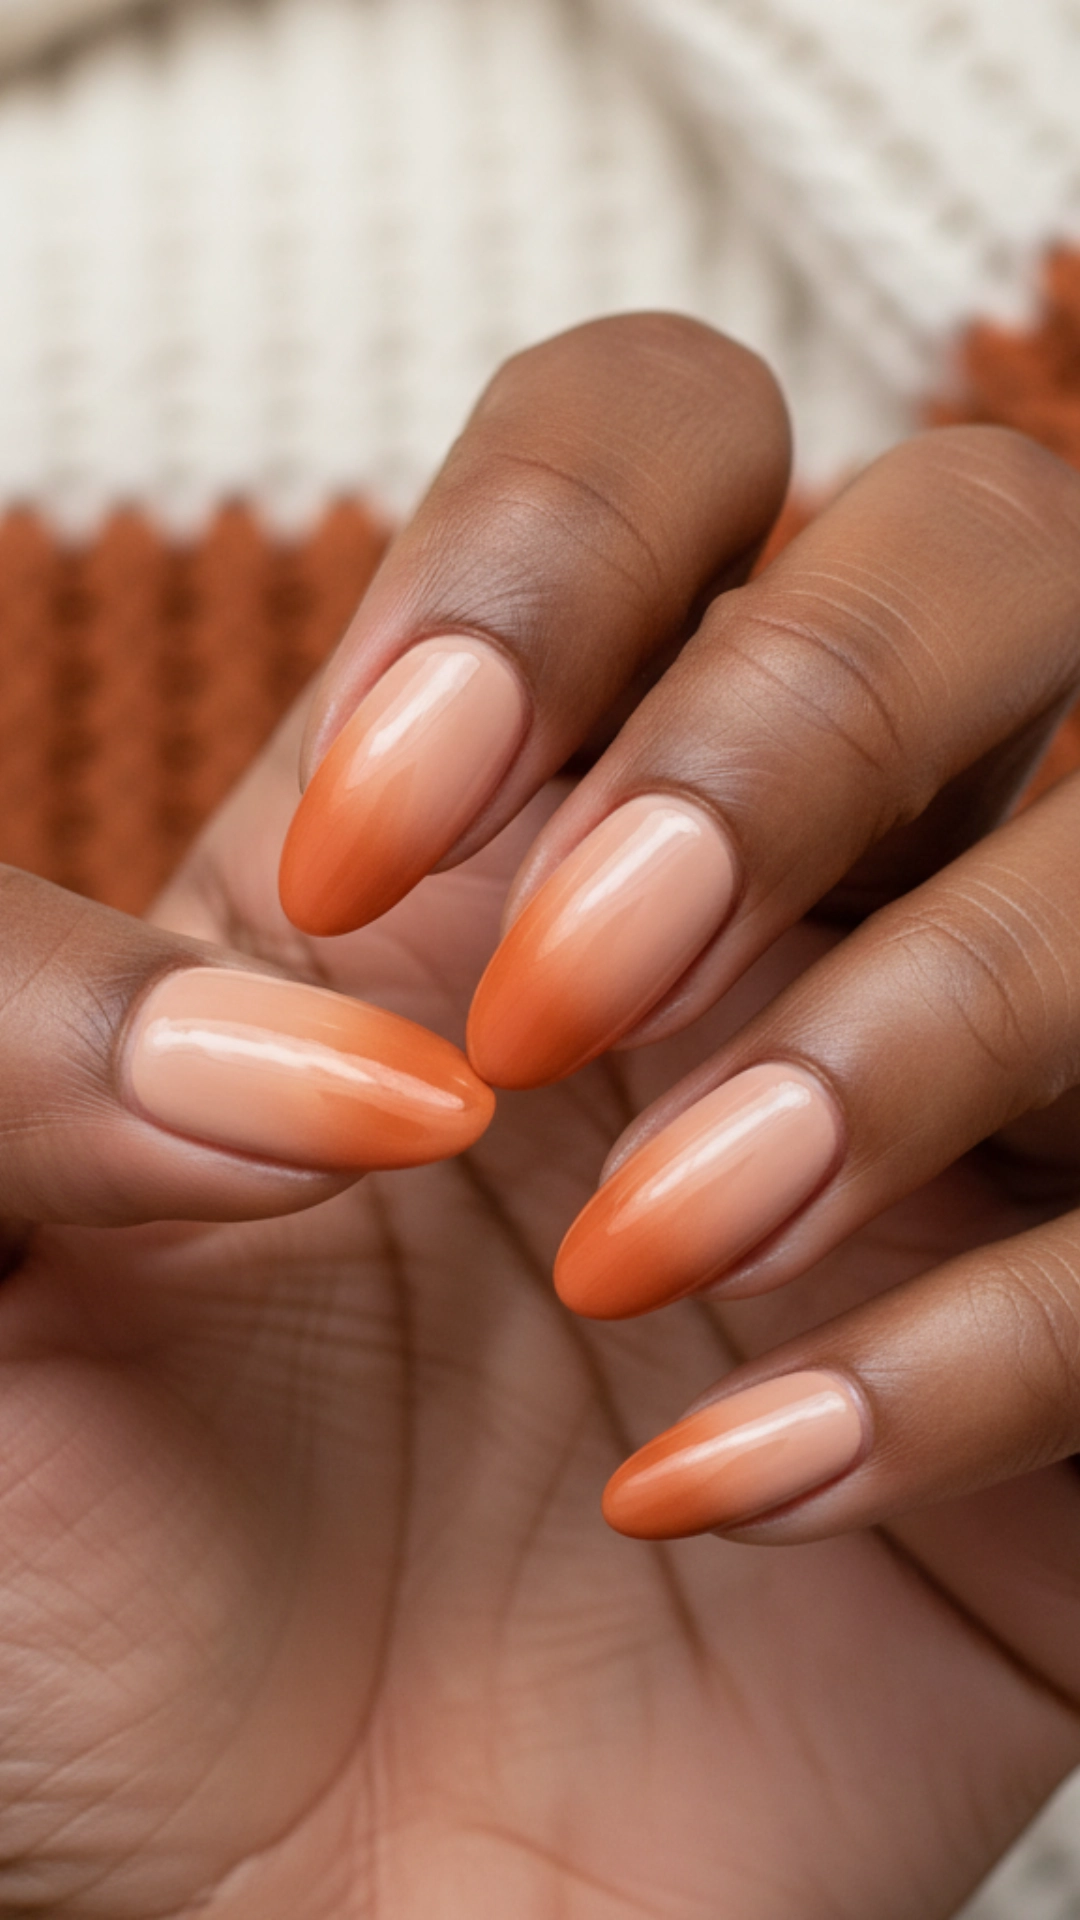
I’m obsessed with this look because it’s the perfect blend of trendy and classic. It beautifully captures the essence of a warm pumpkin spice latte with a smooth gradient effect from a creamy natural to a rich, burnt orange.
You’ll need: Neutral polish, burnt orange polish, a clear top coat, and a small makeup sponge.
Steps:
- Start by applying two coats of the nude polish as your base. Let it dry completely.
- On the makeup sponge, apply a stripe of the nude polish and a stripe of the burnt orange polish right next to each other.
- Gently dab the sponge onto your nail, moving it slightly up and down to blend the colors and create the ombre effect.
- Repeat the dabbing process until you are happy with the color intensity.
- Clean up any polish on the skin around your nail using a small brush dipped in nail polish remover.
- Finish with a glossy top coat to seal the design and make it shine.
Moody Matte Burgundy
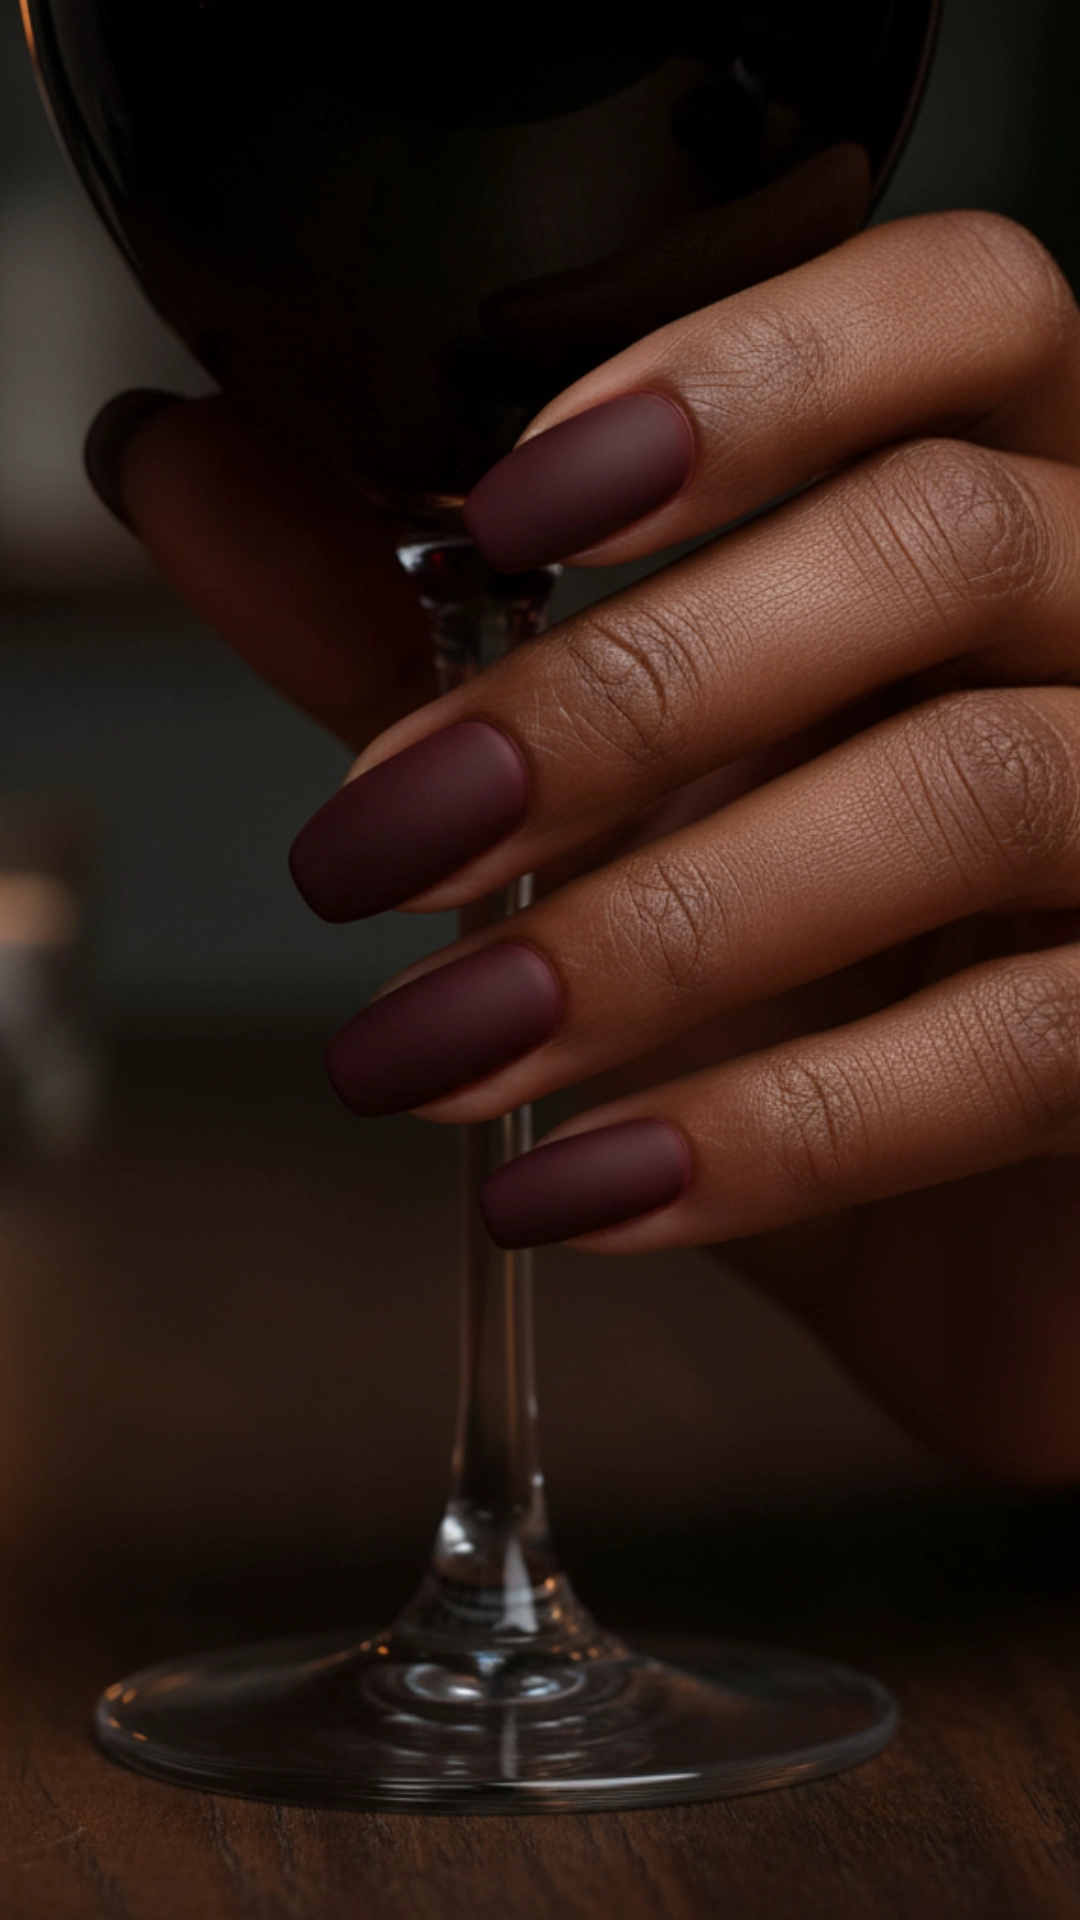
There’s something so sophisticated about a deep, matte color. This moody burgundy is robust and chic, perfect for a crisp autumn evening. I love how the matte finish gives it a modern, velvety texture.
You’ll need: A rich burgundy polish and a matte top coat.
Steps:
- Apply two thin coats of the burgundy polish, allowing each coat to dry thoroughly.
- Make sure the surface is smooth and free of any imperfections.
- Instead of your usual glossy top coat, apply one layer of the matte top coat.
- Watch as the polish transforms from shiny to a sophisticated, non-reflective matte finish.
Gilded Gold Leaf Accents
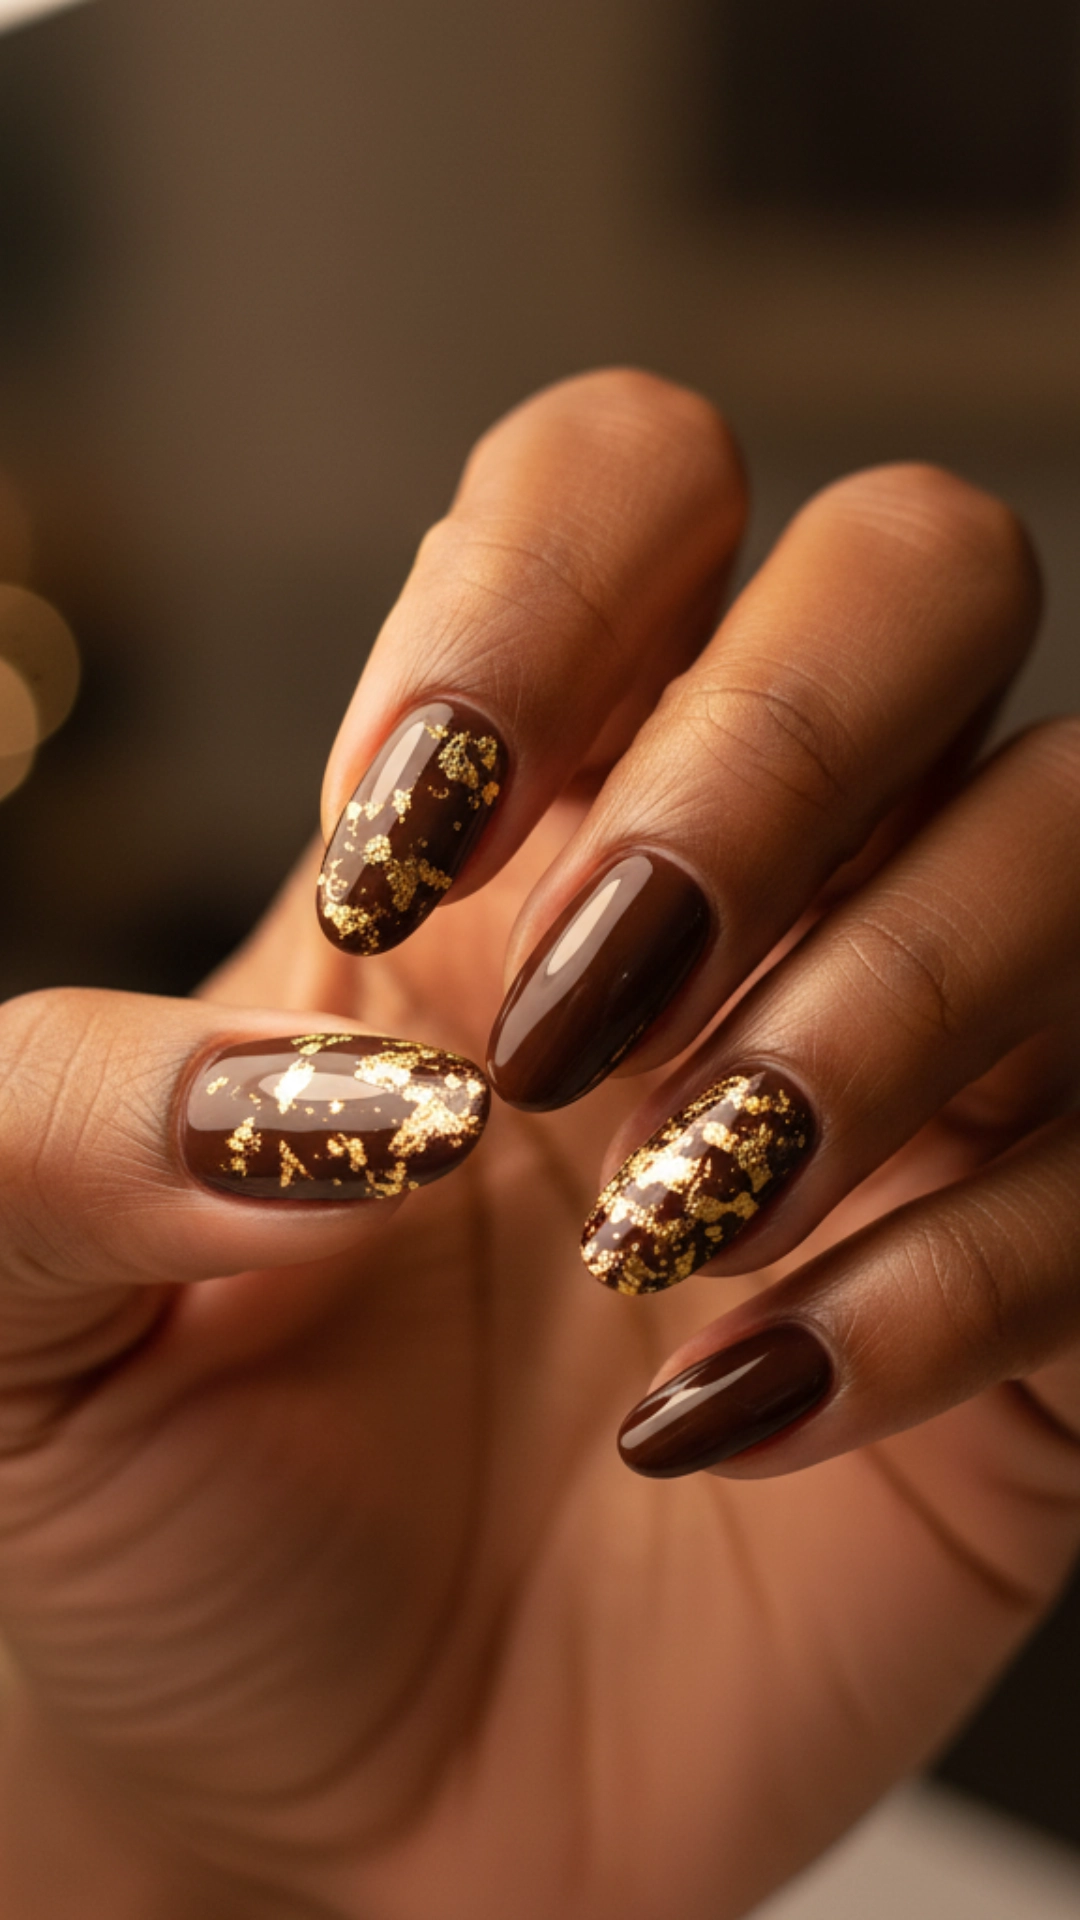
If you want to add a touch of luxury to your autumn manicure, this is it. I adore how delicate gold leaf flakes look scattered over a dark, earthy base color like deep brown or forest green. It’s pure elegance.
You’ll need: A dark base polish (like chocolate brown), gold leaf flakes, a clear top coat, and a pair of tweezers.
Steps:
- Paint your nails with two coats of your chosen dark base color.
- While the second coat is still slightly tacky, gently pick up small pieces of gold leaf with tweezers.
- Carefully place the gold leaf flakes in a random, scattered pattern on your nail. For a different effect, you can concentrate them near the cuticle or the tip.
- Gently press the flakes down to ensure they adhere to the polish.
- Once the base is dry, apply a generous layer of a clear top coat to smooth everything out and secure the gold leaf.
Cozy Sweater Knit Texture
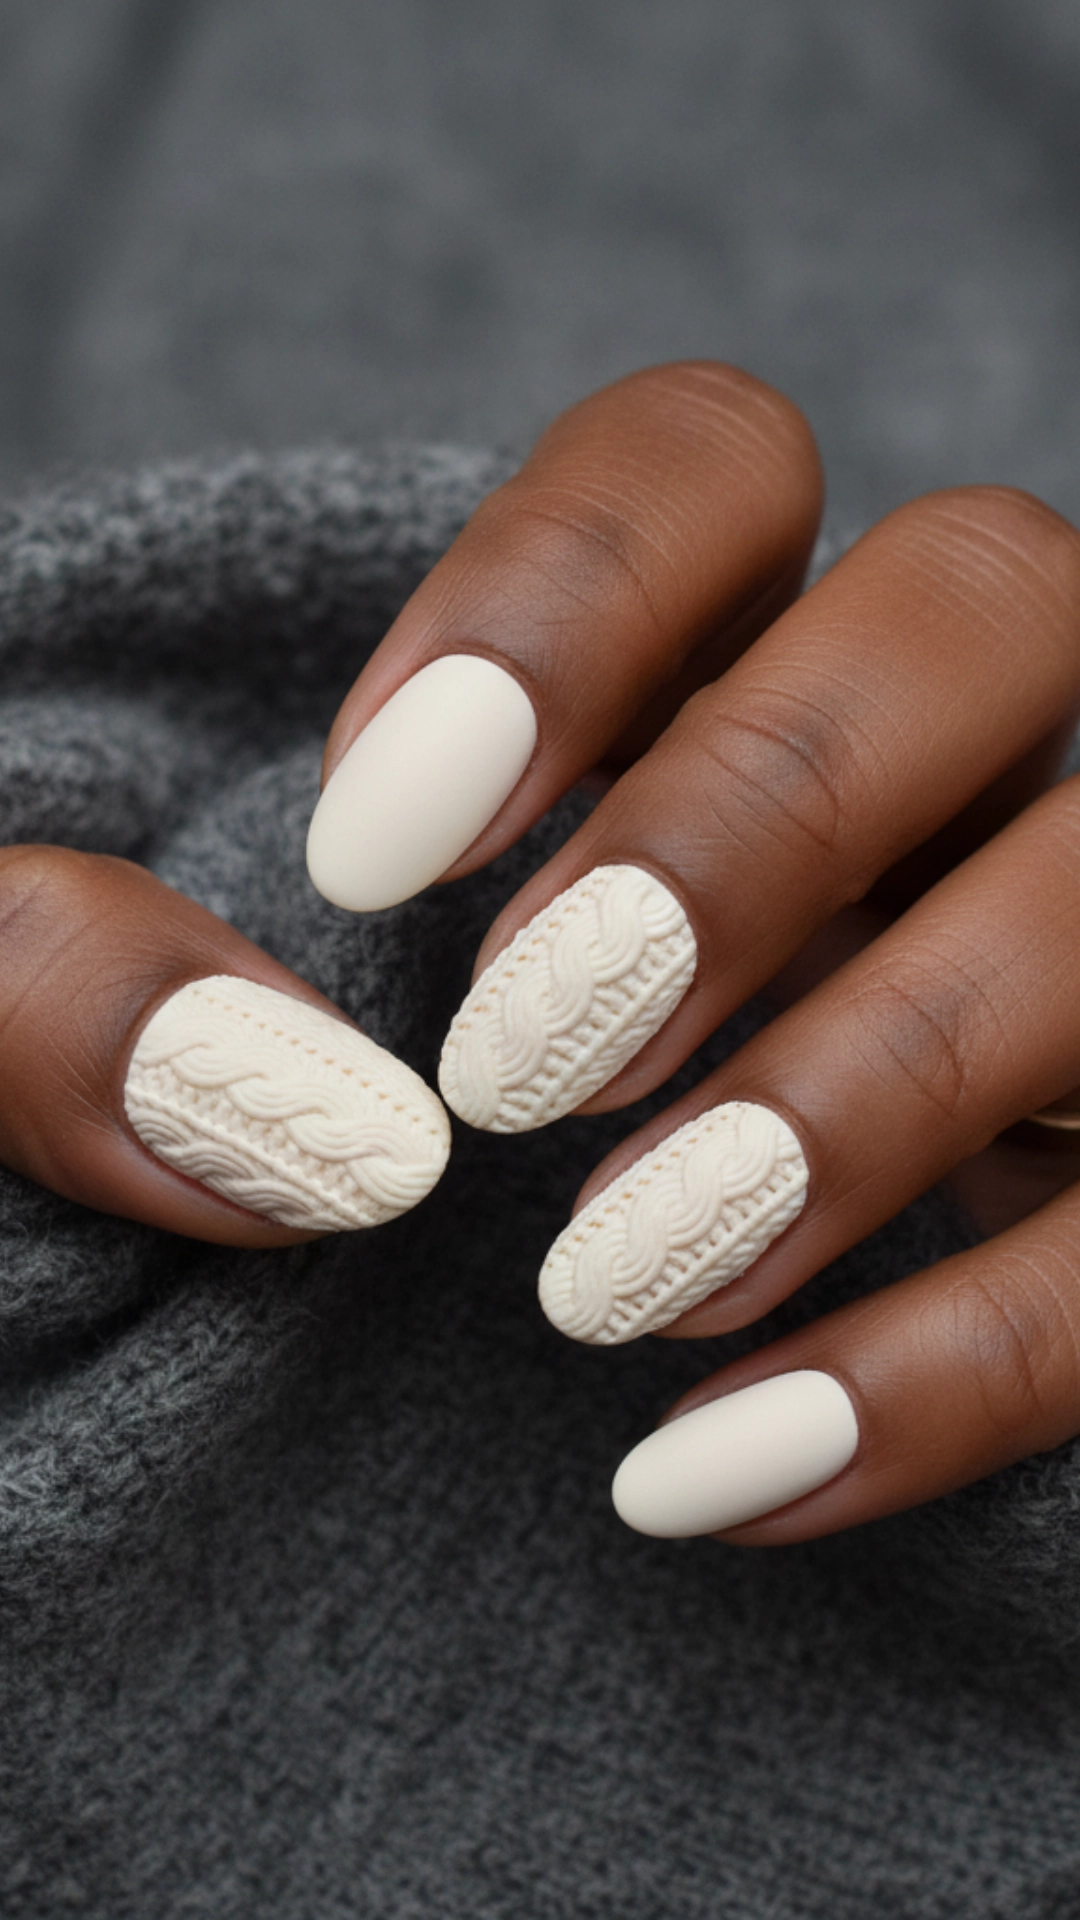
This design literally looks like your favorite cozy cable-knit sweater. It’s such a unique and fun way to embrace sweater weather, and it’s a 3D effect that is surprisingly easy to create.
You’ll need: A base color polish (like cream or gray), a gel polish in the same color, a thin nail art brush, and a UV/LED lamp if using gel. Alternatively, you can use 3D nail art gel.
Steps:
- Apply two coats of your regular base color and let it dry completely.
- Using the thin nail art brush and the matching gel polish, carefully paint sweater patterns (like cable knits or simple vertical lines) onto your nail.
- Build the pattern by reviewing it again to create a raised, 3D texture.
- Cure the gel polish under a UV/LED lamp according to the product’s instructions.
- Leave it as is for a glossy sweater look, or apply a matte top coat over the entire nail for a softer, more realistic fabric feel.
Tortoiseshell Tips
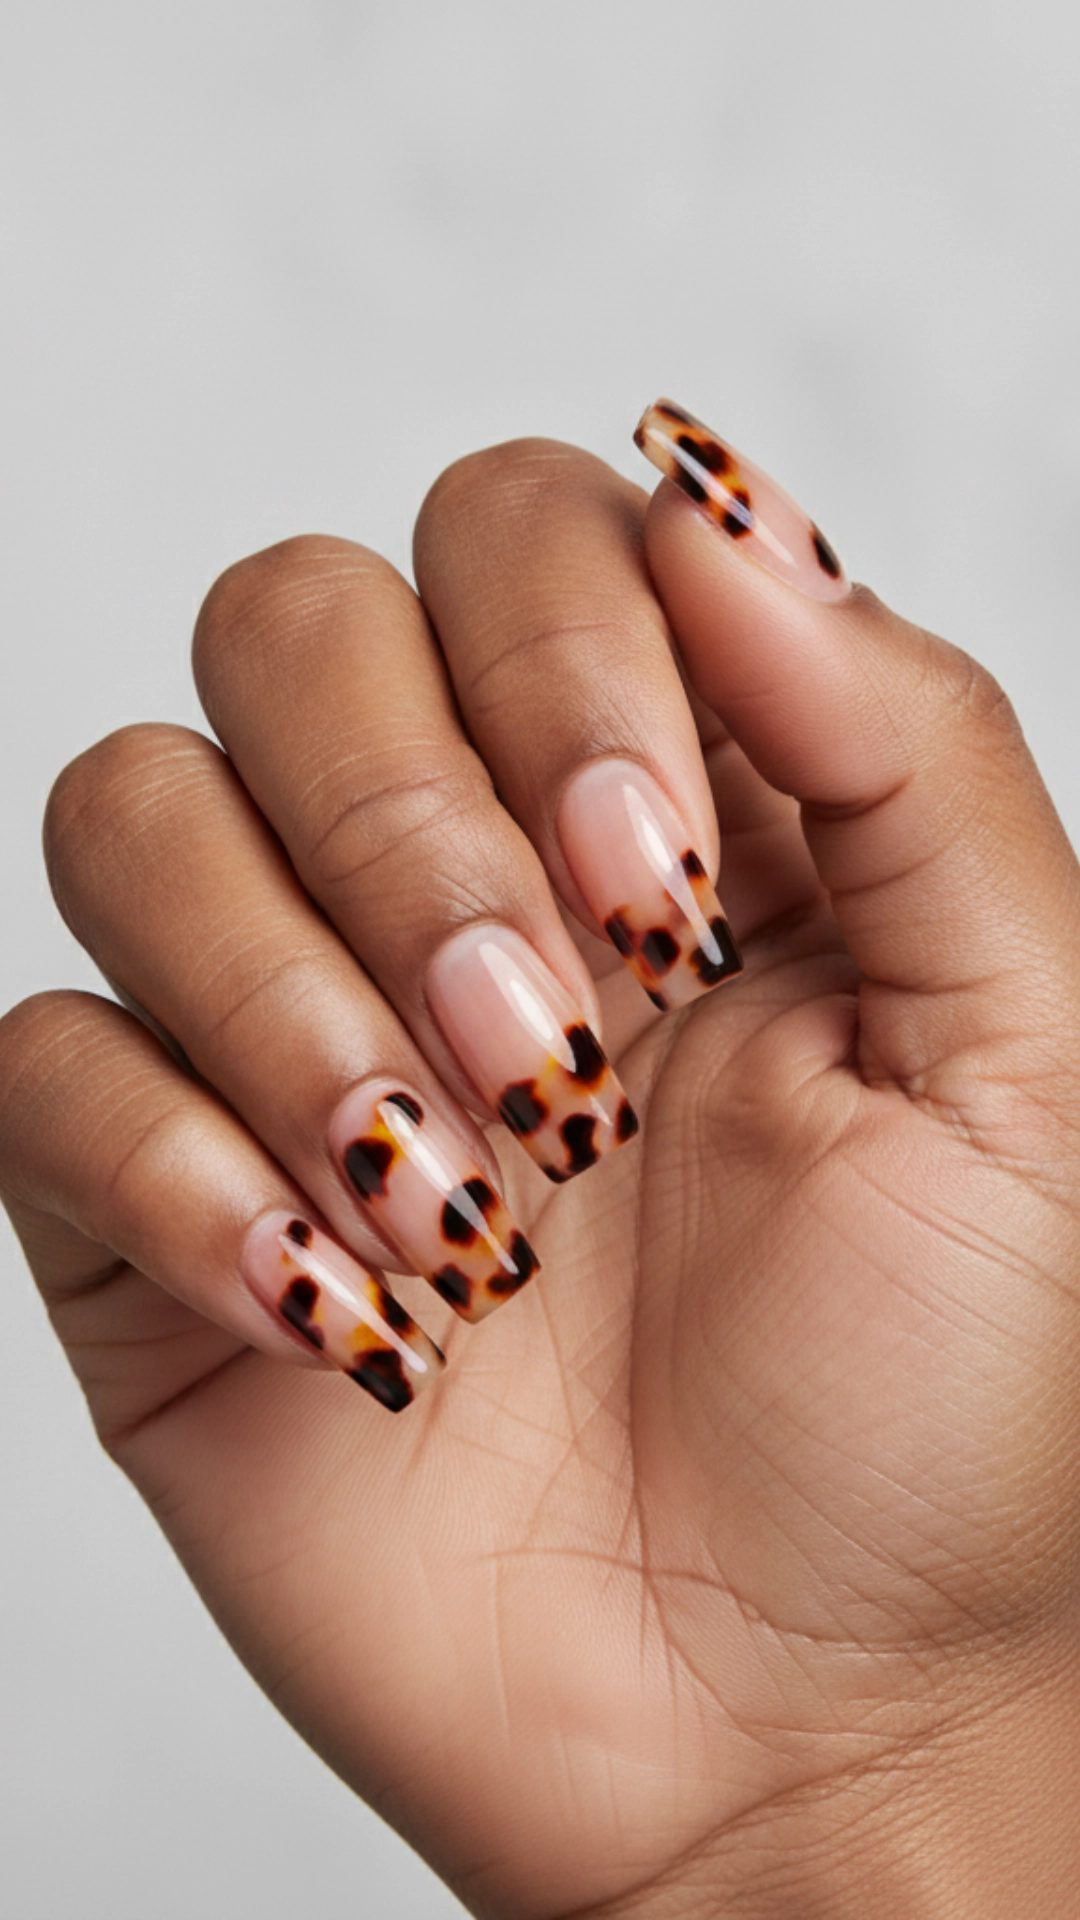
Tortoiseshell is a timeless pattern that I find captivating. Applying it to the tips instead of a whole nail gives you a modern and chic French manicure twist that is perfect for fall.
You’ll need: A sheer caramel or amber polish, a brown polish, a black polish, and a small detail brush.
Steps:
- Apply a coat of the sheer caramel polish over the entire nail, or just the tips if you prefer a negative space base.
- While the caramel coat is still wet, use the detail brush to add random splotches of the brown and black polish.
- Gently swirl the colors slightly with the brush to create that classic tortoiseshell depth. Don’t overmix!
- Apply another thin layer of sheer caramel polish to the top to blend the design and give it a glassy finish.
- Seal with a glossy top coat.
Deep Forest Green
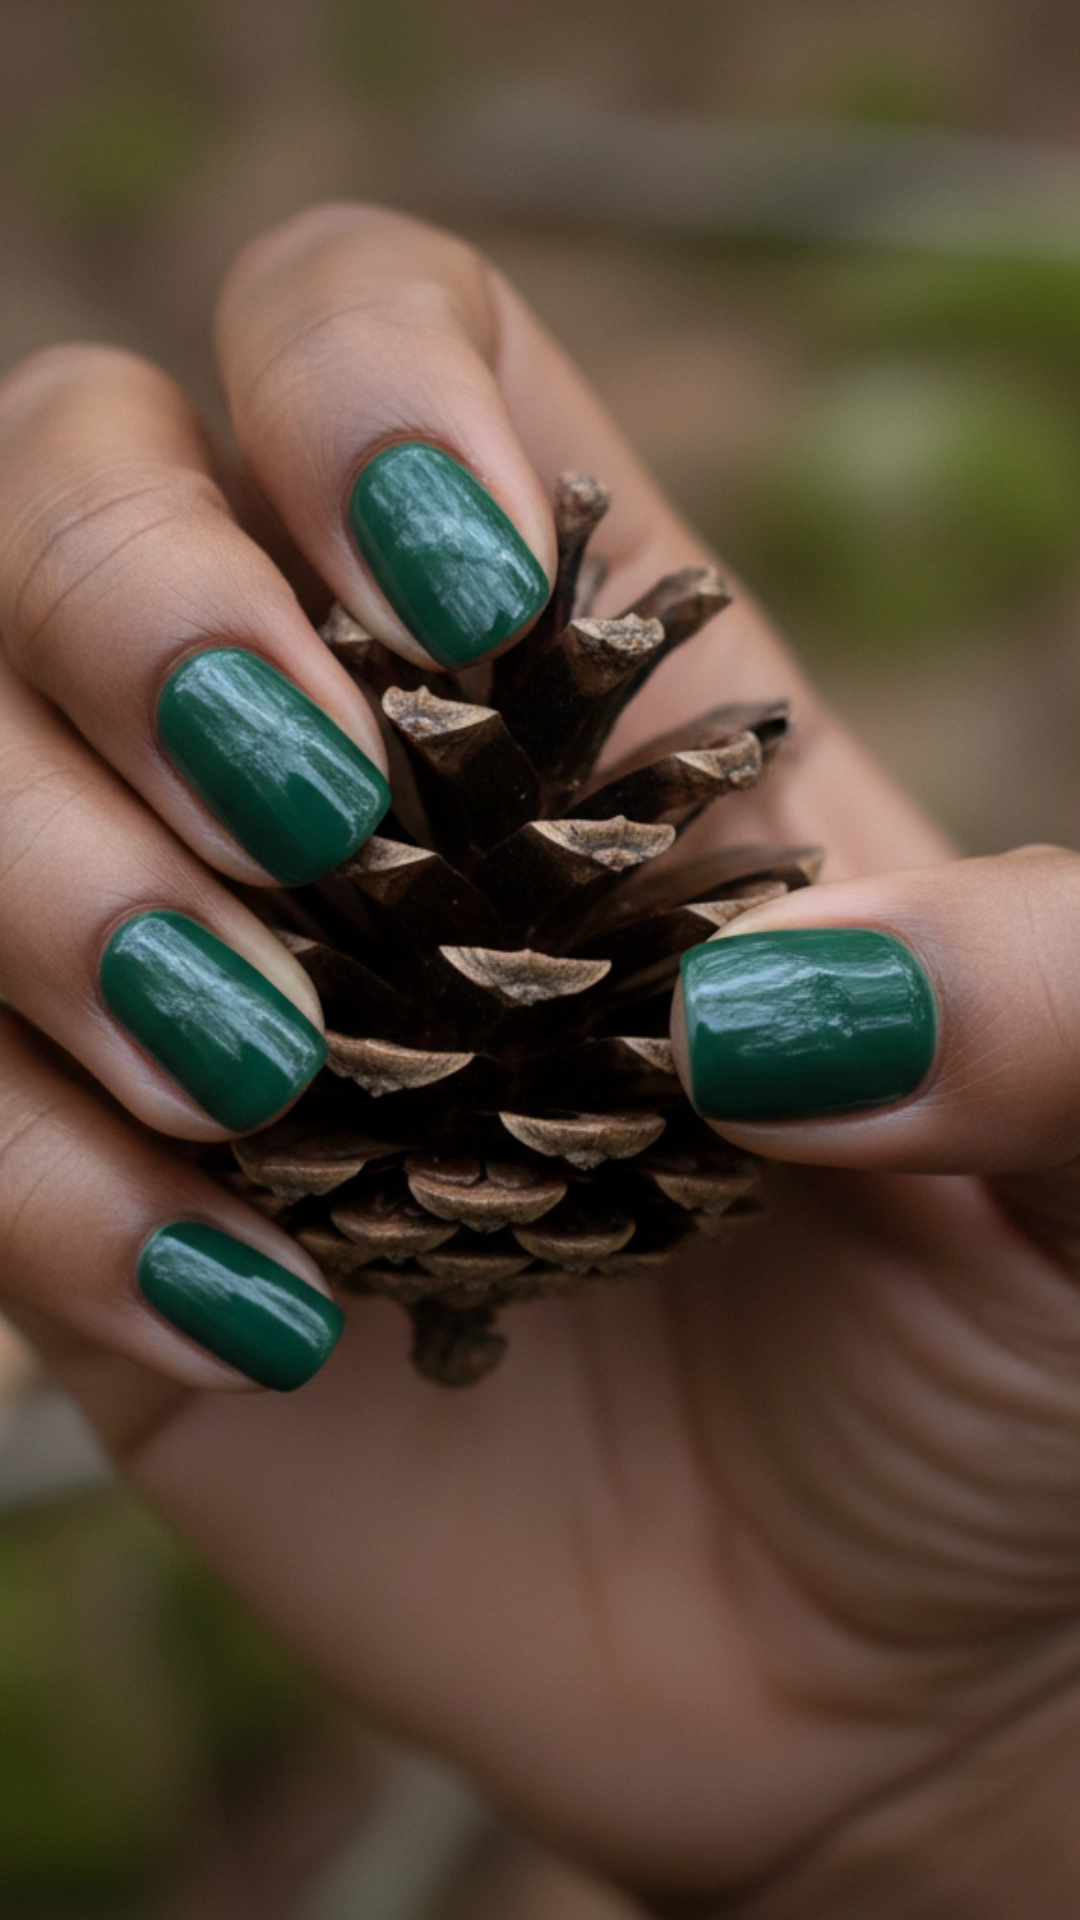
Sometimes, a simple, solid color is all you need to make a powerful statement. For fall, I’m in love with deep forest green. It’s rich and earthy and feels incredibly luxurious, especially with a high-gloss finish.
You’ll need: A high-quality, opaque forest green polish and a glossy top coat.
Steps:
- Ensure your nails are clean and properly shaped.
- Apply a base coat to protect your nails from staining.
- Carefully apply the first coat of forest green polish, getting as close to the cuticles as possible without touching them.
- Let it dry for a few minutes, then apply a second coat for full, even coverage.
- Finish with a super shiny top coat to give it that wet, glossy look.
Burnt Orange with a Glitter Accent
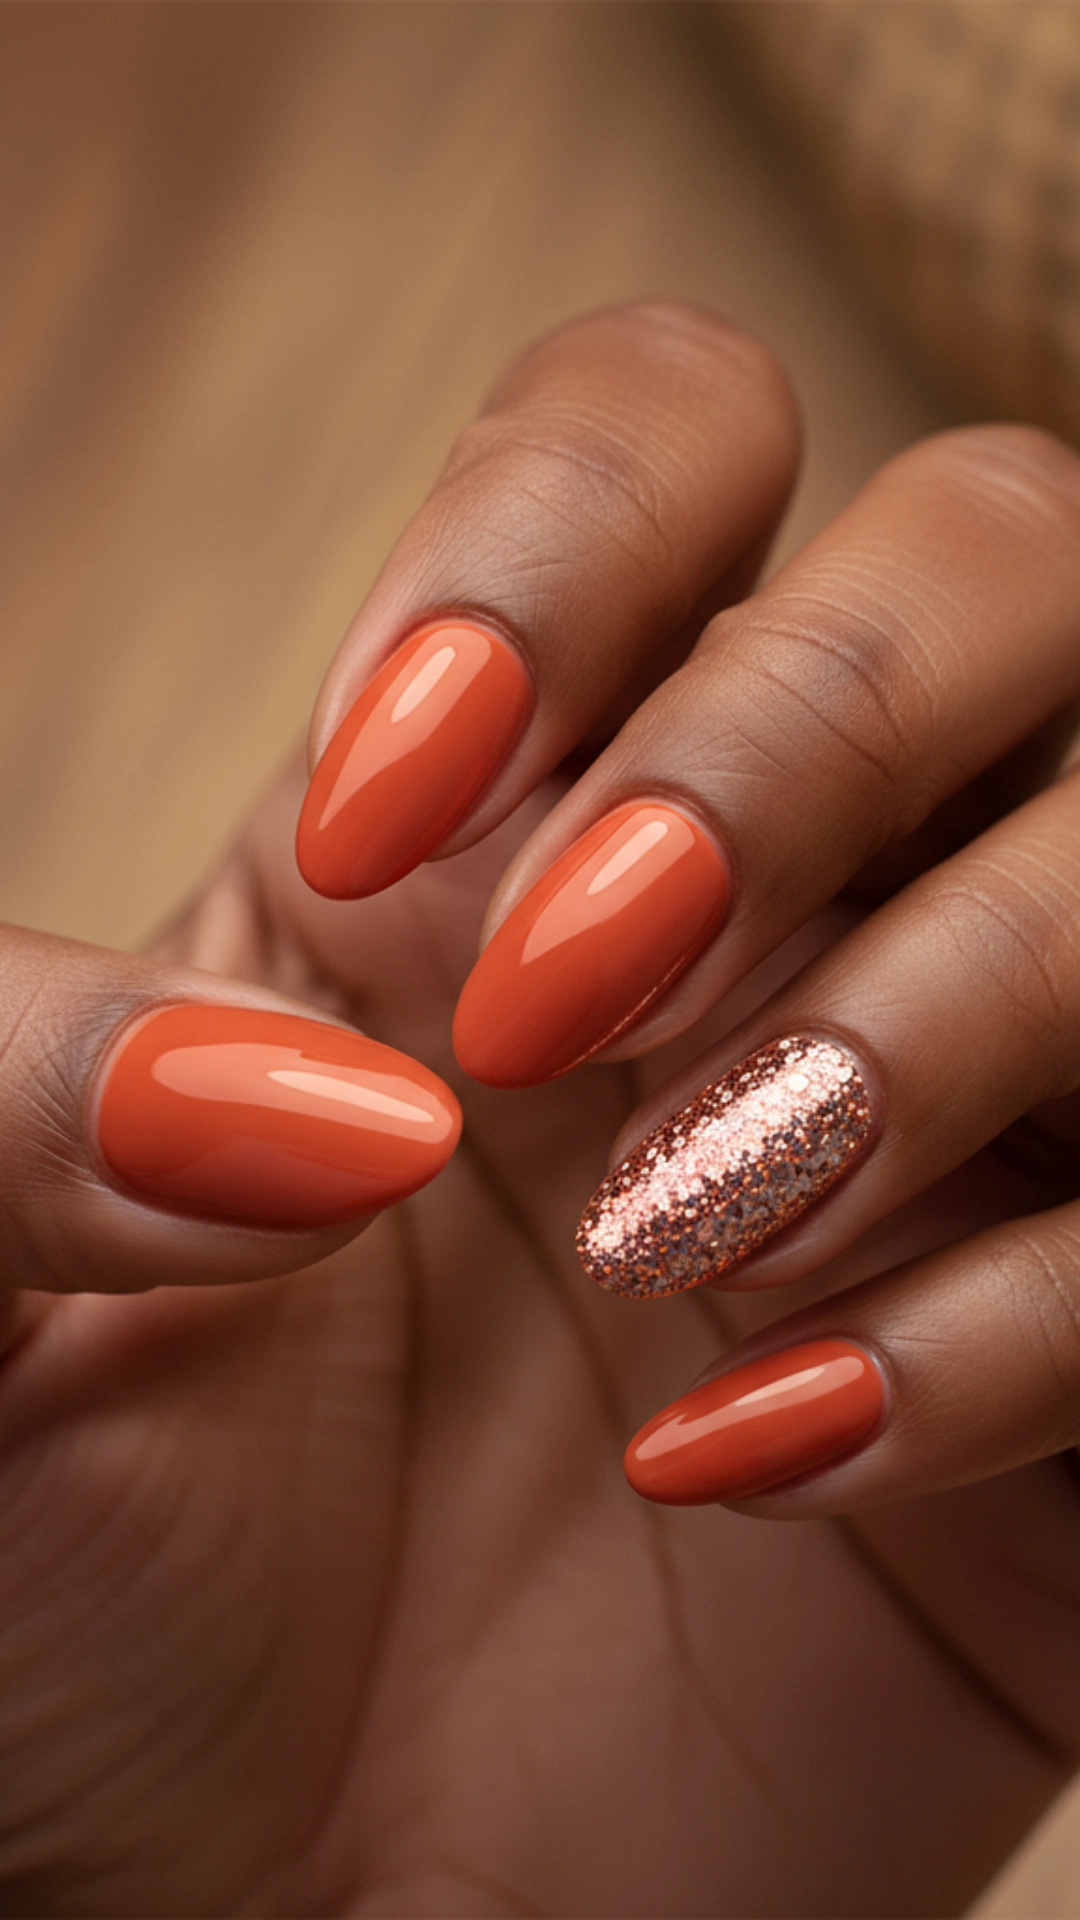
This is a classic fall look that I always come back to. A vibrant burnt orange polish on most nails, paired with a single, dazzling glitter accent nail, perfectly balances glamorous and straightforward.
You’ll need burnt orange polish, chunky gold or copper glitter polish, and a top coat.
Steps:
- Paint your thumb, index, middle, and pinky fingers with two coats of the burnt orange polish.
- Apply two or three coats of glitter polish on your ring finger until you achieve full, opaque coverage.
- For an extra smooth finish on the glitter nail, apply a special glitter-filling top coat first, then your regular top coat.
- Apply a top coat to all nails to seal the design and add shine.
Minimalist Autumn Dots
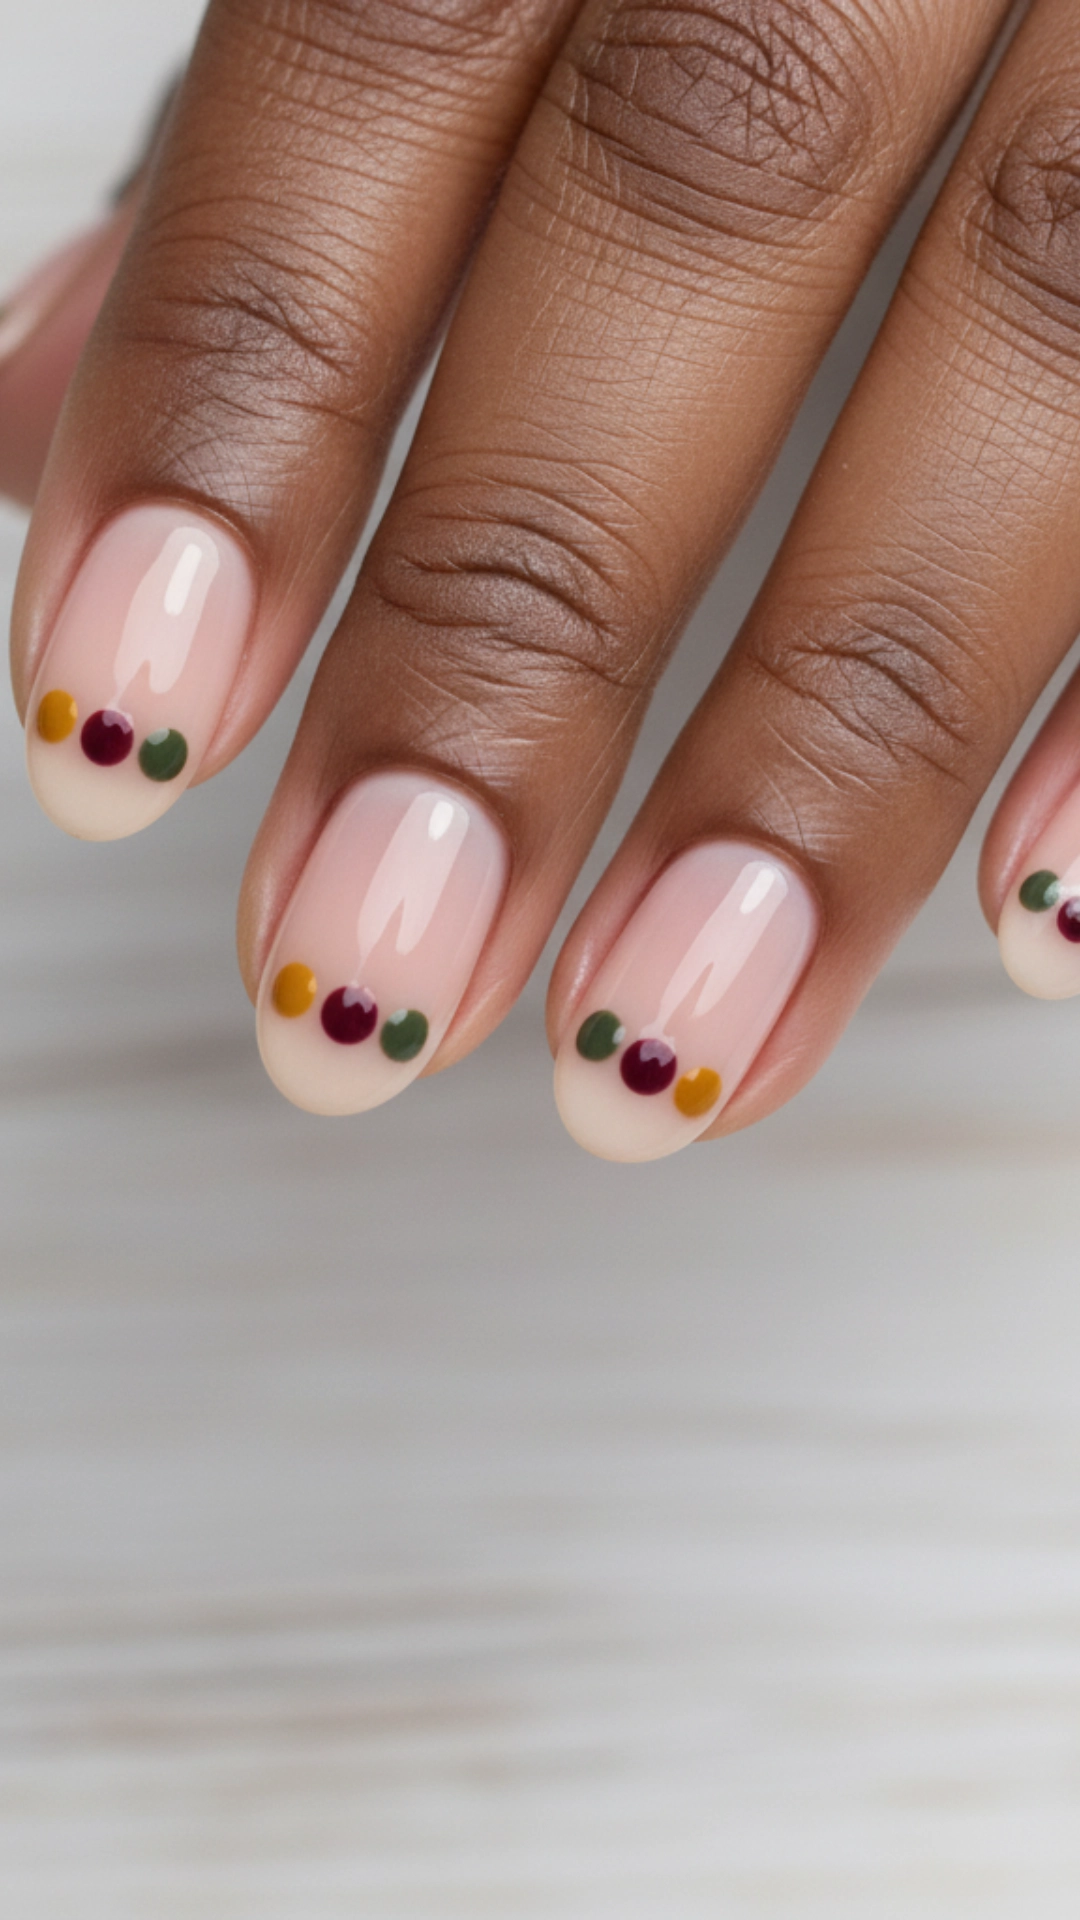
For those who prefer a more subtle design, this is perfect. I love the simplicity of a few carefully placed dots in autumnal colors over a clean, nude base. It’s modern, chic, and so easy to do.
You’ll need: A nude base polish, polishes in fall colors (like mustard, olive, and burgundy), a dotting tool or the end of a bobby pin.
Steps:
- Apply two coats of the nude polish and let it dry completely.
- Pour a small drop of each of your autumn-colored polishes onto a piece of paper or a palette.
- Dip your dotting tool into one color and place a few dots on each nail. You can create a pattern, like a small triangle of dots near the cuticle, or put them randomly.
- Clean the tool and repeat with the other colors.
- Seal the design with a glossy top coat.
Chocolate Brown Swirls
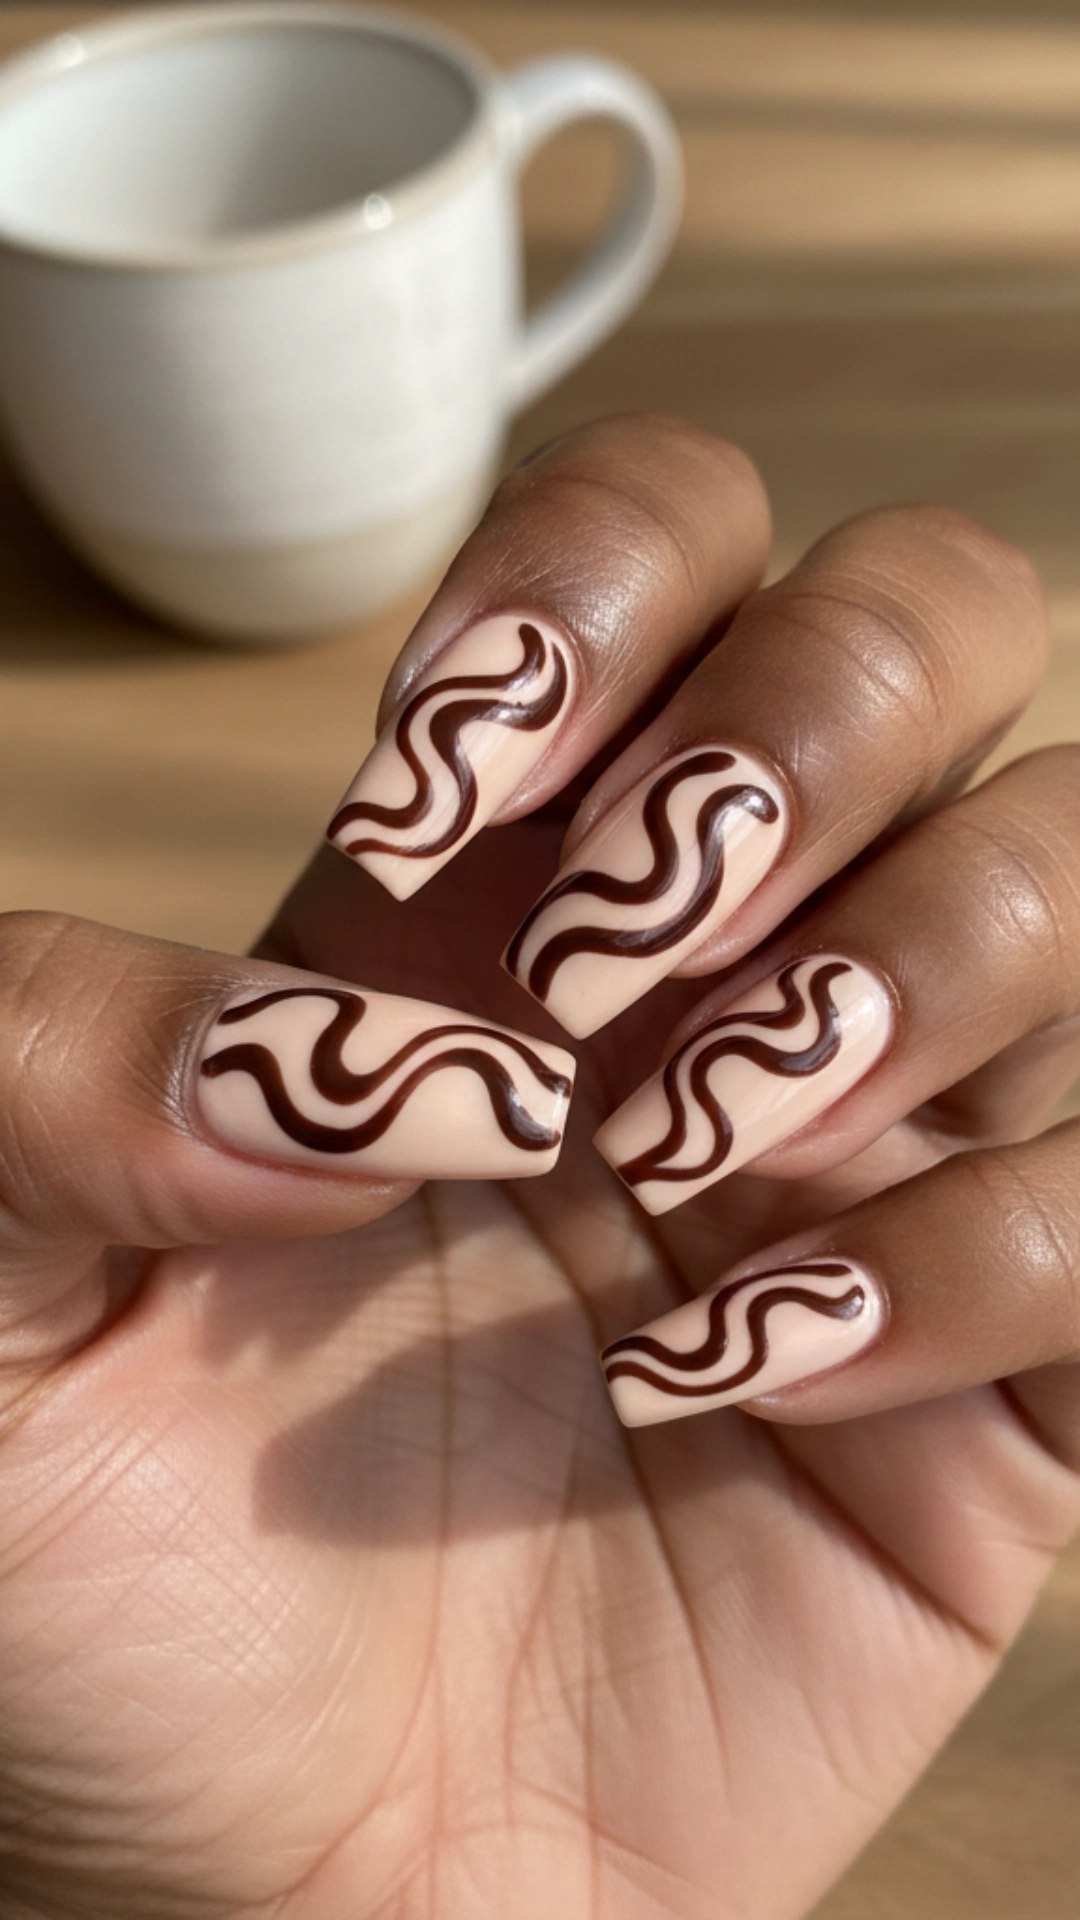
I’m obsessed with the retro swirl trend, and it looks even better with a fall color palette. Creamy swirls of chocolate brown and beige create a mesmerizing, latte-art effect on your nails.
You’ll need: A beige or nude base polish, a chocolate brown polish, and a thin nail art brush.
Steps:
- Apply two coats of your beige base polish and let it dry.
- Dip the thin brush into the chocolate brown polish and paint wavy, swirling lines across your nails.
- Vary the thickness of the lines for a more dynamic and organic look.
- For more dimension, you can add swirls of another color, like a lighter caramel.
- Finish with a glossy top coat.
Plaid Perfection
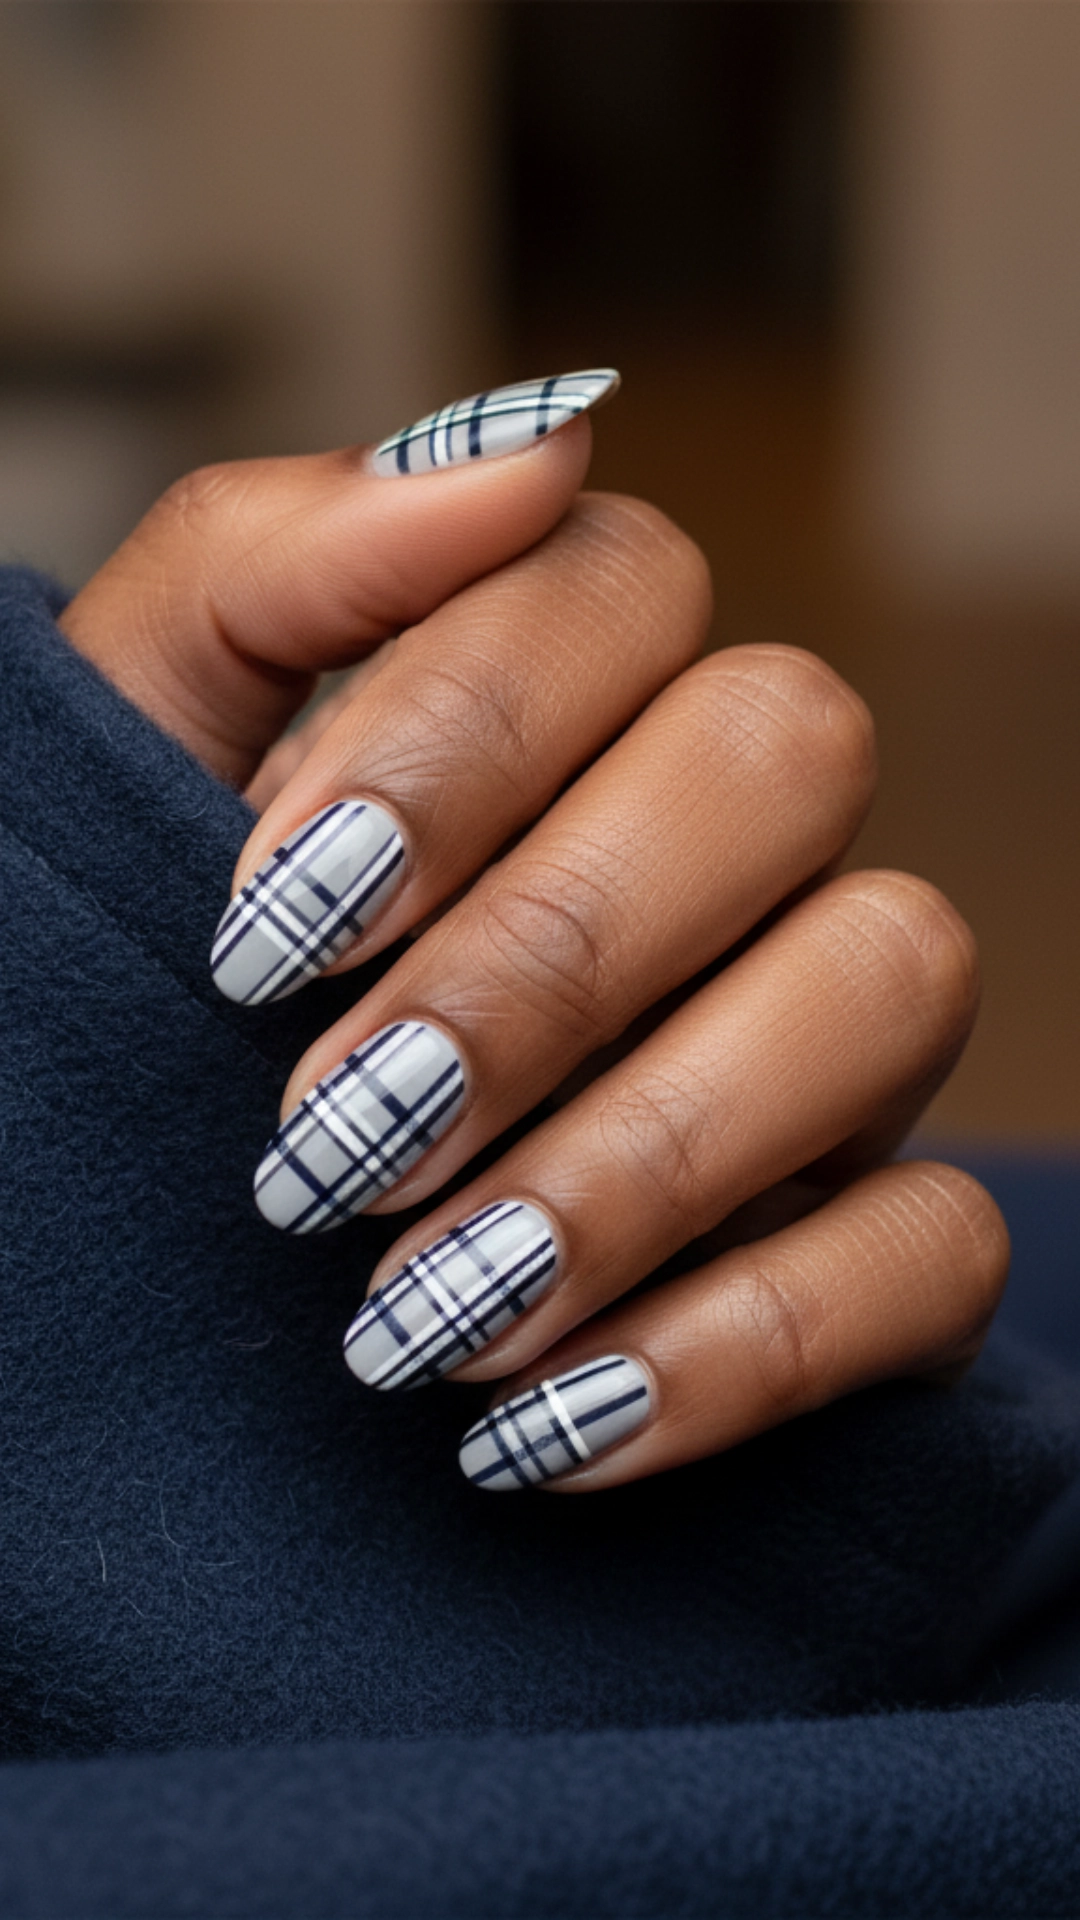
Plaid is the ultimate fall pattern, and it looks fantastic on nails. I find this design so cozy and nostalgic. It might look not very easy, but it’s just a series of intersecting lines.
You’ll need: A base color (like gray or beige), two or three other fall colors for the stripes (like navy, red, and white), and a skinny striping brush.
Steps:
- Apply two coats of your chosen base color and let it dry completely.
- Paint two vertical lines on the nail using your striping brush and the first color.
- Next, paint two horizontal lines with the same color, crossing over the vertical ones.
- Clean your brush and repeat the process with your second color, painting thinner lines slightly offset from the first set.
- You can add a third color, metallic or white, for even thinner accent lines.
- Let the design dry thoroughly before applying a top coat.
Spiced Wine Half-Moons
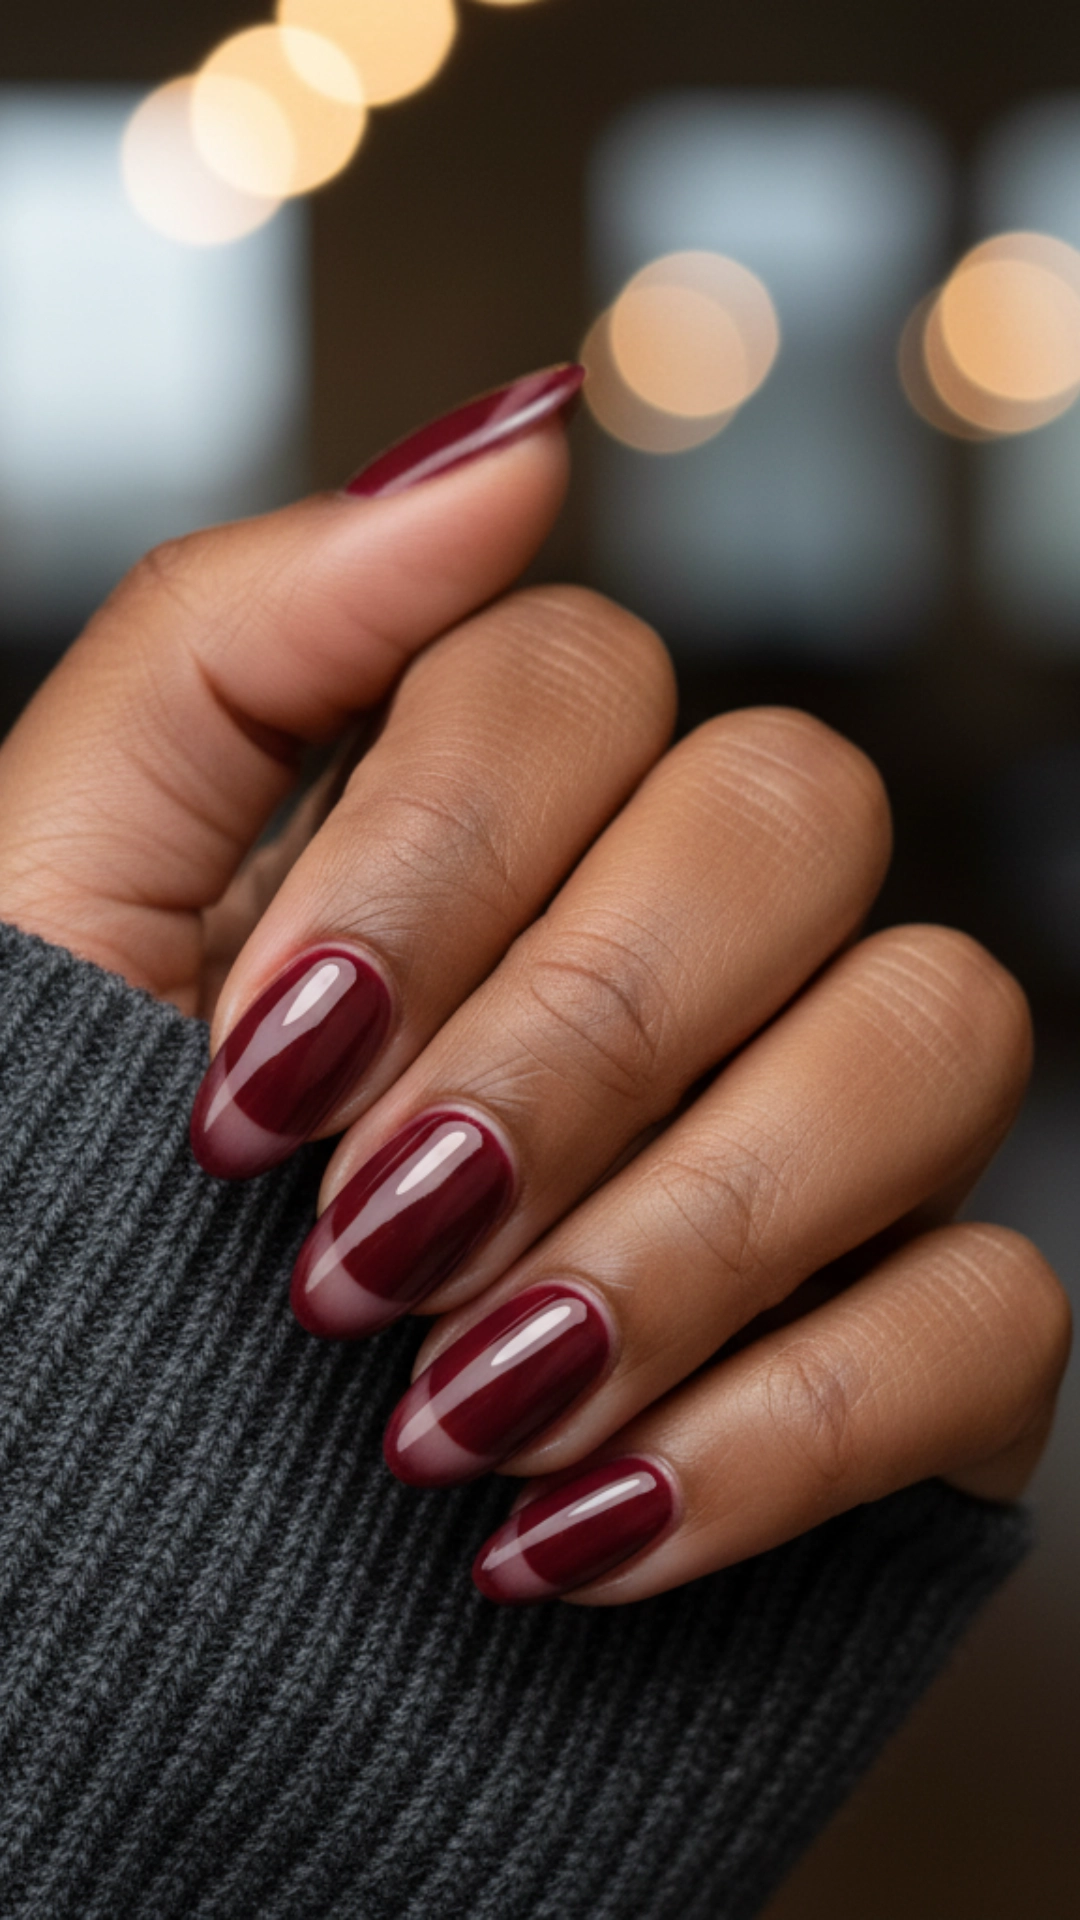
This is a vintage-inspired look with a modern twist that I just love. The half-moon design, a reverse French manicure, looks incredibly sophisticated in a deep, spiced wine color against a bare nail.
You’ll need: A deep wine-colored polish and French manicure guide stickers (or a steady hand).
Steps:
- If using guides, place the rounded sticker at the base of your nail, covering the half-moon area (the lunula).
- Paint the rest of your nail with two coats of the wine-colored polish.
- Carefully remove the sticker while the polish is wet to ensure a crisp line.
- If you do it freehand, use a small brush to outline the half-moon shape carefully and then fill in the rest of the nail.
- Apply a glossy top coat to the entire nail.
Abstract Autumn Hues
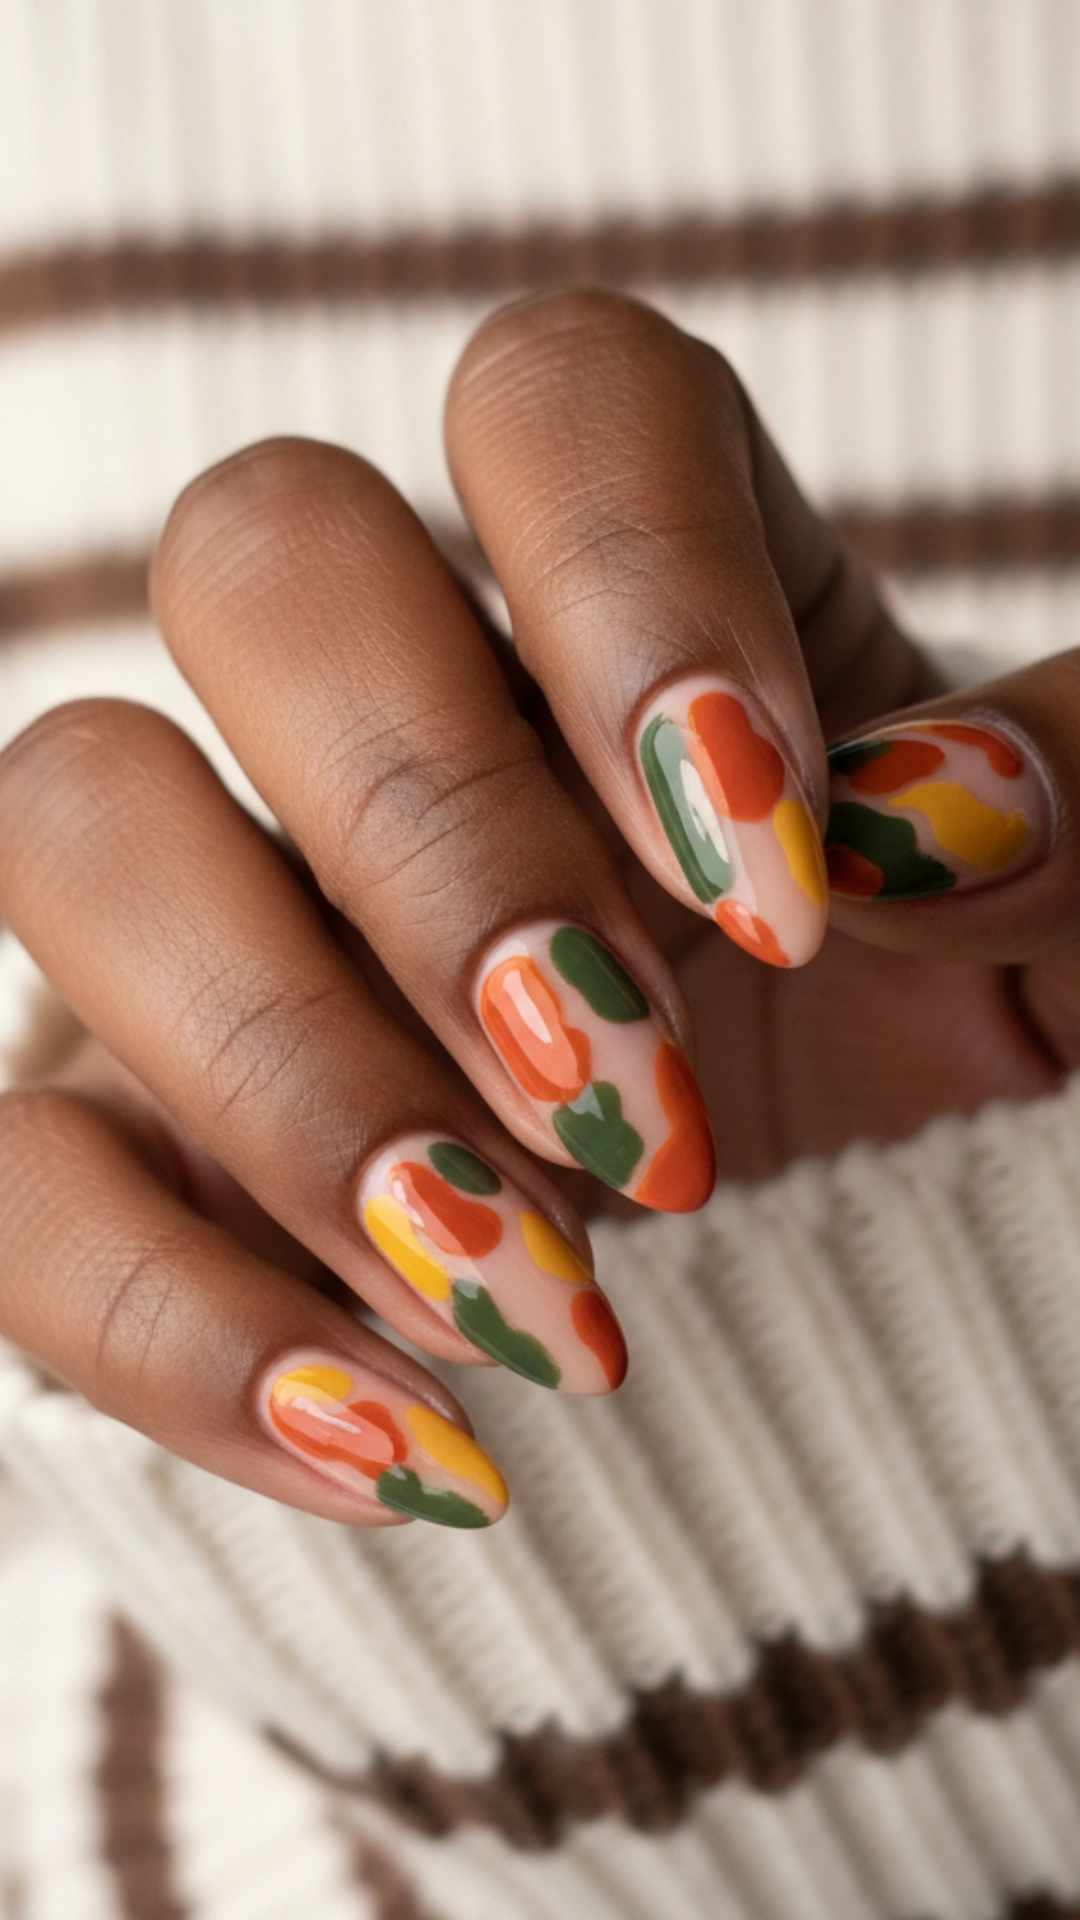
Get creative and let your inner artist shine! This is one of the most fun fall nail ideas because there are no rules. Grab your favorite autumn polishes and create abstract shapes and strokes for a unique, painterly manicure.
You’ll need: A neutral base polish and several polishes in fall colors (e.g., rust, mustard, olive green). You’ll also need a fine nail art brush.
Steps:
- Apply your neutral base color and let it dry.
- Using one of your fall colors, paint an abstract shape or a simple brush stroke on one part of the nail.
- Clean the brush and choose another color. Paint another shape that might slightly overlap the first one.
- Continue this process with all your chosen colors until you have a balanced, abstract design.
- You can even add a small fleck of gold or black for contrast.
- Seal your masterpiece with a top coat.
Copper Chrome Finish
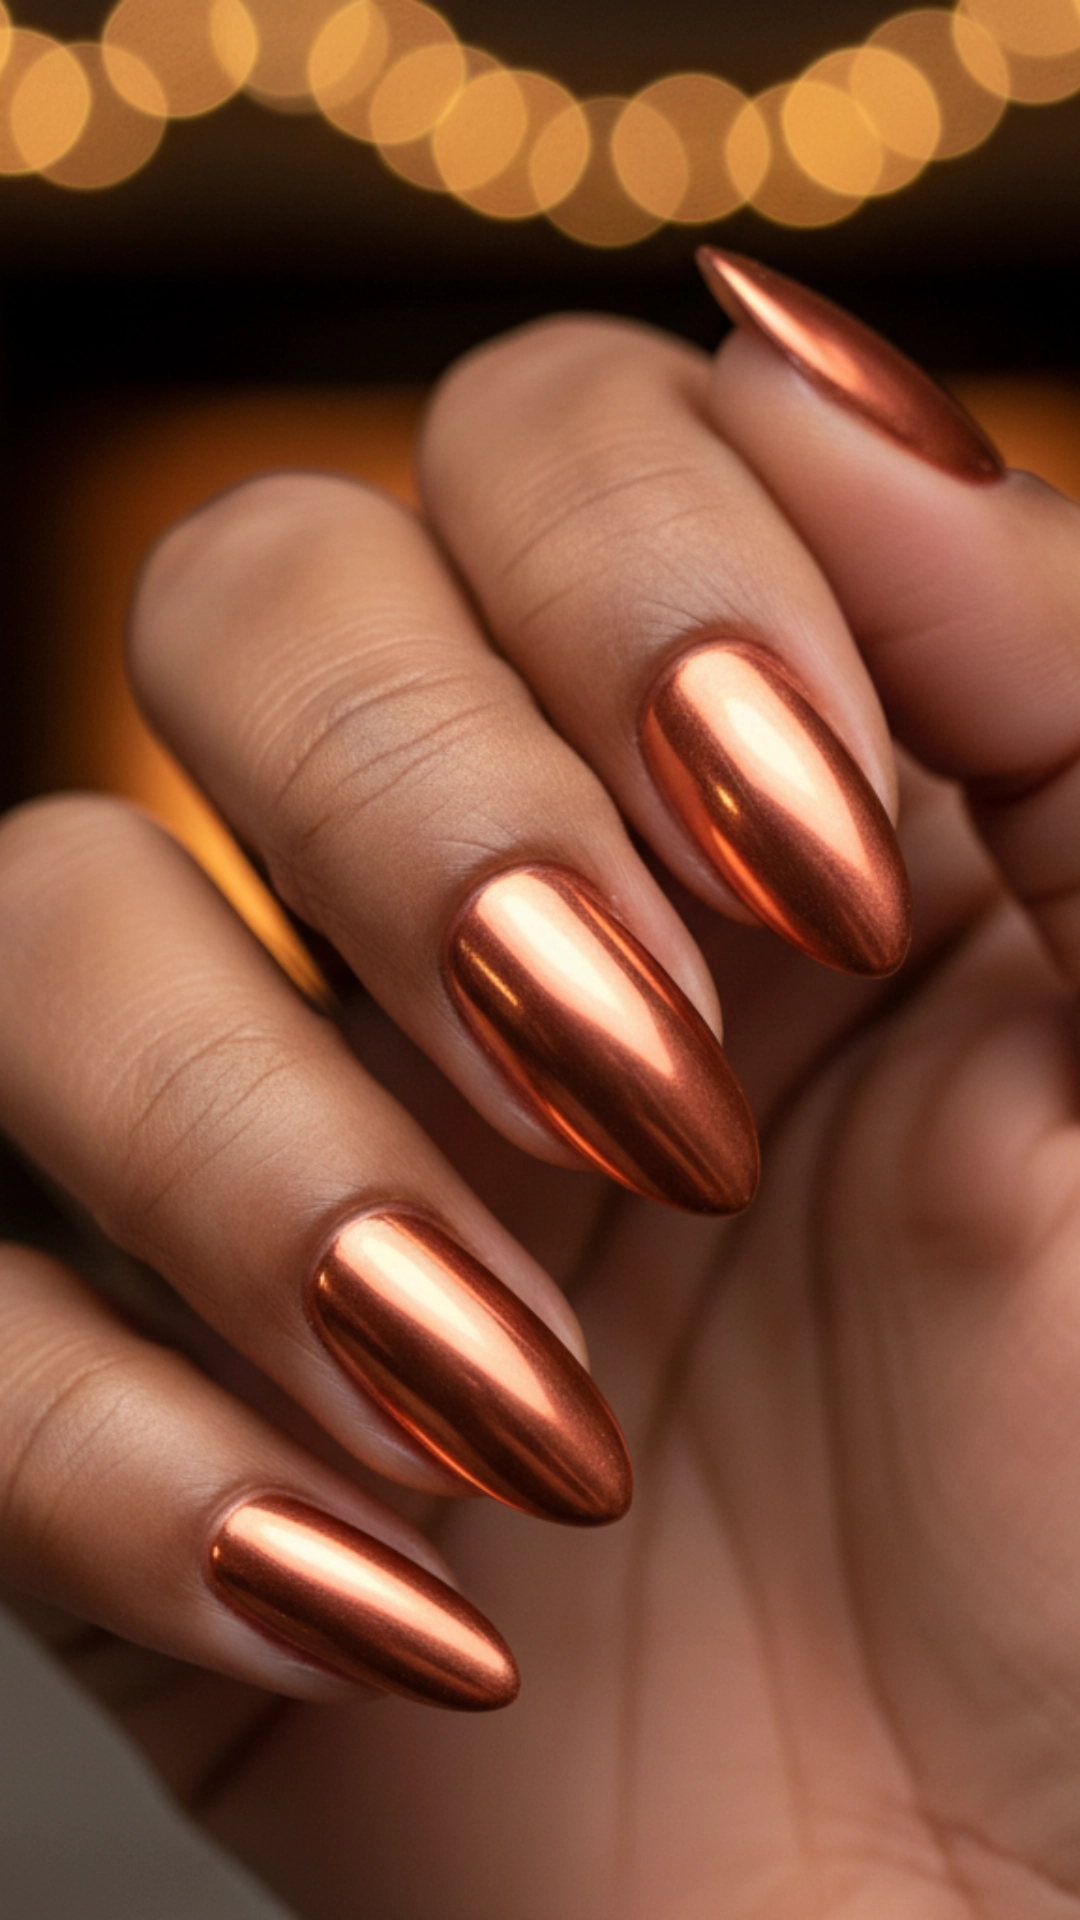
I’m obsessed with the chrome nail trend, and warm copper chrome is absolutely perfect for fall. It’s reflective, high-impact, and beautifully captures the metallic glow of autumn leaves.
You’ll need: A no-wipe gel top coat, copper chrome powder, and a small applicator sponge (like the ones for eyeshadow). You will also need a UV/LED lamp.
Steps:
- Apply a base color (black makes the chrome pop) and cure it.
- Apply a single layer of the no-wipe gel top coat and cure it under the lamp for the recommended time. It must be fully healed but not have a sticky layer.
- Use the applicator sponge to pick up a small amount of the copper chrome powder.
- Rub the powder firmly onto the nail until the surface is completely covered and has a mirror-like finish.
- Dust off any excess powder with a soft brush.
- Apply another layer of the no-wipe top coat to seal the powder and cure it last.
Delicate Dried Flower Inclusions
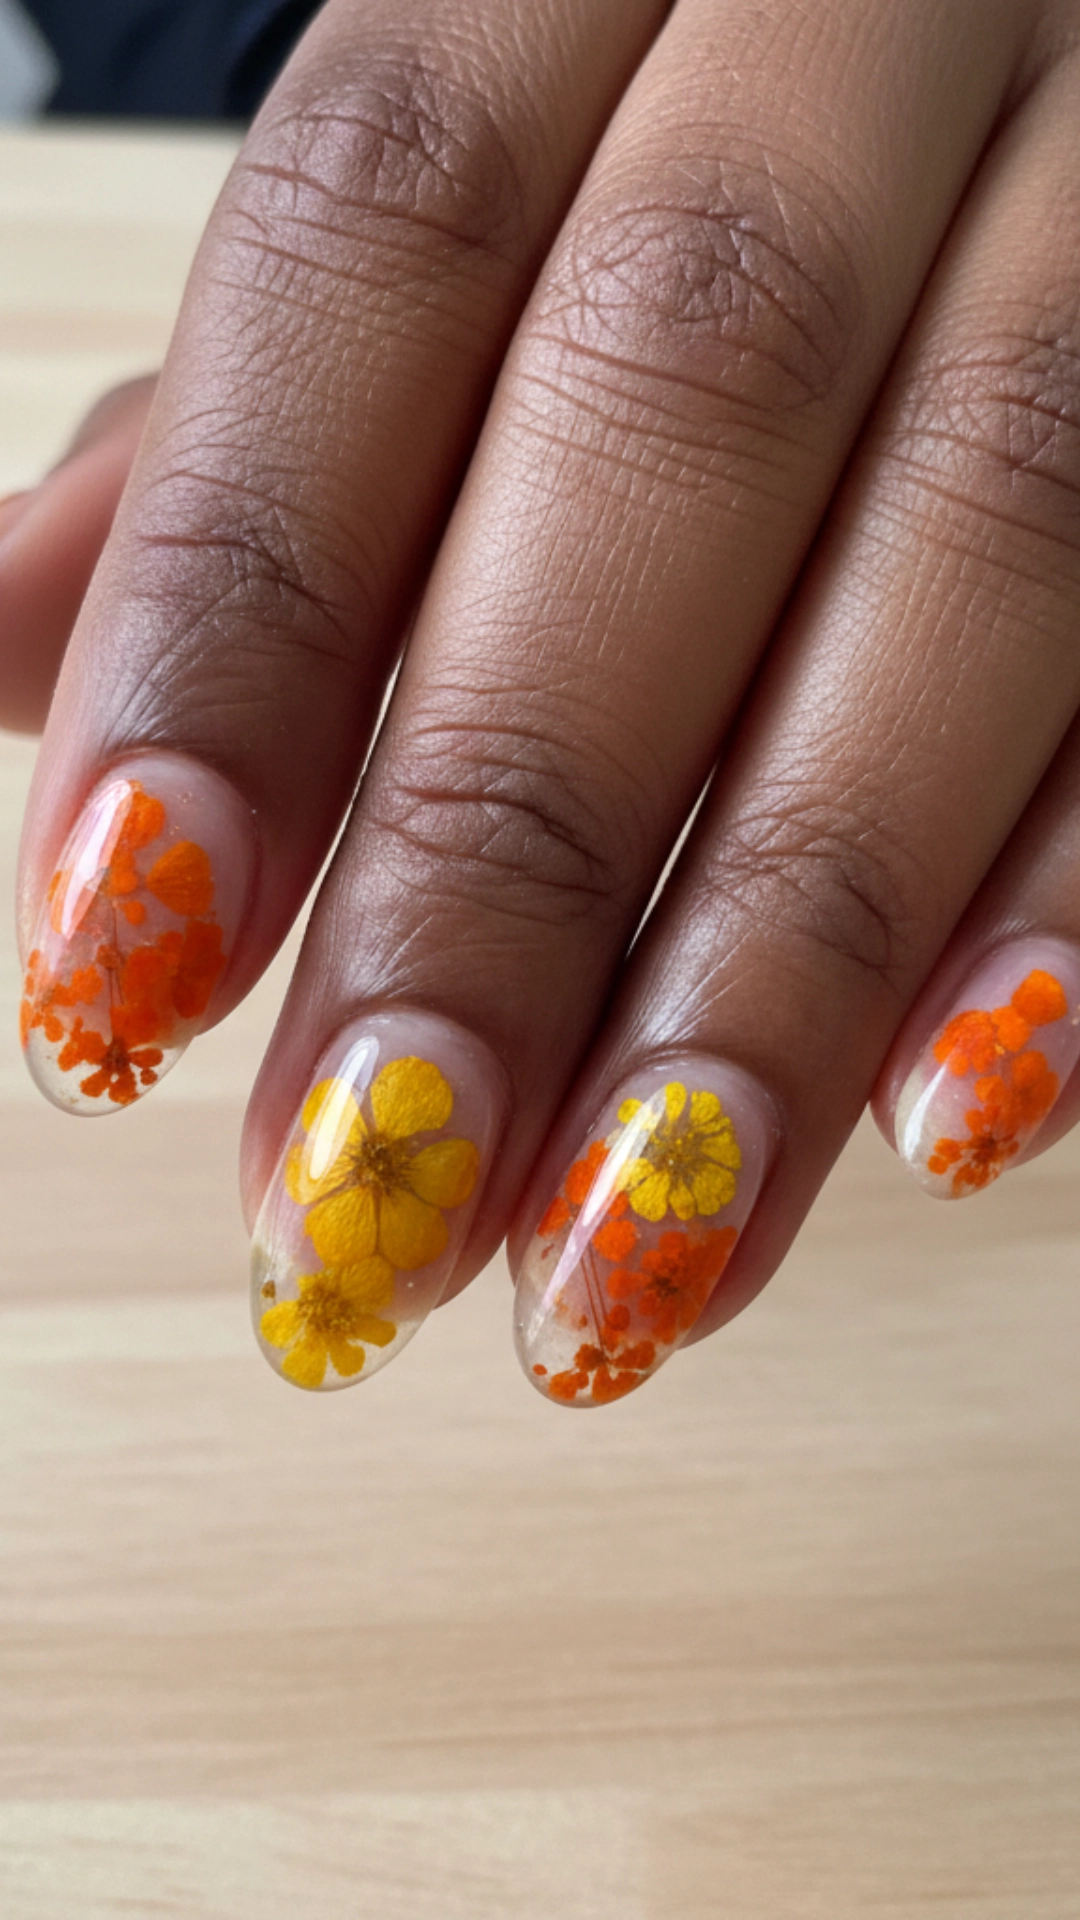
This is such a dreamy and romantic look. I love how embedding tiny, real dried flowers into your manicure creates a beautiful, botanical piece of art. Choose flowers with autumnal colors for a seasonal touch.
You’ll need: A sheer or nude gel polish, tiny dried flowers, a clear builder gel, tweezers, and a UV/LED lamp.
Steps:
- Apply one coat of the sheer gel polish and cure it.
- Apply a thin layer of clear builder gel (but it hasn’t been cured yet).
- Using tweezers, carefully place the tiny dried flowers onto the wet gel.
- Gently press them down so they lie as flat as possible.
- Cure the nail to set the flowers in place.
- Encapsulate the flowers by applying another layer of the clear builder gel over the entire nail, ensuring the surface is smooth.
- Cure again, then finish with a top coat and a final cure.
Mismatched Fall Tones
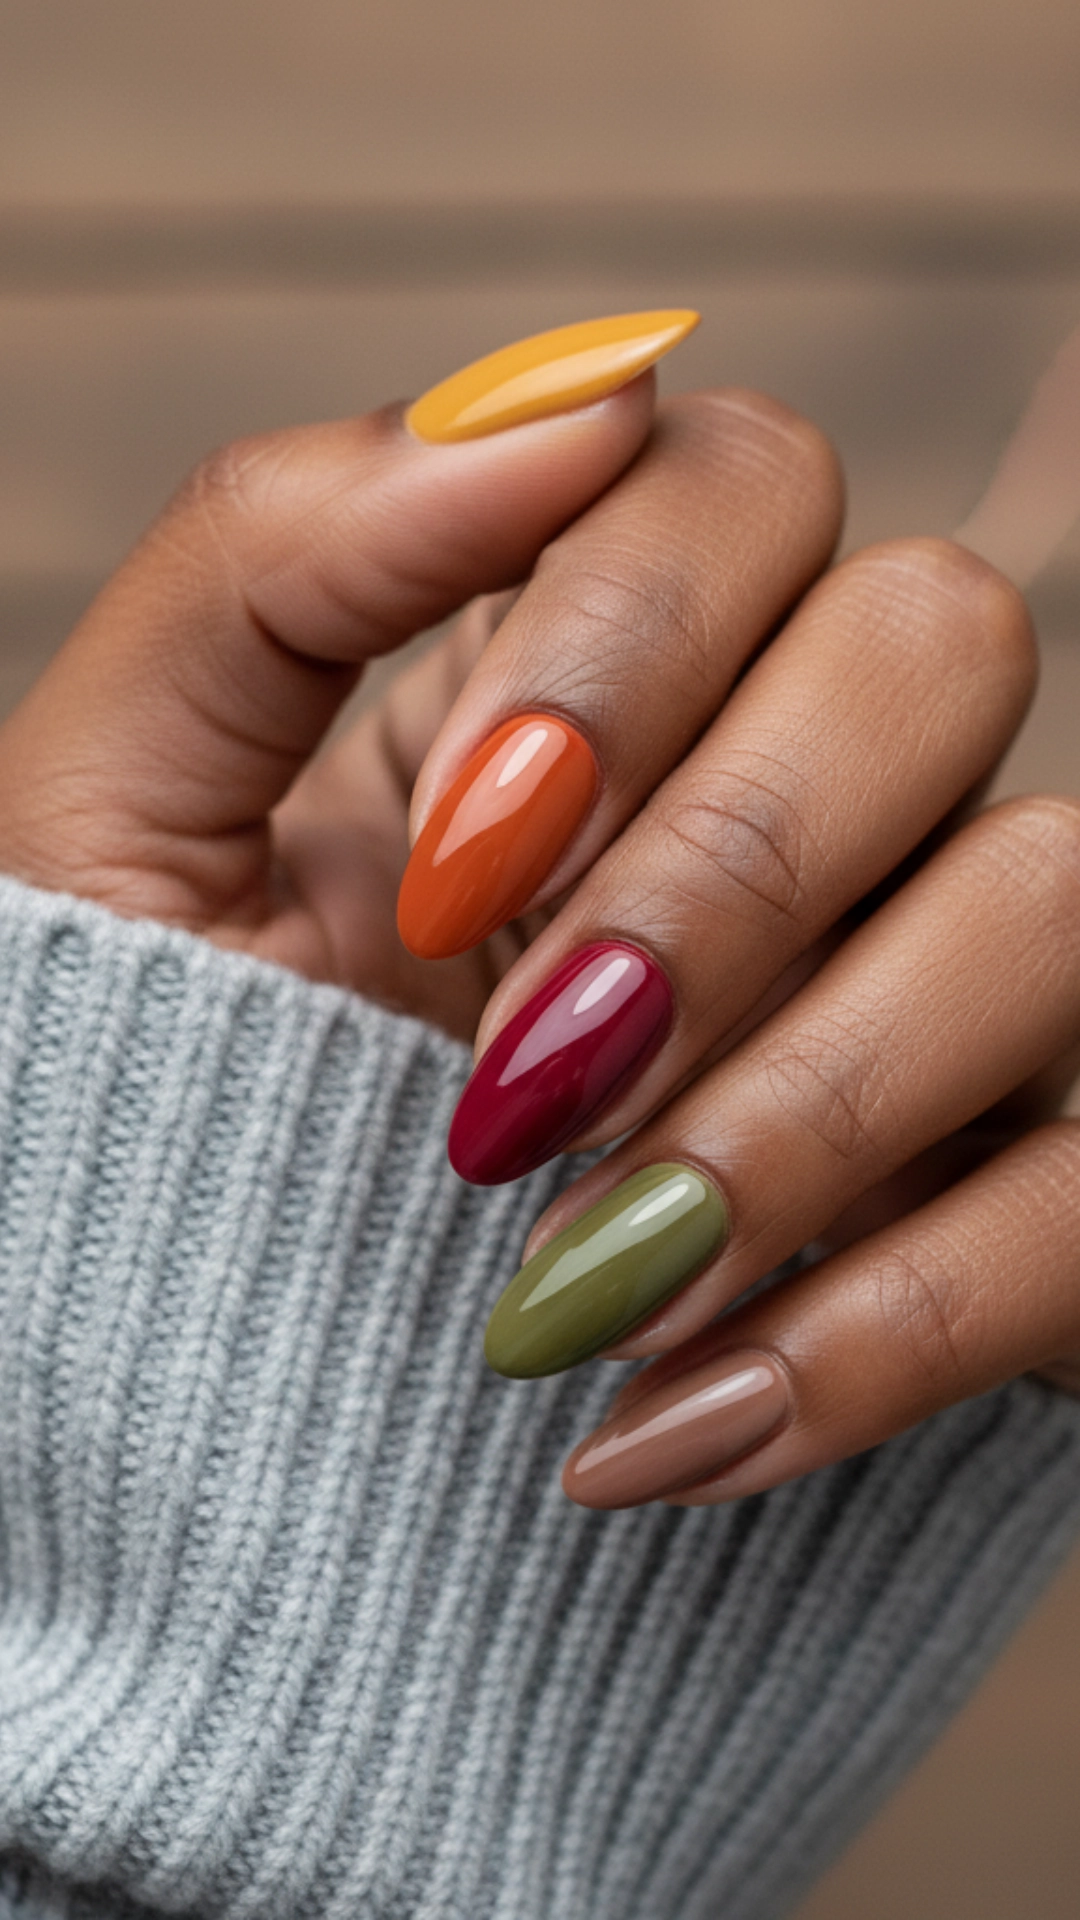
Why choose just one color when you can wear them all? I love the simplicity and visual interest of painting each nail a different, complementary fall color. It’s an easy way to create a trendy and cohesive look.
You’ll need: Five different polishes from a fall color palette (e.g., mustard yellow, burnt orange, burgundy, olive green, and chocolate brown).
Steps:
- Choose your five colors and arrange them in a pleasing order.
- Paint each nail with a different color, starting from your thumb and moving to your pinky.
- Apply a second coat to each nail for full opacity.
- Finish with a glossy or matte top coat, depending on the vibe you’re going for.
Smoky Gray Gradient
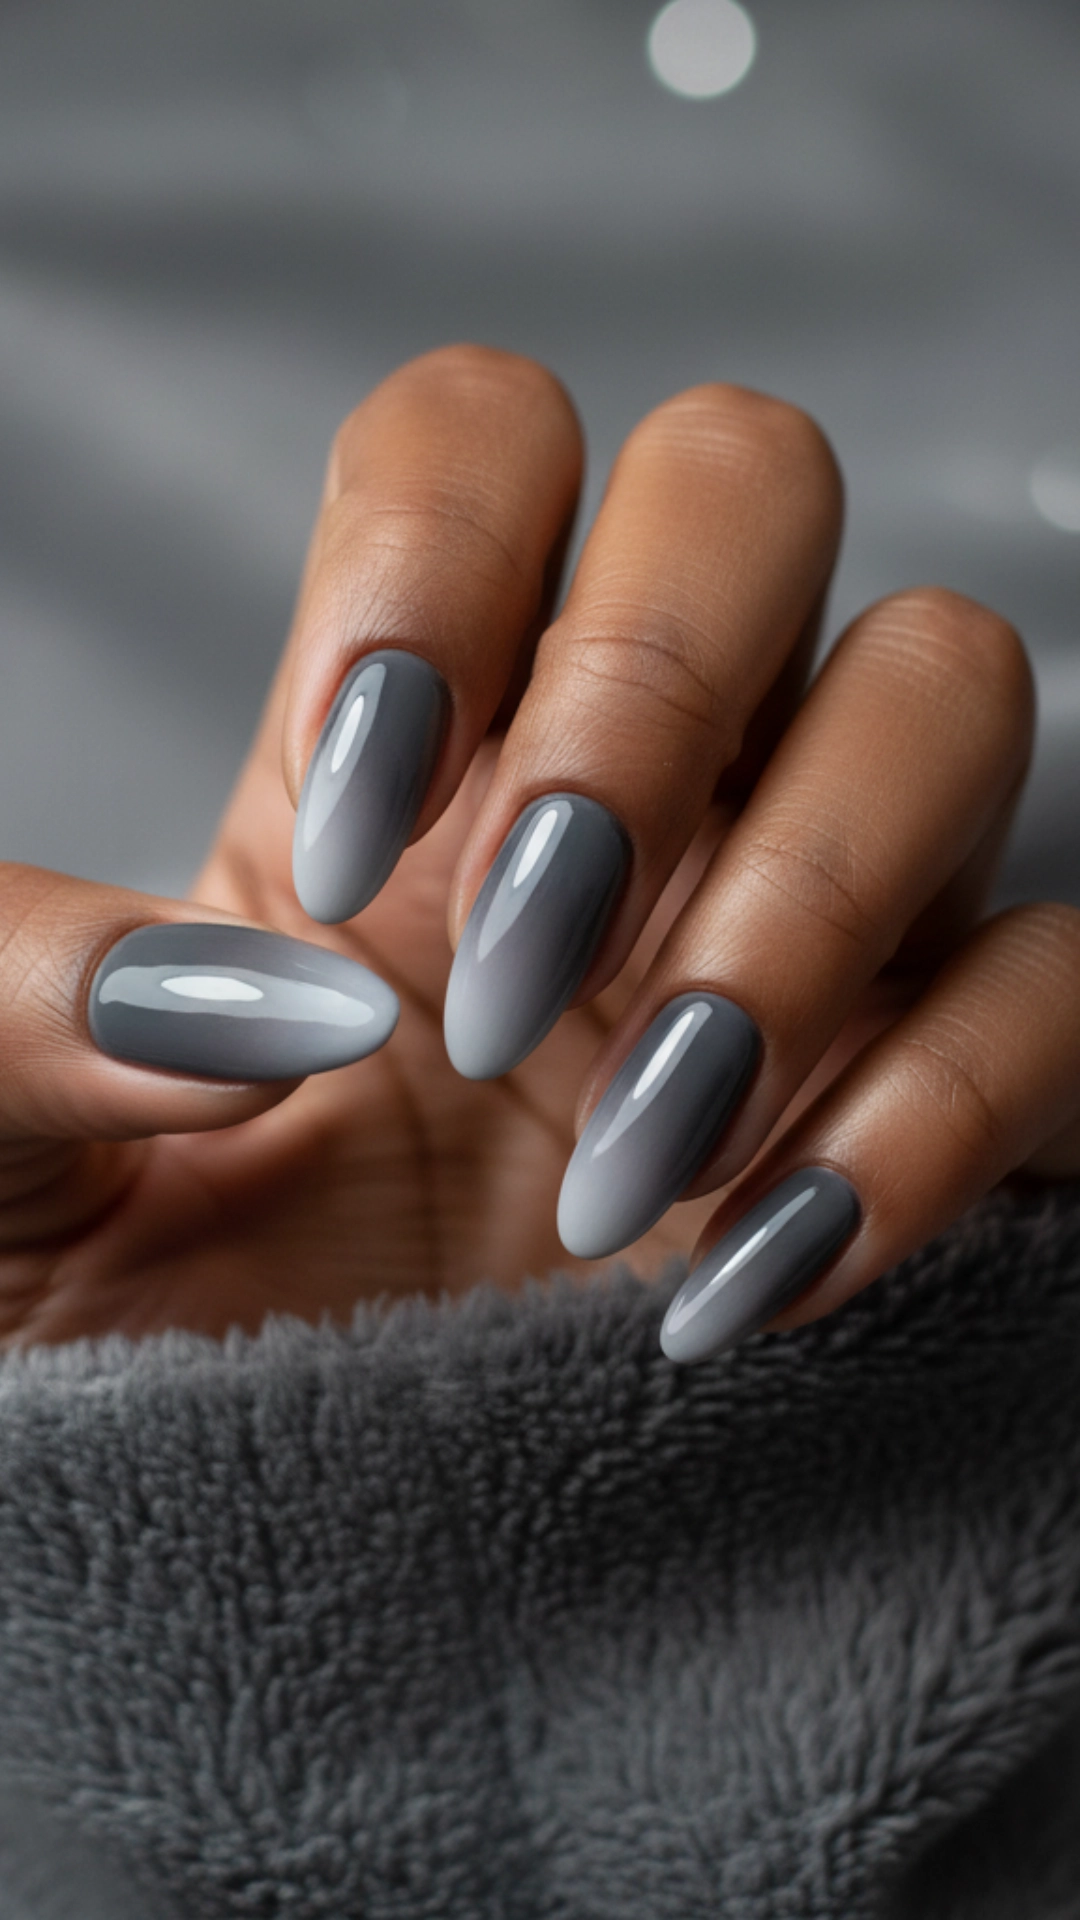
This is a chic and moody take on the ombre trend. A gradient from a light, misty gray to a deep charcoal is perfect for capturing the feel of a foggy autumn morning. I find it incredibly sophisticated.
You’ll need: A light gray polish, a dark charcoal gray polish, a makeup sponge, and a top coat.
Steps:
- Apply two coats of the light gray polish as your base. Let it dry.
- On your makeup sponge, paint a stripe of the light gray and a stripe of the dark gray right next to each other.
- Press and dab the sponge onto your nail, focusing the darker color towards the tip.
- Reload the sponge and repeat until you have a smooth, blended gradient.
- Clean up the skin around your nail.
- Apply a glossy top coat to blend the colors even more seamlessly.
Negative Space Falling Leaves
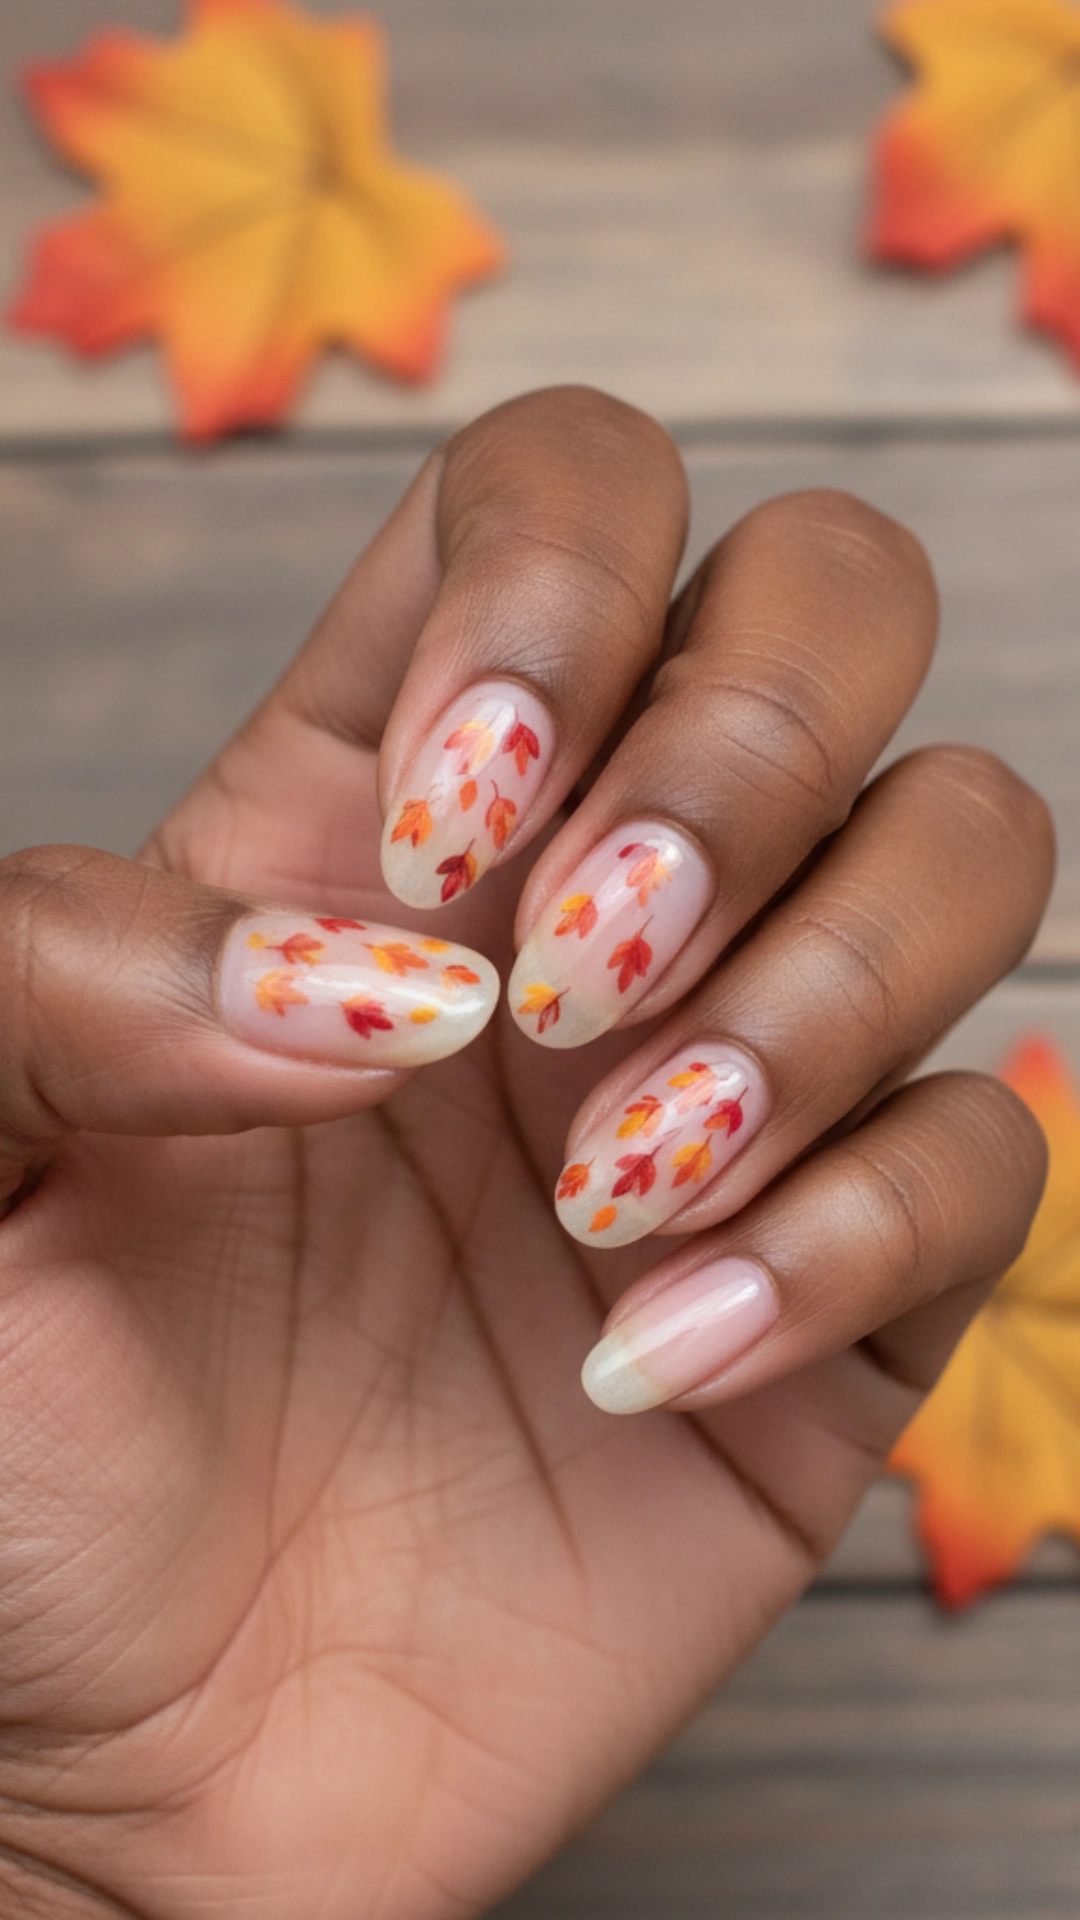
I adore negative space designs because they feel so modern. This design uses the bare nail as a canvas, with delicate, hand-painted leaves appearing to fall down the nail.
You’ll need: A clear base coat, polishes in fall leaf colors (red, orange, yellow), and an excellent nail art brush.
Steps:
- Apply a clear base coat and let it dry.
- Paint a small, simple leaf shape using the fine brush and your first color (e.g., orange). Start with a small V-shape and fill it in.
- Use another color (e.g., red) to paint another leaf nearby, perhaps slightly overlapping.
- Add a few more leaves in different colors, creating a cascading or “falling” effect from the cuticle to the tip.
- Keep the design simple and don’t overcrowd the nail.
- Finish with a glossy top coat.
Warm Taupe with a Single Stripe
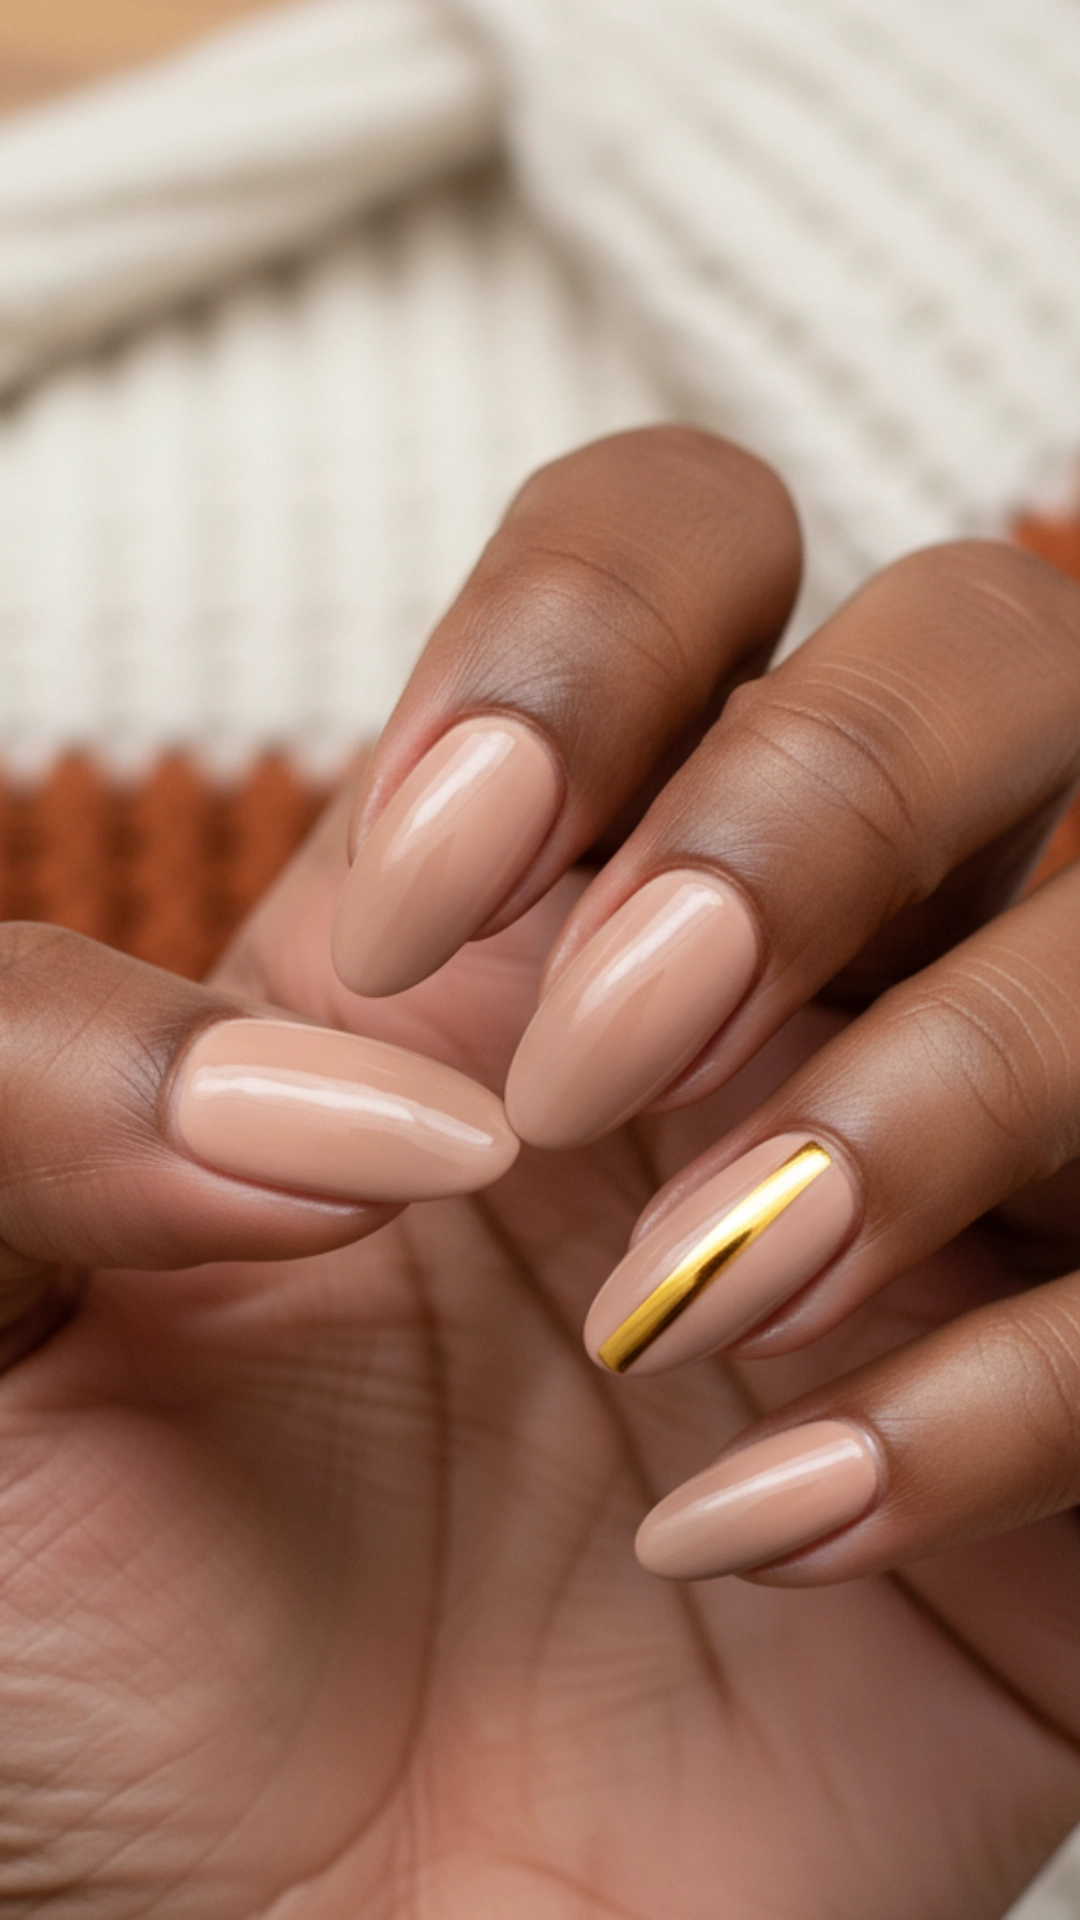
This is the epitome of minimalist chic. A warm, creamy taupe is a perfect fall neutral, and a single, crisp vertical stripe in a contrasting color like white or gold adds a touch of modern elegance.
You’ll need: A warm taupe polish, a polish for the stripe (e.g., metallic gold), and thin striping tape or a striping brush.
Steps:
- Paint your nails with two coats of the taupe polish and let them dry completely.
- If using tape, place a piece of striping tape vertically down the center (or off-center) of your nail.
- Paint over the tape with your gold polish.
- Remove the tape immediately for a clean line.
- Alternatively, use a striping brush to carefully paint the line freehand.
- Seal with a top coat.
Deep Navy with Gold Flecks
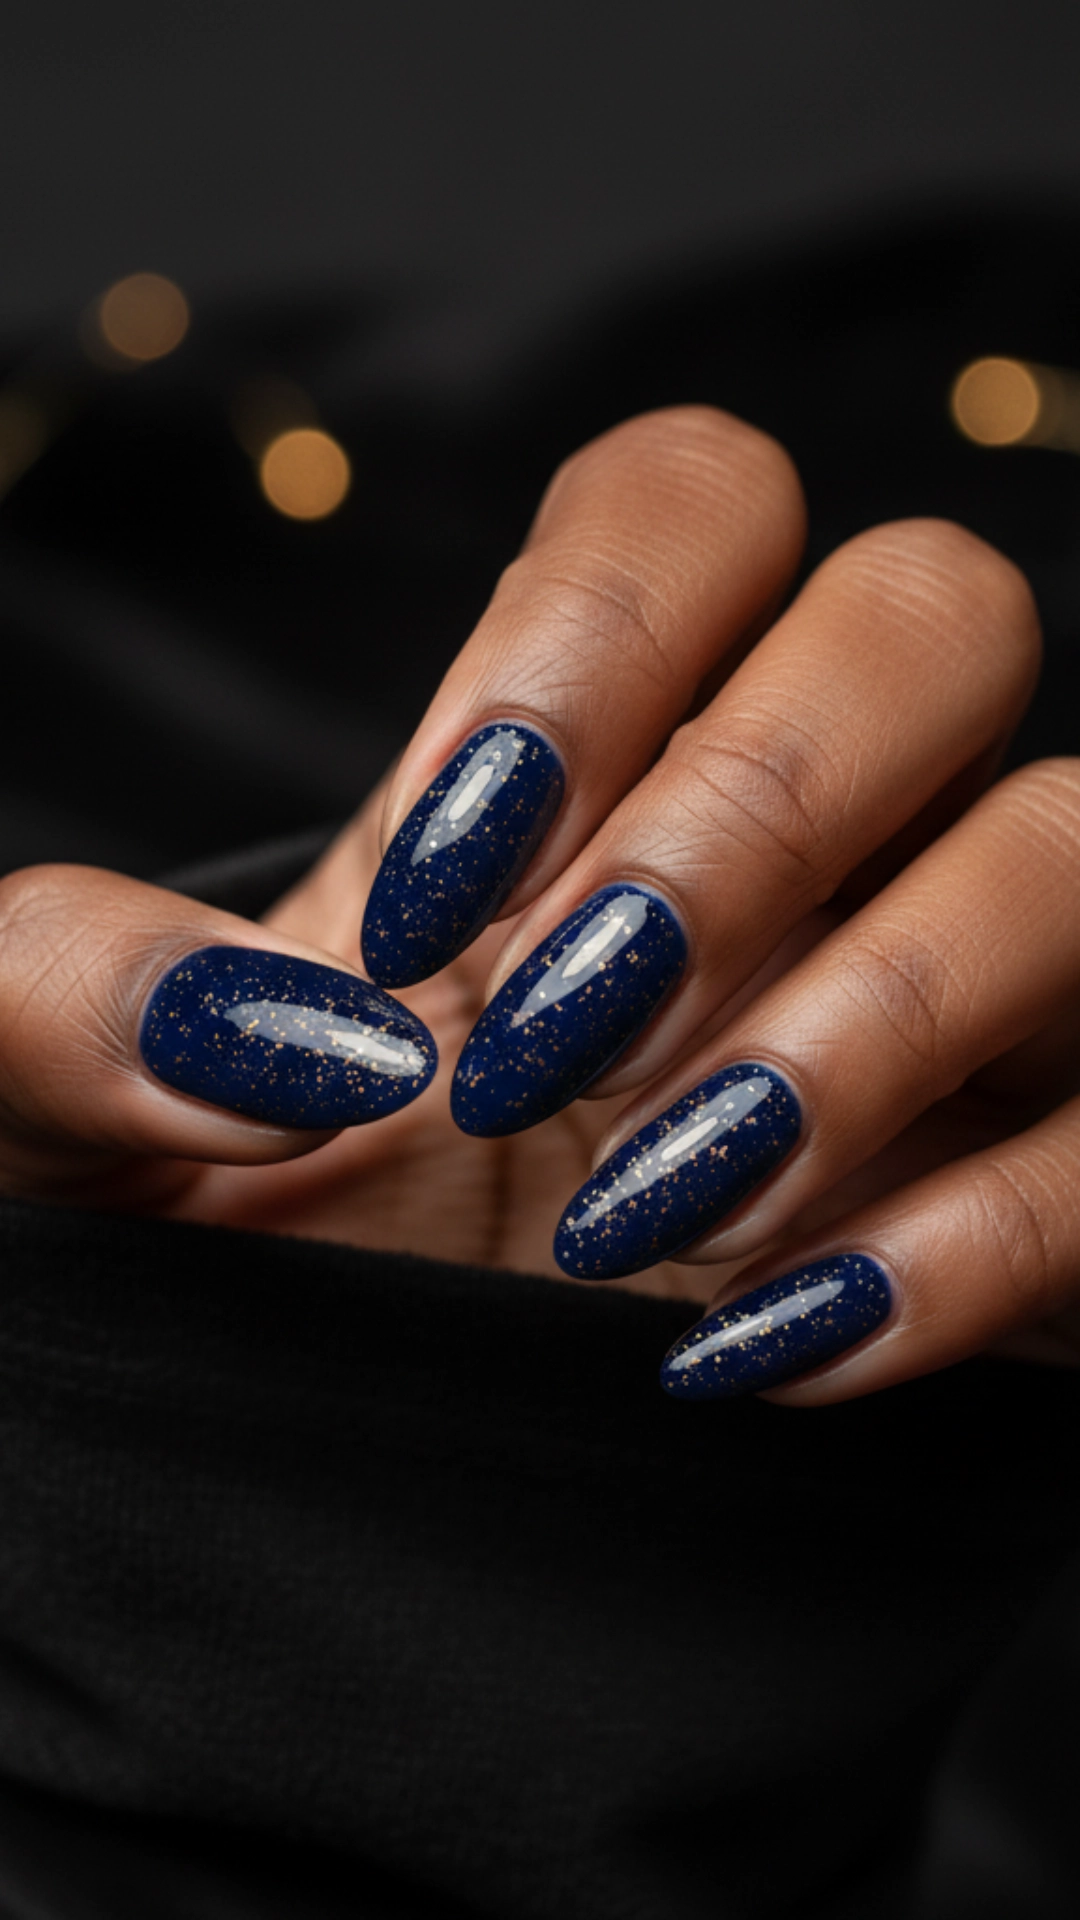
Navy blue is a stunning and unexpected fall color. It mimics the early evening autumn sky, and when you add tiny flecks of gold, it looks like a starry night. So magical!
You’ll need: A deep navy blue polish and a top coat with fine gold glitter or flecks.
Steps:
- Apply two coats of the navy polish for a rich, deep base. Let it dry completely.
- Apply one or two coats of the gold-flecked top coat.
- Distribute the flecks evenly across the nail for a balanced, starry effect.
- Finish with a regular glossy top coat to ensure a smooth surface.
Cranberry Red French Manicure
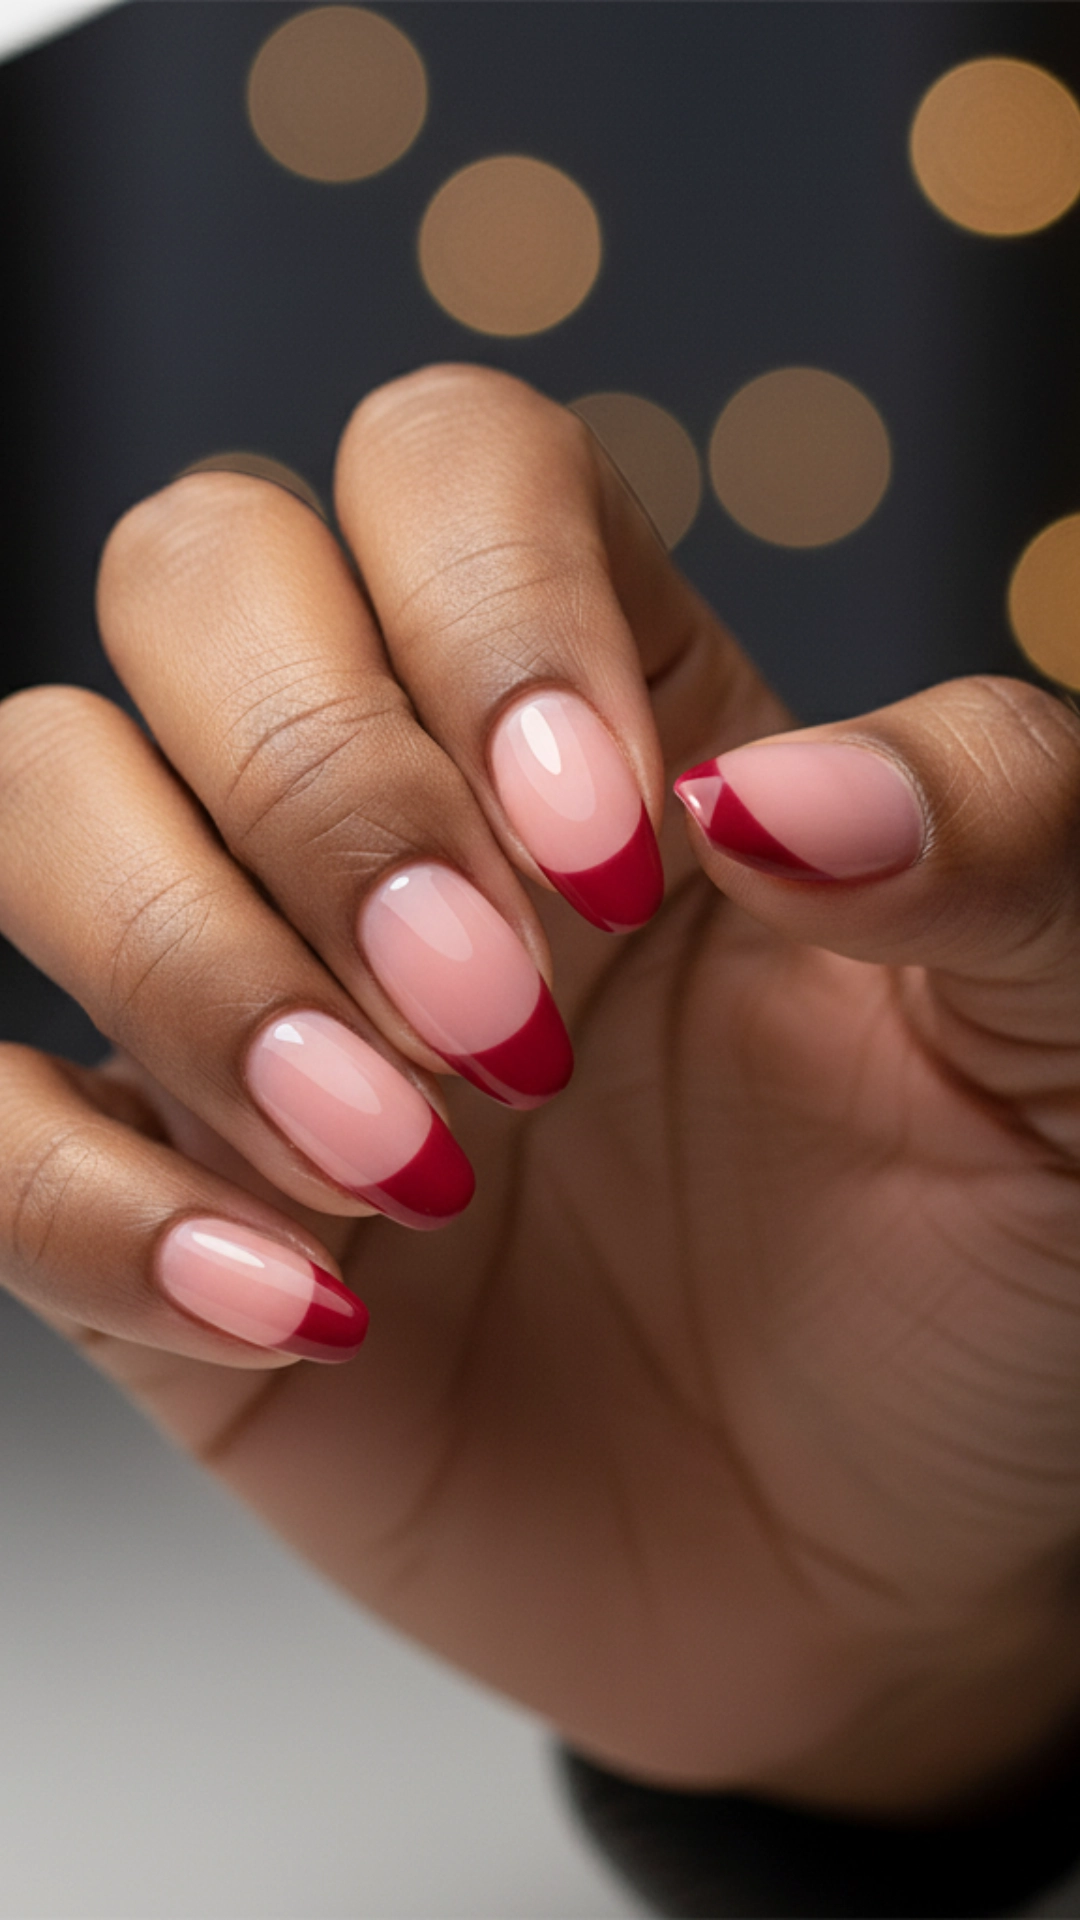
Give the classic French manicure a seasonal update. I love swapping the traditional white tip for a bold, festive cranberry red. It’s a simple change that makes a significant impact.
You’ll need: A sheer pink or nude base polish and a cranberry red polish.
Steps:
- Apply one or two coats of the sheer pink/nude polish to the entire nail.
- Once dry, carefully paint the tip of your nail with the cranberry red polish. You can do this freehand with the bottle brush or use a small art brush for more precision.
- You can also use French tip guide stickers for a perfect curve.
- Apply a second coat to the tip if needed for opacity.
- Finish with a glossy top coat.
Olive Green and Cream Abstract
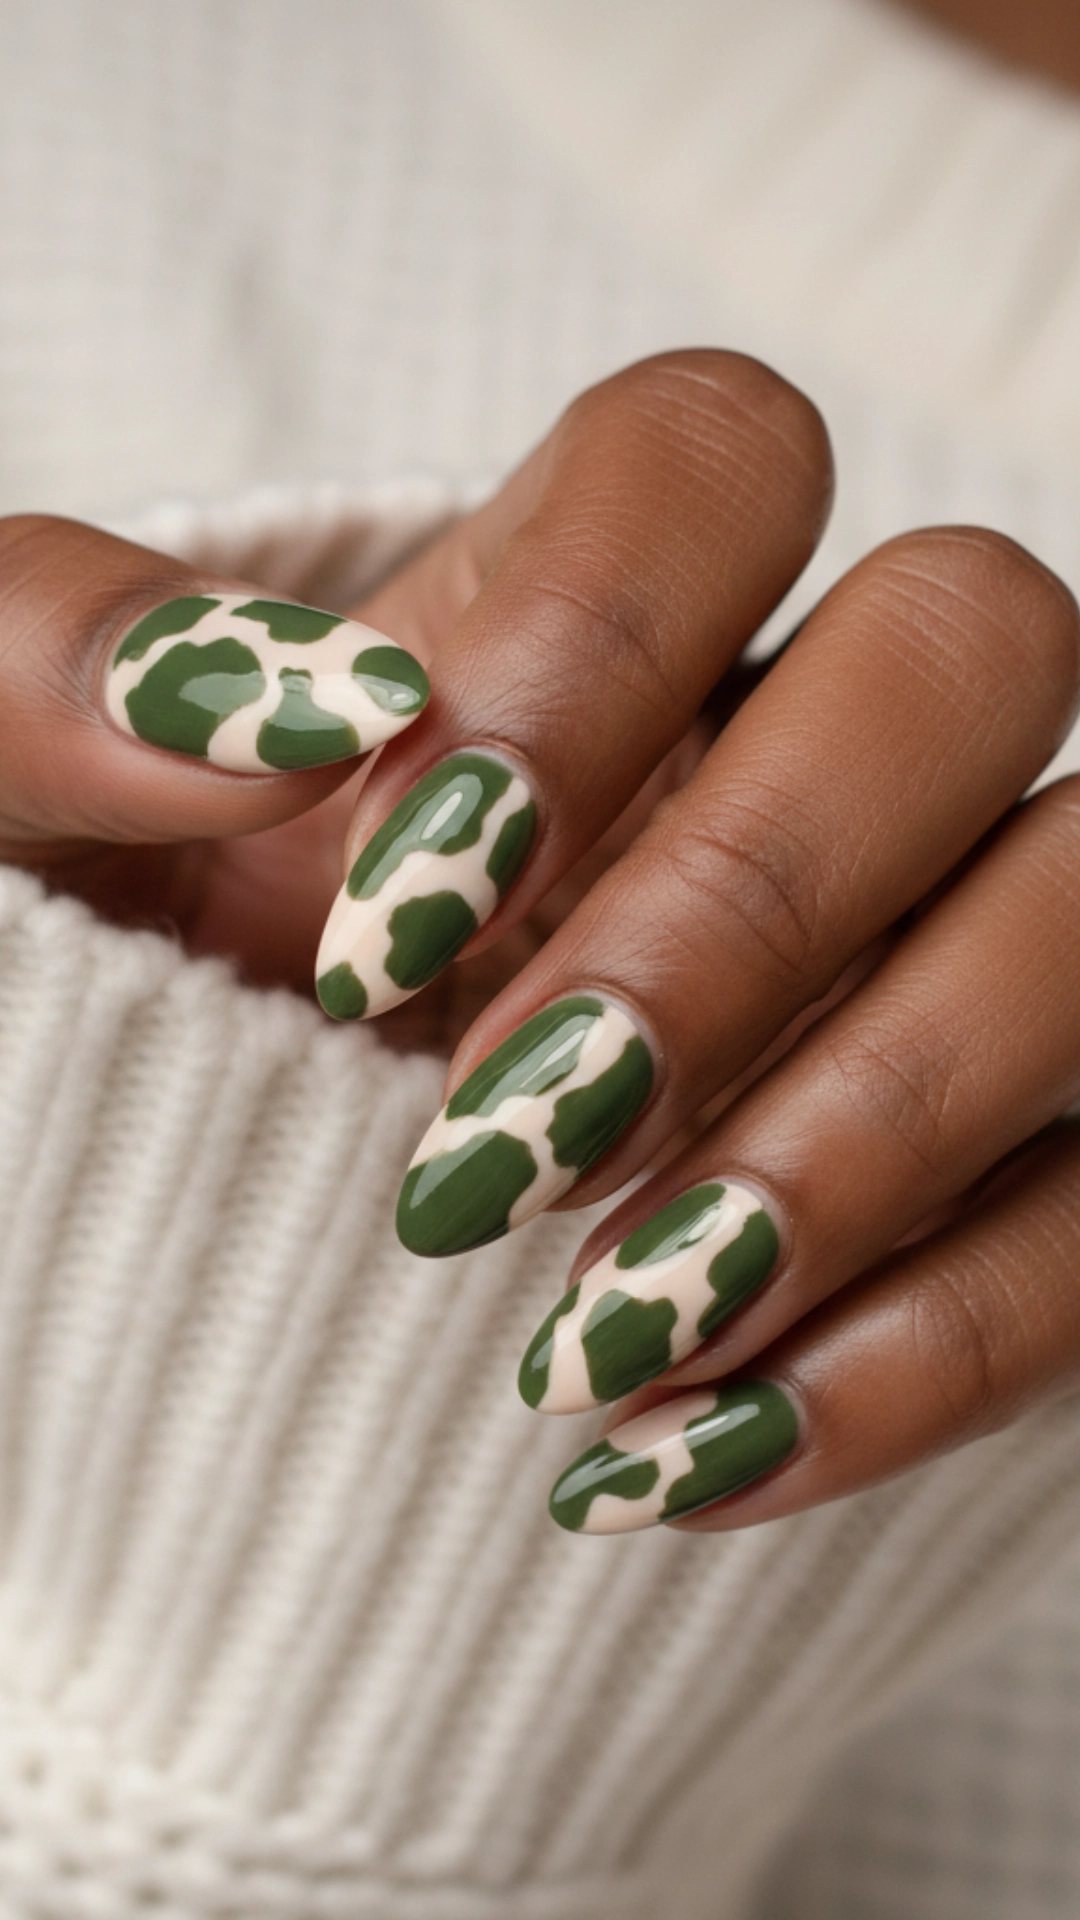
The earthy olive green and soft cream combination is perfect for fall. I love how an abstract design using these two colors looks, both organic and modern.
You’ll need: An olive green polish, a cream polish, and a nail art brush.
Steps:
- Choose one color as your main base (e.g., cream), apply two coats, and let it dry.
- Use the nail art brush and olive green polish to add abstract shapes. Think large spots, curved lines, or artistic splotches.
- Leave some of the cream base showing through.
- You can even use a dotting tool to add a few small dots of the alternate color for extra detail.
- Seal with a matte or glossy top coat.
Toffee Swirl Marble
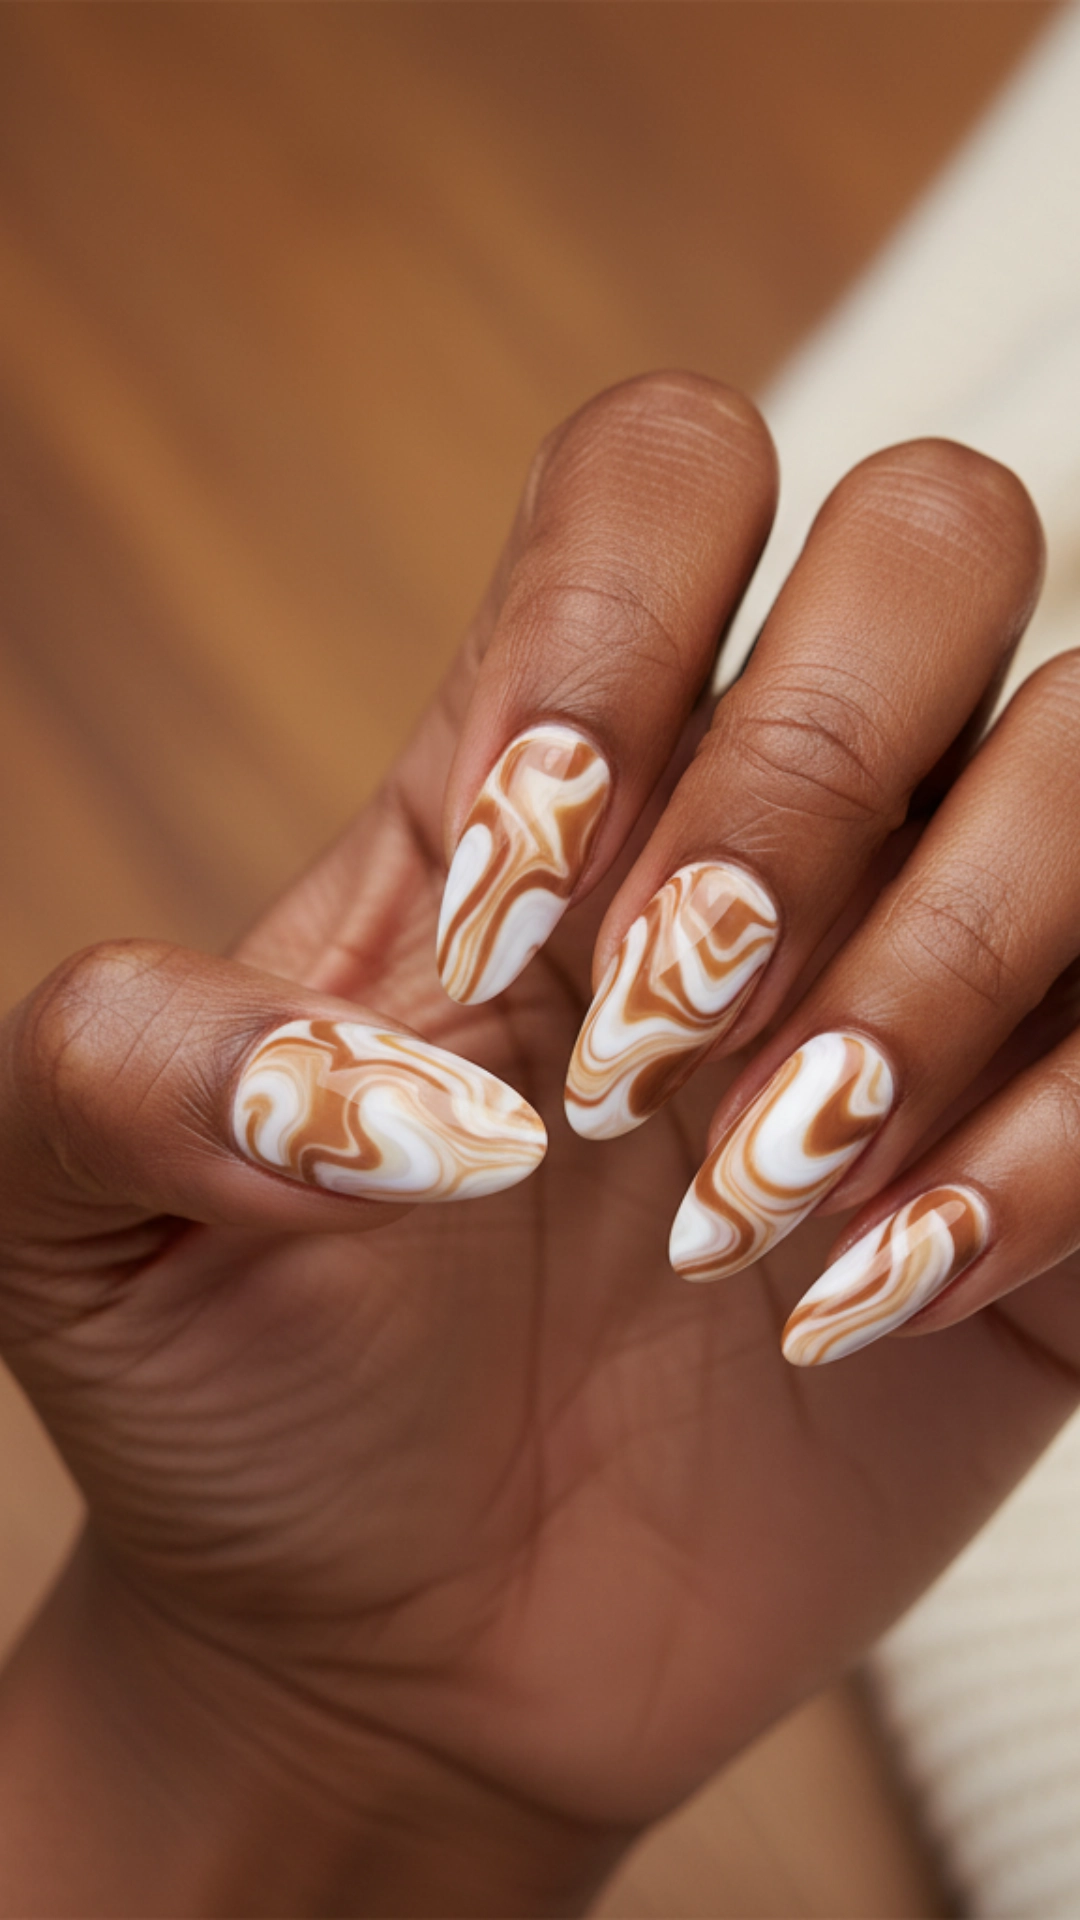
This design makes your nails look like a delicious toffee or caramel candy piece. I’m obsessed with this water marble technique’s warm, gooey look.
You’ll need: A white or cream base polish, a toffee-colored polish, a caramel-colored polish, a cup of room-temperature water, and a toothpick.
Steps:
- Apply two coats of white or cream-based polish and let it dry. Protect the skin around your nails with liquid latex or tape.
- Drop alternating toffee and caramel polishes into the cup of water. They should spread out into rings.
- Use a toothpick to gently drag through the rings of color to create a marbled pattern.
- Carefully dip your nail flat onto the surface of the pattern in the water.
- Keep your finger submerged, and use the toothpick to clean the excess polish off the water’s surface before pulling it out.
- Remove the protective barrier from your skin and clean up any messy edges.
- Finish with a glossy top coat.
Matte Black with a Glossy Tip
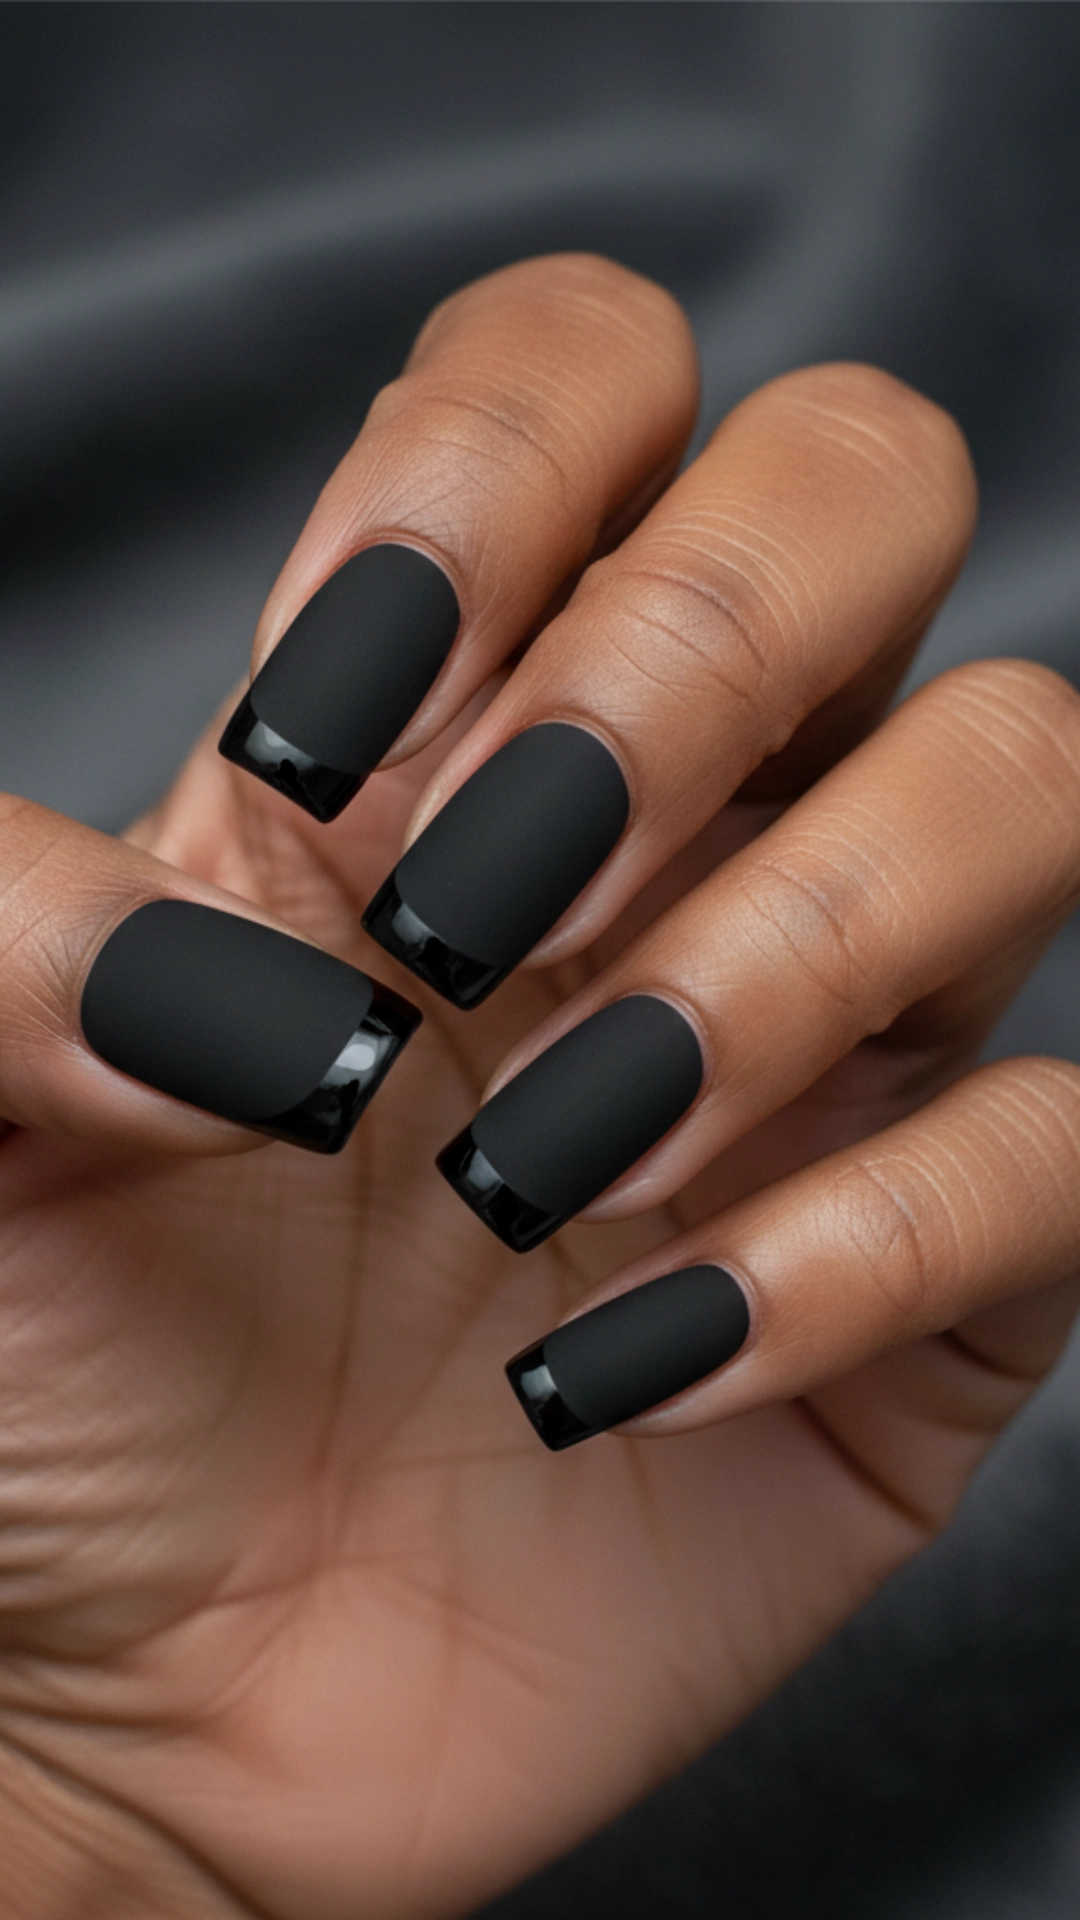
This is such a cool, edgy look with a subtle twist. The contrast between the matte black base and the high-shine glossy tip is incredibly chic and sophisticated. I love this modern take on a French manicure.
You’ll need: A black polish, a matte top coat, and a glossy top coat.
Steps:
- Apply two coats of black polish and let it dry completely.
- Apply a layer of the matte top coat over the entire nail. Let this dry thoroughly.
- Using the brush from the glossy top coat, carefully paint just the tip of your nail, following its natural curve.
- The result is a subtle but striking textural contrast.
Sunset Sky Gradient
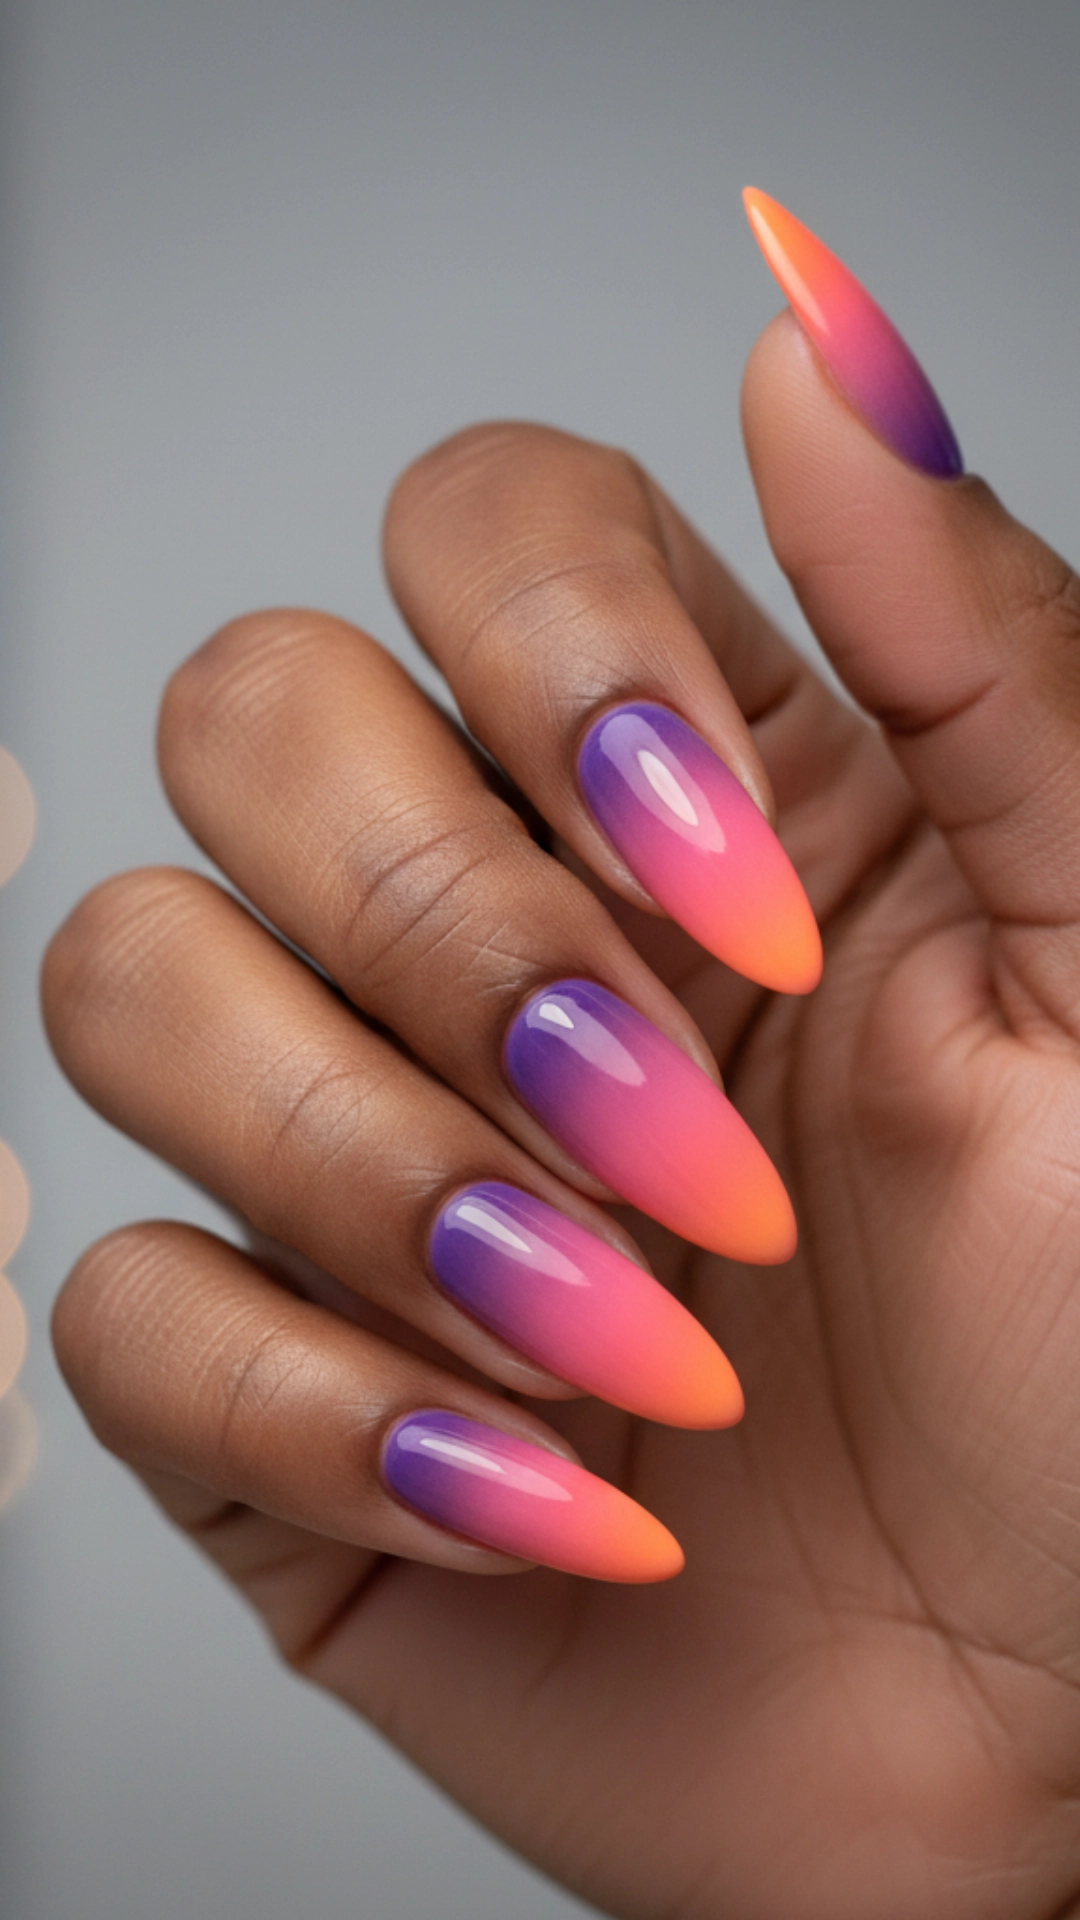
Capture the beauty of a breathtaking autumn sunset on your nails. I love this gradient’s warm, beautiful blend of deep orange, soft pink, and a hint of purple.
You’ll need: A deep orange polish, a pink polish, a purple polish, and a makeup sponge.
Steps:
- You can apply a white base coat to make the colors pop, but it’s optional.
- On your makeup sponge, paint stripes of purple (near the cuticle), pink (in the middle), and orange (at the tip).
- Dab the sponge onto your nail, blending the colors to create a smooth sunset effect.
- Repeat until the colors are vibrant and well-blended.
- Clean up the edges and seal with a glossy top coat. You can even add a sparse glitter top coat to mimic stars.
Terracotta Clay Solid
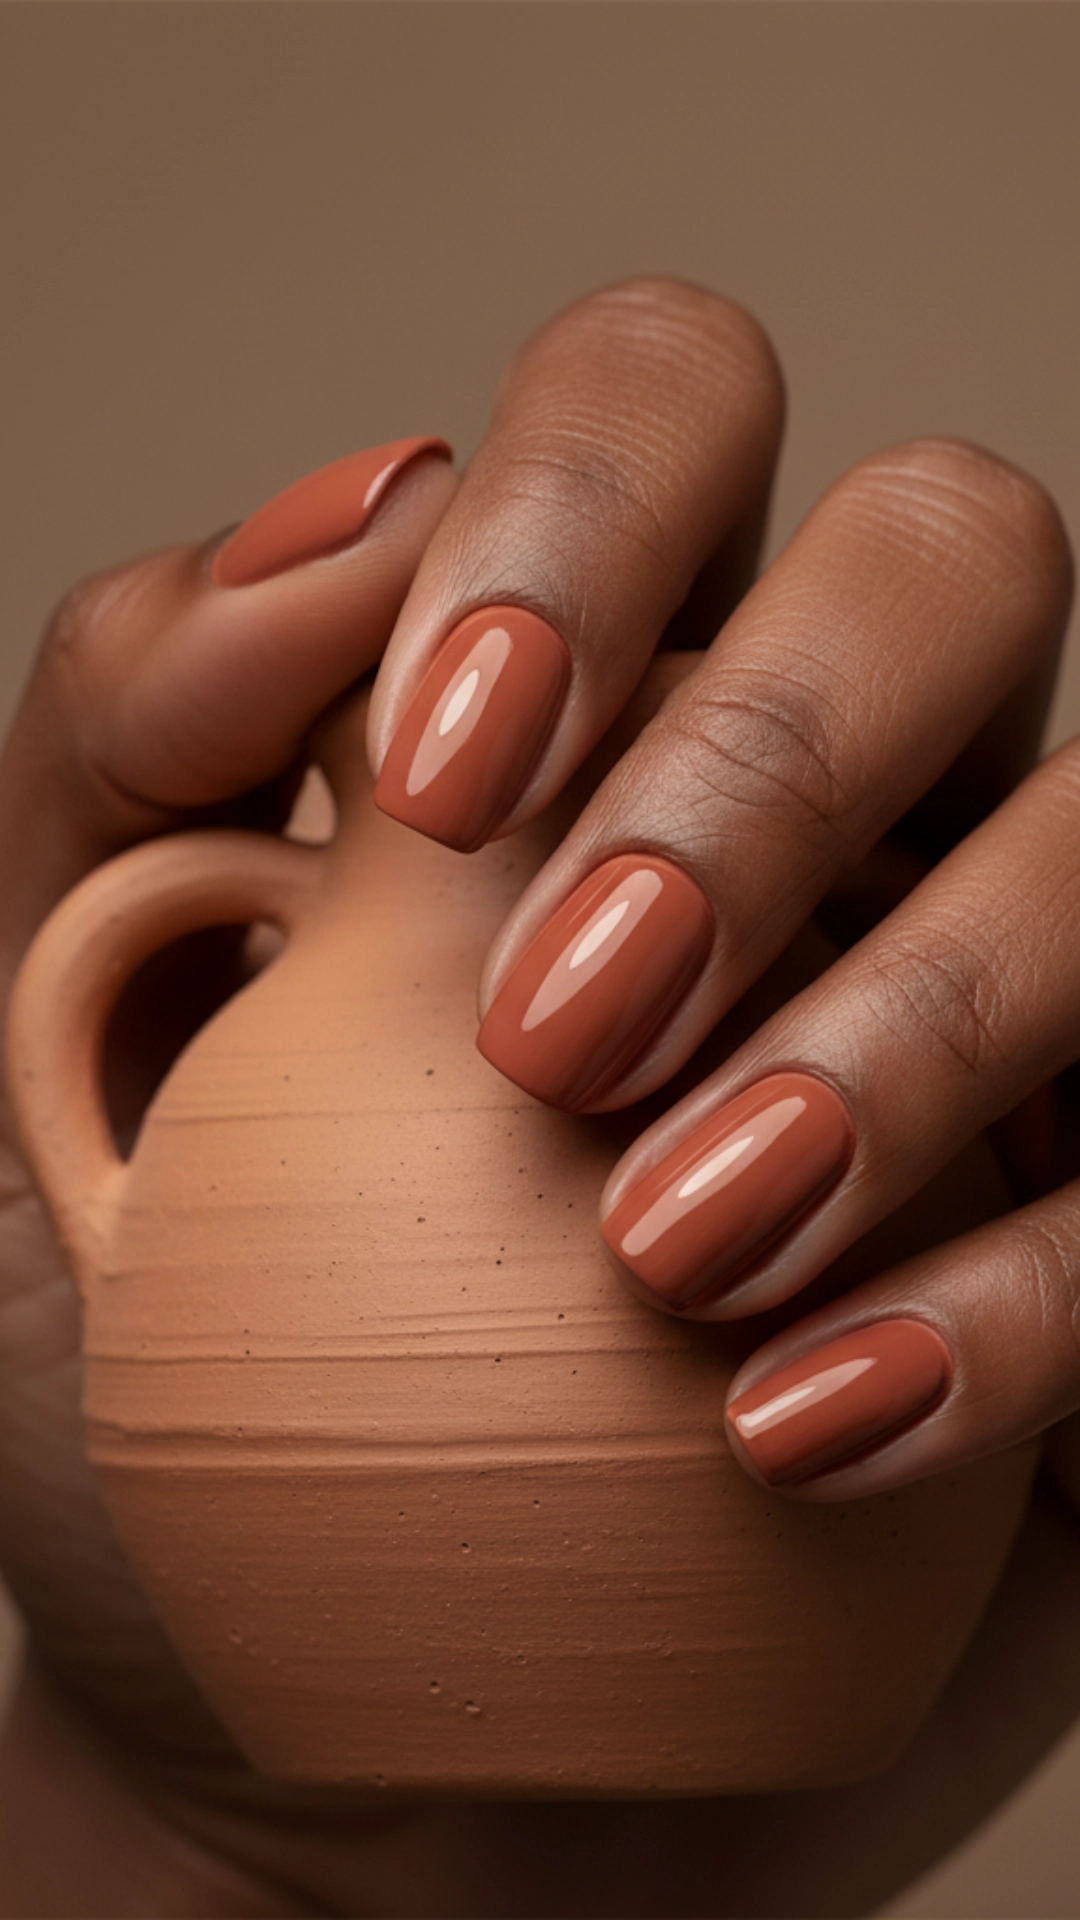
This beautiful, earthy color reminds me of pottery and fallen leaves. A simple, solid manicure in a warm terracotta shade is one of the most underrated but chicest fall nail ideas. It’s sophisticated, warm, and suits every skin tone.
You’ll need: An opaque terracotta or clay-colored polish and a top coat of your choice (glossy or matte).
Steps:
- Apply a base coat to your clean, shaped nails.
- Paint on two even coats of the terracotta polish, allowing the first coat to dry before applying the second.
- This color looks fantastic with a high-gloss finish for a polished look or a matte top coat for a more earthy, clay-like texture.
- Apply your chosen top coat to seal in the color and complete the manicure.
Conclusion
There are 25 incredible fall nail ideas to inspire you for the coziest season of the year. I hope you found a few new styles you’re excited to try. A perfect autumn look awaits you, whether you prefer a simple, elegant solid color like terracotta or a more intricate design like plaid or sweater texture.
Don’t be afraid to experiment with different colors and techniques. The most important thing is to have fun and choose a design that makes you feel great. These fall nail ideas embrace autumn’s warm, cozy, and beautiful vibes.
