This post may contain affiliate links, which means I may receive a small commission should you decide to click that link and make a purchase. For more information please refer to the Terms & Conditions.

Spring is in the air, and Easter is just around the corner! If you’re looking for Easter Dessert Ideas to celebrate the season, we’ve got you covered.
Here are 12 easy Easter Dessert Ideas that will bring a smile and a little sweetness to your gathering. From colorful cookies to delightful cakes, there’s something here for everyone to enjoy without spending hours in the kitchen.
1. Coconut Cream Pie with Toasted Flakes
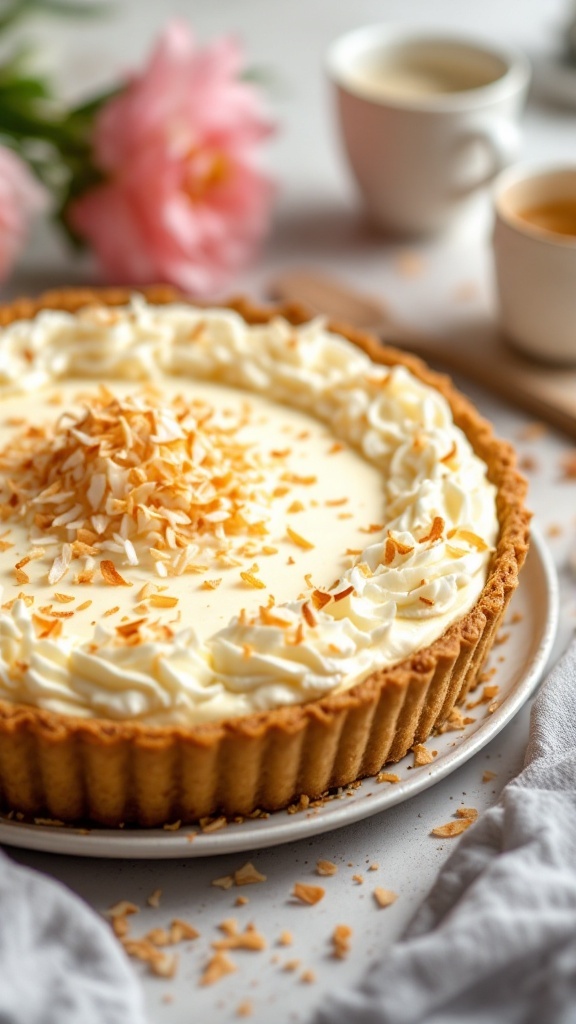
Coconut cream pie is a delightful dessert that brings a taste of the tropics to your table. Its creamy, rich filling with coconut milk is balanced perfectly by the light buttery crust. Topped with toasted coconut flakes, this pie is not only delicious but visually enticing as well.
This recipe is easy to follow, making it perfect for seasoned bakers and those just starting out. The combination of flavors and textures—from the smooth filling to the crunchy topping—makes this pie an irresistible treat for any Easter gathering.
Ingredients
- 1 pre-made pie crust
- 1 cup coconut milk
- 1 cup heavy cream
- 3/4 cup granulated sugar
- 1/4 cup cornstarch
- 1/4 teaspoon salt
- 3 large egg yolks
- 1 teaspoon vanilla extract
- 1 cup shredded coconut, toasted
- Whipped cream for topping
Instructions
- Prepare the Crust: Bake the pie crust according to the package instructions until golden brown. Let it cool completely before filling.
- Make the Filling: In a saucepan, combine coconut milk, heavy cream, sugar, cornstarch, and salt. Whisk over medium heat until the mixture thickens, about 5-7 minutes.
- Add Egg Yolks: Beat the egg yolks in a separate bowl. Gradually mix in about 1/2 cup of the hot coconut mixture to temper the eggs, then whisk this mixture back into the saucepan. Continue to cook for another 2 minutes.
- Flavor It: Remove from heat and stir in the vanilla extract and 1/2 cup of the toasted coconut. Pour the filling into the cooled pie crust and smooth the top.
- Chill: Cover with plastic wrap and refrigerate for at least 4 hours or until set.
- Serve: Top with whipped cream and the remaining toasted coconut before slicing and serving.
2. Chocolate Bunny Cupcakes

Chocolate Bunny Cupcakes are a delightful treat that perfectly captures the spirit of Easter. These rich and moist cupcakes are topped with creamy frosting and decorated to resemble adorable bunny faces, making them delicious and a fun project for the whole family.
With a simple chocolate cake base and easy-to-follow decorating steps, these cupcakes are perfect for novice bakers and seasoned pros. They taste rich and chocolatey, balanced by sweet frosting and colorful decorations that will bring smiles to everyone at your Easter gathering.
Ingredients
- 1 3/4 cups all-purpose flour
- 3/4 cup unsweetened cocoa powder
- 2 cups granulated sugar
- 1 1/2 teaspoons baking powder
- 1 1/2 teaspoons baking soda
- 1 teaspoon salt
- 2 large eggs
- 1 cup whole milk
- 1/2 cup vegetable oil
- 2 teaspoons vanilla extract
- 1 cup boiling water
- 1 batch of buttercream frosting
- Colored candy melts for decoration
- Mini marshmallows
- Assorted sprinkles
Instructions
- Prepare the Cupcakes: Preheat your oven to 350°F (175°C) and line a cupcake pan with liners. Combine flour, cocoa powder, sugar, baking powder, baking soda, and salt in a large bowl. Mix well.
- Mix Wet Ingredients: Add eggs, milk, vegetable oil, and vanilla extract to the dry ingredients. Mix until smooth. Gradually stir in the boiling water until the batter is well combined.
- Bake: Fill cupcake liners about 2/3 full with the batter. Bake for 18-20 minutes or until a toothpick comes out clean. Allow them to cool completely on a wire rack.
- Decorate: Once cooled, frost the cupcakes with buttercream frosting. Using colored candy melts, create bunny ears and attach them to the frosting along with mini marshmallows for the bunny faces. Add sprinkles for extra color!
3. Easter Egg Rice Krispie Treats
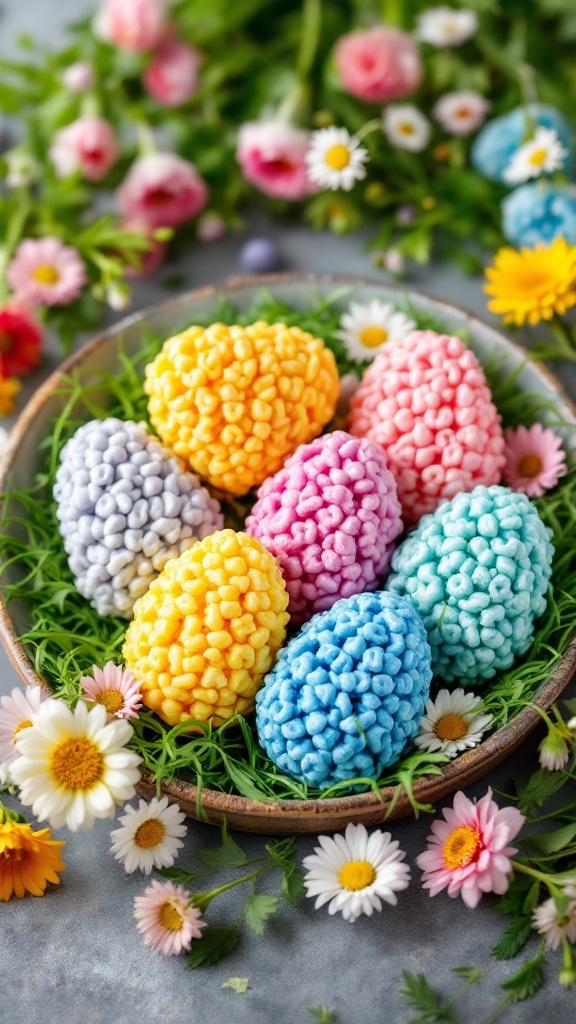
Bring festive cheer to your Easter celebration with these delightful Easter Egg Rice Krispie Treats! They’re chewy, sweet, and oh-so-fun to make, especially with little helpers. The colorful eggs look adorable and add a charming touch to your dessert table.
This recipe is super simple, requiring just a few ingredients, and it’s sure to be a hit with kids and adults alike. The combination of gooey marshmallows and crispy cereal creates a delightful texture, and the vibrant colors make these treats irresistible.
Ingredients
- 3 tablespoons unsalted butter
- 1 package (10 oz) marshmallows
- 6 cups Rice Krispies cereal
- Food coloring (various colors)
- Non-stick cooking spray
Instructions
- Prepare the Mixture: Melt the butter in a large saucepan over low heat. Add the marshmallows and stir continuously until completely melted and smooth.
- Add the Cereal: Remove the saucepan from the meat and gradually stir in the Rice Krispies cereal until evenly coated.
- Color the Mixture: Divide the mixture into bowls and add a few drops of food coloring. Mix until the colors are evenly distributed.
- Shape the Eggs: Lightly grease your hands with non-stick spray and shape small portions of the colored mixture into egg shapes.
- Let Set: Place the formed eggs on a baking sheet lined with parchment paper and let them cool completely before serving.
4. Pistachio and Lime Tarts

Pistachio and lime tarts are a delightful combination of rich and zesty flavors. The creamy pistachio filling offers a subtle nuttiness, while the lime adds a refreshing burst of citrus. These tarts are not just tasty; they also have a beautiful presentation, making them a perfect treat for Easter gatherings or any spring celebration.
The best part? They’re surprisingly simple to make! You can whip up these tarts with just a few ingredients and impress your friends and family. The buttery crust beautifully complements the smooth filling, creating a delicious balance everyone will love.
Ingredients
- 1 cup crushed graham crackers
- 1/4 cup melted butter
- 1/2 cup powdered sugar
- 1 cup unsweetened almond milk
- 1/2 cup pistachio paste
- 2 tablespoons lime juice
- 1 tablespoon lime zest
- 1 tablespoon cornstarch
- 1/4 teaspoon salt
- Pistachio pieces and lime wedges for garnish
Instructions
- Prepare the Crust: Preheat your oven to 350°F (175°C). Mix crushed graham crackers with melted butter and powdered sugar in a bowl until well combined. Press the mixture into tartlet pans to form the crusts. Bake for about 10 minutes, then allow to cool.
- Make the Filling: In a saucepan, combine the almond milk, pistachio paste, lime juice, lime zest, cornstarch, and salt. Cook over medium heat, whisking constantly until the mixture thickens (about 5-7 minutes).
- Assemble the Tarts: Pour the pistachio filling into the cooled crusts and smooth the tops. Refrigerate for at least 2 hours to set.
- Garnish and Serve: Once set, top each tart with pistachio pieces and a wedge of lime for a pop of color. Serve chilled, and enjoy!
5. Mini Cheesecakes with Fruit Toppings
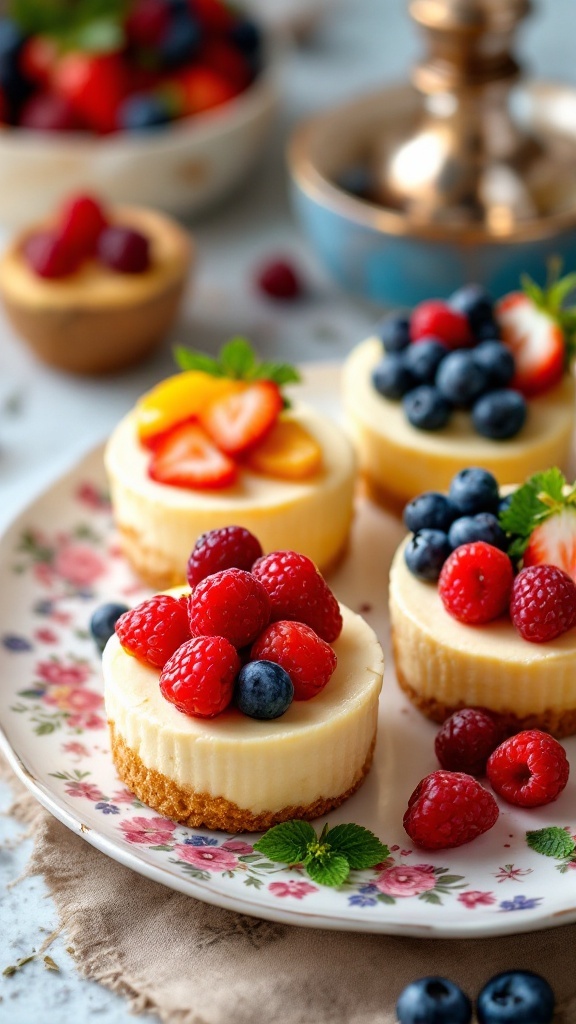
These mini cheesecakes are a delightful treat that combines creamy, rich flavors with a fresh fruit topping. They’re simple to make, and their size makes them perfect for any gathering, especially during Easter celebrations. The smooth cheesecake pairs wonderfully with various fruits, allowing you to customize each one to your liking.
Not only do these desserts look appealing on a platter, but they are also a fantastic way to satisfy your sweet tooth without overindulging. The creamy filling and fruity brightness make these mini cheesecakes a hit with everyone!
Ingredients
- 1 cup graham cracker crumbs
- 3 tablespoons granulated sugar
- 4 tablespoons unsalted butter, melted
- 16 ounces cream cheese, softened
- 1/2 cup granulated sugar
- 2 large eggs
- 1 teaspoon vanilla extract
- 1 cup mixed fresh berries (strawberries, blueberries, raspberries)
- Mint leaves for garnish (optional)
Instructions
- Preheat your oven to 325°F (160°C) and line a muffin tin with paper liners.
- Mix graham cracker crumbs, sugar, and melted butter in a bowl until combined. Press this mixture into the bottom of each muffin liner to form the crust.
- In another bowl, beat the softened cream cheese and sugar until smooth. Add eggs one at a time, mixing well after each addition, and then stir in the vanilla extract.
- Pour the cream cheese mixture over the crusts in the muffin tin, filling each cup about 3/4 full.
- Bake for 18-20 minutes or until the centers are set. Let them cool in the tin for a few minutes before transferring to a wire rack to cool completely.
- Once cooled, top each cheesecake with fresh mixed berries and a mint leaf for garnish if desired. Serve chilled, and enjoy!
6. Easter Dessert Ideas – Berry Pavlova Nest
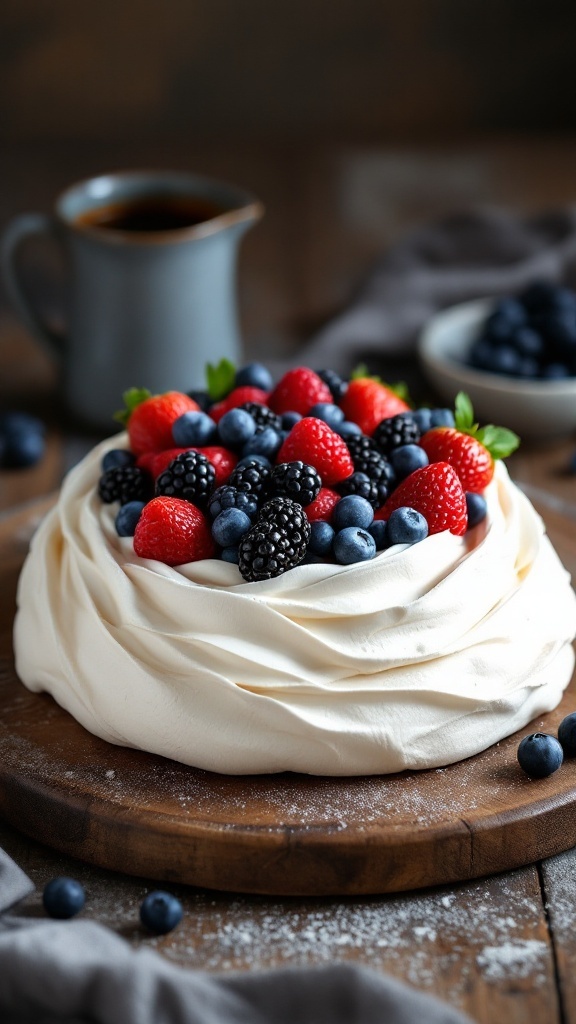
Berry Pavlova Nest is a delightful dessert that combines a crisp meringue shell with a soft, marshmallow-like interior. Topped with fresh berries and whipped cream, it offers a light and airy texture that melts in your mouth. This dessert is visually appealing and flavorful, making it an excellent choice for any Easter celebration.
The best part? It’s surprisingly simple to make! You can create a show-stopping dessert with just a few ingredients that will impress your guests. Perfect for sharing, this berry pavlova nest will surely be a hit among family and friends.
Ingredients
- 4 large egg whites
- 1 cup granulated sugar
- 1 teaspoon vanilla extract
- 1 teaspoon white vinegar
- 1 cup heavy cream
- 2 tablespoons powdered sugar
- 1 cup mixed berries (strawberries, blueberries, raspberries, blackberries)
- Fresh mint leaves for garnish (optional)
Instructions
- Preheat the oven to 250°F (120°C) and line a baking sheet with parchment paper. On the parchment, draw a circle about 8 inches in diameter to guide the shape of your pavlova.
- In a large mixing bowl, beat the egg whites on medium speed until soft peaks form. Gradually add the granulated sugar, continuing to beat until the mixture is glossy and stiff peaks form. This should take about 5-7 minutes.
- Gently fold in the vanilla extract and white vinegar. Spoon the meringue mixture onto the prepared parchment, shaping it into a nest by creating a slight dip in the center.
- Bake for 1 hour, then turn off the oven and allow the pavlova to cool completely inside the oven.
- Once cooled, whip the heavy cream with the powdered sugar until soft peaks form. Spread the whipped cream over the cooled meringue nest.
- Top with mixed berries and garnish with mint leaves if desired. Serve immediately and enjoy your delightful dessert!
7. Carrot Cake Trifle
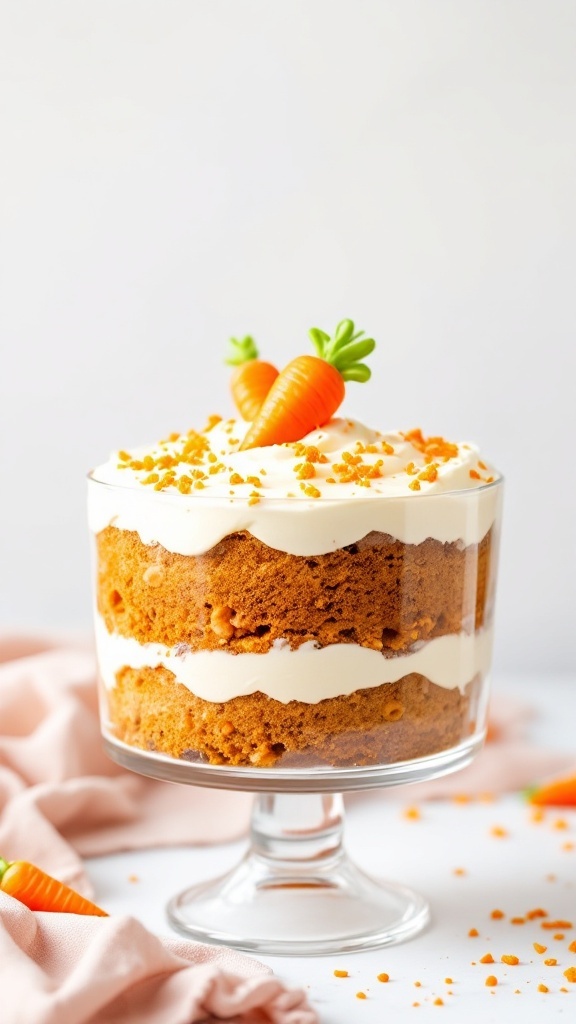
If you’re looking for a delightful dessert that’s both simple and delicious, a Carrot Cake Trifle is a fantastic choice! This layered treat combines moist carrot cake, fluffy cream cheese frosting, and a sprinkle of crunchy toppings, creating a wonderful blend of flavors and textures.
Making this trifle is incredibly easy and perfect for Easter celebrations or any spring gathering. Each spoonful is a delightful mix of sweet and spiced, with just the right amount of creaminess. Plus, it looks stunning as a centerpiece on your dessert table!
Ingredients
- 1 box carrot cake mix
- 3 large eggs
- 1/2 cup vegetable oil
- 1 cup water
- 8 oz cream cheese, softened
- 1/2 cup powdered sugar
- 1 cup heavy cream
- 1 teaspoon vanilla extract
- 1/2 cup crushed pineapple, drained
- 1/2 cup chopped walnuts or pecans (optional)
- Carrot decorations for garnish
Instructions
- Prepare the Cake: Preheat your oven according to the cake mix instructions. Mix the carrot cake batter using the box instructions, then bake it in a rectangular pan until golden brown and a toothpick comes out clean. Let it cool completely.
- Make the Frosting: In a large bowl, beat the softened cream cheese and powdered sugar until smooth. In another bowl, beat the heavy cream and vanilla until stiff peaks form. Gently fold the whipped cream into the cream cheese mixture until well combined.
- Layer the Trifle: Once the cake is cool, cut it into cubes. In a large glass trifle bowl or individual cups, layer the cake cubes, a layer of the cream cheese frosting, and a sprinkle of crushed pineapple. Repeat the layers until all ingredients are used, finishing with a layer of frosting.
- Garnish and Serve: Top your trifle with chopped nuts and carrot decorations. Chill for at least an hour before serving to allow the flavors to meld.
8. Lemon Meringue Pie with Colorful Sprinkles

Lemon meringue pie is a delightful dessert with a zesty twist to your Easter celebrations. With its tangy lemon filling and fluffy, sweet meringue topping, this pie perfectly balances flavors and textures. The addition of colorful sprinkles gives it a festive touch, making it not just tasty but visually appealing!
This lemon meringue pie recipe is simple to follow, making it accessible for bakers of all levels. Whether you’re hosting a gathering or simply treating yourself, it is sure to brighten your day!
Ingredients
- 1 pre-made pie crust
- 1 cup granulated sugar
- 2 tablespoons cornstarch
- 1/4 teaspoon salt
- 1 1/2 cups water
- 3 large egg yolks, beaten
- 1/4 cup fresh lemon juice
- 2 tablespoons unsalted butter
- 1 teaspoon lemon zest
- 3 large egg whites
- 1/4 teaspoon cream of tartar
- 1/2 cup powdered sugar
- Colorful sprinkles for decoration
Instructions
- Preheat the oven to 350°F (175°C). Place the pre-made pie crust in a pie dish and bake for 10-12 minutes or until lightly golden. Remove and let it cool.
- In a saucepan, whisk together granulated sugar, cornstarch, and salt. Gradually add water and cook over medium heat until it thickens, stirring constantly.
- In a separate bowl, combine the beaten egg yolks with a bit of the hot mixture, then return it to the saucepan. Stir in the lemon juice, butter, and lemon zest. Cook for 2 minutes, then pour the filling into the baked crust.
- In a clean bowl, beat the egg whites with cream of tartar until soft peaks form. Gradually add powdered sugar and continue to beat until stiff peaks form.
- Spread the meringue over the lemon filling, sealing the edges. Use a spatula to create peaks.
- Bake for 10-15 minutes until the meringue is golden. Allow to cool, then sprinkle with colorful sprinkles before serving.
9. Chocolate Covered Strawberries

Chocolate-covered strawberries are a delightful treat that combines the sweetness of strawberries with rich, melted chocolate. They’re easy to make and make for a lovely dessert, especially during Easter celebrations. The combination of juicy fruit and decadent chocolate creates a taste sensation that is both refreshing and indulgent.
This recipe is perfect for any skill level, requiring just a few simple steps. You can customize them by choosing different types of chocolate or adding fun toppings. These treats are sure to impress your family and friends!
Ingredients
- 1 pound fresh strawberries
- 8 ounces semi-sweet chocolate chips
- 4 ounces white chocolate chips
- Sprinkles, crushed nuts, or coconut for topping (optional)
Instructions
- Wash the strawberries and dry them thoroughly. Avoid moisture, as it can interfere with the chocolate coating.
- Melt the semi-sweet chocolate chips in a microwave-safe bowl in 30-second intervals, stirring in between, until smooth.
- Dip each strawberry into the melted chocolate, allowing excess chocolate to drip off.
- Place the dipped strawberries on a baking sheet lined with parchment paper. If you’re adding toppings, sprinkle them on before the chocolate sets.
- Melt the white chocolate chips similarly and drizzle over the chocolate-covered strawberries for a decorative touch.
- Chill the strawberries in the refrigerator until the chocolate hardens, about 30 minutes.
10. Spring Flower Sugar Cookies
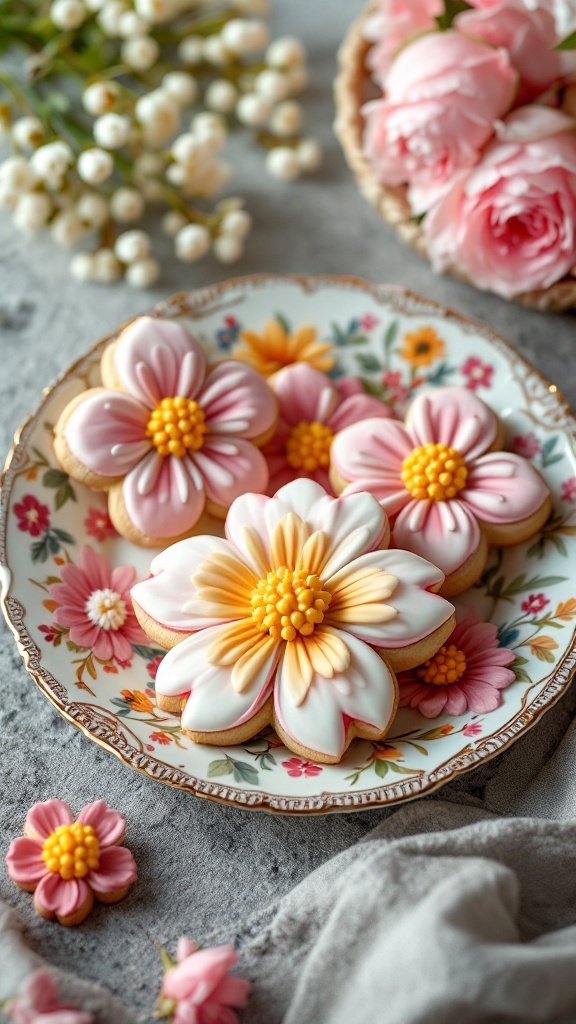
Spring Flower Sugar Cookies are a delightful treat that perfectly captures the season’s essence. With their vibrant, floral designs and sweet, buttery flavor, these cookies are fun to make and a charming addition to any Easter celebration.
The beauty of this recipe lies in its simplicity. Even if you’re not a seasoned baker, crafting these cookies is enjoyable. They are soft and chewy, making them a hit with both kids and adults alike. Decorating them with colorful icing is a perfect way to express creativity!
Ingredients
- 2 ¾ cups all-purpose flour
- 1 teaspoon baking soda
- ½ teaspoon baking powder
- 1 cup unsalted butter, softened
- 1 ½ cups white sugar
- 1 egg
- 1 teaspoon vanilla extract
- 3 to 4 cups powdered sugar
- 2 tablespoons milk
- Food coloring (various colors for decorating)
Instructions
- Preheat your oven to 375°F (190°C). In a small bowl, stir together flour, baking soda, and baking powder; set aside.
- In a large bowl, cream the butter and sugar together until smooth. Beat in the egg and vanilla. Gradually blend in the dry ingredients.
- Roll rounded tablespoonfuls of dough into balls and place them on ungreased pans. Flatten each ball slightly with a glass.
- Bake for 8 to 10 minutes in the oven or until golden. Let cool on wire racks.
- Mix powdered sugar with milk and add food coloring to make the icing. Decorate the cooled cookies with your colorful icing to create beautiful flower designs!
11. Mango Tart with Whipped Cream
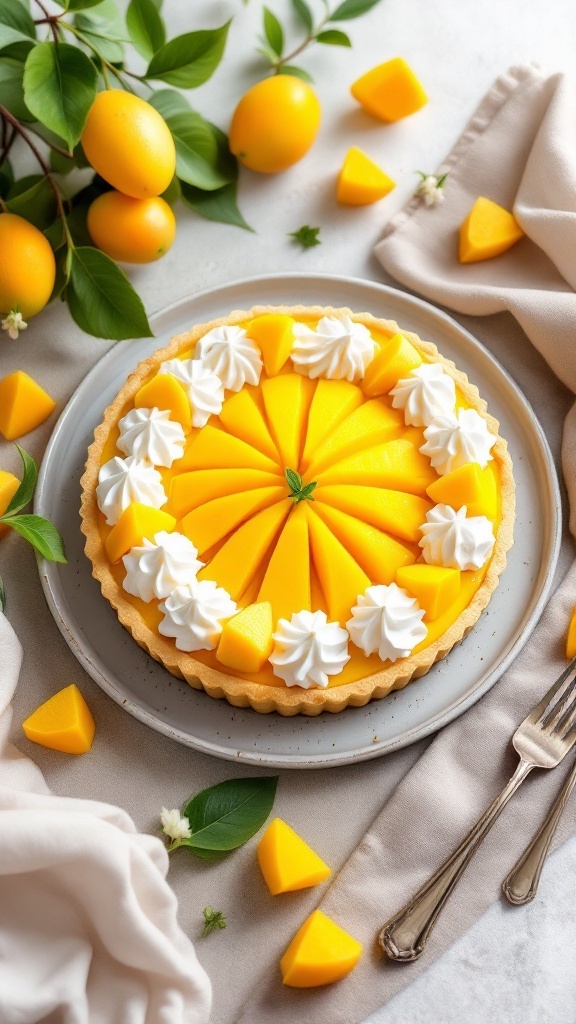
If you’re looking for a light and refreshing dessert, a mango tart with whipped cream could be just the thing. This dessert boasts a delightful balance of sweet mango flavors and creamy texture, making it a perfect treat for any spring or summer gathering.
The best part? It’s simple to make! You’ll create a buttery tart crust, fill it with a smooth mango filling, and top it off with fluffy whipped cream. This dessert will impress your friends and family without requiring hours in the kitchen.
Ingredients
- 1 ½ cups all-purpose flour
- ½ cup unsalted butter, softened
- ¼ cup powdered sugar
- 1 large egg yolk
- 3 ripe mangos, pureed
- 1 cup heavy cream
- ¼ cup sugar
- 1 teaspoon vanilla extract
- 1 tablespoon lemon juice
- Fresh mango slices for decoration
Instructions
- Make the Tart Crust: Combine flour and powdered sugar in a bowl. Cut in the butter until the mixture resembles coarse crumbs. Add the egg yolk and mix until the dough forms. Press into the bottom and up the sides of a tart pan. Chill for 30 minutes.
- Bake the Crust: Preheat the oven to 350°F (175°C). Bake the crust for 15-20 minutes until lightly golden. Let it cool.
- Prepare the Filling: In a bowl, mix mango puree with lemon juice. Spread the mango filling into the cooled tart crust.
- Make the Whipped Cream: Wash heavy cream with sugar and vanilla extract in a separate bowl until soft peaks form. Spread or pipe the whipped cream over the mango filling.
- Decorate and Serve: Top with fresh mango slices and chill for about an hour before serving. Enjoy your light and fruity treat!
12. Peanut Butter Egg Treats

Peanut Butter Egg Treats are a delightful and simple dessert that perfectly captures the essence of Easter. The creamy, sweet peanut butter center is covered in a smooth chocolate shell, making each bite a treat for your taste buds. These treats are delicious and incredibly easy to make, allowing even beginner bakers to whip them up without any hassle.
These treats combine peanut butter’s rich taste with chocolate’s sweetness, creating a flavor that feels indulgent yet comforting. They’re a fun and festive way to celebrate the holiday and work wonderfully as gifts or party favors. Gather your ingredients, and let’s dive into making these tasty delights!
Ingredients
- 1 cup creamy peanut butter
- 1/2 cup powdered sugar
- 1/4 cup unsalted butter, softened
- 1 teaspoon vanilla extract
- 2 cups chocolate chips (milk or dark)
- 1 tablespoon coconut oil (optional for melting chocolate)
Instructions
- Make the Peanut Butter Filling: In a mixing bowl, combine peanut butter, powdered sugar, softened butter, and vanilla extract. Mix until smooth and well blended.
- Shape the Peanut Butter Mixture: Using your hands, form small egg shapes out of the peanut butter mixture and place them on a parchment-lined baking sheet. Refrigerate for about 30 minutes until firm.
- Melt the Chocolate: In a microwave-safe bowl, combine chocolate chips and coconut oil (if using). Heat in 30-second intervals, stirring in between, until thoroughly melted and smooth.
- Coat the Eggs: Dip each peanut butter egg into the melted chocolate, ensuring they are fully covered. Let any excess chocolate drip off, then place them back on the parchment sheet.
- Let Set: Allow the chocolate to harden at room temperature, or place them in the fridge for quicker setting. Enjoy your homemade Peanut Butter Egg Treats!
