This post may contain affiliate links, which means I may receive a small commission should you decide to click that link and make a purchase. For more information please refer to the Terms & Conditions.
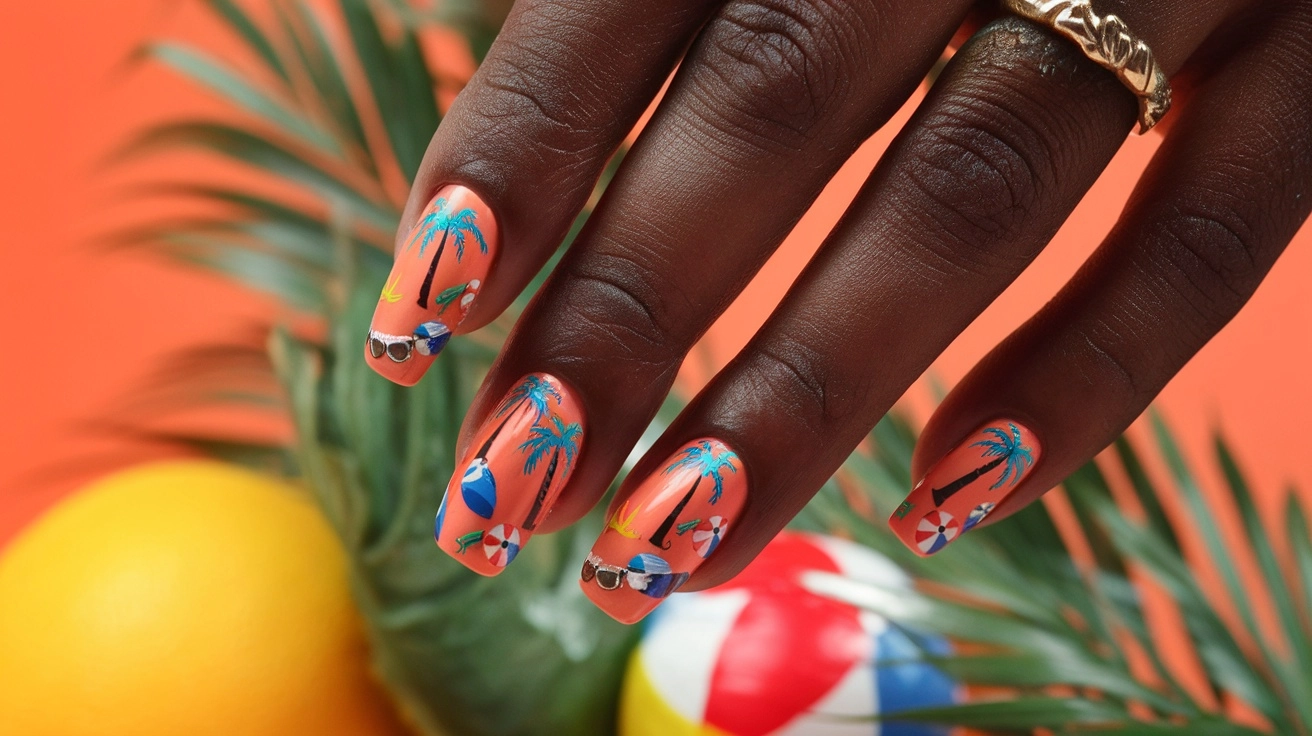
I’m so excited to share my favorite Summer Vacation Nail Designs! Summer is when I love showing off fun, colorful vacation nails that perfectly match my sunny mood.
I can’t wait to help you bring out your inner artist with my step-by-step guide. Trust me, you’ll soon be rocking nails as bright and cheerful as all your excellent summer plans!
Tropical Palm Tree Designs
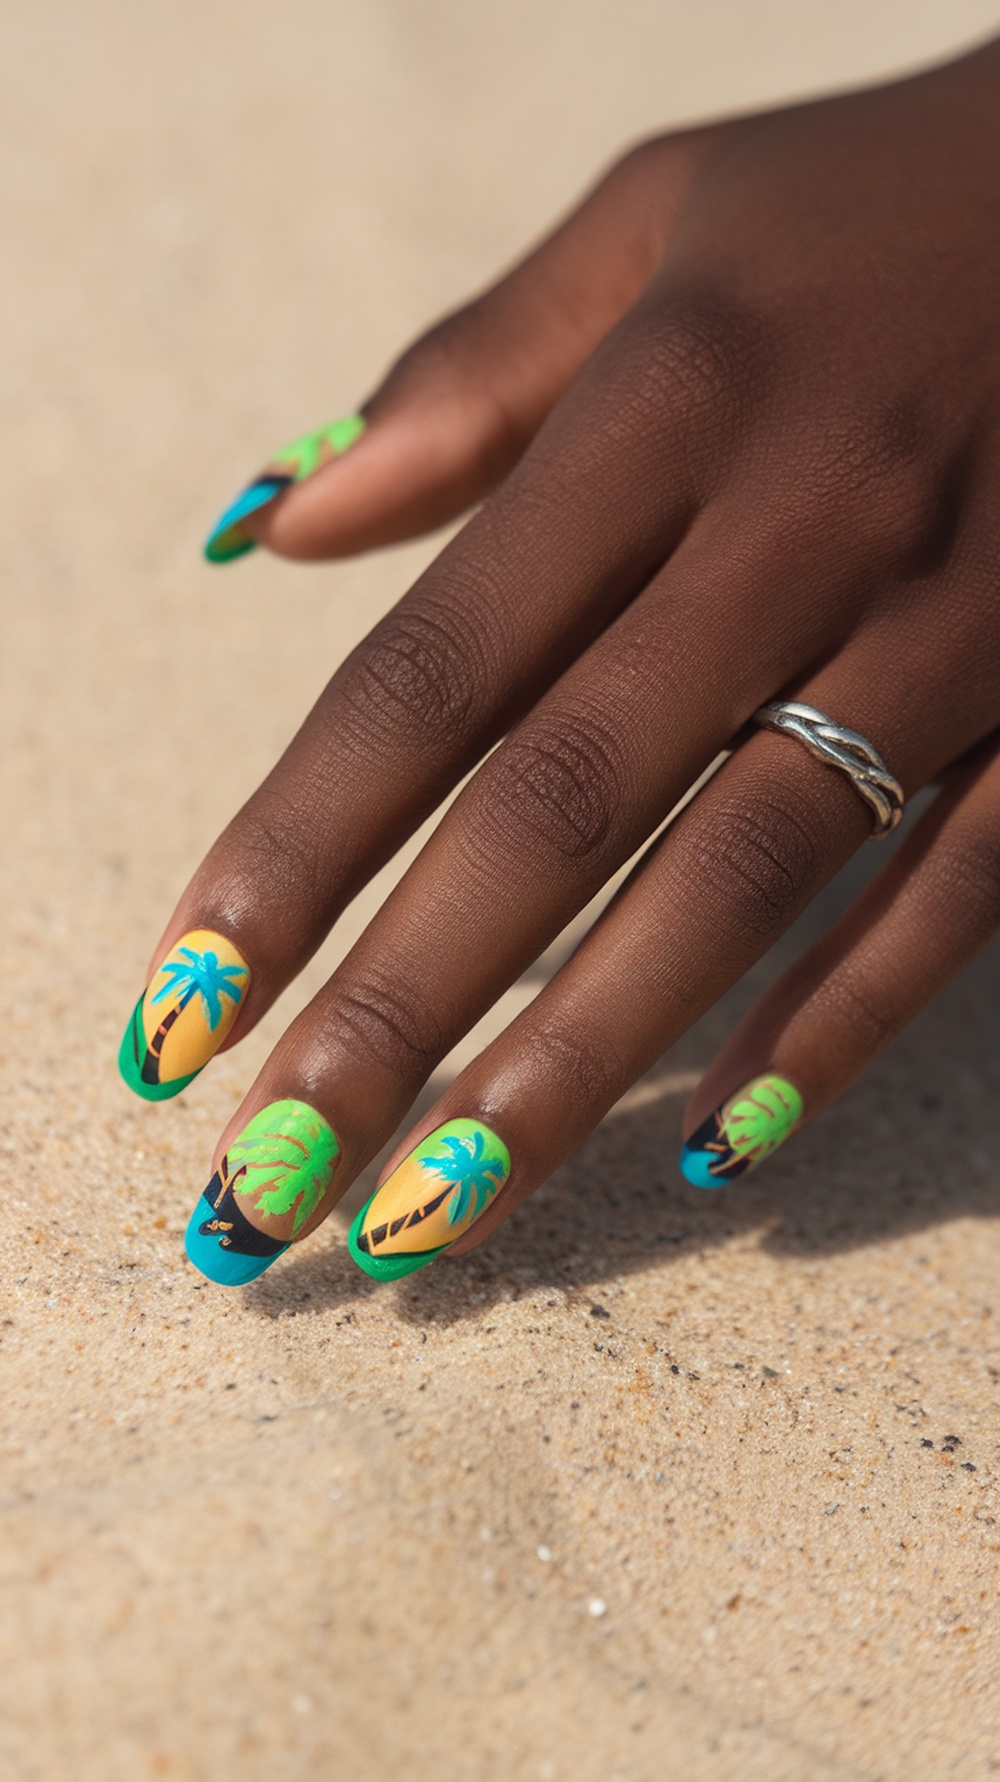
Summer is the perfect time to embrace bright colors and fun designs, and tropical palm tree nails are an ideal choice! These designs bring a bit of the beach to your fingertips, making them perfect for any vacation. The vibrant greens, yellows, and playful palm tree motifs instantly evoke warm, sunny days.
To achieve these stunning vacation nails, start with a base coat that protects your natural nails. Next, pick a bright color like sunny yellow or ocean blue for your base. Use a fine brush to create palm tree silhouettes on top, adding some neon green for the leaves. Don’t forget a top coat to seal in your design!
Feeling inspired? Try pairing these tropical designs with other nail ideas, like ‘Gel Nails Holiday Summer’ or ‘Summer Beach Nail Designs Hawaii.’ Whether heading to Turks and Caicos or just dreaming of a summer getaway, these nails will keep you in the holiday spirit!
Ocean Wave Nail Art
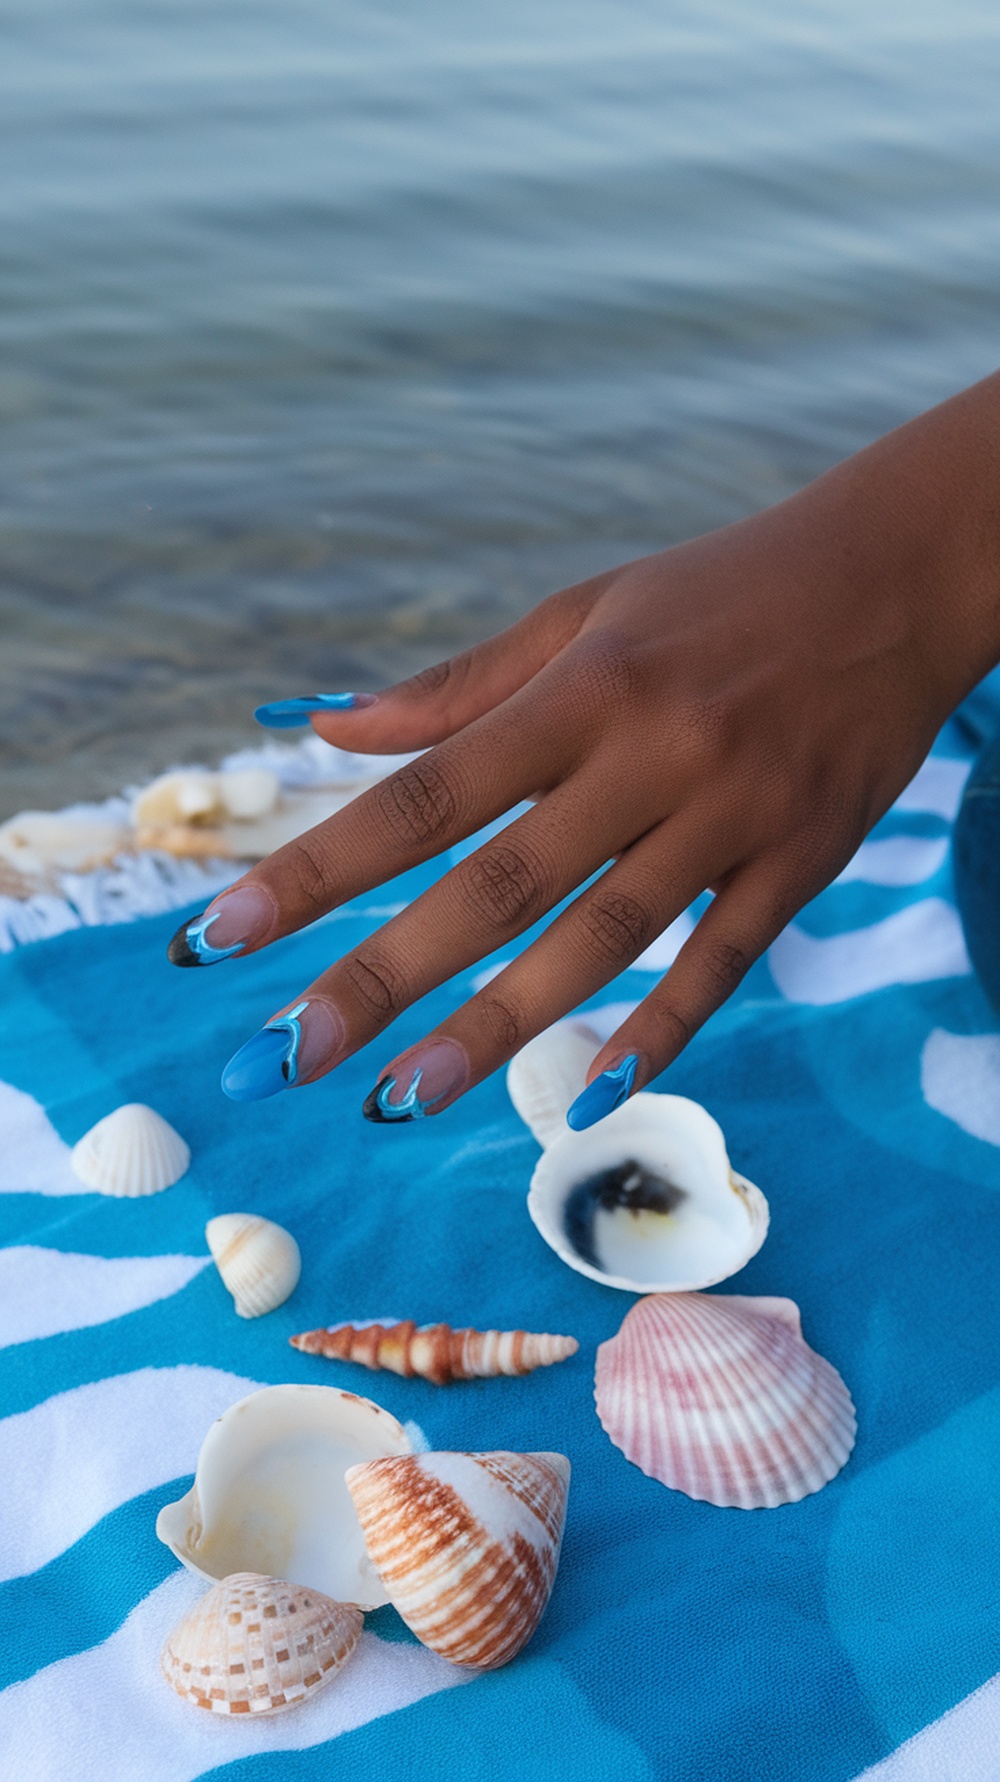
Summer is the perfect time to show off fun and creative nail art. Ocean wave nail designs capture the essence of beach vacations, making them a go-to choice for your holiday nails. The blue hues in the nail art mimic the water, while the wave patterns add a playful touch.
To achieve this look, start with a base coat to protect your nails. Next, paint your nails a solid blue color, representing the ocean. Using a lighter blue or white polish, create wave designs at the tip of your nails. Consider using a top coat that gives your nails a glossy finish for added flair.
This nail art pairs beautifully with beachy outfits, making it ideal for summer trips. Whether heading to Hawaii or enjoying a day at the local beach, these nails will turn heads. They reflect fun and relaxation, perfect for any summer getaway.
Fruit-Inspired Nail Designs
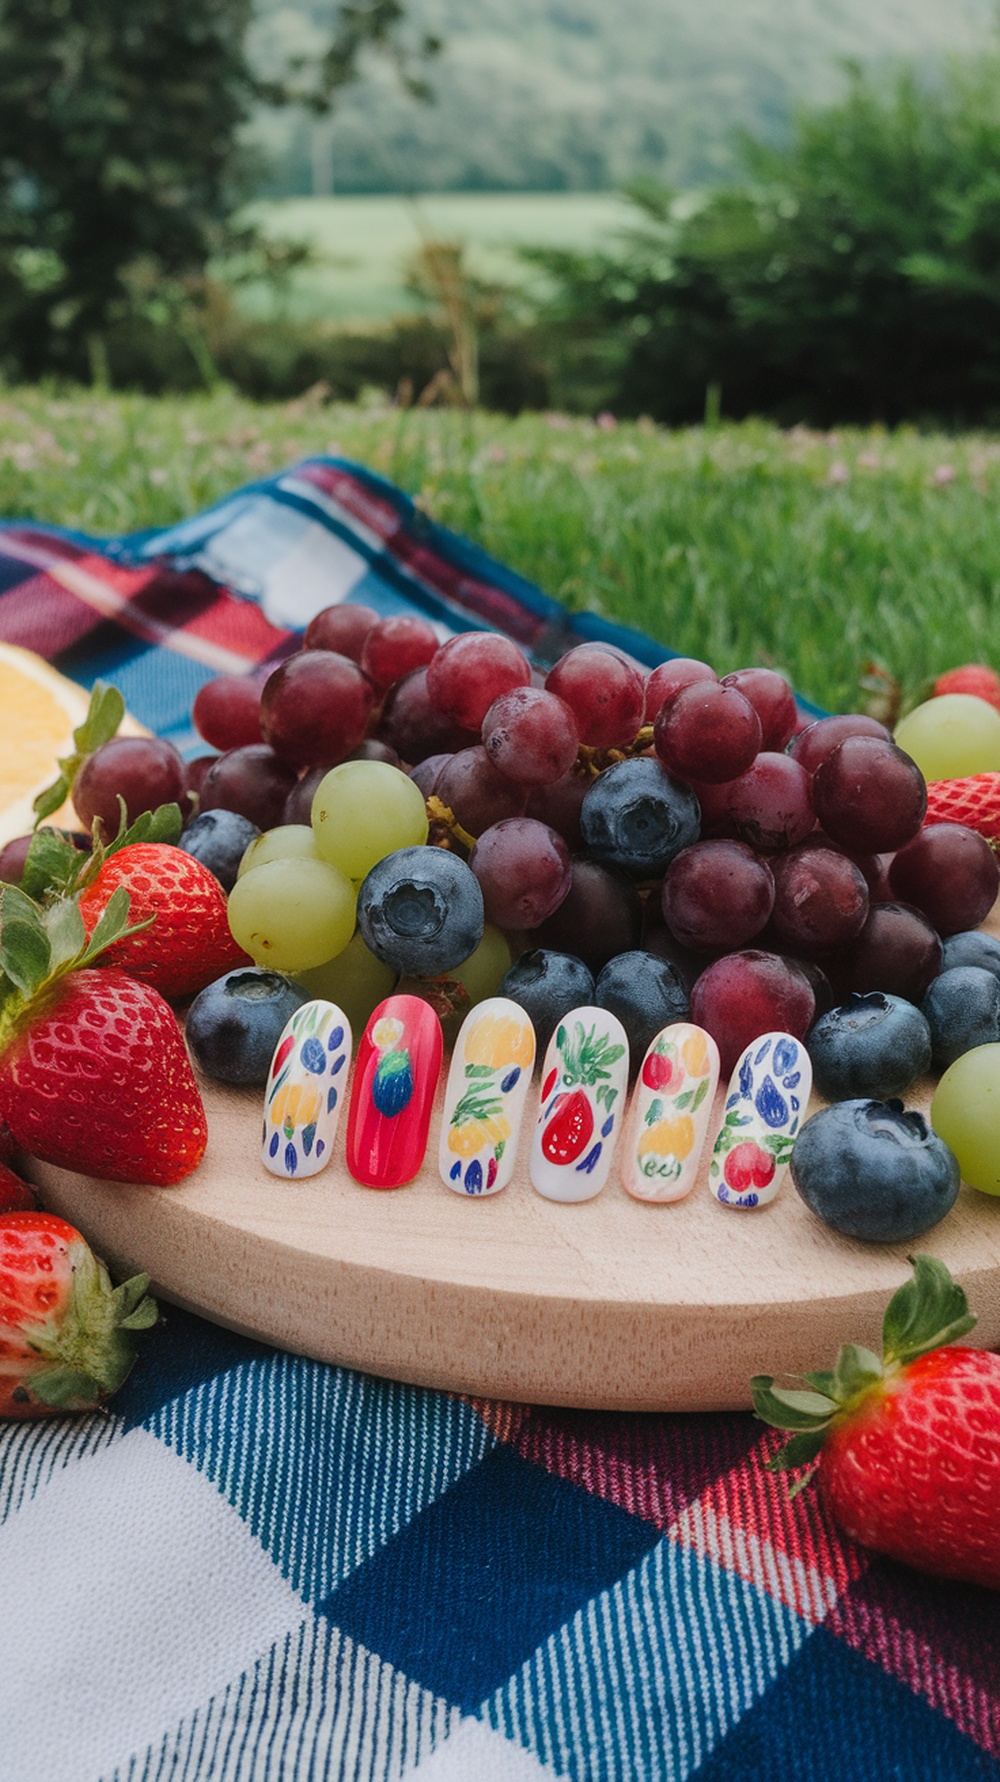
Fruit-inspired nail designs are fun to kick off your summer vacation vibes! Imagine showcasing colorful, juicy fruits right on your nails. From strawberries to blueberries, these designs can be as playful and vibrant as a summer picnic.
Each design is unique, featuring bright colors that bring joy and creativity. These nails would complement any summer outfit or beachy look!
To achieve the perfect fruit-inspired vacation nails, follow this simple step-by-step guide:
- Prep Your Nails: Start with clean, shaped nails. Apply a base coat to protect them.
- Choose Your Base Color: Pick a color that contrasts nicely with your fruit designs. White or light blue works great!
- Paint the Fruits: Using a fine brush, create your fruit designs. Think strawberries, lemons, and grapes. Don’t be afraid to get creative!
- Add Details: Use a smaller brush to add leaves or highlights. This makes your fruits pop!
- Top It Off: Apply a top coat for shine and durability once dry.
These summer vacation nail ideas are not just super cute, but they also capture the essence of sunny days and fruity treats. Whether heading to the beach or enjoying summer at home, fruit nails can brighten your style!
Watermelon Nail Designs
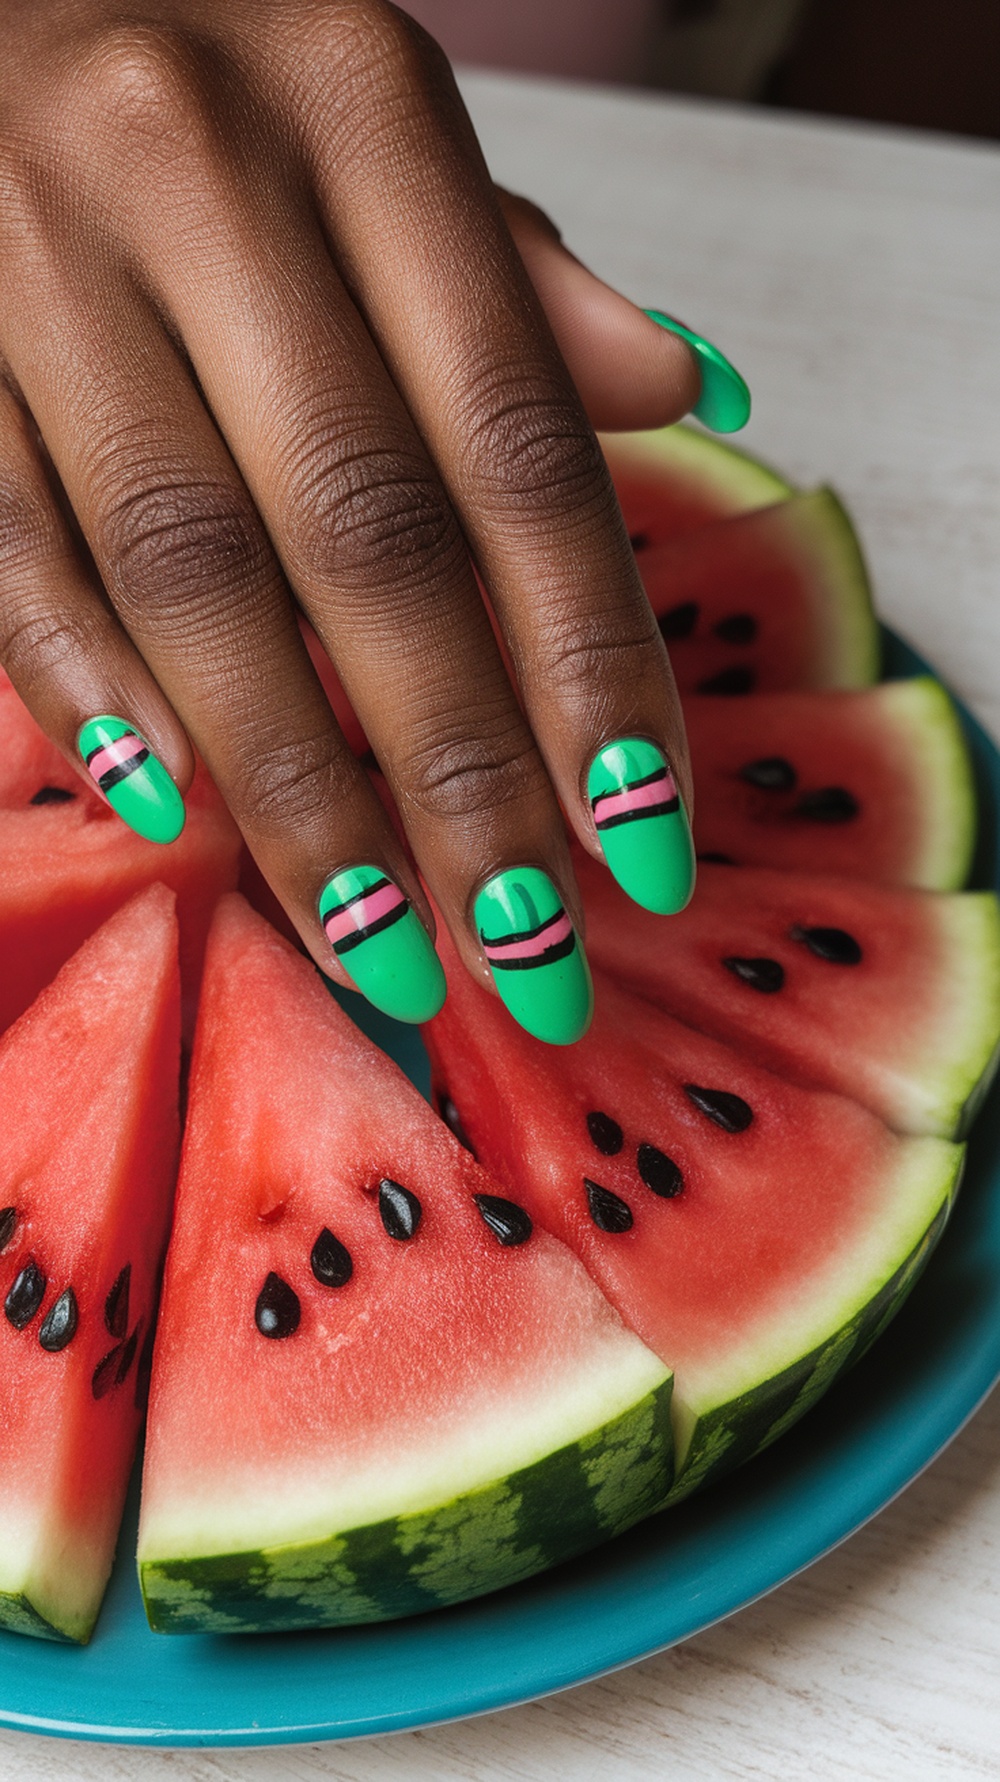
Nothing screams summer quite like watermelon! This fun fruit makes for the perfect inspiration for your vacation nails. The vibrant green and pink colors in watermelon can bring a joyful energy to your summer style. Whether heading to Turks and Caicos or enjoying a sunny day, watermelon nail designs are a must-have.
To achieve these playful watermelon nails, start with a bright green base. Then, add a thin pink strip near the cuticle to mimic the fruit’s flesh. Finish off with black dots to represent the seeds. This simple yet cute nail art idea is perfect for anyone looking for standout summer beach nail designs.
For a step-by-step guide:
- Start with clean, shaped nails. Apply a base coat for protection.
- Paint your nails with a vibrant green polish and let it dry.
- Using a nail art brush, create a pink line near the cuticle.
- Add small black dots for seeds using a dotting tool or a toothpick.
- Finish with a top coat to seal your design.
These watermelon nails are not only cute, but they also fit right into your holiday nail inspo summer collection. Perfect for showcasing on vacation or just feeling fancy at home, they capture the essence of summer in every swipe!
Floral Nail Art for Summer
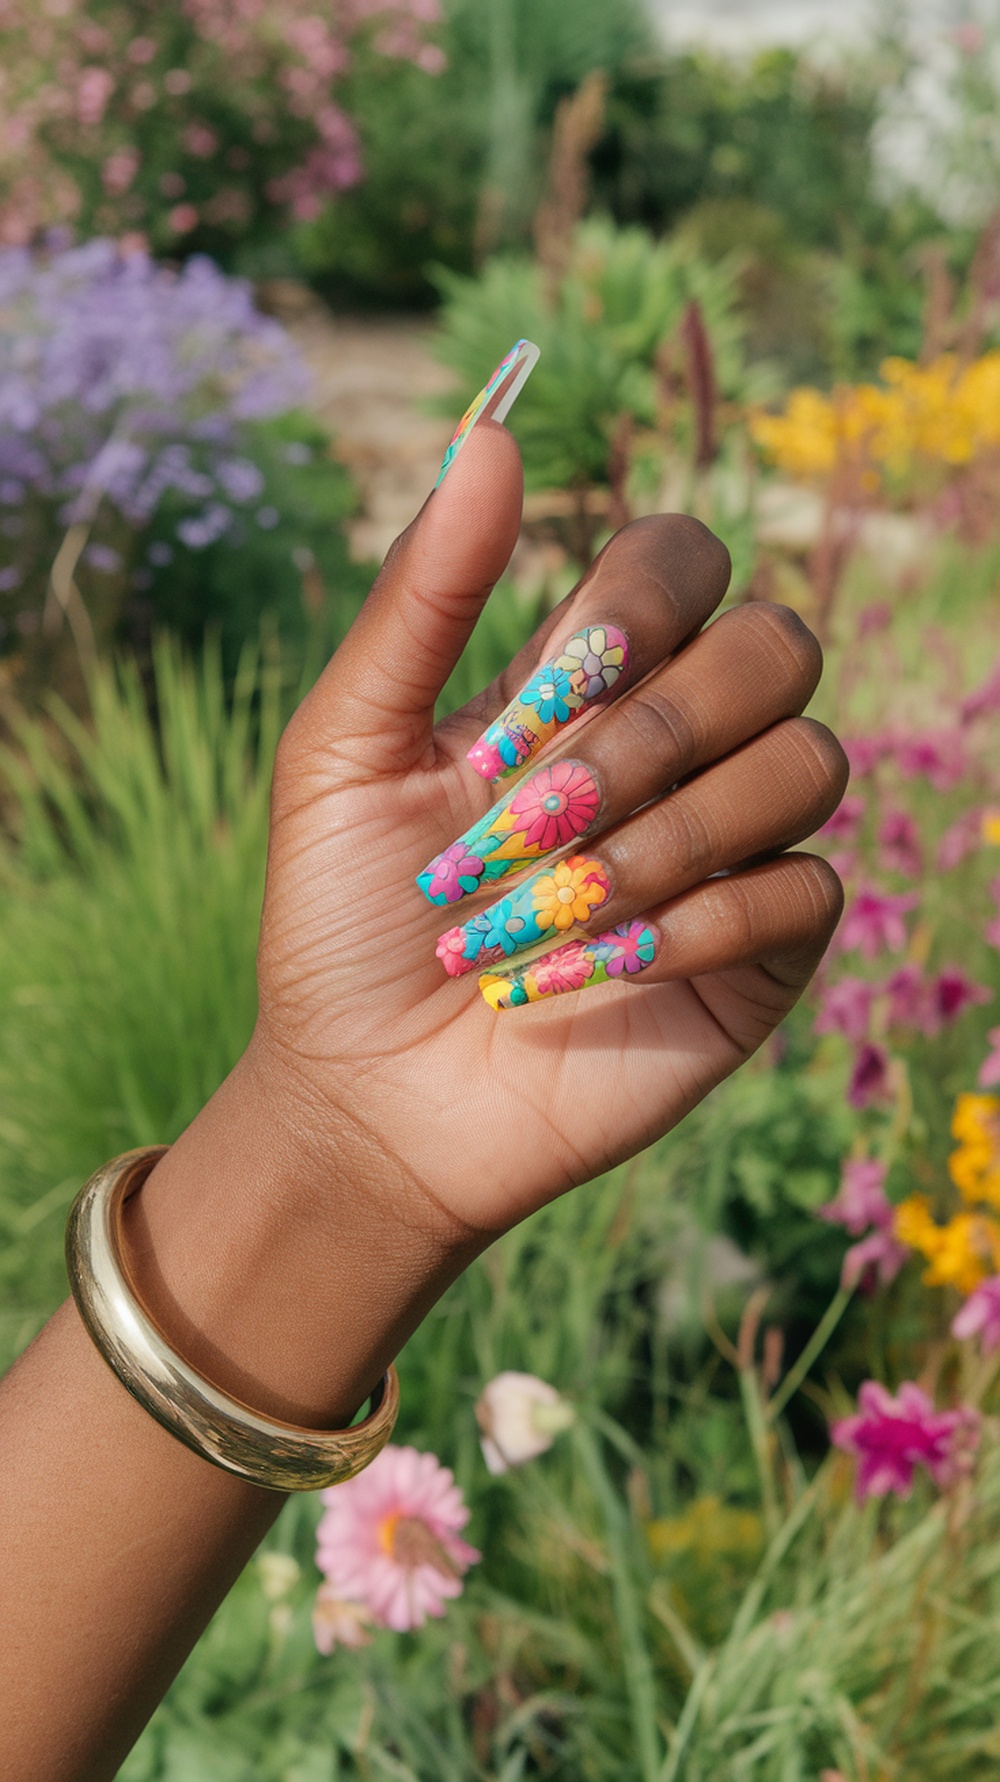
Floral nail art is a fantastic choice for summer, bringing a burst of color and fun to your look. These nails’ vibrant pink, blue, and yellow flowers perfectly capture the season’s spirit. These nails will turn heads whether you’re hitting the beach or enjoying a garden party.
Start with a base coat to protect your nails and achieve the perfect floral design. Then, choose your favorite colors for the flowers. Consider short almond summer nail ideas with colorful floral patterns for a simple yet stunning design. You can opt for girly acrylic nails or simple gel nails for a fresh summer vibe.
Here’s a step-by-step guide to creating your floral masterpiece:
Step 1: Prep your nails by trimming and filing them into your desired shape. Apply a base coat to keep them healthy.
Step 2: Choose your base color. Light blue or pastel shades work well for a summer feel.
Step 3: Paint your flower designs using a fine brush or dotting tool. Pink flower nails look cute and cheerful!
Step 4: Add details like leaves and accents with contrasting colors to make your design pop.
Step 5: Finish with a top coat to seal your artwork and provide a glossy finish.
These adorable nails are perfect for any summer trip, making them a must-have for your vacation nails collection. Whether going to Turks and Caicos or enjoying a sunny day, floral nail art adds a delightful touch to your summer look.
Bright Neon Colors for Summer Vibes
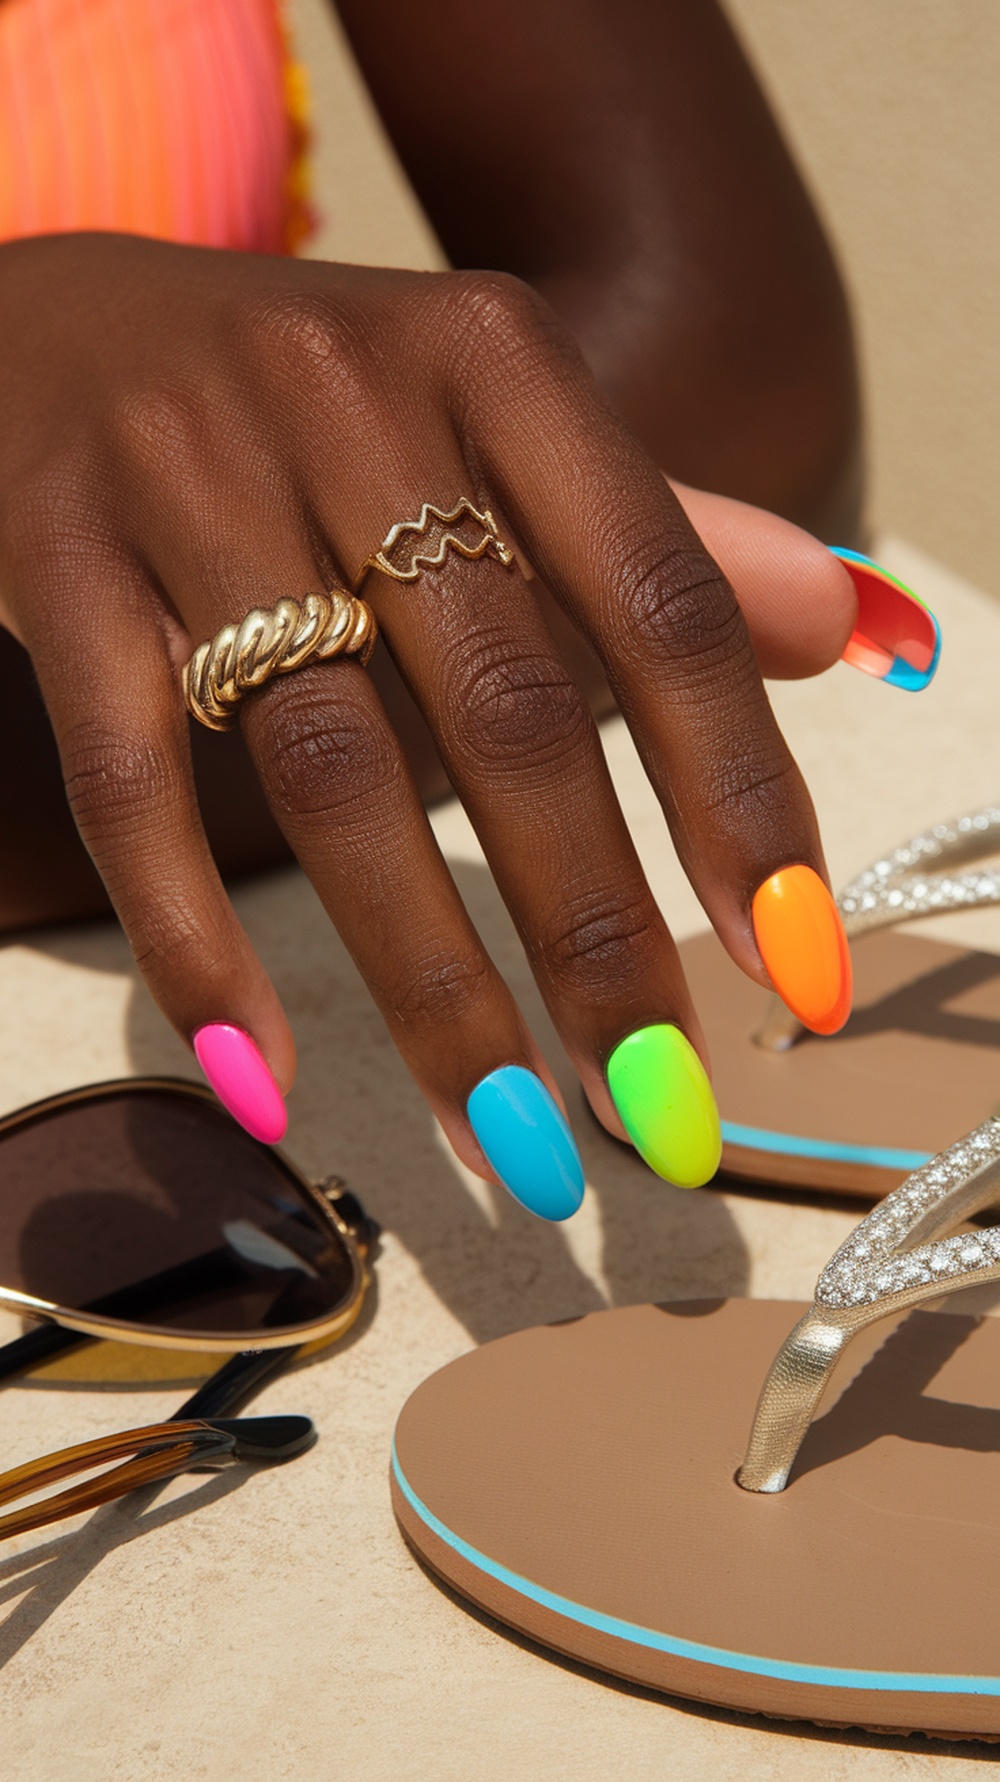
Bright neon colors are the perfect way to capture the essence of summer. When you look at vacation nails, it’s all about those eye-catching hues that instantly bring joy. Imagine the sun shining, waves crashing, and your nails popping with vibrant shades. From hot pink to electric blue, these colors scream summer fun!
Whether you’re heading to a tropical getaway or just lounging by the pool, these nails will make a statement.
To achieve the perfect summer nails, follow these simple steps:
- Prep Your Nails: Start with clean, trimmed nails. Push back your cuticles and buff the surface lightly.
- Base Coat: Apply a clear base coat to protect your nails and ensure the polish adheres well.
- Choose Your Colors: Choose your favorite neon shades. Think of vibrant pink, green, orange, and blue.
- Color Application: Apply two coats of your chosen neon polish, allowing each layer to dry completely. This ensures the color is bold and bright.
- Add Some Design: A contrasting color makes it easy to add cute nail art designs, like simple stripes or dots.
- Top Coat: Finish with a top coat to add shine and longevity to your nails.
- Final Touch: Clean up around your nails to remove any excess polish for a neat look.
Whether you go for cute nail art designs or keep it simple, bright neon colors will keep your summer vibes alive. These vacation nails are not just stylish; they also reflect the carefree spirit of the season. So grab your favorite neon polishes and get ready to flaunt those beachy nails!
Shell Accents and Glitter
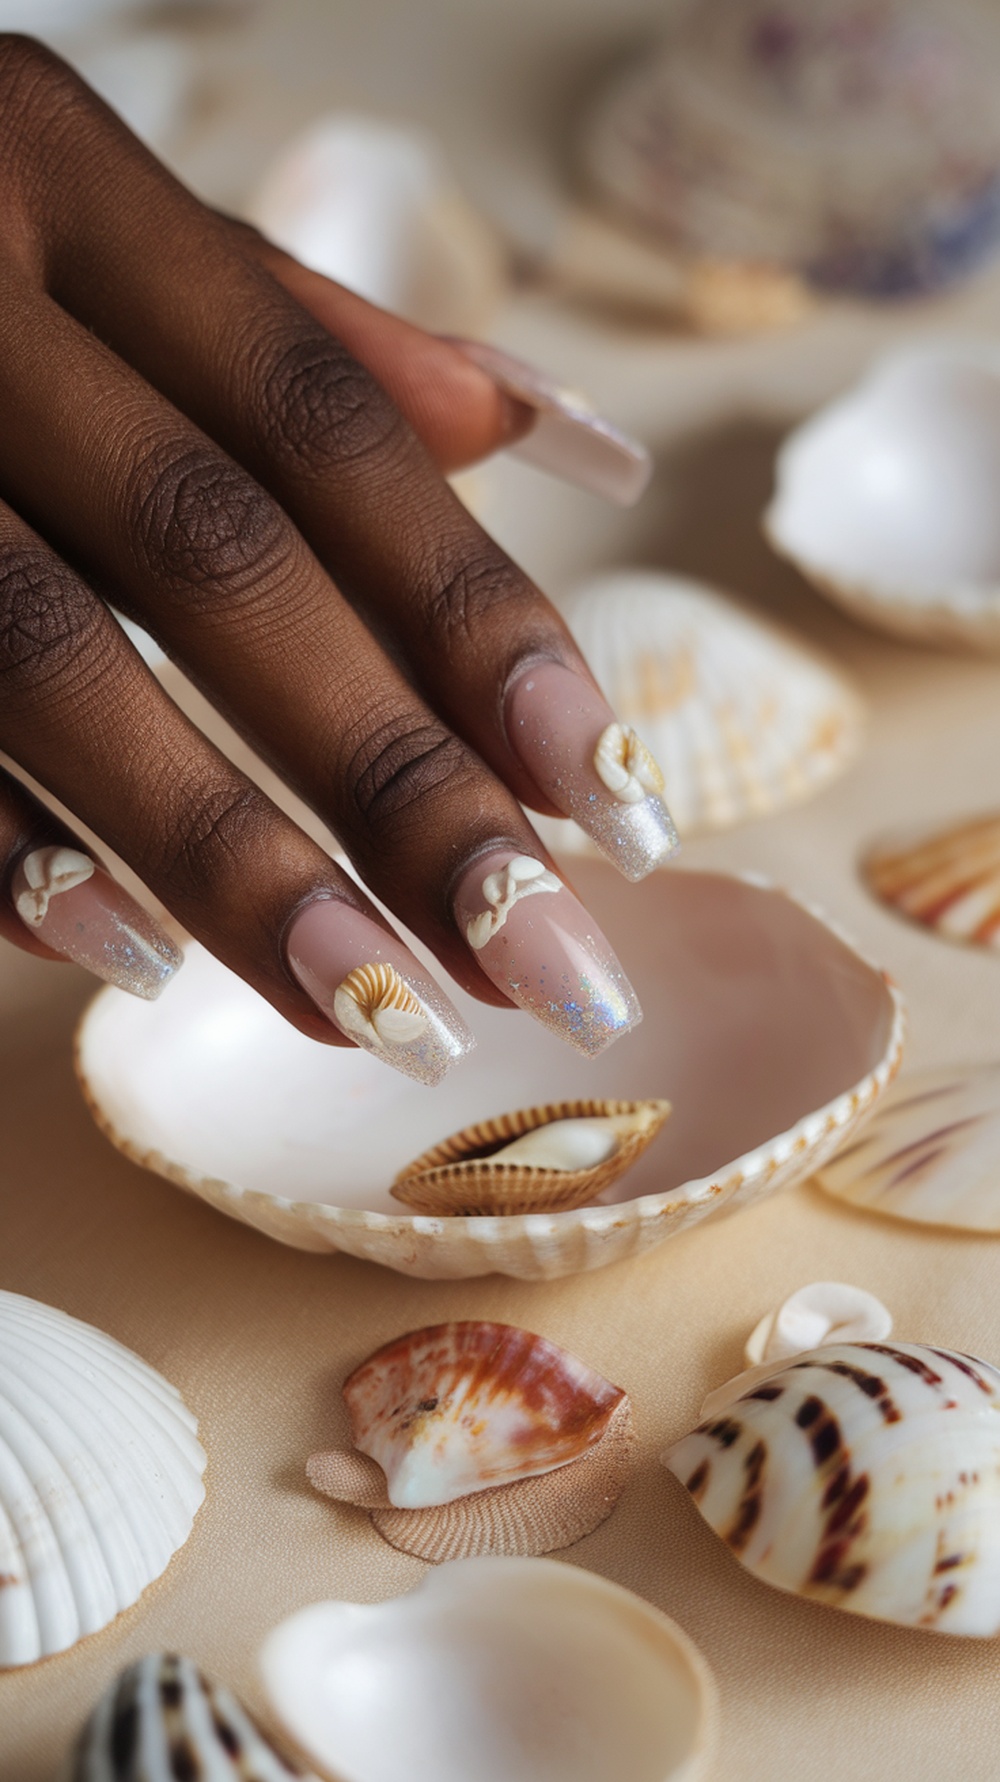
Shell accents and glitter are perfect for vacation nails this summer! This look captures the essence of beach vibes with a beautiful blend of natural elements. The light, shimmery base reflects the sun and adds fun to your nails.
The shell decorations add a cute touch that perfectly complements any beach outfit. With these designs, you can channel your inner mermaid!
To achieve vacation nails like these, follow this step-by-step guide:
- Prep Your Nails: Start with clean nails. Shape them into your desired style, such as a vacation nails oval shape or a trendy squared tip.
- Apply a Base Coat: Use a clear base coat to protect your nails and help the polish adhere better.
- Choose Your Color: Pick a soft pink or nude as your primary color. Apply two coats for an even finish.
- Add Glitter: While the last coat is wet, sprinkle some fine glitter on the tips for a beachy look.
- Apply Shell Accents: Place small shell decorations on your nails using nail glue. Position them creatively for a unique design.
- Seal It All: Finish with a top coat to lock in your design and add shine. This will also help the shell accents stay put.
These nails are not just stylish; they also add a playful vibe to your summer outings. Whether heading to Turks and Caicos or hanging out at a local beach, these are the perfect holiday nail inspo for summer!
Beach Sunset Gradient Nails
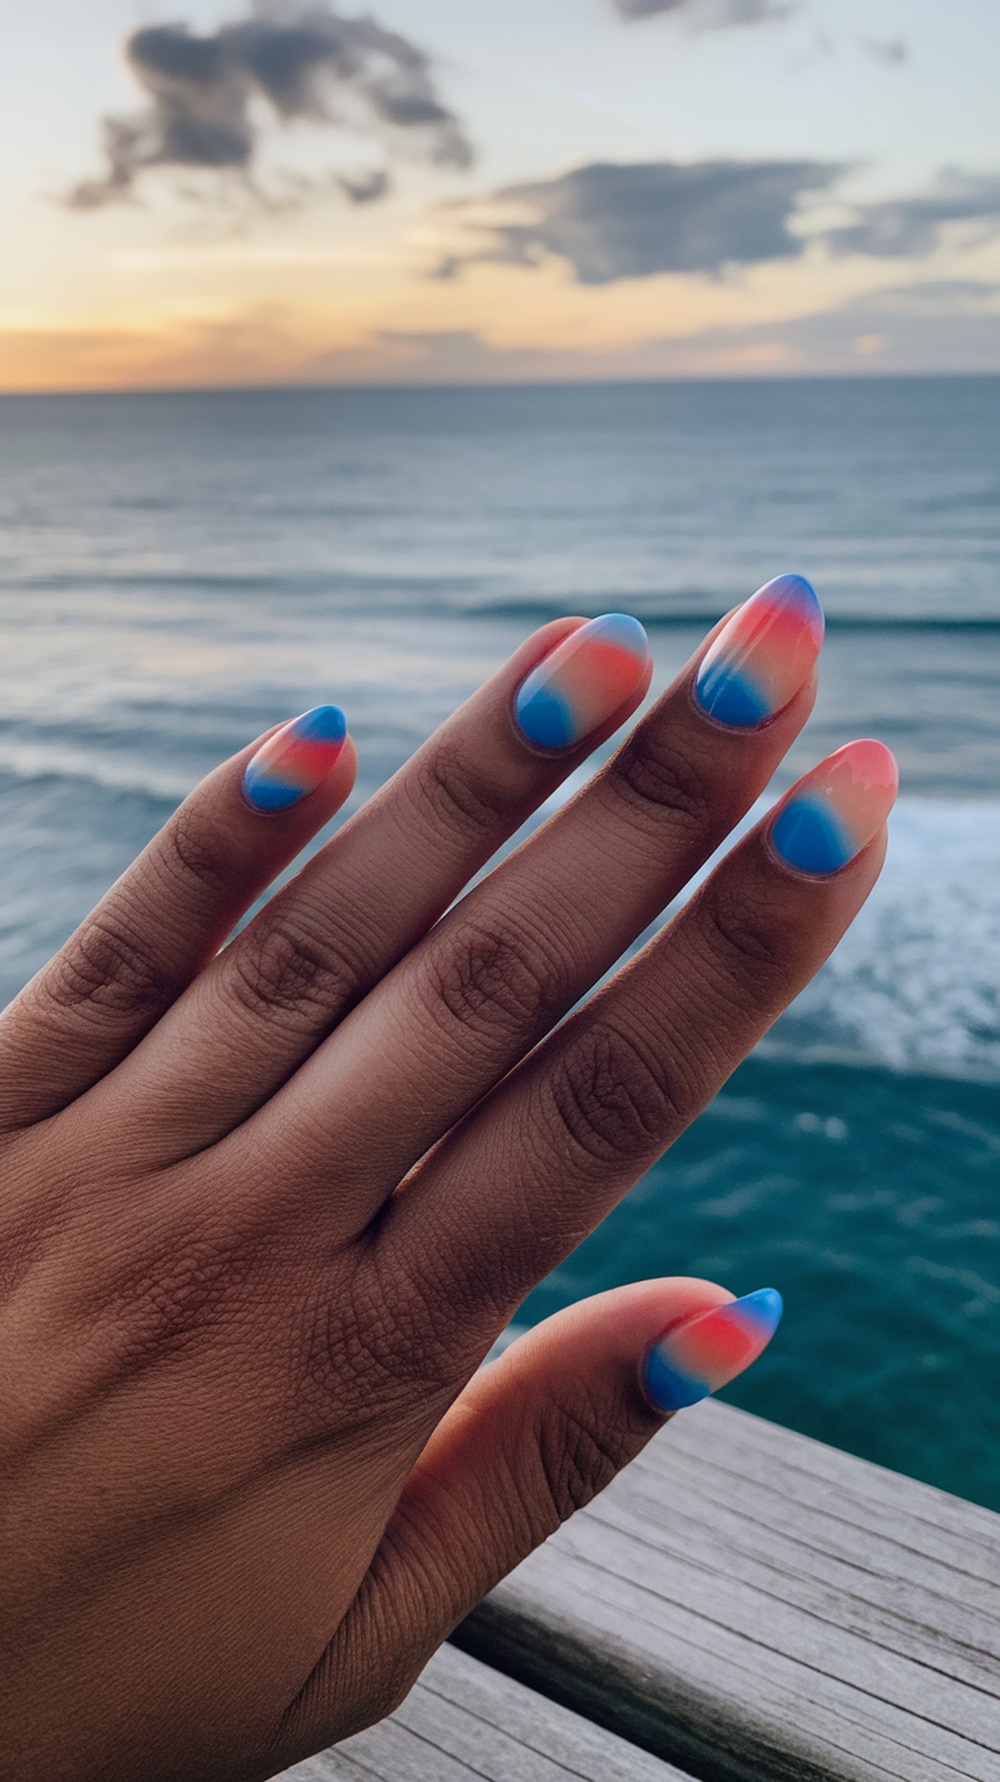
Beach sunset gradient nails capture the magic of summer evenings by the ocean. The blend of pink and blue hues on the nails mimics the vibrant colors of a sunset, creating a stunning look that’s perfect for vacation vibes. These nails not only look beautiful against the backdrop of the sea but also add a playful touch to your beach attire.
These nails are a fantastic choice if you’re dreaming of your next getaway. They complement the theme of summer vacation nail ideas, making them ideal for a trip to places like Turks and Caicos or even a simple beach day. With the trend of ocean nails gaining popularity, this design fits right in!
To achieve these gorgeous beachy nails at home, follow this step-by-step guide:
1. Start with clean, shaped nails. Opt for a vacation nails oval shape for that extra flair.
2. Apply a base coat to protect your nails and ensure a smooth finish.
3. Choose your colors. For a sunset effect, you’ll need a soft pink, a bright coral, and a dreamy blue.
4. Using a makeup sponge, dab the pink and coral colors together, then blend the blue at the tips for a gradient effect.
5. Seal your design with a top coat for a glossy finish and added durability.
Now you have the perfect beach nail designs to show off! Try adding cute nail art designs like small flowers or even going for sculpted flower nails for a more intricate look.
Whether you choose girly acrylic nails or keep it simple with gel nails, these beach sunset gradient nails will shine throughout your summer trip!
Sandy Beach Textures
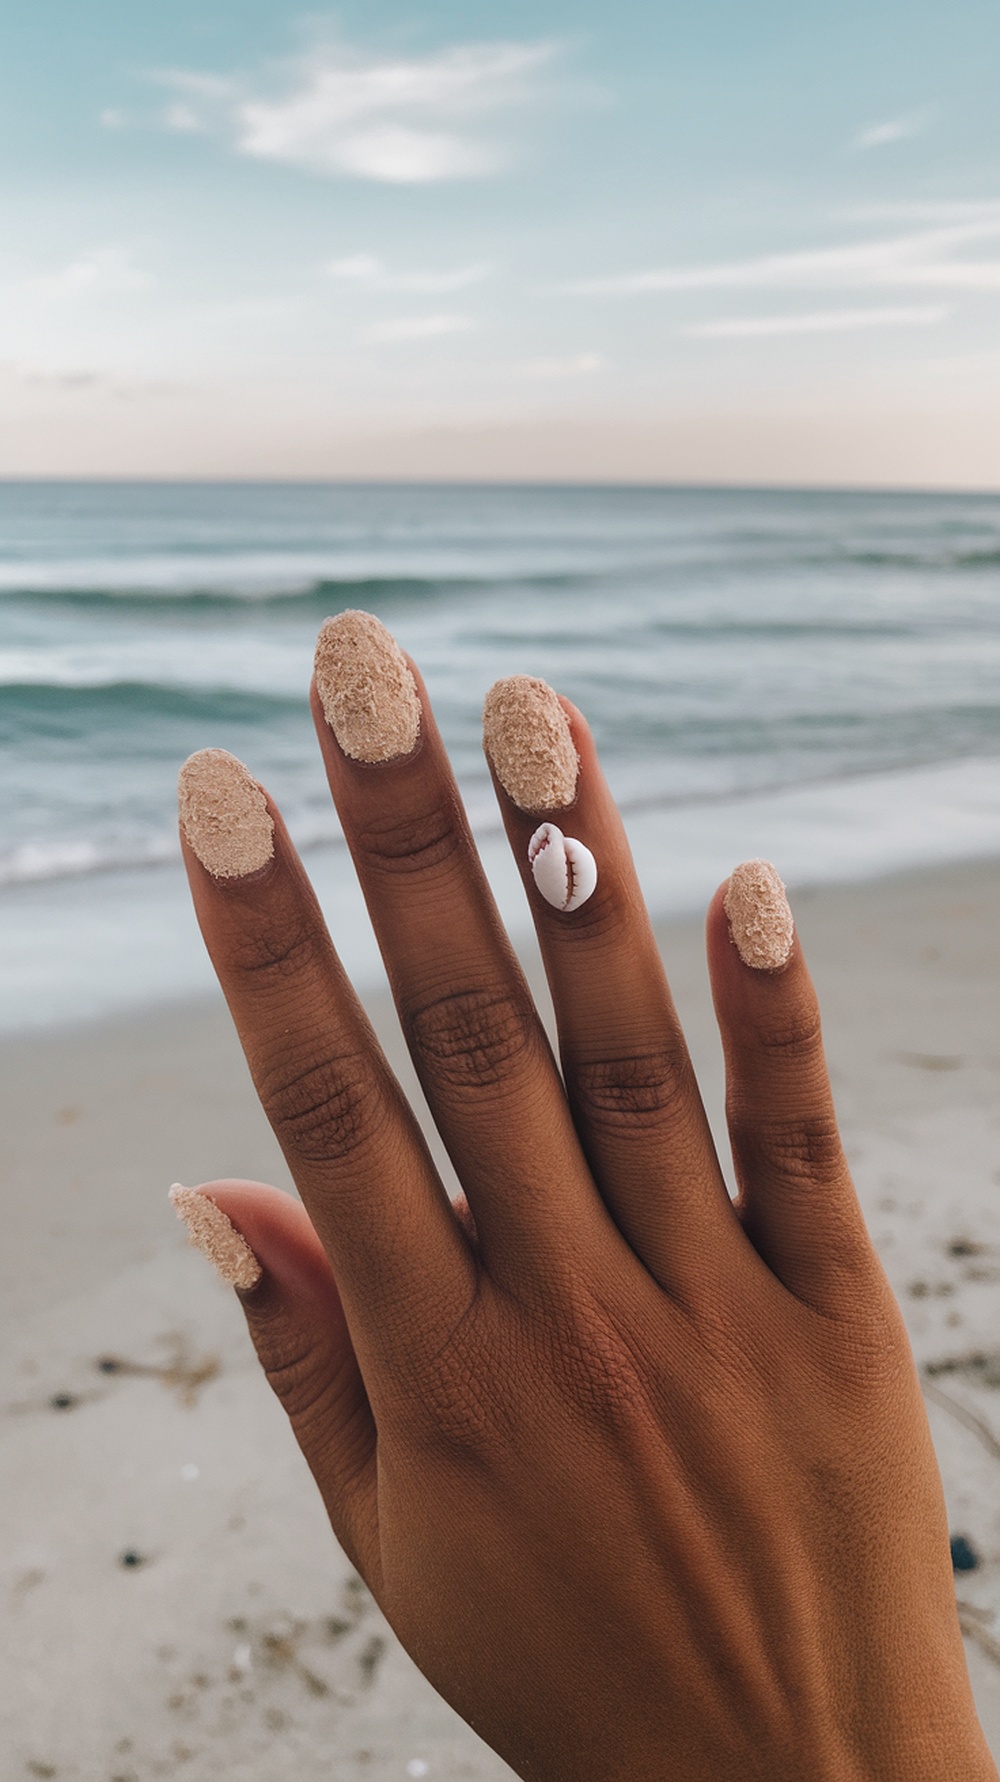
Beach days are perfect for showcasing fun nail designs, and this image beautifully captures the essence of summer vacation nails. The sandy texture on the nails perfectly mirrors the beach vibe, making them an ideal choice for a holiday getaway.
This design features a unique combination of a soft, sandy base and a delicate shell accent. It’s a playful way to bring a touch of the beach to your fingertips. Think of how great these nails would look while lounging on the sand or sipping a drink by the water.
To achieve stunning vacation nails this summer, follow this simple step-by-step guide:
1. Start with clean nails. Remove old polish and shape your nails into your favorite style, like oval or almond.
2. Apply a base coat to protect your nails and ensure the polish adheres well.
3. Choose a nude or beige polish to emulate sandy textures and apply two coats for full coverage.
4. For the sandy effect, use a textured top coat or sprinkle some fine sand onto the wet polish before sealing with a clear top coat.
5. Add a small seashell embellishment on one of the nails for that beachy touch!
6. Finish with a good quality top coat for shine and longevity.
Now you’re ready to flaunt your beach nails! Whether you’re heading to Turks and Caicos or enjoying a local beach, these nails will inspire envy.
Colorful Tie-Dye Nails
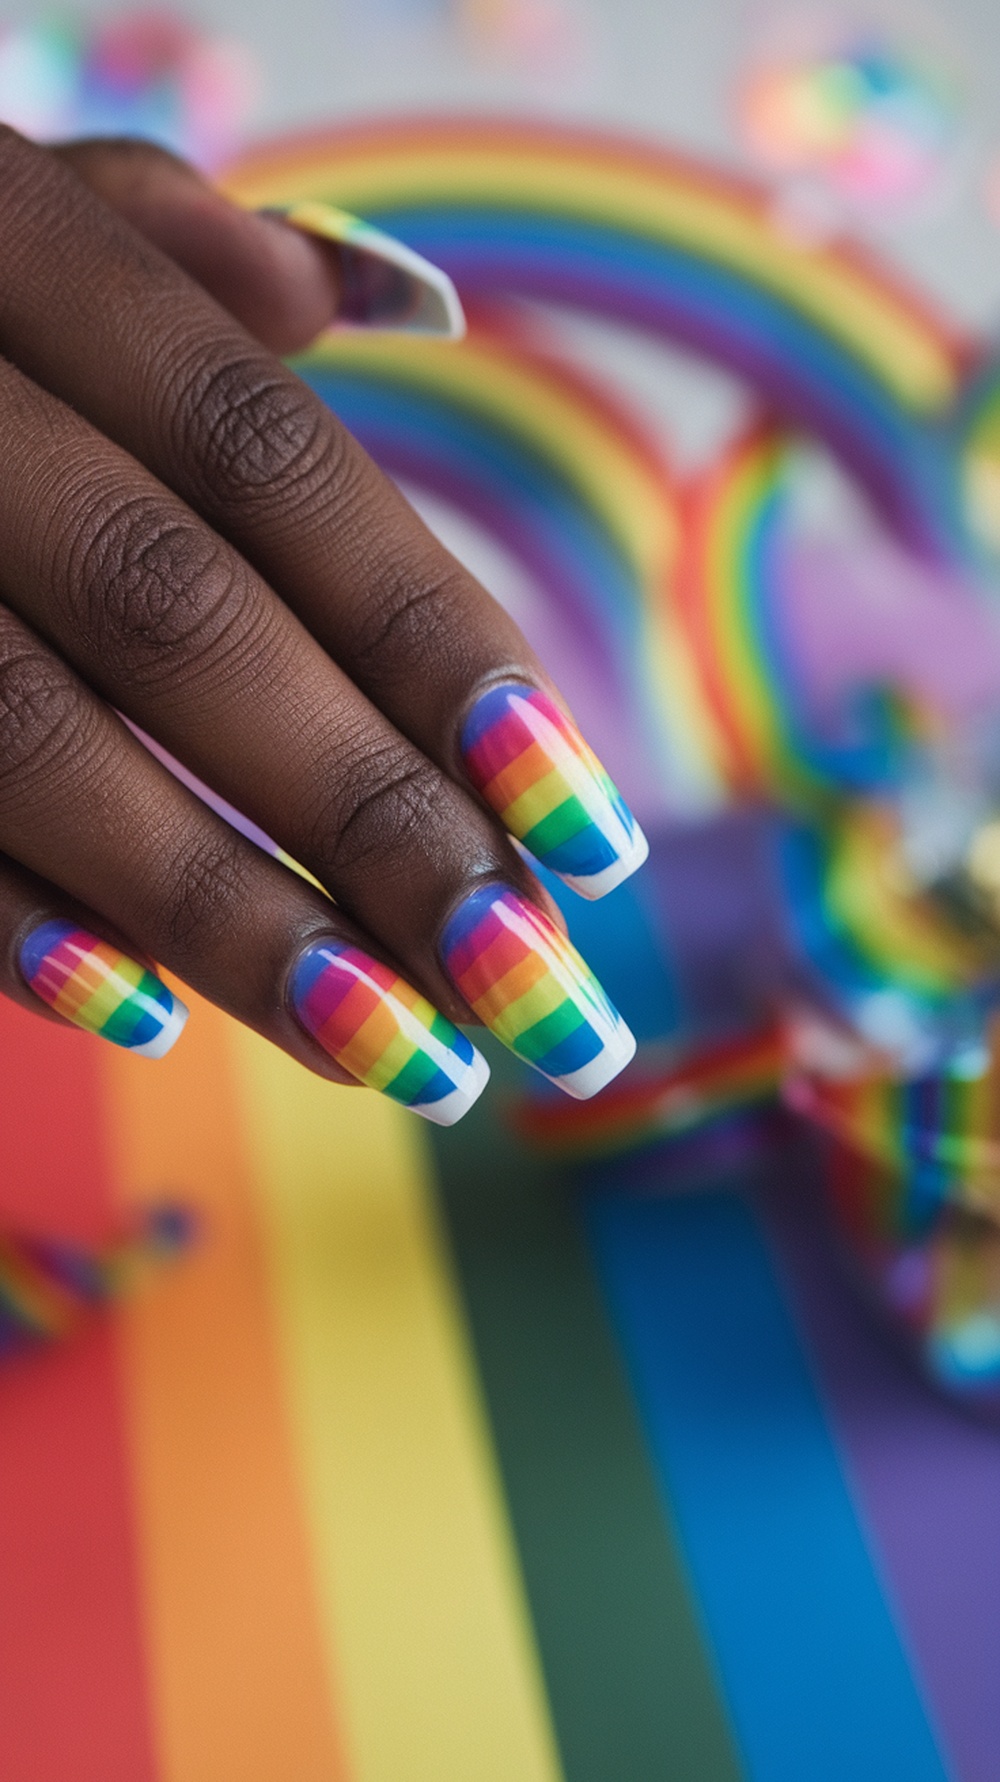
Colorful tie-dye nails are a fun and vibrant choice for your summer vacation. They instantly bring a playful vibe that matches perfectly with sunny beach days. The beautiful rainbow effect on the nails can remind you of summer festivals and warm nights.
To achieve these stunning nails, you can try a simple technique that combines different colors to create a tie-dye effect. You can also mix cute nail art designs like flowers or waves for a more personalized look. Colorful nails will make a statement, whether you opt for gel or acrylic.
Here’s a step-by-step guide to help you create your colorful tie-dye nails:
- Start with clean, shaped nails. Apply a base coat to protect them.
- Choose your favorite colors. You’ll need at least three for a vibrant look.
- Using a sponge, dab the colors onto your nails in a random pattern for that tie-dye effect.
- Blend the colors slightly for a seamless transition.
- Allow the nails to dry completely before applying a top coat to seal your design.
These colorful tie-dye nails can complement any summer outfit. Whether you’re enjoying the beach or hanging out with friends, they will add that extra flair. So grab your favorite shades and get creative!
Vibrant Sunset Nail Art
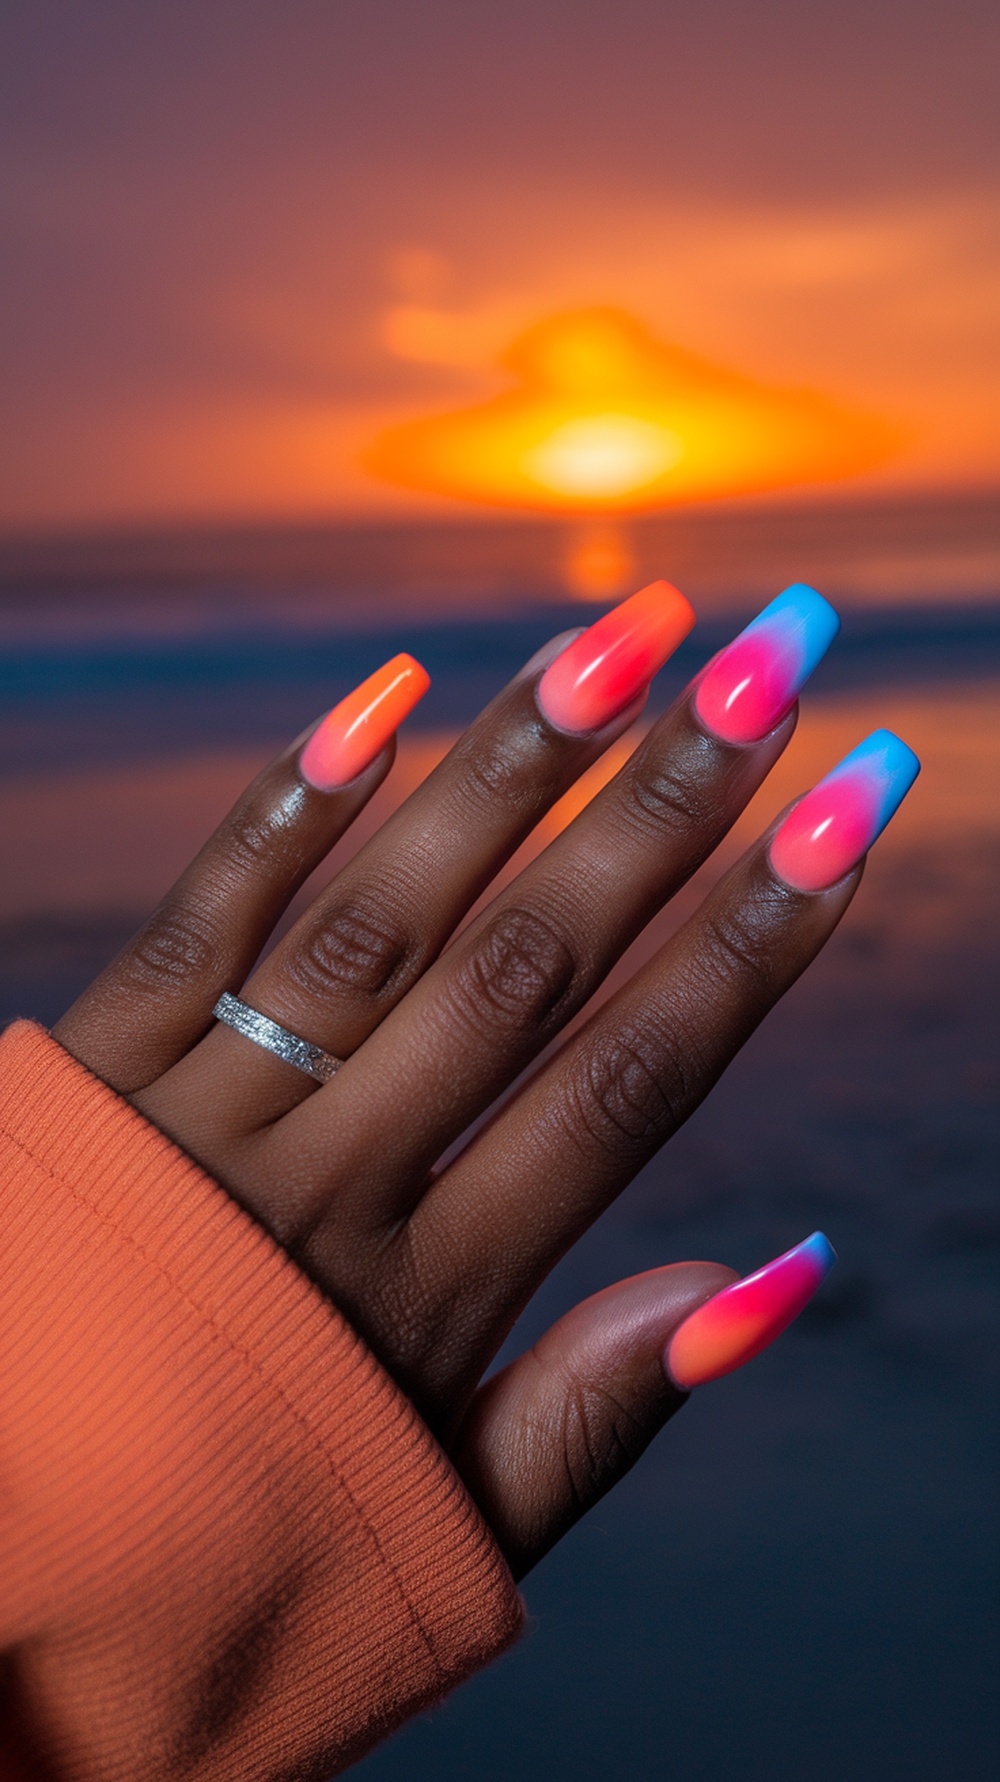
Sunset nails are perfect for summer vacations. The beautiful blend of orange, pink, and blue in this nail design captures the essence of a beach sunset. These colors not only brighten your look but also match any summer outfit.
To achieve this stunning look, start with a base coat for protection. Then, apply a bright orange polish on the bottom half of your nails. Next, a sponge creates an ombre effect with pink and blue shades on the tips. Seal everything with a top coat to keep your nails glossy and vibrant.
If you want flair, consider adding simple nail art like tiny stars or waves, reminiscent of those beautiful beach vibes. This design is an excellent fit for beach nail designs or vacation nails, with an oval shape that makes your fingers look lovely by the shore.
Geometric Summer Patterns
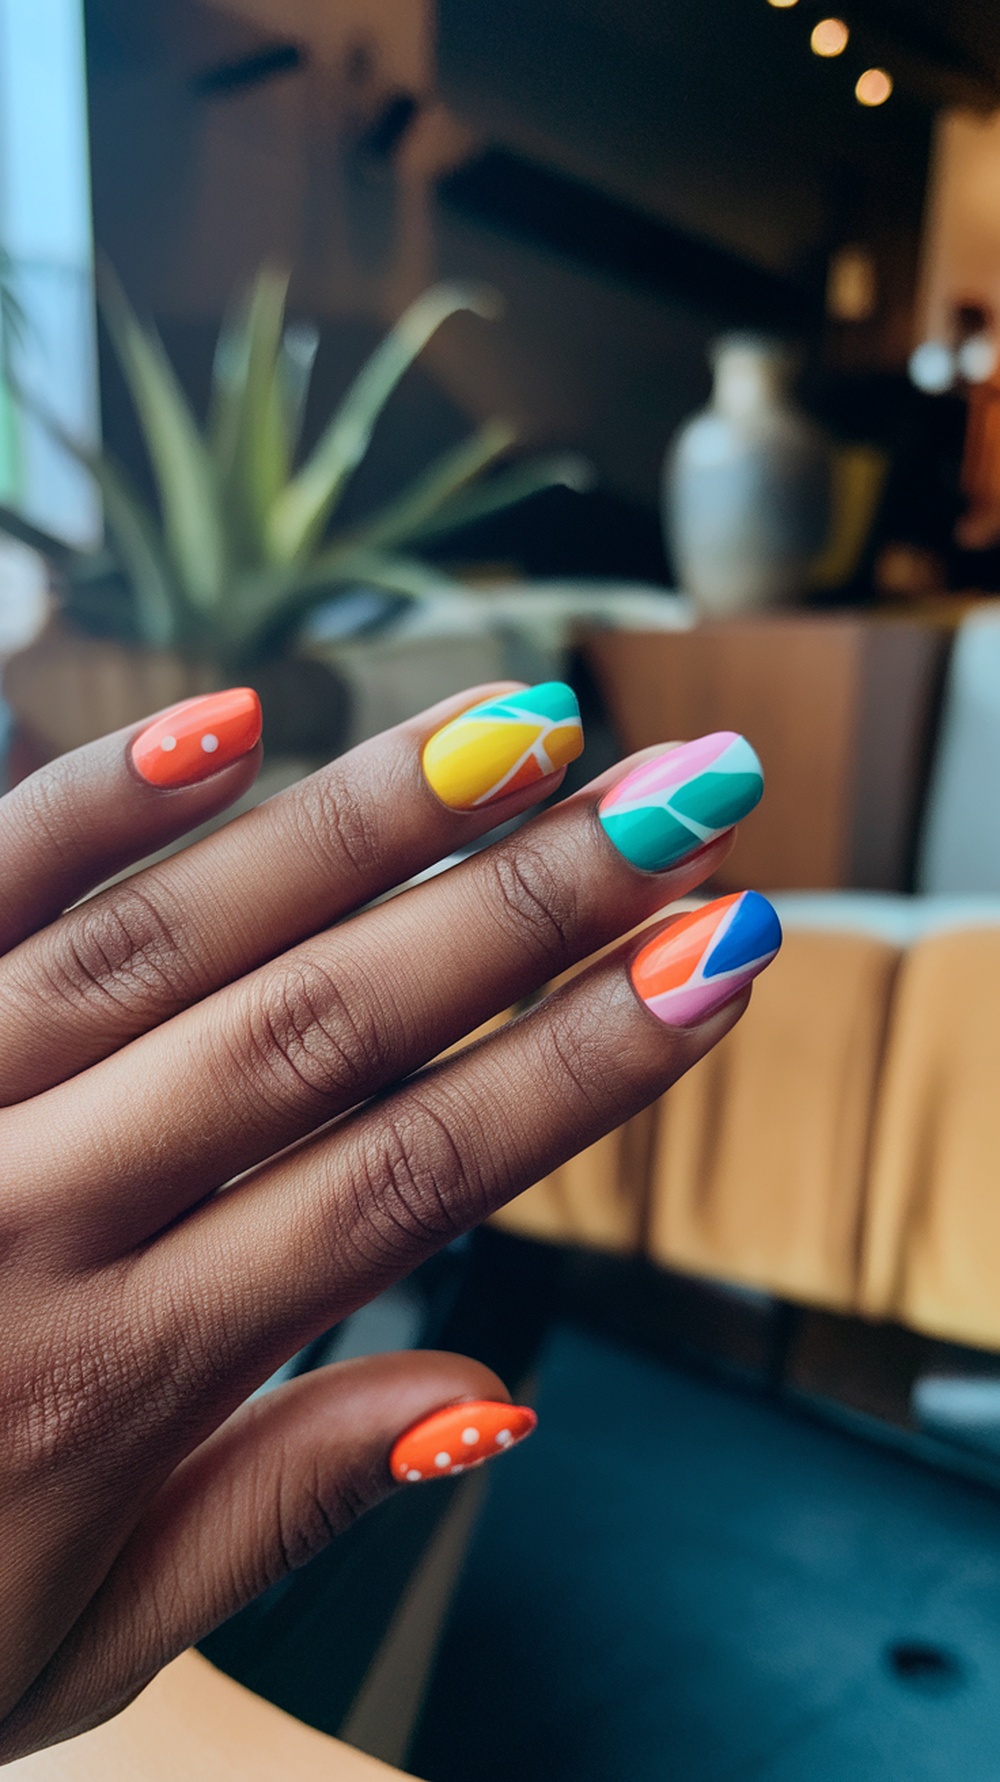
Summer brings a burst of color and fun, and what better way to celebrate than with geometric nail art? This playful design features a mix of vibrant shades like orange, yellow, teal, and pink, creating eye-catching patterns that scream vacation vibes.
These classy acrylic nails are perfect for your beach trip, offering a stylish way to express your summer spirit. The geometric shapes and bold colors make them stand out. Beach Nails Inspo for anyone looking to refresh their look.
Ready to achieve your perfect Vacation Nails Summer? Here’s a step-by-step guide!
Lemonade-Inspired Nail Colors
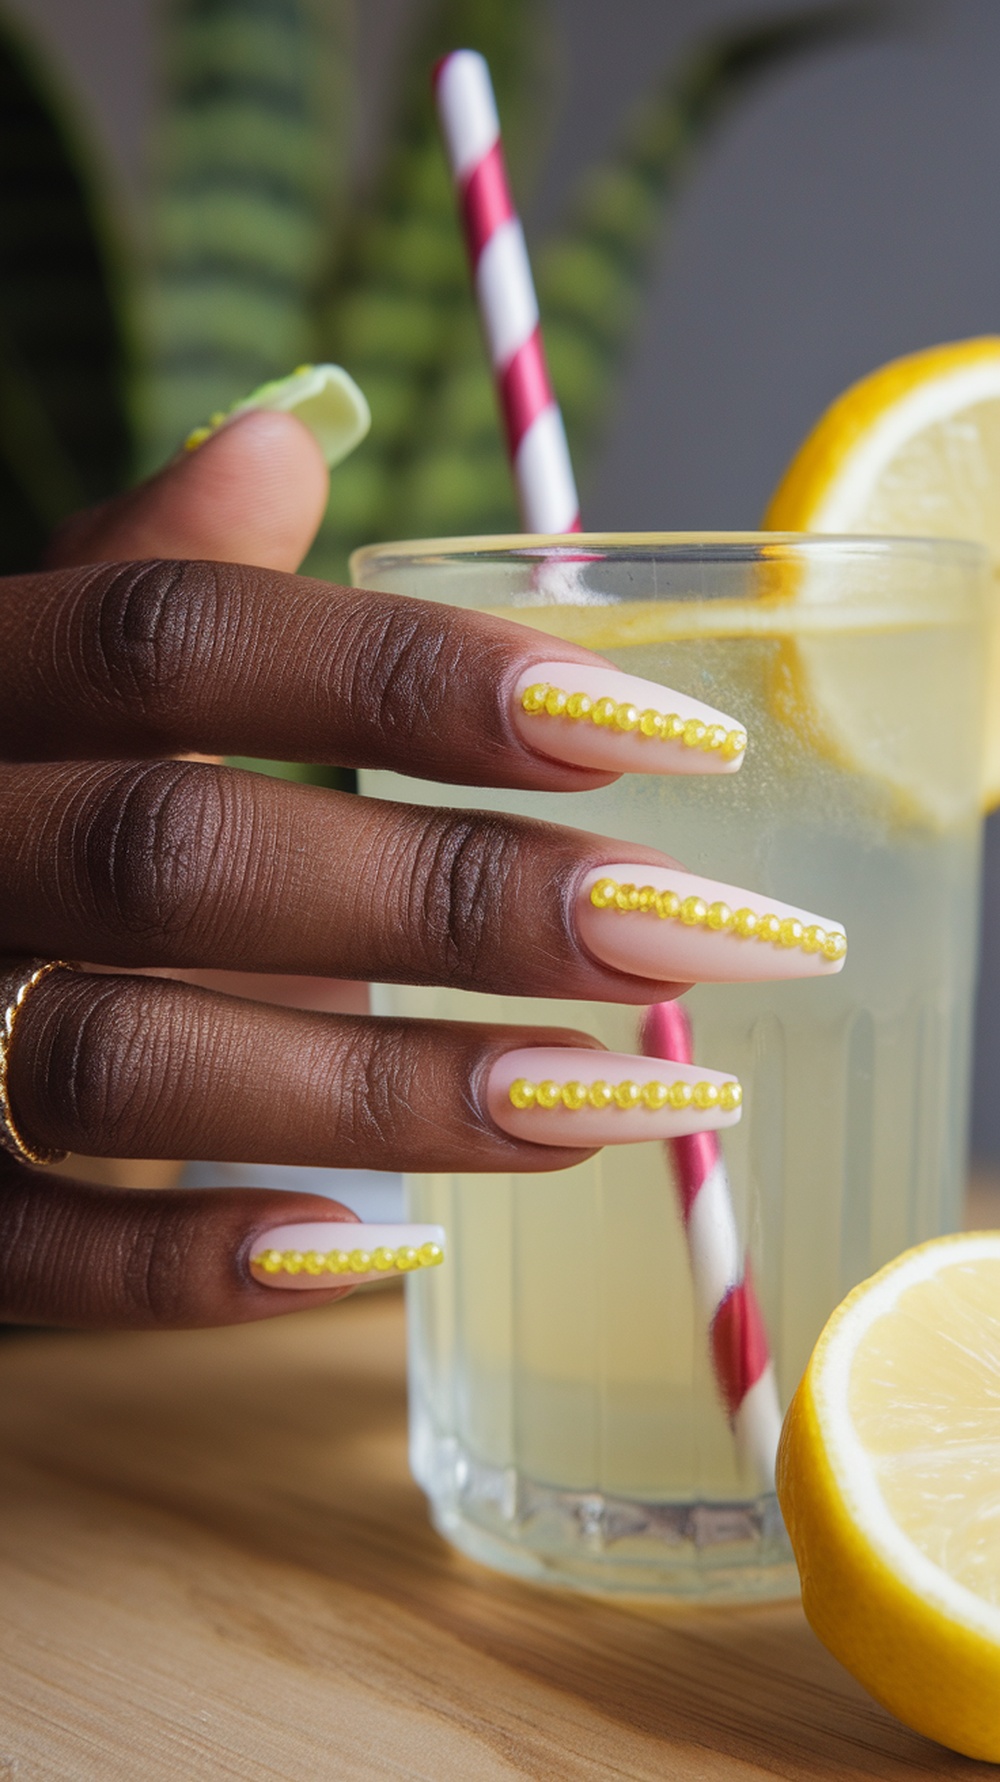
Summer is the perfect time to refresh your look, and lemonade-inspired nails are a fun way to embrace the season. Picture a sunny afternoon, a cool drink, and nails matching the cheerful vibe. The image shows stunning nails decorated with bright yellow accents, resembling the refreshing drink we love.
These nails are not just pretty; they also channel a playful spirit. The soft nude base enhances the vibrant yellow beads, giving them a fresh and lively feel. If you’re thinking about your next summer vacation or want to brighten your everyday look, this nail design is a must-try! Pair it with some cute beachwear for the ultimate beachy vibe.
To achieve this look, follow these simple steps for perfect vacation nails:
Step 1: Start with clean, filed nails. Choose a nude polish as your base and apply a couple of coats for even coverage.
Step 2: Once dry, use bright yellow polish to create thin lines or dots along the cuticles. If you’re creative, you can add small beads or rhinestones for that lemonade sparkle!
Step 3: Seal your design with a top coat for shine and durability. This will keep your nails looking fresh throughout your summer adventures.
Whether off to the Bahamas or enjoying a sunny day at home, these lemonade-inspired nails will add a fun pop of color. Combine them with other summer nail ideas, like Sculpted Flower Nails or Beach Nail Designs, for a complete vacation-ready look!
Pastel Seashell Nail Art
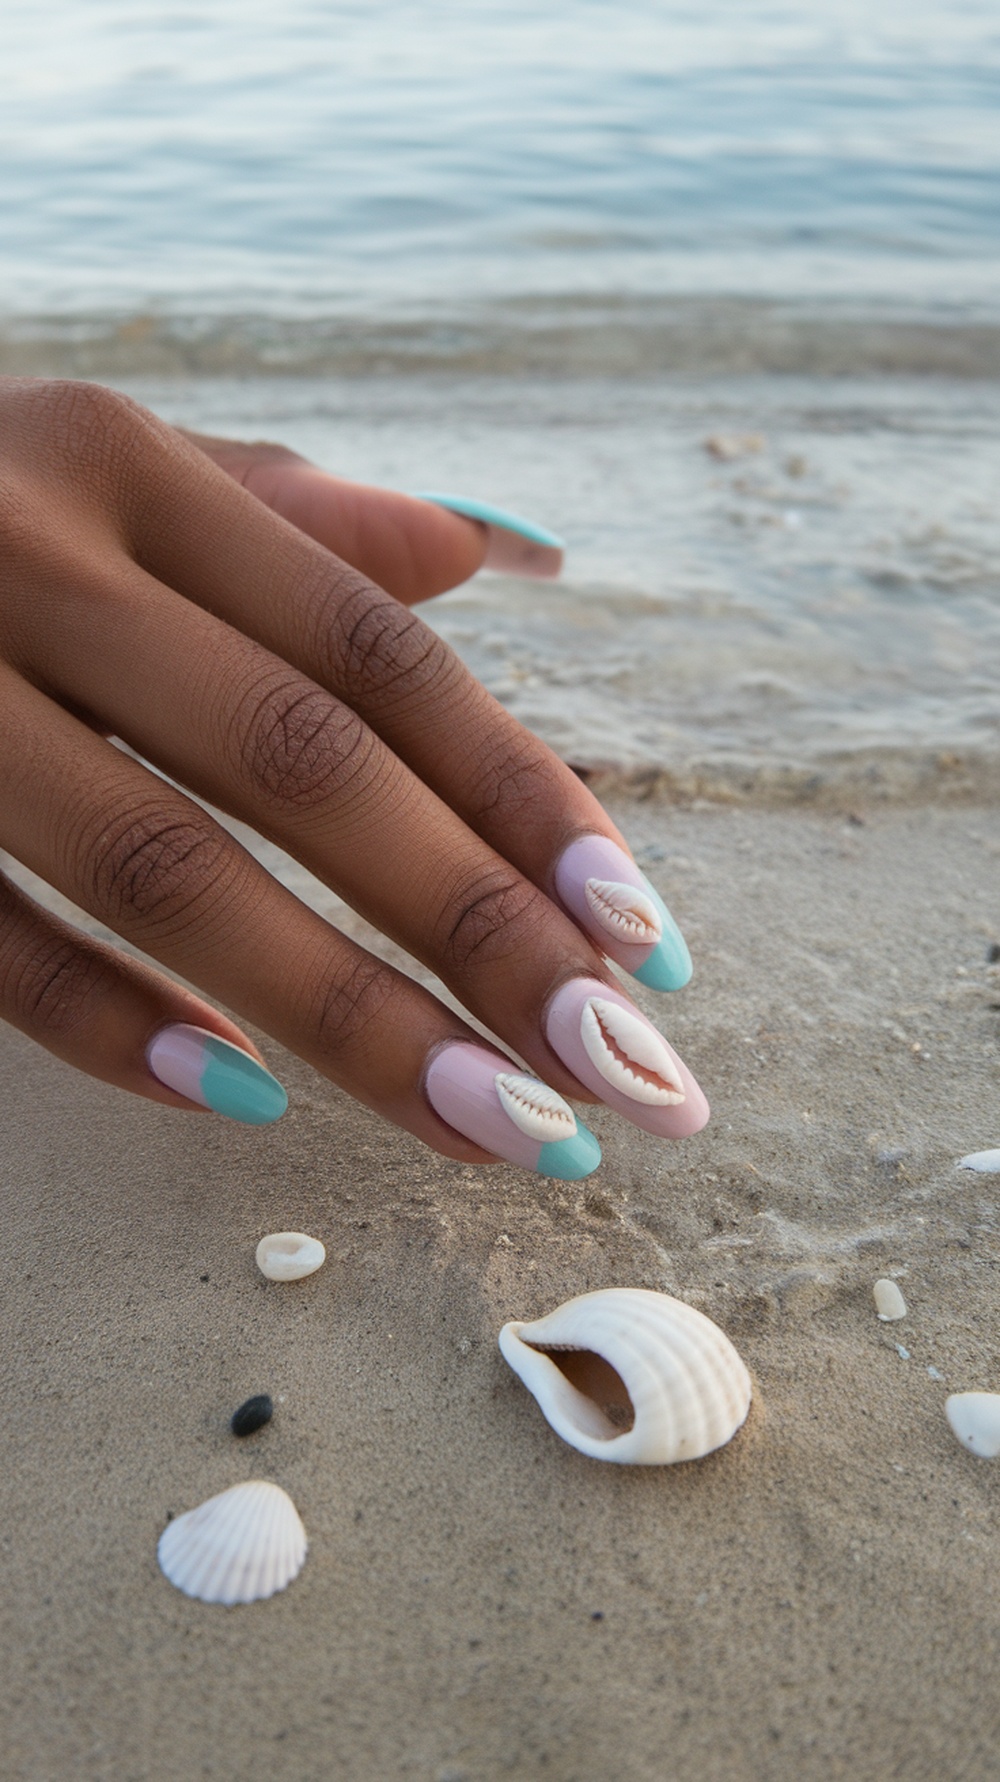
Pastel seashell nail art is a trendy way to show off beachy vibes. The image features beautifully designed nails in soft pastel colors, reminiscent of summer skies and sandy shores. With shades of aqua and pink, this nail art instantly transports you to a tropical paradise.
The seashell detail adds a fun twist, making these nails perfect for vacation. They can easily complement any beach outfit. Whether lounging by the ocean or attending a seaside party, these nails will turn heads.
If you want to create this look, here’s a simple guide to achieve perfect vacation nails this summer. Start by prepping your nails with a base coat. Then, paint your nails in your chosen pastel colors. Once dry, use a thin brush to create seashell designs using white or cream polish.
Finish off with a top coat to seal your artwork. This design fits right into the summer beach nail designs vibe and will inspire your next mani!
Sunshine Yellow and Coral
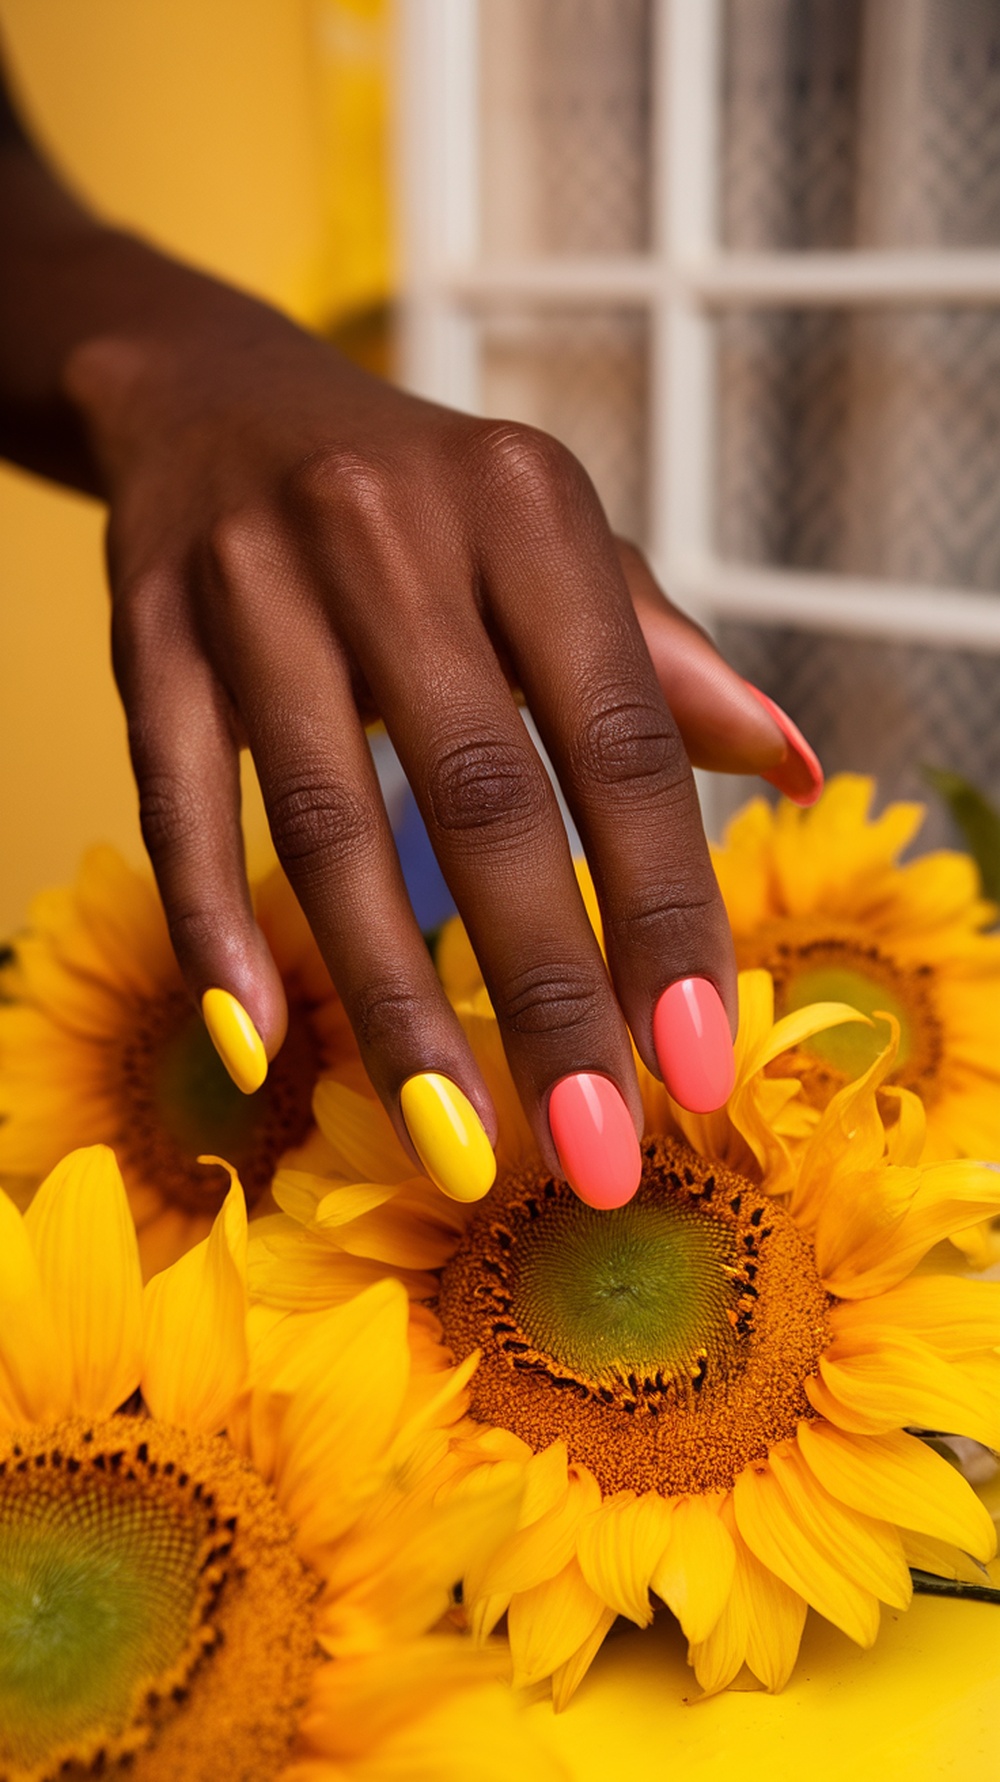
Summer nails are all about fun and color; nothing screams summer like a mix of sunshine yellow and coral. This vibrant combo instantly lifts your mood and brings a beachy feel to your look. Just picture yourself in a tropical setting, with those cheerful hues reflecting the warm sun. It’s a perfect match for vacation vibes!
When it comes to nail designs, there’s so much you can do with these colors. Consider simple gel nails with a glossy finish for a simple yet chic look. You might go for cute nail art designs, adding a few tiny flowers to enhance that summer spirit. Feeling adventurous? Try out some beach nail designs that incorporate ocean waves or palm trees.
If you’re into a bit more flair, girly acrylic nails are great for achieving that stylish edge. Sculpted flower nails in coral can add a playful touch, while a pop of yellow keeps things bright. Imagine rocking those nails while enjoying a summer trip, feeling confident and trendy!
To achieve the perfect vacation nails this summer, follow these easy steps:
- Prep Your Nails: Start with clean, trimmed nails. Gently push back your cuticles for a neat look.
- Base Coat: Apply a clear base coat to protect your nails and help the polish adhere better.
- Apply Color: Choose one color for each hand or mix them on one hand. Apply two coats for a vibrant finish.
- Nail Art: Use nail art pens or stickers to add cute designs like flowers or waves.
- Top Coat: Seal your design with a glossy top coat to add shine and durability.
- Dry: Let your nails dry completely before any activities.
This easy routine can lead to stunning beachy nails perfect for any summer outing. Whether it’s a trip to Turks and Caicos or just lounging by the pool, these nails will steal the show!
Bright Coral and Aqua Color Scheme
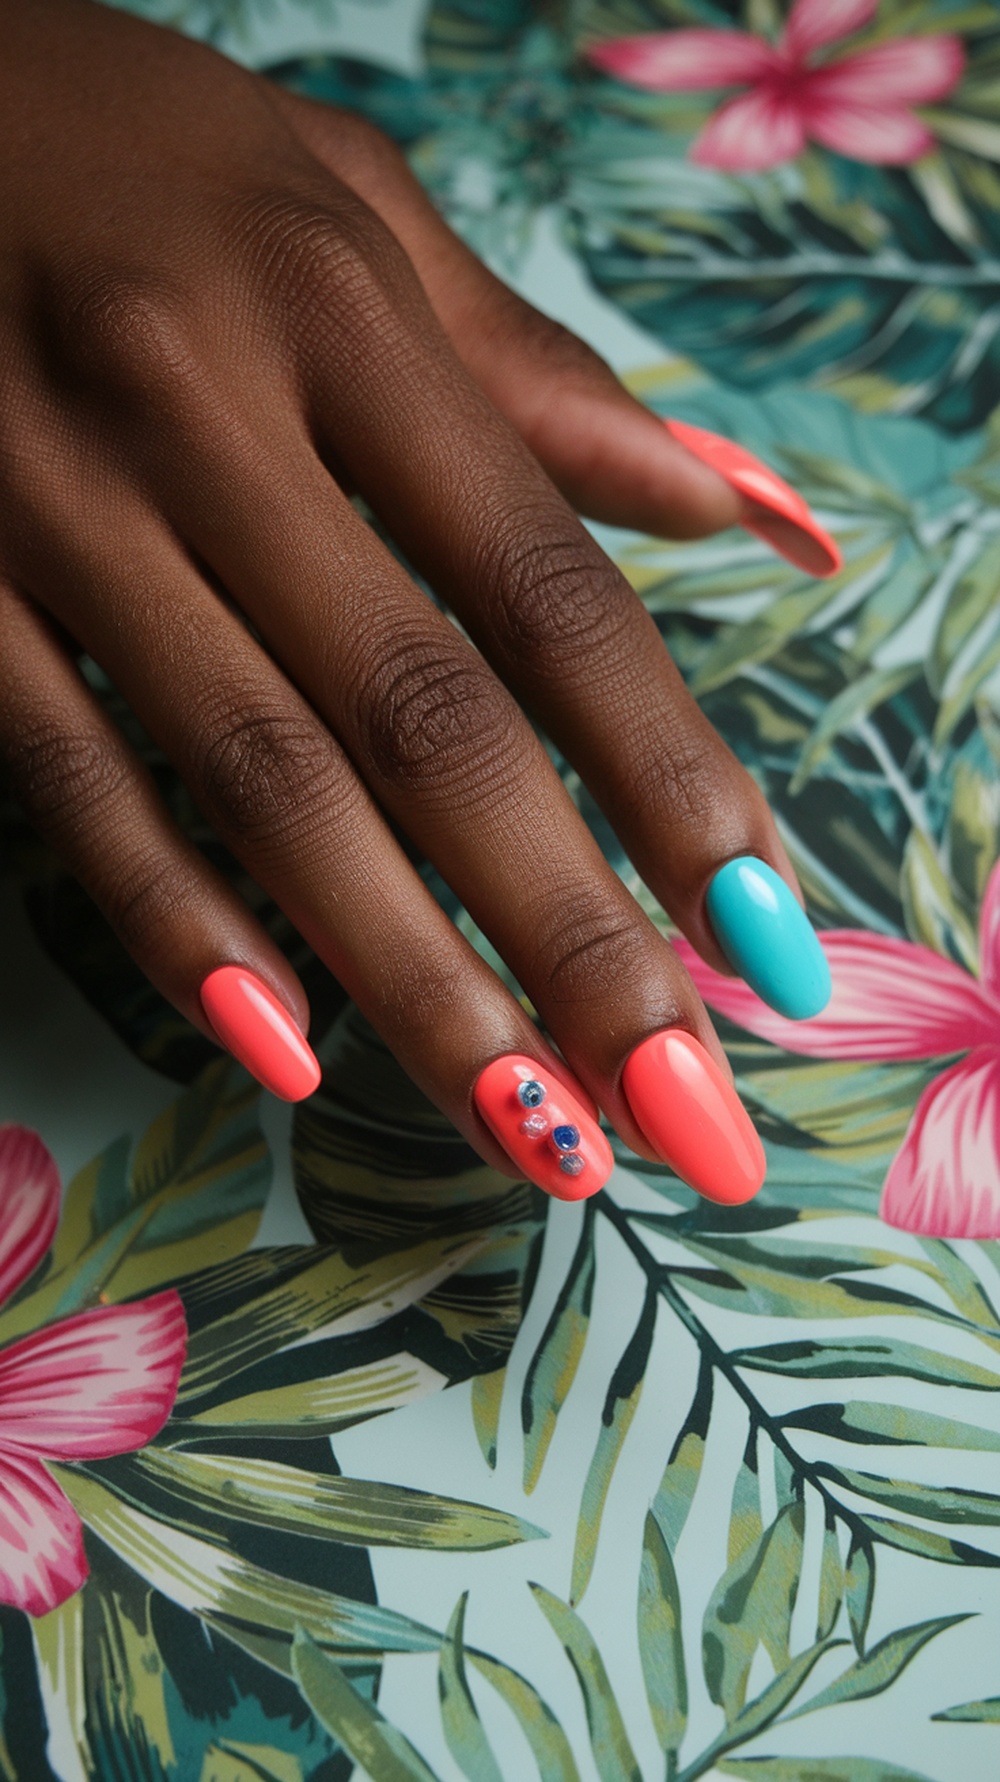
This nail design’s bright coral and aqua color scheme screams summer fun! These colors remind us of sunny beaches and refreshing ocean waves. Perfect for a summer vacation, this look is eye-catching and playful.
The coral shade is vibrant and energetic, making it an excellent choice for those who want to stand out. Pairing it with aqua creates a lovely contrast, reminiscent of tropical paradise. This combination fits perfectly for those planning a trip to the Bahamas or wanting to feel the summer vibes.
Add some flair with simple nail art, like the cute little gems on one of the nails. They add just the right amount of sparkle without overshadowing the colors. These nails would fall under the category of vacation nails, summer!
Under the Sea Nail Art
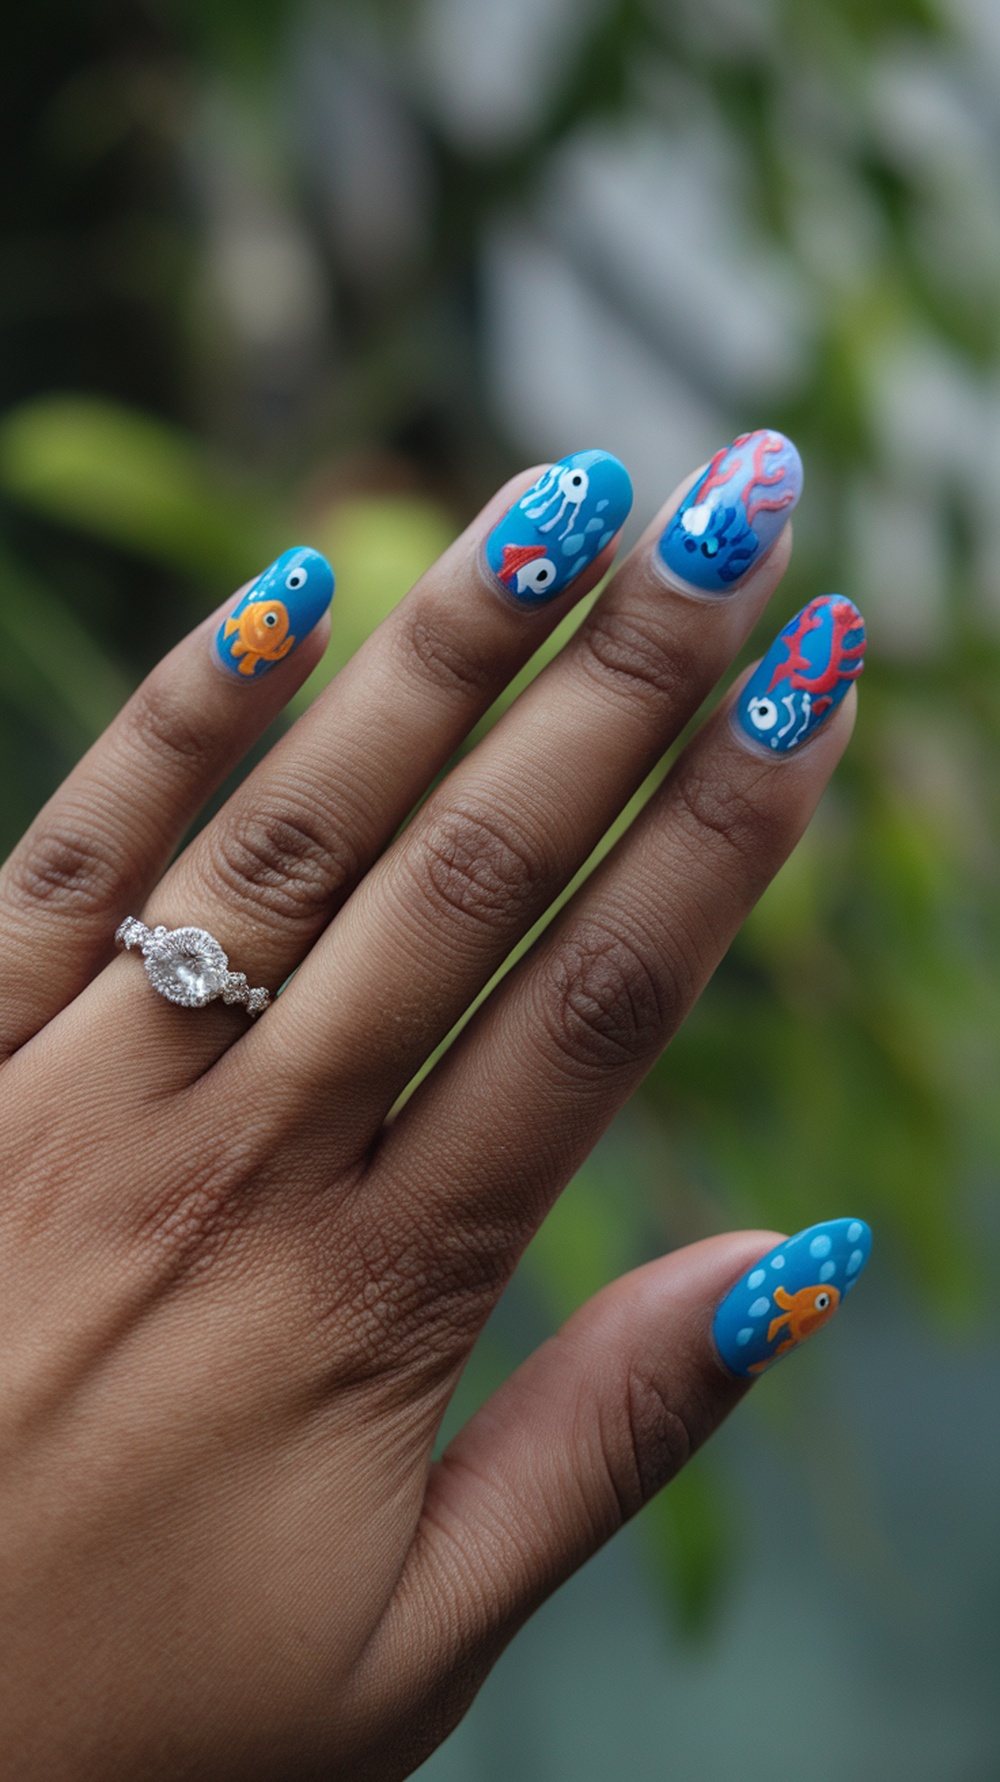
Summer is here, and it’s time to show off those vacation nails! Under the sea nail art is a fun and vibrant theme that genuinely captures the essence of summer. Imagine bright ocean blue backgrounds with playful sea creatures swimming across your fingertips. This design is eye-catching and a perfect representation of beach vibes.
Imagine ocean nails adorned with cute fish, jellyfish, and colorful coral for inspiration. These designs can be intricate and straightforward, making them great for teens and adults. Whether you want cute, simple nails or classy acrylic nails, there’s a design for everyone!
Now, let’s talk about how to achieve these stunning summer trip nails. Follow this easy step-by-step guide to get your perfect beachy nails:
- Prep Your Nails: Start by cleaning and shaping your nails. Push back cuticles and buff the surface lightly.
- Apply a Base Coat: Use a clear or colored base coat to protect your nails and help the polish adhere better.
- Choose Your Colors: Select a blue polish for the ocean base and other colors for the designs—think orange for fish and pink for coral.
- Paint the Base: Apply two coats of the blue polish to create a vibrant oceanic background.
- Add Art: Use a fine brush or dotting tool to paint sea creatures and coral. Get creative with your designs!
- Seal It: Once your art is dry, finish with a top coat to seal and shine.
- Show It Off: Share your beautiful nails with friends and flaunt them on your summer vacation!
With this guide, you’ll have cute nails matching your summer adventures. Whether you’re headed to the Bahamas or enjoying a sunny day at the park, these nails will bring ocean magic wherever you go!
Surfboard and Wave Art
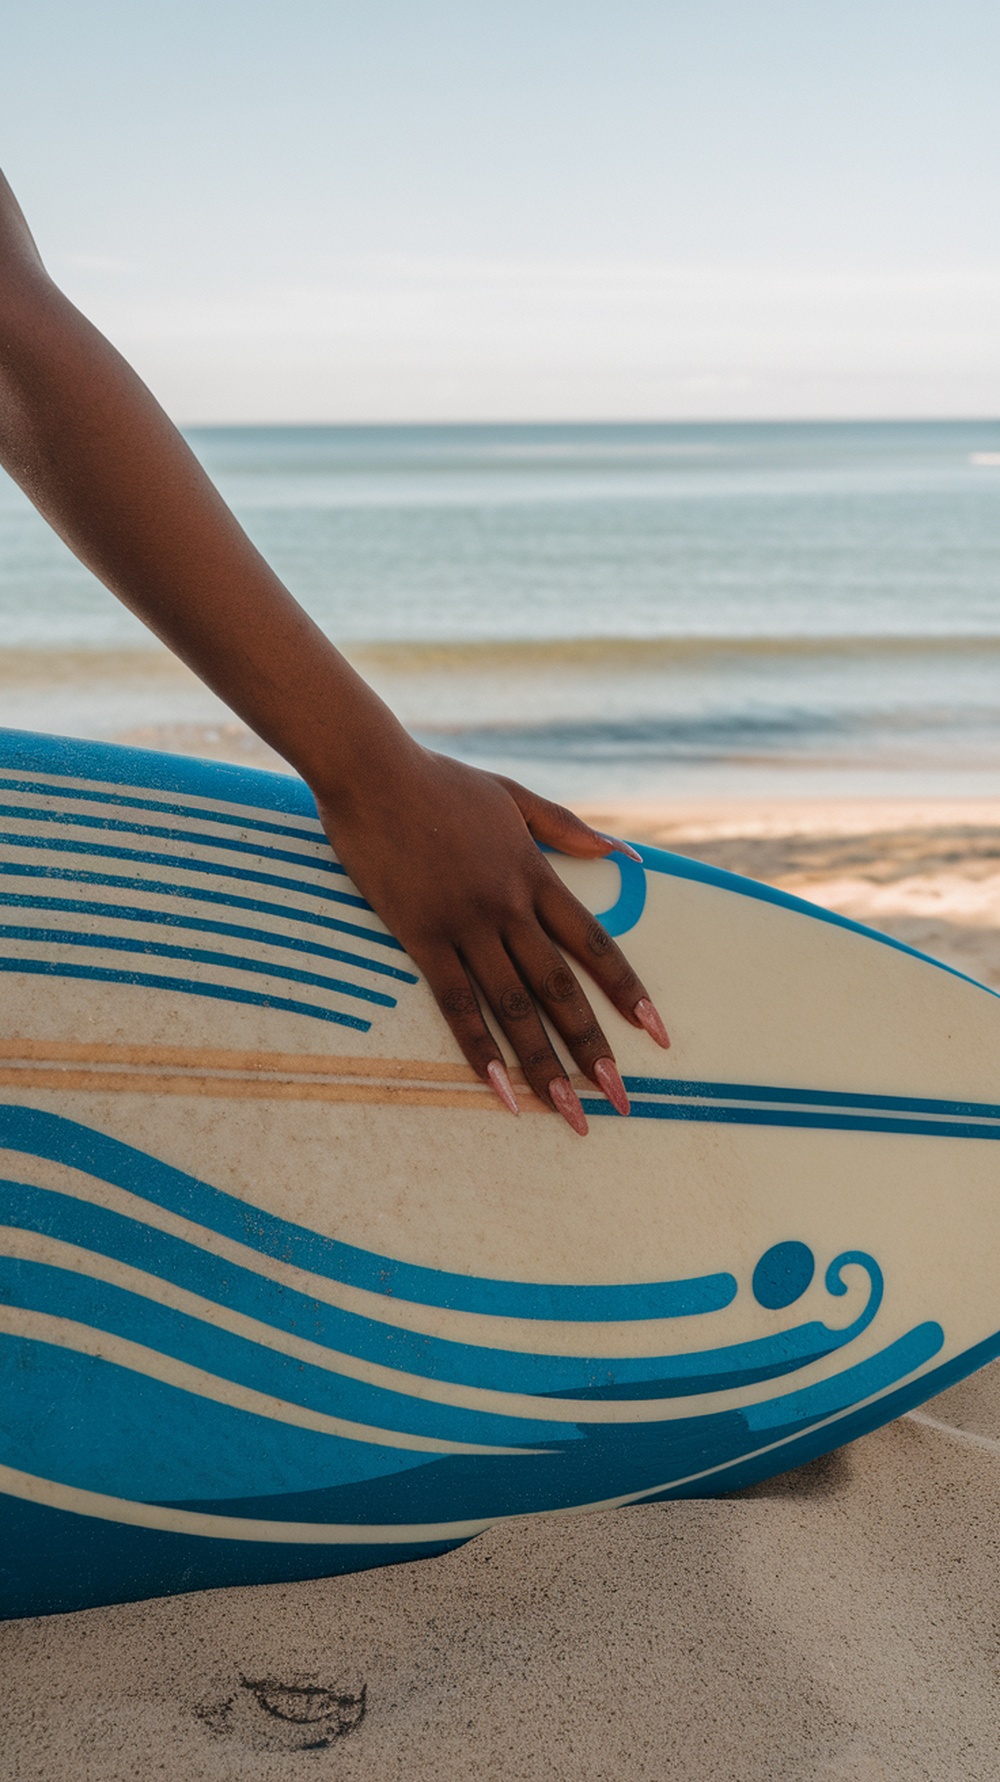
Summer vacations are all about fun in the sun, and what better way to express that than with beachy nails? The image captures a hand resting on a surfboard, hinting at the ocean vibes that come with a summer getaway.
The nails have a lovely shape and soft color, perfect for a beach setting. These adorable nails complement the surfboard’s blue waves, creating a relaxing and playful look. Whether you’re hitting the waves or lounging by the shore, having nails that fit the vibe is essential.
To achieve perfect vacation nails this summer, start with a clean slate. First, trim and shape your nails to your liking. Next, apply a base coat to protect them. Choose a fun color, maybe a soft pink or ocean blue, and paint two smooth coats. Finish with a top coat for shine.
Add simple nail art, like tiny waves or flowers if you want something extra. Sculpted flower nails or cute, simple nails can elevate your look. You can even go for gel nails for that long-lasting finish.
Summer Vacation Nail Designs – Palm Leaf Patterns
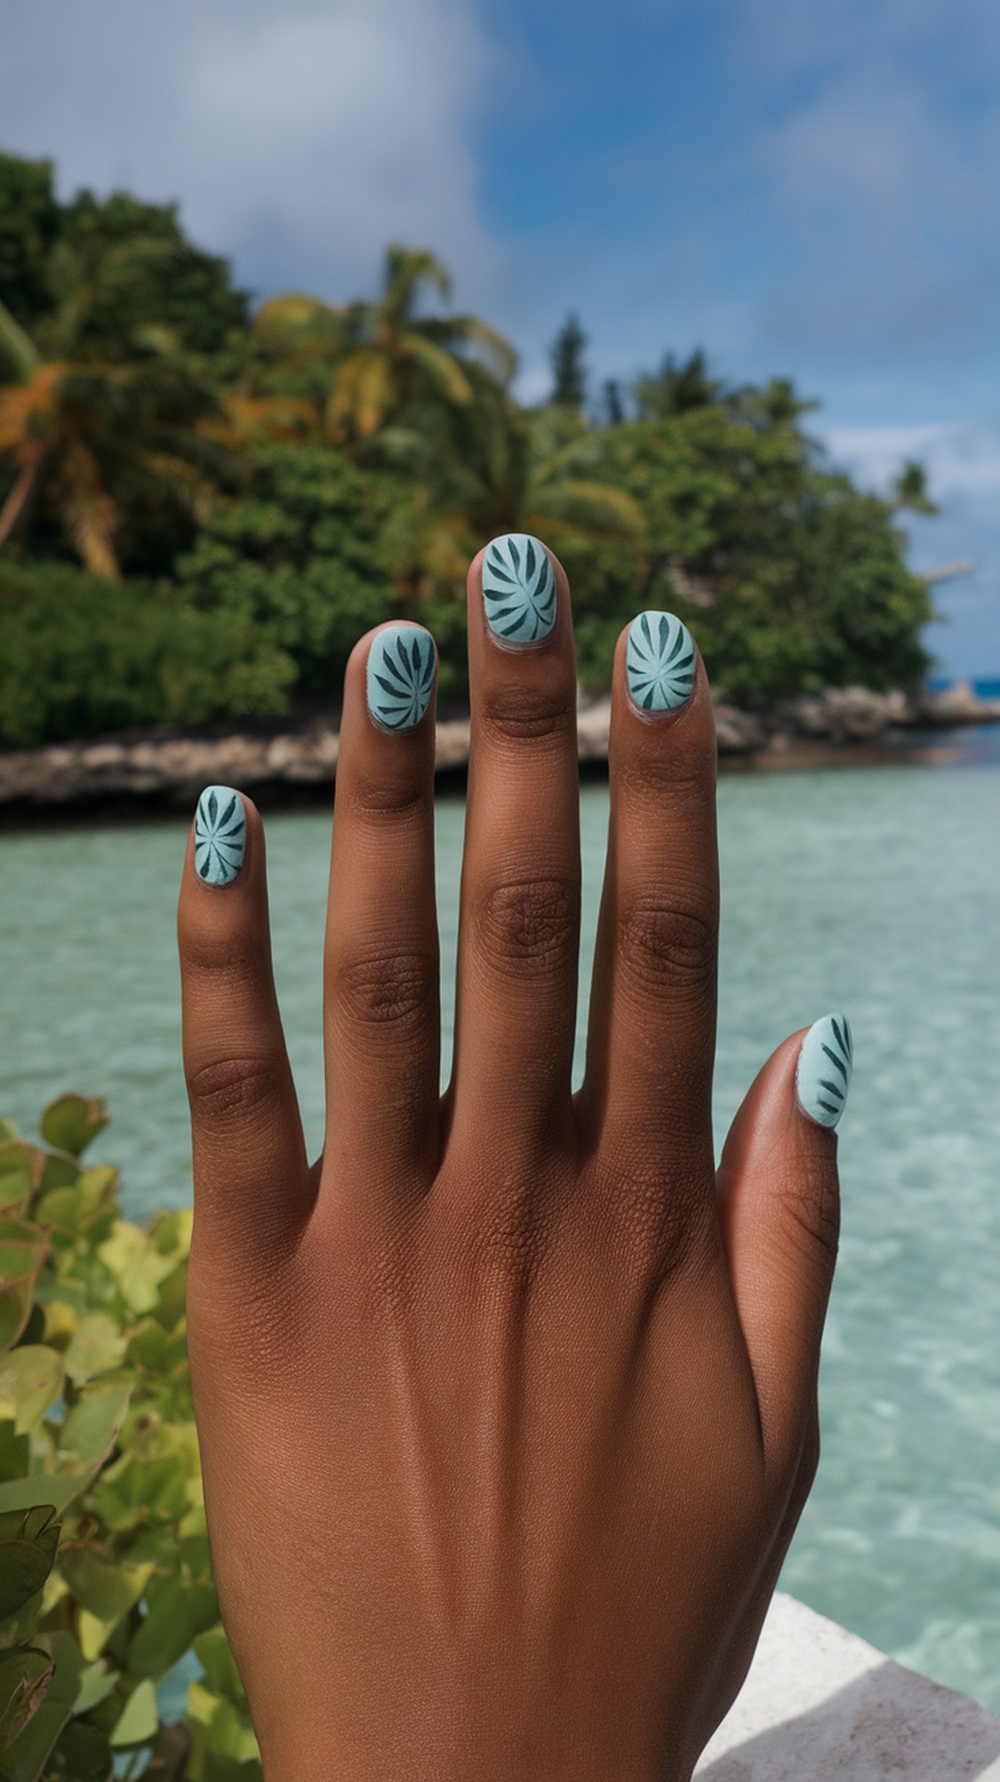
Palm leaf patterns are a perfect match for summer vacation vibes. These designs bring that tropical feel right to your fingertips. Imagine yourself lounging by the beach, with a drink in hand, and those cute, simple nails catching the sunlight.
Her nails in this image showcase a lovely mint green base with intricate palm leaf designs. This combination screams summer and adds a chic twist to your beach nail designs. It’s a trendy way to express your love for island life.
Palm leaf patterns are a great choice if you’re looking for summer vacation nail ideas. They pair beautifully with ocean nails and can be customized to fit any style. Whether you prefer classy acrylic nails or short almond summer nail ideas, these designs can fit right in.
Want to achieve the perfect vacation nails this summer? Here’s a quick step-by-step guide:
1. Start with clean, dry nails. Prep your nails by filing and pushing back cuticles.
2. Apply a base coat to protect your natural nails.
3. Choose a mint green polish for a fresh base.
4. use a fine brush to create palm leaf designs once dry. Opt for a darker green for contrast.
5. Seal your design with a top coat for a glossy finish.
6. Finally, let your nails dry completely, and you’re ready to flaunt those beachy nails!
Holographic Summer Sparkles
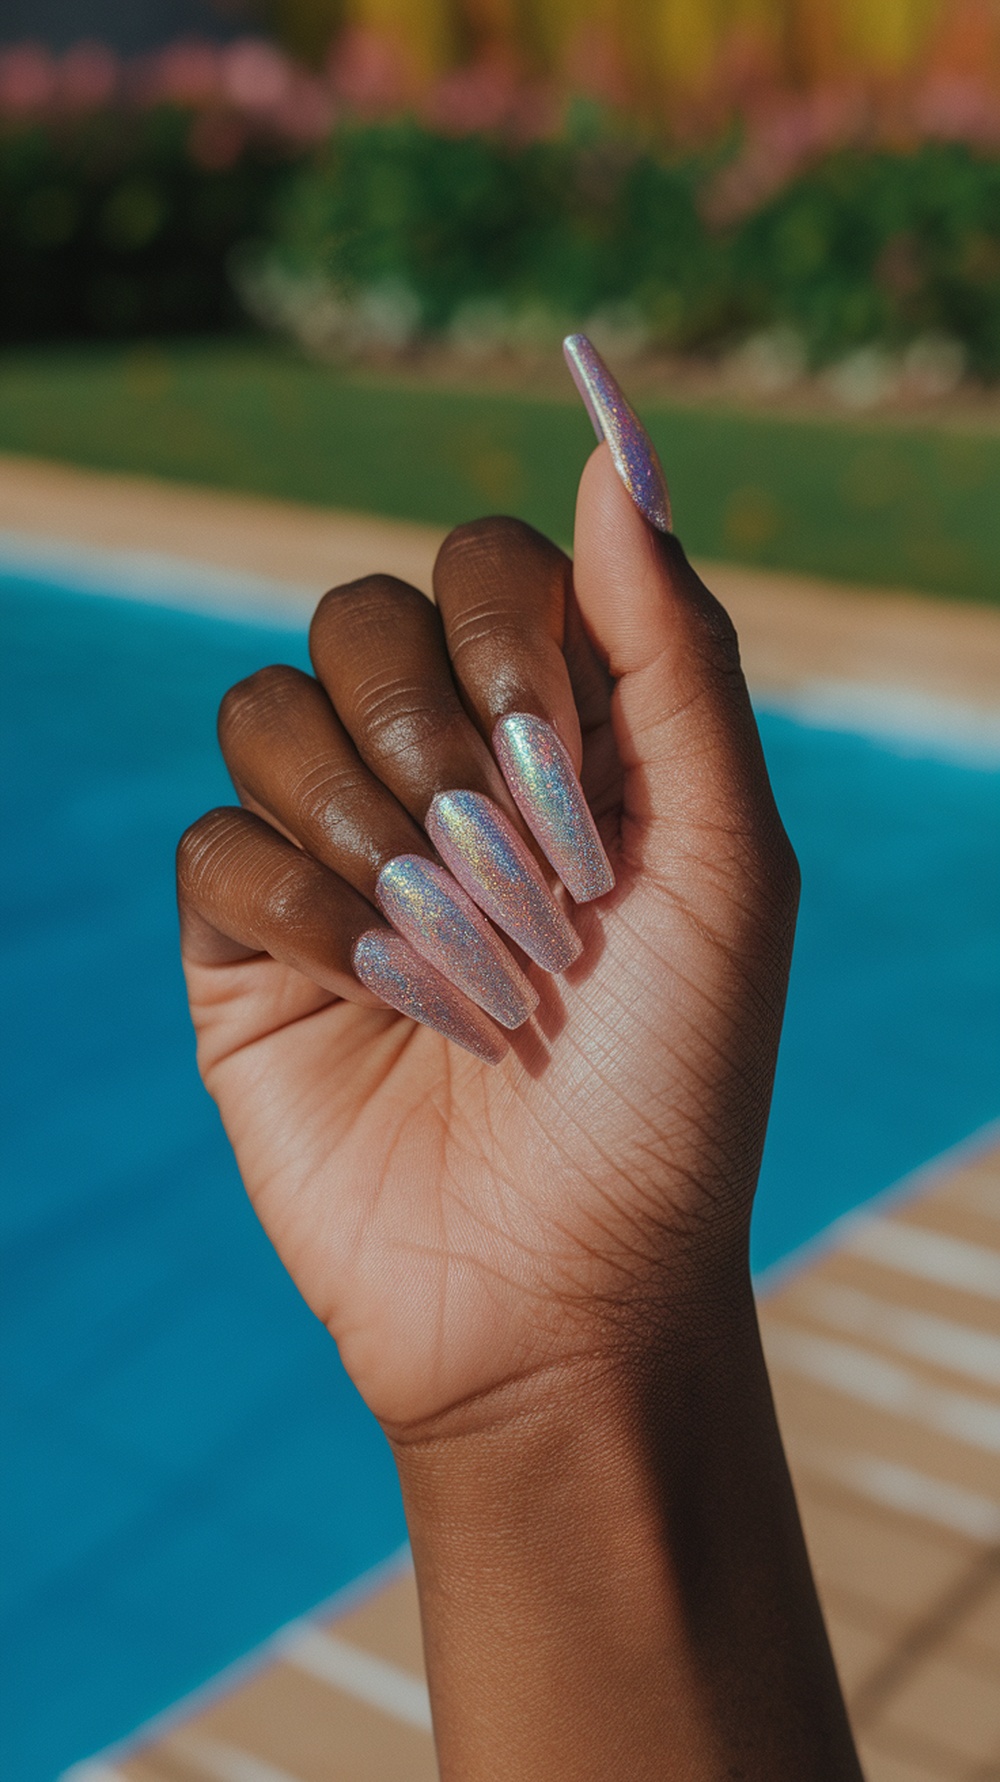
Summer is the perfect time to let your nails shine with a holographic sparkle. This stunning nail design is trendy and fun, making it an ideal choice for your vacation. The picture showcases long, elegant nails with a mesmerizing holographic finish. The colors shift beautifully in the sunlight, capturing the essence of summer vibes.
To achieve these fabulous holographic nails, follow this step-by-step guide. First, choose a base color that you love. Light shades like pastel pink or soft blue work well for a fresh look. Next, apply a holographic top coat to create that magical sparkle. This step is crucial to get that shimmering effect that will catch everyone’s eye.
After applying the top coat, cure your nails under a UV lamp if you’re using gel polish. For a quick touch, you can opt for regular nail polish, but let it dry completely. Finally, finish with a clear top coat to seal in the shine. Voila! Your nails are ready for your summer beach getaway, whether for a Turks and Caicos retreat or an Alaskan cruise.
Perfect holographic nails are not just for vacations; they can elevate any summer look. So, grab your favorite shades and get ready to show off those cute summer nails!
Cactus and Desert Floral Nails
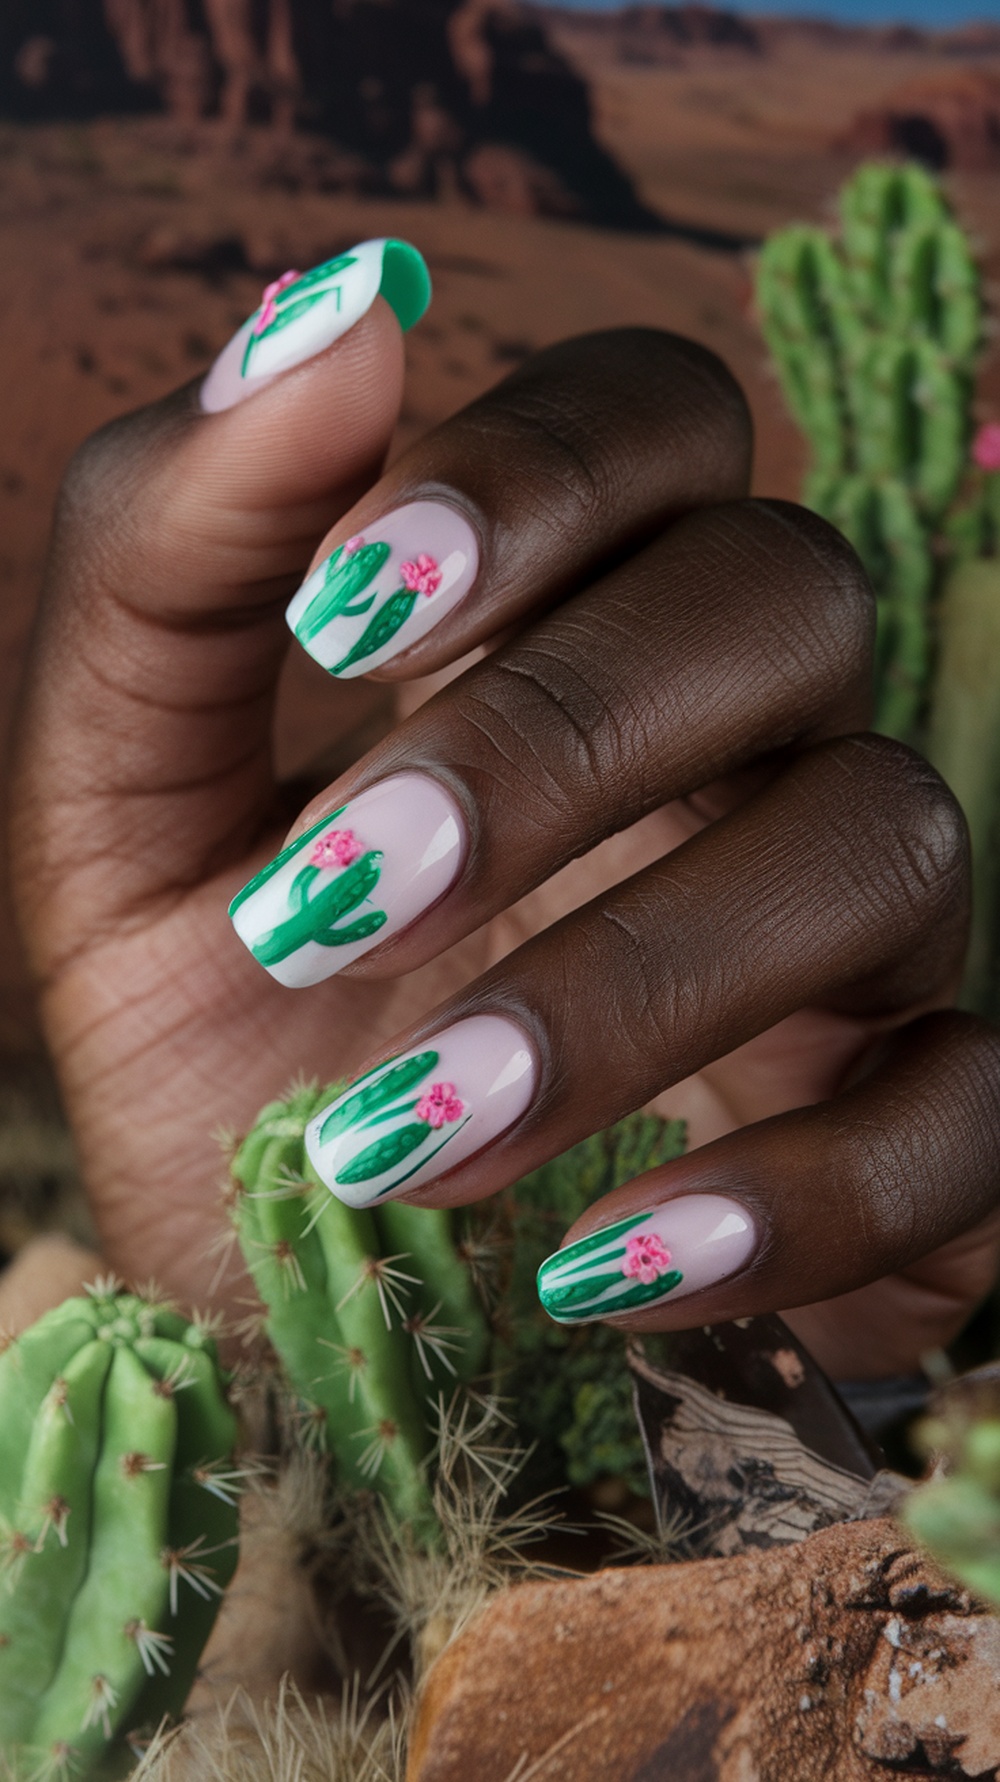
These cactus and desert floral nails are perfect for summer vibes! The vibrant green cactus designs and soft pink flowers create a fun and playful look. This style is ideal for anyone looking to show off their personality while enjoying the sunny season.
Start with a good base coat to protect your nails to achieve this eye-catching look. Choose a nude or light pink polish for the base. Then, using a thin brush, carefully paint small green cacti on the tips of your nails. Add delicate pink flowers for that extra pop! Finish with a top coat to seal everything in.
This design is not just for the beach but works for any summer outing. Whether you go to a BBQ, a picnic, or a tropical vacation, these nails will surely turn heads. They fit perfectly into various themes, from ‘Beach Nail Designs’ to ‘Cute Simple Nails.’
Here’s a quick step-by-step guide to get your perfect vacation nails:
- Prep Your Nails: Start trimming and filing your nails to your desired shape.
- Apply Base Coat: Use a base coat to protect your nails.
- Paint Base Color: Choose a nude or light shade as your base color.
- Create Cactus Design: Paint green cacti on your nails with a thin nail art brush.
- Add Flowers: Use a dotting tool or fine brush to add pink flowers for a pop of color.
- Finish with a Top Coat: Apply a top coat to seal your design and add shine.
This look is easy at home and a fantastic way to celebrate summer. Try these cactus and floral nails for your next summer trip or beach day!
Bora Bora Inspired Nail Art
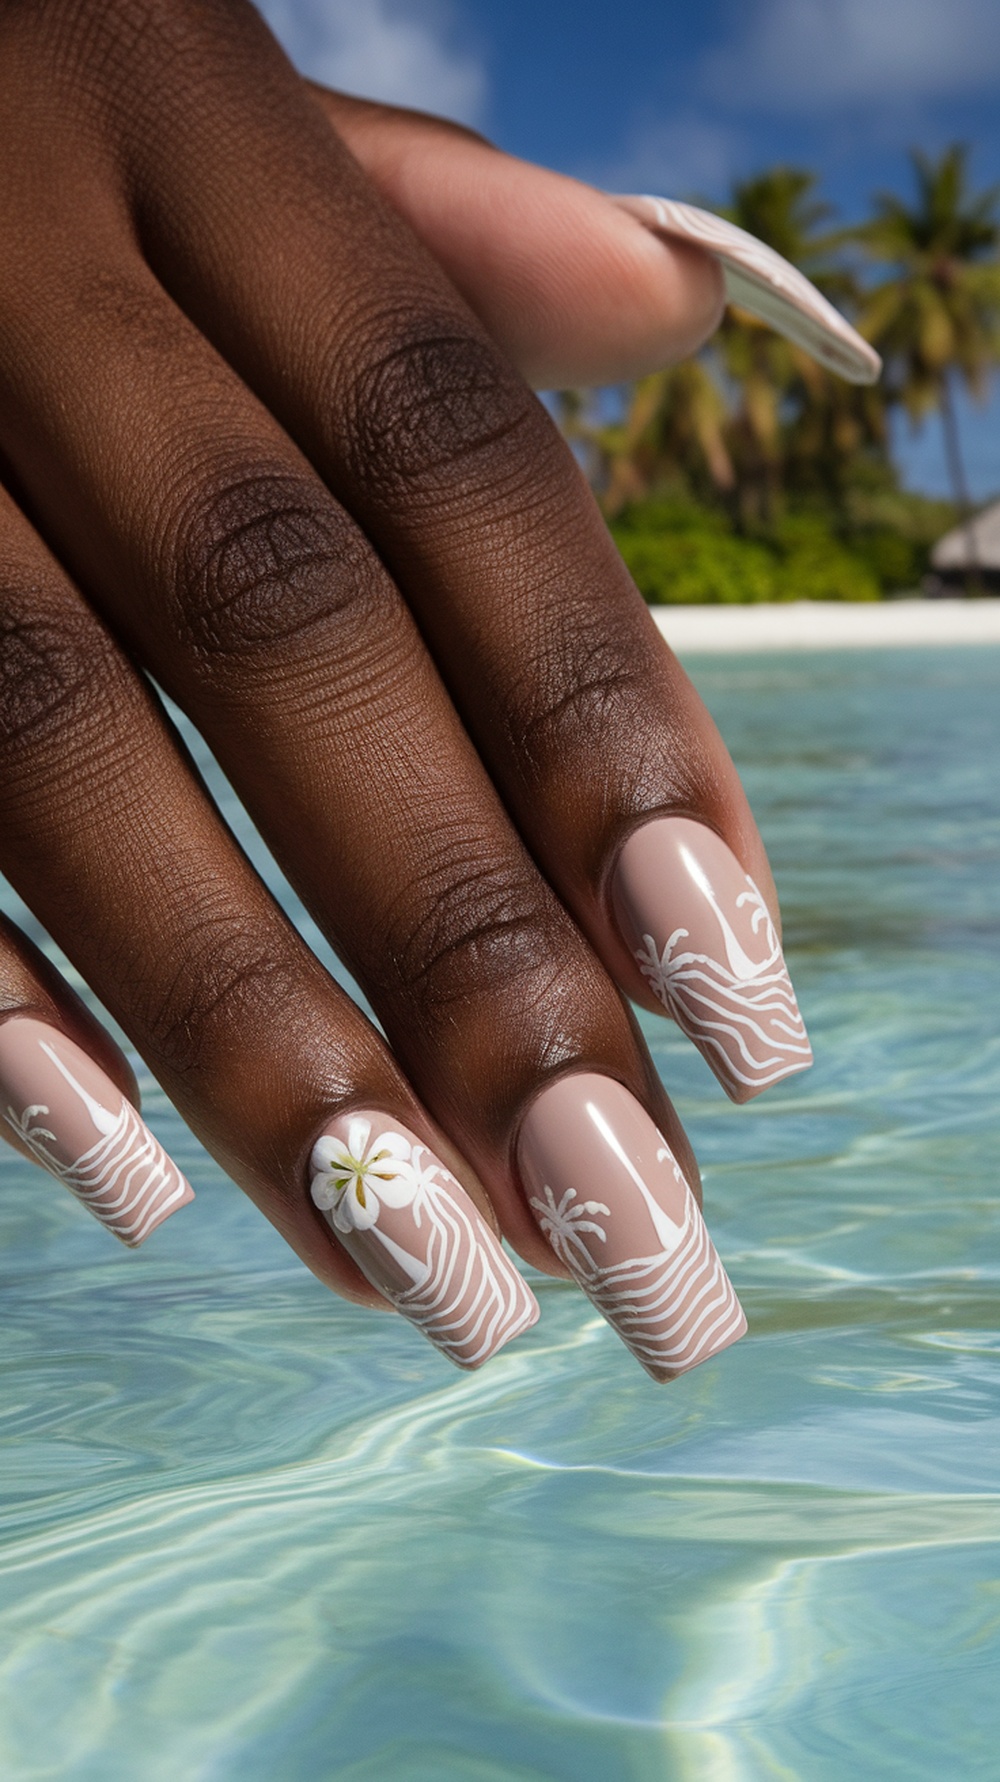
Summer nails can be a fun blend of colors and designs that capture the essence of vacation vibes. Think Bora Bora-inspired nail art with soft, beachy tones and tropical motifs. The image showcases a stunning set of nails featuring delicate palm trees and waves, reminiscent of serene days spent by the ocean.
The base color is a lovely nude that complements various skin tones. This is ideal for those looking for simple holiday nails this summer. The white nail art adds a refreshing touch, making it perfect for beach nail designs. These are not just any nails; they’re a way to express your love for summer trips and tropical getaways!
If you’re inspired to recreate this look, here’s a step-by-step guide to achieving perfect vacation nails this summer!
Retro Summer Stripes
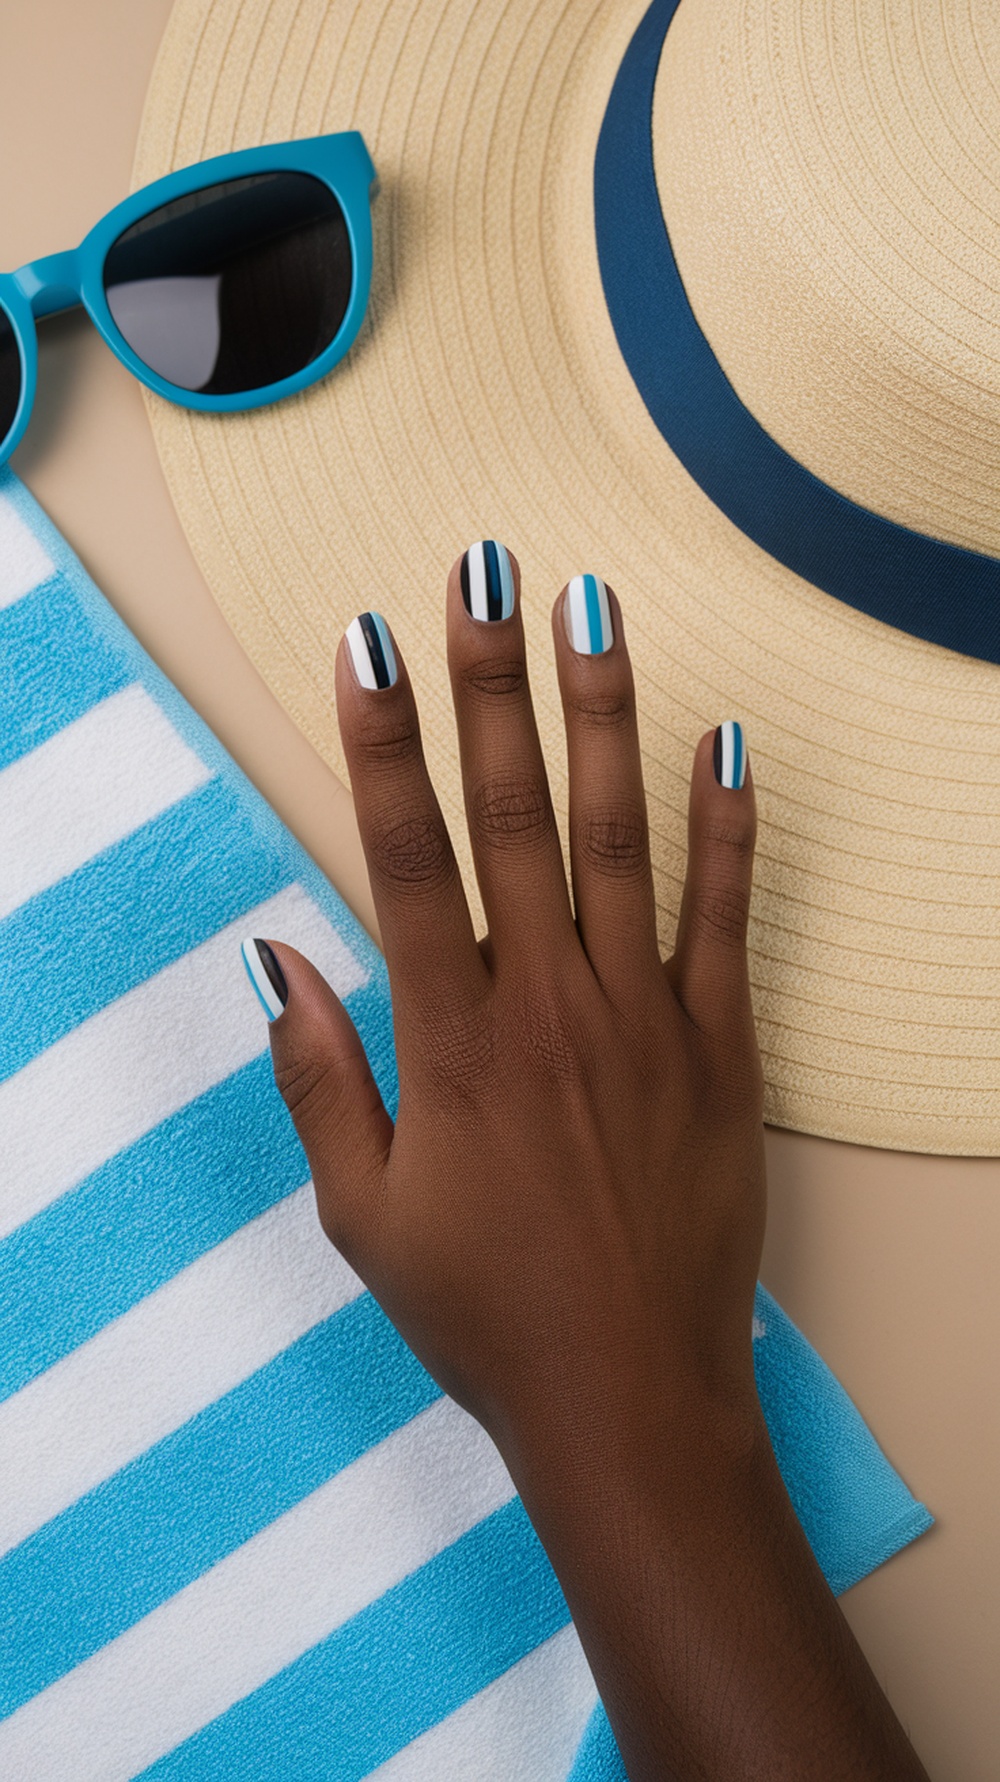
This season, retro summer stripes are making a splash in nail art! The image showcases a hand with nails painted in a fun stripe pattern featuring shades of blue, white, and black. This design brings a beachy vibe, perfect for your summer getaway.
Stripes can remind you of relaxing beach towels and sunny days by the ocean. These nails are an excellent choice for anyone looking for vacation nails that are both stylish and playful. Whether you’re headed to Turks and Caicos or enjoying a sunny weekend, these nails fit right in.
To achieve this look, start with a simple gel base. Then, using a striping brush or tape, create alternating stripes in your chosen colors. Finish off with a glossy top coat for that perfect shine. These cute nail art designs will surely turn heads!
Rainbow Ombre Nails
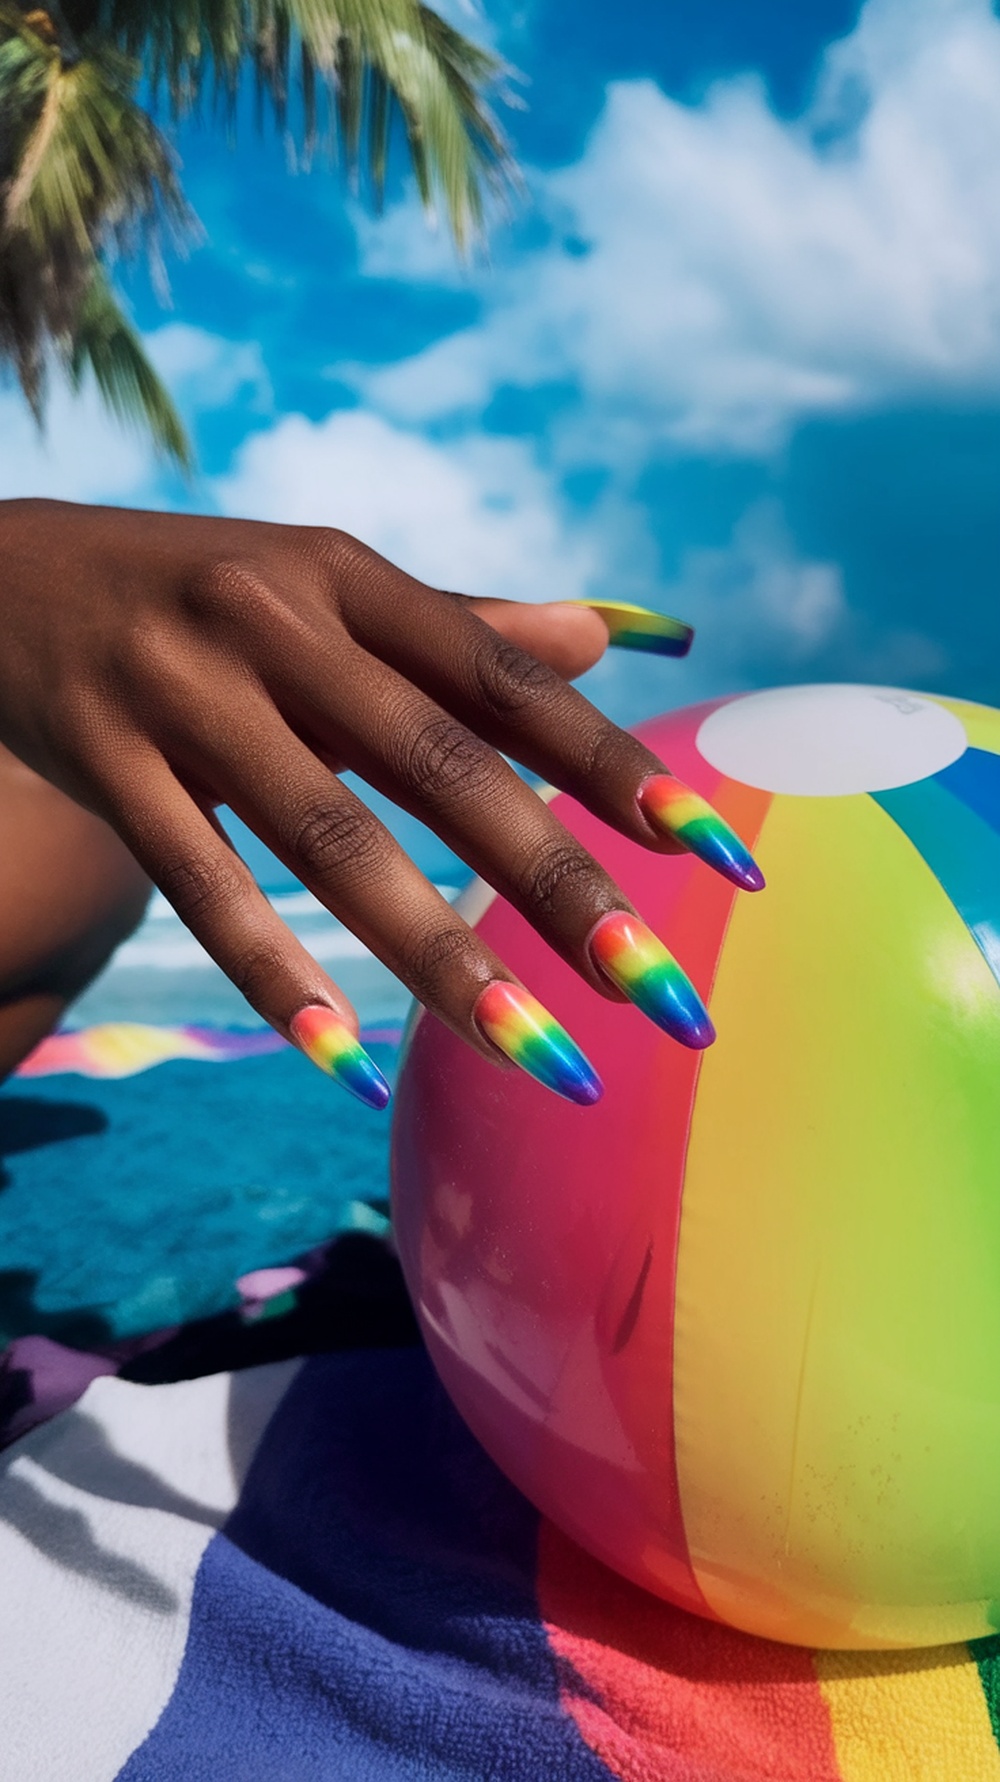
Rainbow ombre nails are the perfect way to embrace summer vibes. This design combines bright colors in a beautiful gradient effect, creating a fun and lively look that stands out. The nails in the image showcase a stunning blend of colors, capturing the essence of sunny days and beach fun.
The rainbow ombre effect is not only eye-catching but also versatile. Whether you’re headed to a beach party or a casual outing, these nails add a playful touch to any outfit. They perfectly match summer themes, making them a must-try for vacation nails.
If you’re looking for a great way to achieve these trendy rainbow ombre nails for your summer trip, here’s a step-by-step guide:
- Choose Your Colors: Pick four to five vibrant nail polish colors representing a rainbow palette.
- Prepare Your Nails: Start with clean, shaped nails. Apply a base coat to protect them.
- Apply the Base Color: Use a light base for better blending. Let it dry completely.
- Create the Ombre Effect: Use a makeup sponge to apply the chosen colors in stripes. Dab the sponge onto your nails to create the gradient effect.
- Blend the Colors: Press the sponge onto your nails until the colors blend smoothly.
- Add a Top Coat: Finish with a top coat to seal your design and add shine. This will make your rainbow ombre nails last longer.
Now you’re ready to show off your colorful nails! Whether planning an Alaskan Cruise or simply enjoying a day at the beach, these nails will ideally complement your summer look.
Exotic Floral Patterns
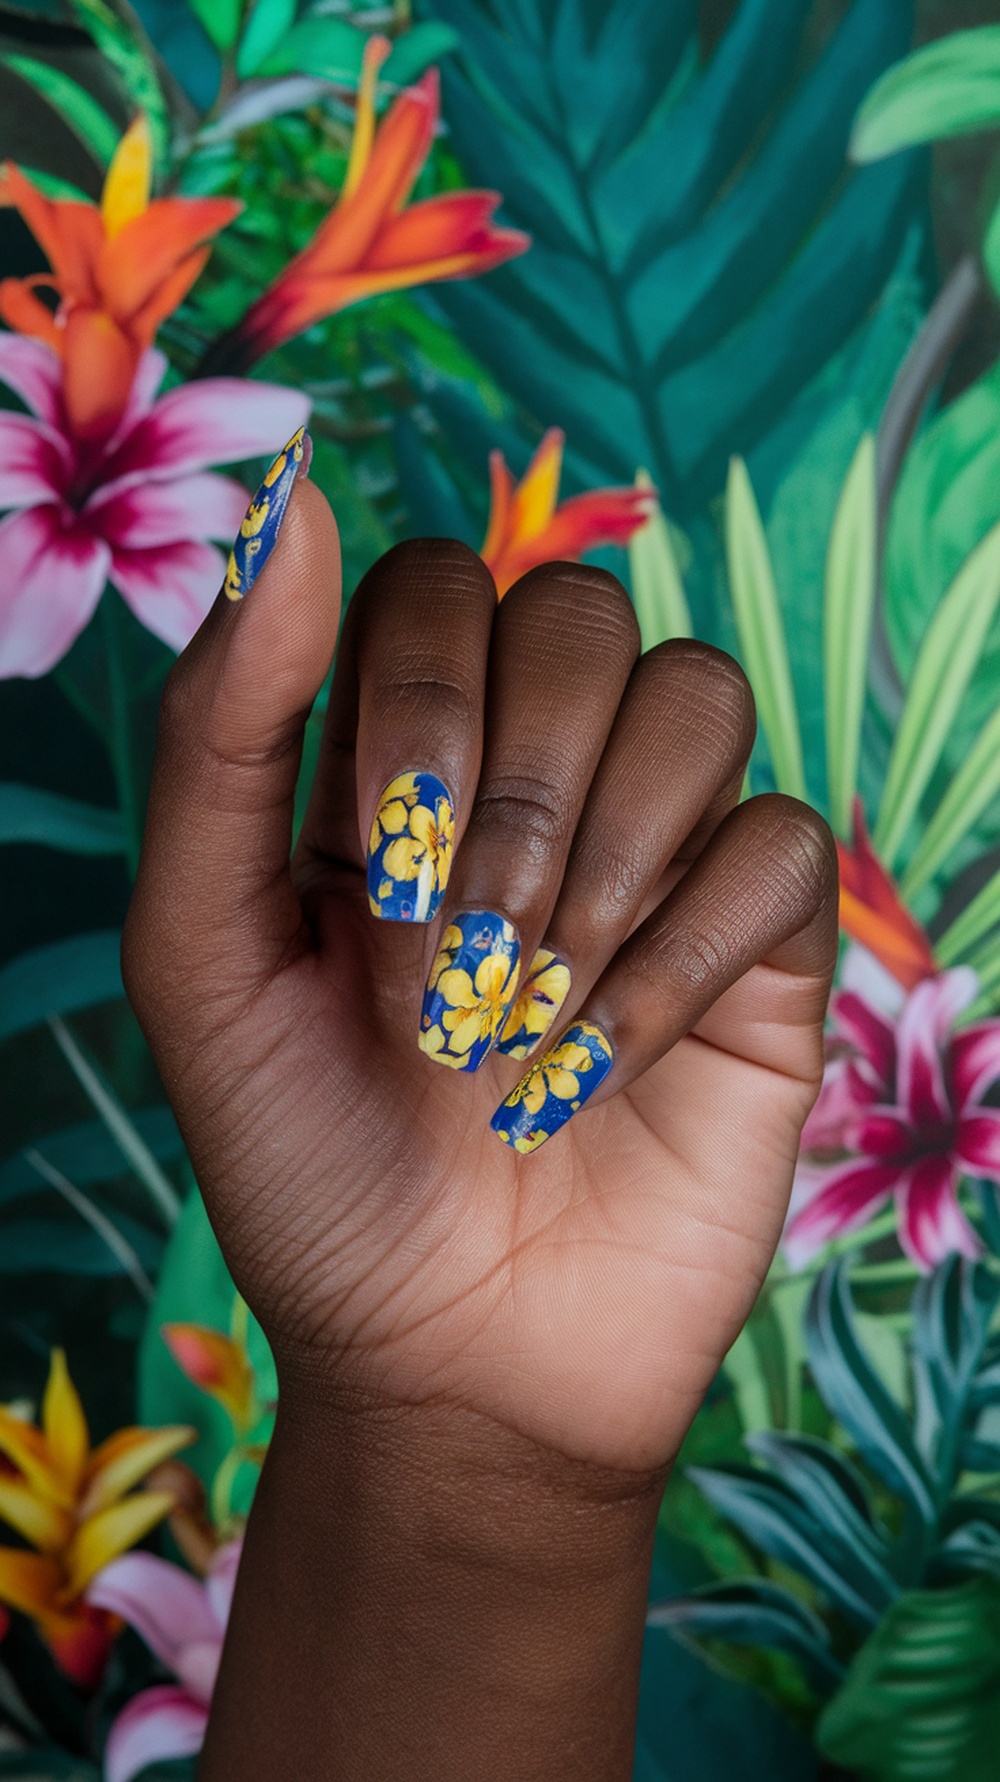
Floral patterns are perfect for summer vacation nails. The vibrant colors and designs bring a touch of paradise to your fingertips. The image showcases stunning blue backgrounds adorned with bright yellow flowers. These patterns instantly evoke feelings of a tropical getaway, making them ideal for your holiday nail inspo this summer.
If you’re thinking of trying out exotic floral patterns, here’s a simple step-by-step guide to achieving the perfect vacation nails:
1. Choose Your Base Color: Start with a bright or pastel base coat that complements your floral design. Blue or light pink can work beautifully.
2. Add the Floral Design: Use a fine brush or nail art stickers to apply flowers on top. Consider using shades of yellow or white for a pop against the base color.
3. Top Coat: Seal your masterpiece with a glossy top coat to protect the design and add shine.
4. Nail Shape: Opt for a Vacation Nails Oval Shape for a soft and elegant look. This shape pairs wonderfully with floral designs.
These floral nails not only look fabulous but also reflect the spirit of summer. Whether off to the Bahamas or just enjoying your backyard, these nails will brighten your day!
Sunflower Summer Nails
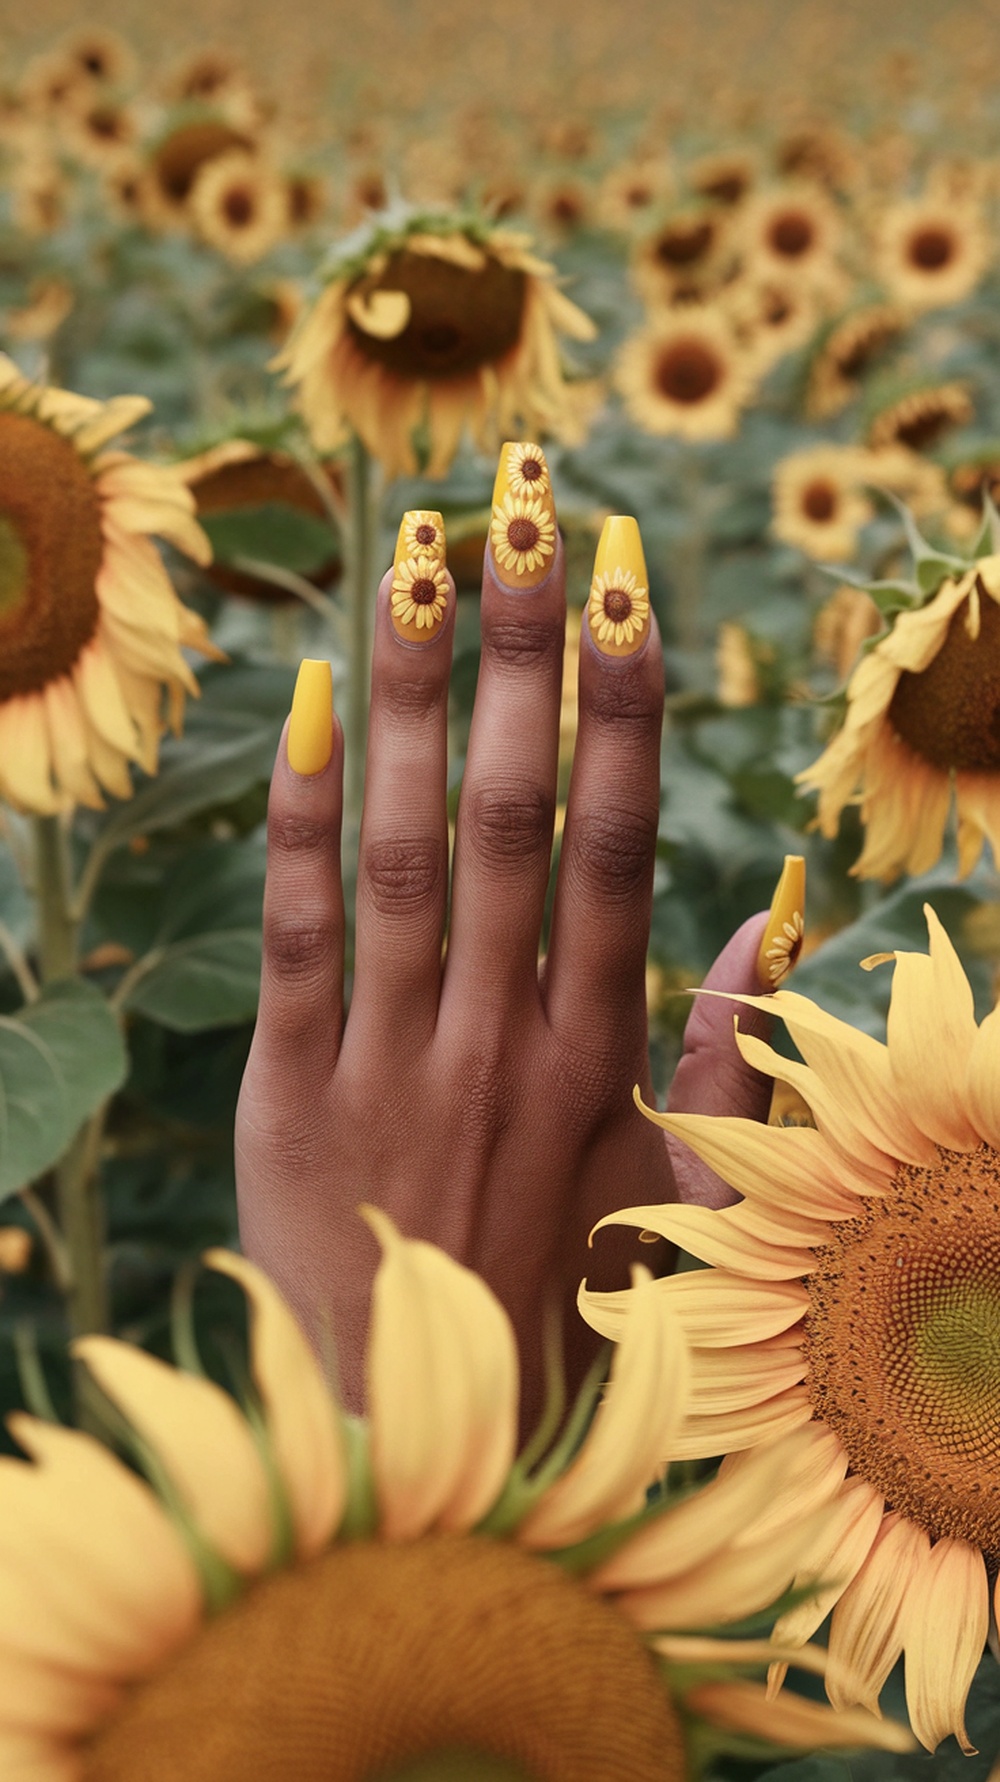
Sunflower summer nails are a cheerful way to express your vibe during the sunny season. The bright yellow tones and floral designs perfectly capture the essence of summer.
These nails bring a playful touch and a refreshing feel, making them an excellent choice for beach outings or summer vacations. Imagine your nails standing out against a backdrop of sunflowers or the ocean waves!
To achieve these stunning sunflower designs, start with a base coat of vibrant yellow polish. This sets the stage for the playful sunflower art. You can use nail art brushes or dotting tools to create the flower patterns. A mix of simple flower designs alongside solid colors makes for cute, simple nails that are easy to maintain.
Here’s a step-by-step guide to getting your perfect vacation nails this summer:
- Prep Your Nails: Start by removing old polish and filing your nails to your desired shape. Clean and buff the nail surface for a smooth application.
- Apply Base Coat: A clear base coat protects your nails and allows the color to adhere better.
- Base Color: Apply two coats of bright yellow polish. Make sure to let each coat dry completely.
- Design Your Sunflowers: Using a fine brush or dotting tool, create sunflower petals with a darker shade of yellow or orange. Add a small brown dot in the center as the flower’s seed.
- Finish with Top Coat: Seal your design with a shiny top coat. This not only adds gloss but also helps your nails last longer.
With this guide, you’ll have cute nails that are perfect for your summer trip. Whether heading to Turks and Caicos or enjoying a sunny day at home, sunflower nails will brighten your look!
Colorful Festival Nails
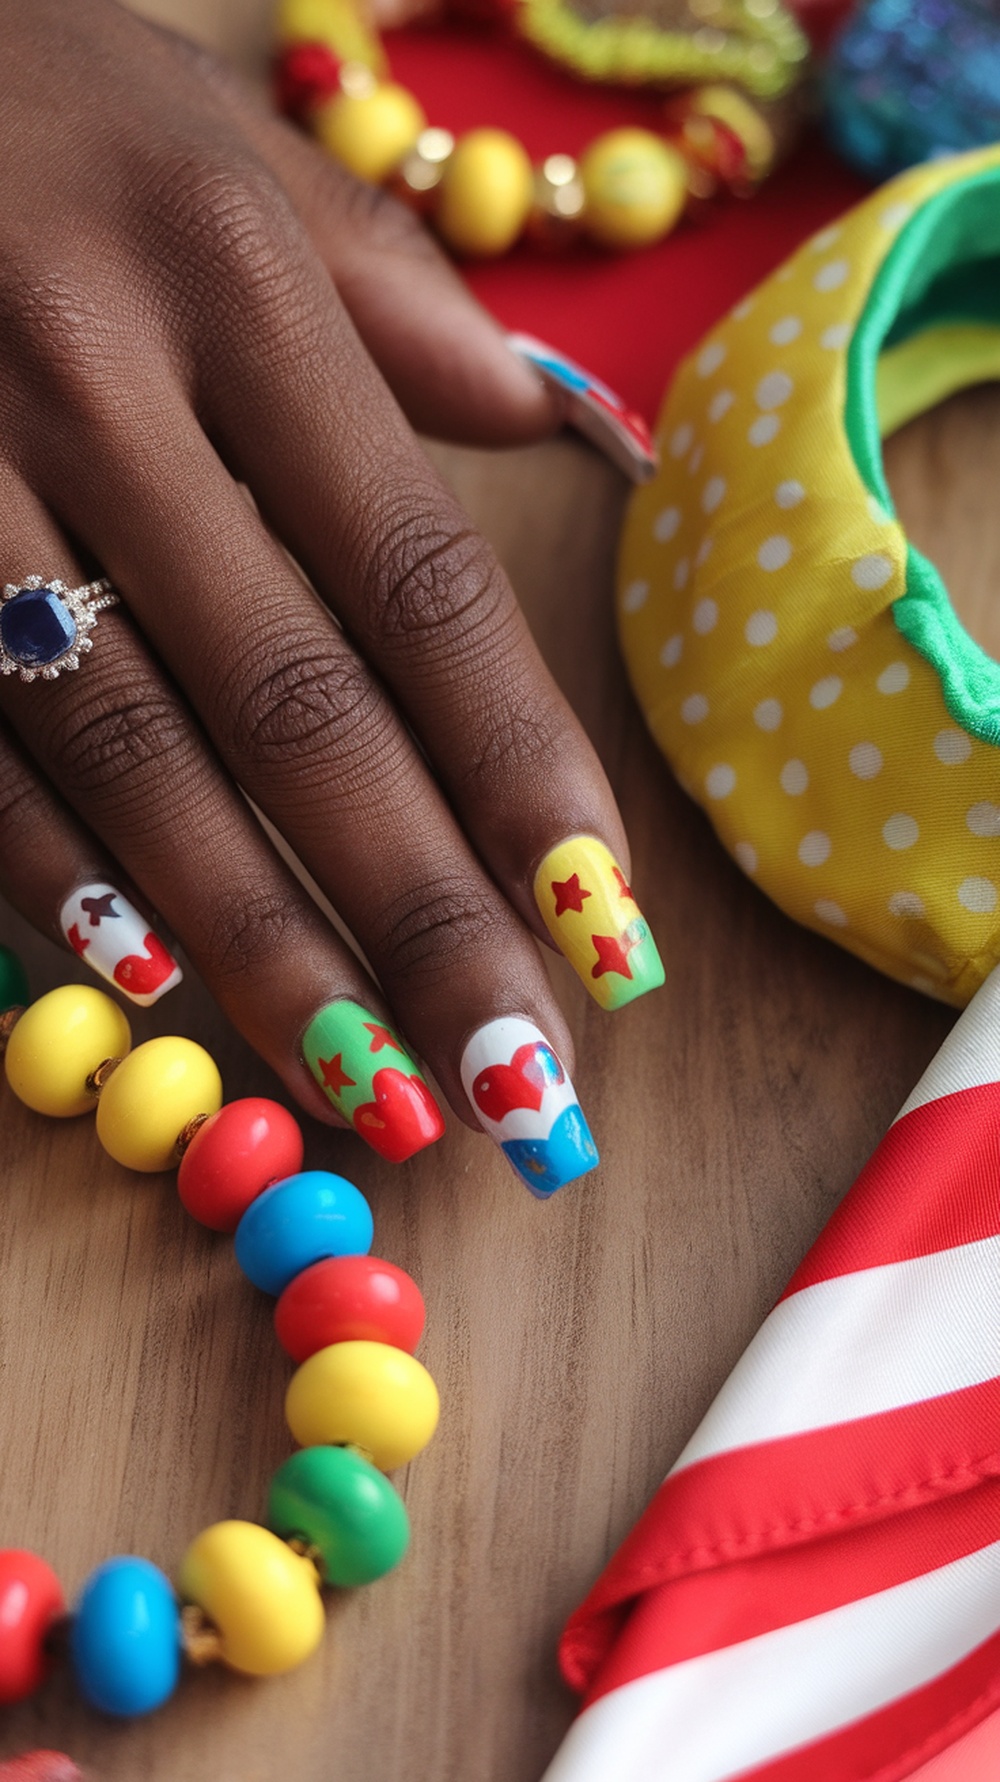
Summer is here, and colorful nails are the perfect way to kick off your sunny days! The nails in the image showcase a fun mix of bright colors and playful patterns, ideal for summer festivities. With a blend of red, blue, green, and yellow, these nails instantly bring joy and excitement.
These are more than just nails; they’re a form of self-expression, ideal for vacations or beach trips. Whether you’re headed to Turks and Caicos or enjoying local fun, vibrant nails like these can complete your look.
If these creative designs inspire you, here’s a step-by-step guide to achieving your colorful festival nails this summer:
Step 1:Start with clean nails. Remove any old polish and push back your cuticles gently.
Step 2:Apply a base coat to protect your nails from staining and to help the colors adhere better.
Step 3: Choose your colors. Choose bright shades like pink, yellow, and turquoise to create that playful vibe.
Step 4: Begin painting your chosen colors on each nail. You can select patterns on each finger, like hearts, stars, or stripes.
Step 5: To avoid smudging, let each layer dry completely before adding more colors or designs.
Step 6:Finish with a top coat to add shine and protect your artwork. This will also help your nails last longer during your summer activities!
Now you’re ready to show off your vacation nails this summer. Whether you’re styling them with beachwear or festival outfits, these colorful nails will surely catch attention!
